
Tools & materials you'll need
Affiliate linksAs an Amazon Associate FixlyGuide earns from qualifying purchases — at no extra cost to you. Prices and availability are accurate as of publication and subject to change.
Quick Answer
To install a floating shelf that can reliably hold 50 pounds or more, the non-negotiable rule is to anchor a heavy-duty steel bracket directly into at least two wall studs. The process involves using a stud finder to locate the structural framing in your wall, using a level to mark the precise bracket position, drilling pilot holes into the center of the studs, and finally securing the bracket with robust lag screws. Standard drywall anchors or other hollow-wall fasteners are completely inadequate for this level of weight and will lead to failure.
The Problem
That beautiful, minimalist floating shelf you bought looks clean and modern on the wall. You load it up with your favorite hardcover books, a ceramic vase, and a small plant. For a week, everything seems fine. Then, you notice a slight sag. A small gap appears between the back of the shelf and the wall. One day, you come home to a crash: the shelf, your books, and the shattered vase are all on the floor, leaving a disastrous, torn-out chunk of drywall in their wake.
This is the all-too-common fate of improperly installed floating shelves. The vast majority of floating shelf kits sold in big-box stores come with plastic drywall anchors that are woefully optimistic about their holding power. The marketing might suggest strength, but the physics tells a different story. A floating shelf acts as a lever, and every inch you move away from the wall multiplies the force exerted on the mounting hardware. Even a 10-pound object placed at the outer edge of an 8-inch deep shelf can exert 50+ pounds of pulling force on the top screws. Drywall, which is essentially gypsum plaster pressed between two sheets of paper, has almost zero shear strength and cannot handle this load. Relying on it is a recipe for disaster.
How It Works
The secret to a truly strong, heavy-duty floating shelf installation has very little to do with the shelf itself and everything to do with what it’s mounted to. Your home’s walls are not just hollow panels; they have a structural skeleton made of wooden studs (or sometimes metal studs).
Think of drywall as just the "skin." It provides a smooth surface for paint but has no real structural integrity. The studs behind it are the "bones." These vertical 2x4s are what the drywall is attached to and what actually supports the weight of your house. To hang something heavy, you must bypass the skin and anchor directly to the bone.
This is achieved using two key components: a heavy-duty floating shelf bracket and lag screws. A proper heavy-duty bracket is made of thick, welded steel, featuring a flat backplate with multiple mounting holes and two or more solid steel rods that slide into the back of your shelf. When you drive a long, thick lag screw through this bracket and into the center of a wood stud, you create an incredibly strong connection. The load from the items on the shelf is transferred from the shelf, through the steel rods, into the bracket’s backplate, and then directly into the solid wood framing of your house via the lag screws. The drywall is merely sandwiched between the bracket and the stud; it bears no weight at all. By anchoring into two or more studs (typically spaced 16 inches apart), you distribute this load across the wall's frame, allowing a properly installed shelf to easily support 50, 100, or even more pounds.
Step-by-Step Fix
1. Gather Your Tools & Materials — Before you begin, assemble everything you need. This prevents interruptions and ensures a smooth workflow. You’ll need your heavy-duty bracket, the corresponding shelf, a high-quality electronic stud finder, a tape measure, a pencil, a 4-foot level (a shorter one can work, but longer is better for accuracy), a power drill with a full set of drill bits, and a socket wrench with a socket that matches your lag screws. Safety glasses are essential.
2. Choose Your Shelf Location & Height — Decide on the final position of your shelf. Consider its purpose. For displaying objects, it might be higher. For books you need to access, it should be within easy reach. A common height is 55-60 inches from the floor. Use your tape measure and pencil to make a light, temporary mark for the approximate center of the shelf.
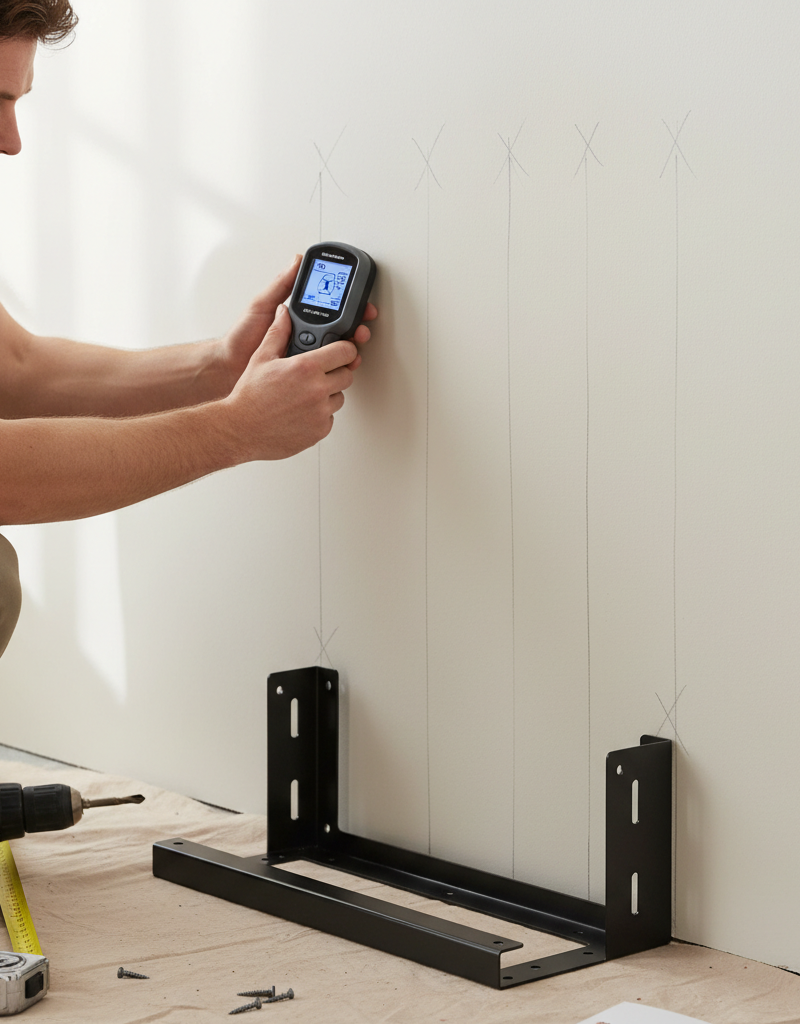
3. Locate the Wall Studs — This is the most critical step. Turn on your electronic stud finder, calibrate it on a section of the wall where you know there isn’t a stud, then slowly slide it horizontally across the wall in your chosen area. The device will light up or beep when it detects the edges and center of a stud. Mark the center of at least two separate studs with your pencil. Standard spacing is 16 inches on center, so your second stud should be roughly that distance from the first.
4. Mark the Bracket’s Position & Level Line — Hold your steel bracket up to the wall, aligning its mounting holes with the stud marks you just made. Use your pencil to mark the exact location for one of the top mounting holes on your first stud. Now, place your level on the wall, align its top edge with that single mark, and adjust it until the bubble is perfectly centered. Draw a long, light, perfectly level line across the face of the wall, extending over your second stud mark. This line is your reference for a professional, level installation.
5. Position the Bracket and Mark All Holes — Place the bracket back on the wall. Align the top edge of the bracket with your level line. Slide it left or right as needed until the mounting holes on both ends of the bracket are centered over your vertical stud marks. Carefully and precisely mark the center of every mounting hole you plan to use on the studs.
6. Drill the Pilot Holes — Choose a drill bit that is slightly smaller in diameter than the lag screws you are using. A common rule is to match the bit to the solid shank of the screw, not the threads. For a 1/4" lag screw, a 5/32" or 3/16" bit is usually appropriate. Drill a straight, perpendicular hole at each of your marked locations. The hole should be about as deep as the screw is long, ensuring it goes at least 1.5 inches into the solid wood stud.
7. Mount the Bracket Loosely — Take your first lag screw (with a washer, if included) and, using your socket wrench, drive it into one of the top pilot holes. Don't tighten it all the way; leave it about a quarter-inch loose. Do the same for a screw on the other end of the bracket. This allows for minor adjustments.
8. Check for Level One Last Time — Place your level on top of the mounted bracket. Nudge it slightly up or down as needed until the bubble indicates it’s perfectly level. Because the screws are slightly loose, you should have enough play to achieve perfection.
9. Secure the Bracket Firmly — Once you’ve confirmed the bracket is level, use your socket wrench to tighten all the lag screws. The screw should be very snug, pulling the bracket tight against the drywall. Be careful not to over-tighten, which can strip the wood inside the stud and compromise the hold. You’ll feel a significant increase in resistance when it’s tight enough.
10. Slide on the Shelf — With the bracket securely mounted to the wall, carefully slide the floating shelf onto the support rods. The fit should be snug. Make sure the back edge of the shelf is flush with the wall. If it’s a tight fit, you may need to gently rock it back and forth to work it on fully.
11. Secure the Shelf to the Bracket — Most heavy-duty shelf systems include a way to lock the shelf to the bracket. This usually involves small set screws on the underside of the shelf. Use the provided Allen key or a screwdriver to tighten these screws. This prevents the shelf from sliding off the bracket and adds stability.
Common Causes of Failure
Understanding why a heavy-duty floating shelf installation fails is key to ensuring yours succeeds. The causes are almost always related to installation errors, not a faulty shelf.
- Relying on Drywall Anchors: This is the number one cause of failure. No matter how "heavy-duty" a plastic or metal drywall anchor claims to be, it is no substitute for a solid wood stud.
- Missing the Stud Center: Hitting just the edge of a stud provides a weak hold. Your screw needs to be in the center 1/3 of the wood for maximum grip.
- Using a Flimsy Bracket: A thin, lightweight bracket can bend under load long before the screws pull out of the wall. Always choose a bracket made of thick, welded steel (at least 3/16" thick backplate).
- Ignoring Weight Limits: Both the shelf and the bracket have specified weight limits. Exceeding them, especially by placing heavy items at the front edge, creates immense leverage and invites failure.
- Improper Fasteners: Using drywall screws or general-purpose wood screws instead of structural lag screws is a critical error. Lag screws are thicker, stronger, and designed to bear significant shear and pull-out forces.
- Uneven Load Distribution: Piling all the heavy items on one side of the shelf can cause twisting forces on the bracket and put undue stress on one of the stud connections.
Common Mistakes to Avoid
- Guessing Stud Locations: Never eyeball it or rely on the "tap test" alone. Use a quality electronic stud finder to be certain. Getting this wrong means your entire installation is unsafe.
- Skipping the Level: A shelf that isn't perfectly level is not only visually jarring but can also cause items to slide and create uneven stress on the mounting bracket.
- Drilling Oversized Pilot Holes: A pilot hole that’s too large won’t give the lag screw threads enough wood to bite into, dramatically reducing its holding power.
- Forgetting the Shelf's Weight: When calculating the total load, remember to include the weight of the shelf itself. Some large, solid wood shelves can weigh 15-20 pounds before you even put anything on them.
- Using Only One Stud: While a small, light-duty shelf might get away with a single-stud bracket, a shelf designed to hold 50 lbs must be anchored to at least two studs to be stable and safe.
- Over-tightening the Lag Screws: Using a high-powered impact driver or too much force on a wrench can strip the wood fibers inside the stud, leaving your screw with nothing to grip. Tighten until snug, then give it a final quarter-turn.
Cost & Time Breakdown
Here’s a realistic look at what it takes to install a heavy-duty floating shelf correctly.
| Task | DIY Cost | Pro Cost | Time |
|---|---|---|---|
| Purchase Shelf & Bracket | $40 - $150 | (Included in labor) | 30 minutes (shopping) |
| Stud Finding & Wall Layout | $0 | (Included in labor) | 15-20 minutes |
| Drilling Pilot Holes & Mounting Bracket | $10 (for new drill bits) | $100 - $175 | 45-60 minutes |
| Final Shelf Mounting & Cleanup | $0 | (Included in labor) | 15 minutes |
| Total | $50 - $160 | $100 - $275 | 1.5 - 2 Hours |
Tips & Prevention
- Invest in a Deep-Scan Stud Finder: A quality stud finder that can also detect electrical wiring and pipes is a smart investment for any homeowner.
- Span an Extra Stud: When possible, buy a longer bracket that can span three studs instead of just two. This provides incredible stability and peace of mind.
- Load Smart: Always place the heaviest items on the shelf as close to the back wall as possible. This minimizes the leverage force on the bracket.
- Use Painter’s Tape for Marks: To avoid drawing directly on your wall, place strips of blue painter's tape where you plan to mark and drill. You can draw your level line and hole locations on the tape, then peel it off after for a clean finish.
- Know Your Wall Type: If you have plaster and lath walls instead of modern drywall, the process is more difficult. Studs can be irregularly spaced. You may need special fasteners and a professional’s help.
- Check Periodically: Once a year, gently try to wiggle the shelf. If you feel any movement, it may be time to check and tighten the mounting screws.
When to Call a Professional
While this is a manageable DIY project for many, there are times when calling a professional handyman or carpenter is the wisest choice. If you are not confident in your ability to accurately locate studs, or if you don't own the necessary tools like a power drill and socket wrench, a pro can get the job done quickly and safely. You should also hire a professional if your wall is made of brick, concrete, or older plaster and lath, as these materials require specialized tools and techniques. Finally, if you are installing a very large, expensive, or complex shelving system, the cost of professional installation is a small price to pay for the guarantee that it will be perfectly level, secure, and capable of handling its rated load without any risk to your home or belongings.
Related Articles
Keep troubleshooting with these hand-picked guides from FixlyGuide:
- Your Floating Shelves Sag? The 3 Drywall Mistakes You're Making — Learn how to install floating shelves into drywall securely and prevent common issues like wobbling or damage with the right tools and tech…
- Your Floating Shelves Failed? 3 Hidden Drywall Mistakes. — Learn how to safely and securely install floating shelves into drywall using the right anchors and tools, avoiding common mistakes.
- The #1 Mistake Homeowners Make Installing Floating Shelves (and How to Fix It) — Discover the crucial error many DIYers make when mounting floating shelves into drywall and learn the simple steps to ensure a secure, sag-…
- That 'Stud-Only' Belief? A Myth for Heavy Shelves — Tired of shelves ripping out of your drywall? The common advice to 'only use studs' is incomplete. Discover the modern anchoring techniques…
- That 'Wet Edge' Trick: Paint a Room in a Single Day — Tired of paint jobs that drag on all weekend? The secret to a flawless, fast finish isn't working harder—it's using the pro 'wet edge' syst…
- Your Squeaky Floor's Secret: It's Not the Wood, It's the Gap — Tired of that persistent floor squeak? Discover the hidden causes of noisy floorboards and learn several easy, DIY methods to silence them…
Recommended for DIYers & woodworkers
Sponsored
The Top 20 Tools for Workshops of Any Budget
No stationary machines or power tools required — plus 3 fundamental tools that can't be bought at any price.
Get the free guide
Ted's Woodworking — The #1 Woodworking Resource
Detailed instructions, dimensioned drawings, materials & cutting lists, and 3D schematics for every skill level.
See the plansSponsored: links above are affiliate links. FixlyGuide may earn a commission on qualifying purchases — at no extra cost to you.
Frequently asked questions
Can I install a heavy floating shelf without studs?+
No, not if you want it to hold significant weight like 50 lbs. Heavy-duty toggle bolts into drywall might hold 20-30 lbs under ideal conditions, but it's risky and not recommended for valuable or heavy items. For true strength, you must anchor into studs.
What kind of bracket do I need for a 50 lb shelf?+
You need a solid steel floating shelf bracket, often called a 'blind' or 'heavy-duty' bracket. Look for one with a thick backplate (at least 3/16 inch thick) and solid steel support rods that extend at least two-thirds the depth of the shelf.
How far apart are wall studs?+
Standard stud spacing in most US homes is 16 inches on center. However, 24-inch spacing is also possible, especially in newer construction or on non-load-bearing walls. Always use a stud finder to confirm the exact spacing in your wall.
What size lag screws should I use?+
For a heavy-duty bracket installation, 1/4-inch or 5/16-inch diameter lag screws are recommended. They should be long enough to penetrate at least 1.5 to 2 inches into the solid wood stud, which usually means a screw length of 2.5 to 3 inches.


Discussion
Loading comments…