
Tools & materials you'll need
Affiliate linksAs an Amazon Associate FixlyGuide earns from qualifying purchases — at no extra cost to you. Prices and availability are accurate as of publication and subject to change.
Quick Answer
When roof shingles go missing after a storm, the immediate danger is water infiltration, which can rot decking and cause mold. Homeowners should first safely inspect the damage from the ground, then gather matching shingles and the necessary tools. The repair typically involves carefully prying up surrounding shingles, removing old fasteners, installing new shingles, and sealing them properly to prevent future blow-offs.
The Problem
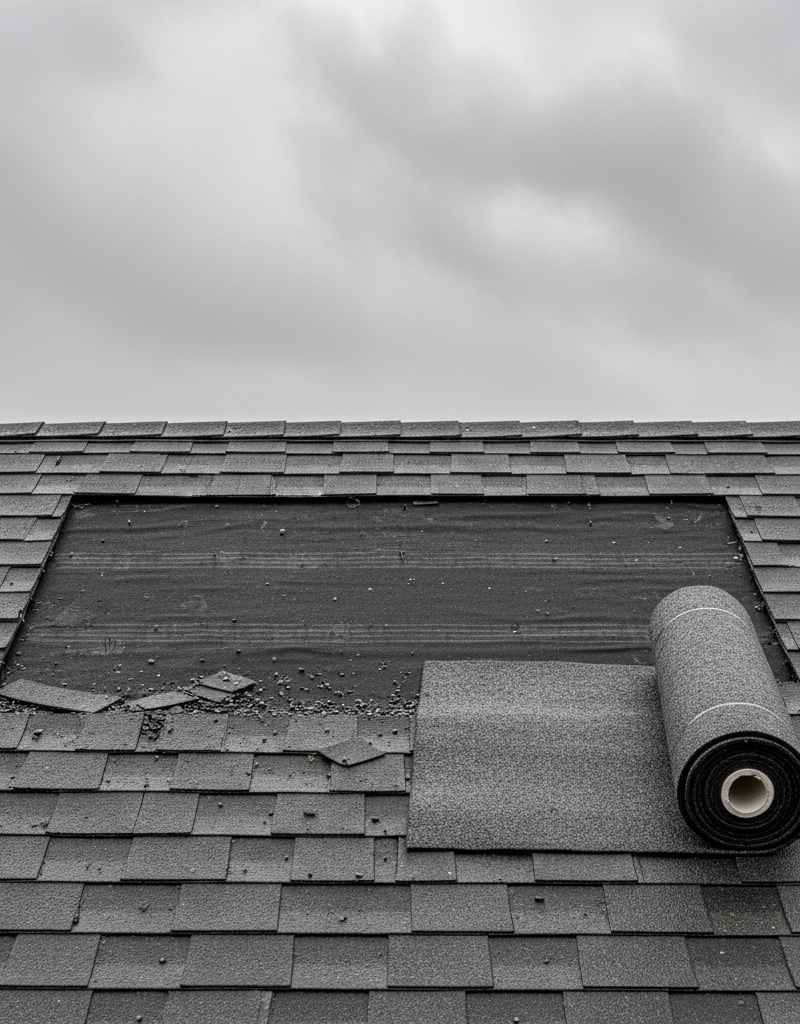
High winds during a storm can rip individual shingles right off your roof, leaving the underlying felt or even bare decking exposed. This isn't just an aesthetic issue; it's an open invitation for water to penetrate your roof system. Even a small missing shingle can allow rainwater to seep into your attic, ceiling, walls, and insulation, leading to costly damage like wood rot, mold growth, diminished insulation performance, and compromised structural integrity. The urgency to address missing shingles is paramount, as prolonged exposure to the elements can exacerbate the problem, turning a simple repair into a major — and expensive — remediation project. Understanding the risks and knowing how to make a timely, effective repair can save you thousands of dollars and extend the life of your roof.
How It Works
Asphalt shingles are designed to interlock and overlap, creating a continuous waterproof barrier. Each shingle has a base reinforced with fiberglass or organic felt, coated with asphalt, and embedded with ceramic granules on the exposed surface. The bottom edge of an overlapping shingle covers the fasteners (nails) of the shingle below it. Crucially, most asphalt shingles also have a thermo-activated sealant strip on their underside. When exposed to sunlight and warmth, this asphaltic strip melts slightly and then cools, bonding the overlying shingle to the one below it. This 'sealing' process is vital for wind resistance, as it prevents wind from getting under and lifting the shingle. After installation, it can take anywhere from a few days to several weeks for shingles to fully seal, depending on temperature and sun exposure. When a shingle is properly installed and sealed, it forms a cohesive, wind-resistant system that sheds water effectively. When this bond breaks due to high winds, defects, or improper installation, individual shingles can become loose and eventually blow off, leaving the underlying layers vulnerable.
Step-by-Step Fix
1. Prioritize Safety — Before you even think about climbing a ladder, assess the situation safely from the ground. Look for downed power lines, damaged trees, or unstable structures near your home. Wait for clear, dry weather. Never work on a wet or icy roof. Use a sturdy ladder placed on level ground, extend it at least three feet above the eave, and have a spotter if possible. * Safety Note: Always use appropriate fall protection when working on a roof, especially if heights or slopes are significant. If you are uncomfortable on a ladder or roof, do not attempt this repair yourself.
2. Gather Your Tools and Materials — You'll need replacement shingles that match your existing roof as closely as possible in color, shape, and size. If you don't have spares, you might find matching shingles in less visible areas, like sheds, or from a local roofing supplier if you know your shingle type and manufacturer. You'll also need a pry bar or flat bar, a hammer, roofing nails (1-1/4 inch galvanized roofing nails are standard), a utility knife, a caulk gun, roofing cement (plastic asphalt cement), and work gloves. * Gloves protect your hands from sharp shingle edges and hot roofing cement. * Having a small bucket or pouch for nails makes the job easier.
3. Loosen Surrounding Shingles — Starting with the shingle directly above the missing one, carefully lift its lower edge. If the shingles are well-sealed, use your flat bar or pry bar to gently separate them. Slide the bar straight up beneath the shingle, wiggling it slightly to break the adhesive seal. Be gentle to avoid cracking or damaging the surrounding shingles. Work your way up to the courses above the missing shingle, loosening only as many as necessary to access the nail heads of the damaged shingle. * If shingles are stubborn: Gently warm them with a heat gun on a low setting, moving it constantly to avoid overheating, which can make them brittle.
4. Remove Old Nails and Debris — Once the overlying shingles are lifted, you'll see the nails holding the exposed shingle and potentially the remnants of the missing shingle. Use the claw of your hammer or the pry bar to carefully pull out all existing nails that were holding the missing shingle and any exposed nails from the surrounding tabs. Inspect the underlying felt or decking for damage. Remove any loose granules, small pieces of shingle, or other debris. * If the underlayment is torn: Apply a patch of roofing felt or self-adhering modified bitumen membrane over the torn area before installing the new shingle.
5. Prepare the New Shingle — Trim the new shingle if necessary to match the space exactly. For three-tab shingles, you may need to cut off the exposed tab portion of the shingle if you're replacing just one tab from a three-tab shingle that has blown off. For architectural shingles, match the cut to the void. Ensure the shingle is clean and free of dust.
6. Slide the New Shingle into Place — Carefully slide the prepared new shingle into the vacant spot, ensuring it aligns perfectly with the adjacent shingles and the courses above and below it. The bottom edge should align with the bottom edge of the course it's part of, and the side edges should be snug against the neighboring shingles. Make sure it's fully seated and not buckled.
7. Nail the New Shingle — Lift the lower edge of the shingle directly above the one you just inserted. Drive 4-6 roofing nails through the new shingle, positioning them about ¾ to 1 inch above the cutouts (for three-tab) or sealant strip, and about 1 inch in from each side. Ensure the nails penetrate firmly into the decking without being over-driven or under-driven. Over-driving can cut the shingle; under-driving leaves the nail head exposed. * Position nails so they also pass through the top edge of the shingle directly below the new one for added security.
8. Apply Roofing Cement — Once the new shingle is nailed, apply a small dab (about a quarter-sized amount) of roofing cement underneath the tabs of the newly installed shingle and the tabs of any adjacent shingles that were disturbed. Also, apply a thin bead of cement under the overlapping edge of the shingle directly above it, where it covers the nails. Press down firmly to create a good seal. This helps secure the shingle and prevents wind uplift while the sun's natural sealing process takes over.
9. Re-seal Disturbed Shingles — Gently press all loosened shingles back down to re-engage their adhesive strips. If the original adhesive strips no longer grip, apply a small amount of roofing cement under the bottom edge of any disturbed shingle tab and press firmly. This is crucial for maintaining wind resistance across the repaired area.
10. Final Inspection from the Ground — Once you're safely off the roof, visually inspect the repaired area from the ground. Ensure the new shingle blends in, all shingles lie flat, and there are no exposed nail heads or lifted edges. Look for any signs of water entry if it rains shortly after the repair.
Common Causes
- High Winds: This is the most common culprit. Strong gusts, especially those exceeding a shingle's wind rating, can lift and tear shingles from the roof. The older the shingle, the weaker its adhesive bond, making it more susceptible.
- Improper Installation: Nails placed incorrectly (too high, too low, or too few), or failure to ensure proper shingle sealing during installation, greatly reduces wind resistance. Without a strong adhesive bond, shingles are easily dislodged.
- Old or Brittle Shingles: As shingles age (typically beyond 15-20 years for 25-year shingles), the asphalt material dries out, becomes brittle, and the adhesive strips lose their effectiveness. This makes them highly vulnerable to even moderate winds.
- Foot Traffic/Impact Damage: Walking on shingles, especially in cold weather, can crack or loosen them. Falling branches or other debris can also directly impact and dislodge shingles.
- Manufacturing Defects: Infrequently, a batch of shingles might have a defect in the adhesive strip or base material, leading to premature failure.
- Roof Decking Issues: While less common, underlying issues with the roof decking (e.g., rotten or loose plywood) can prevent nails from holding properly, indirectly contributing to shingle loss.
Common Mistakes
- Ignoring Safety Protocols: Climbing onto a wet, icy, or steeply pitched roof without proper safety gear (harness, fall arrest system) can lead to serious injury or death. Always prioritize safety over speed.
- Improper Nail Placement: Driving nails too high can leave them exposed to weather and prone to leaks; driving them too low won't secure the shingle above effectively. Over-driving or under-driving also compromises holding power.
- Not Using Roofing Cement: Relying solely on the new shingle's factory adhesive, especially in cooler weather, is a mistake. Roofing cement provides an immediate, strong bond vital for wind resistance until the new shingle fully seals naturally.
- Mixing Shingle Types/Colors: Using a shingle that doesn't match the existing ones aesthetically or functionally (e.g., mixing organic with fiberglass shingles) can look bad and might not provide uniform protection.
- Damaging Surrounding Shingles: Being too aggressive with a pry bar or utility knife can inadvertently crack, tear, or puncture adjacent healthy shingles, creating new points of failure.
- Ignoring Underlying Damage: Not inspecting the felt or decking for tears, rot, or puncture holes means you might fix the shingle but leave a pathway for water to enter below.
Cost & Time Breakdown
| Task | DIY cost | Pro cost | Time |
|---|---|---|---|
| Inspection | $0 | $0–$150 | 10–20 mins |
| Replacement Shingles (1-5) | $5–$25 | Included | 5 mins (shop) |
| Roofing Cement & Nails | $10–$20 | Included | 5 mins (shop) |
| Shingle Removal & Installation | $0 | $150–$400 | 30–60 mins |
| Total | $15–$45 | $150–$400 | 45–90 mins |
Tips & Prevention
- Regular Inspections: Twice a year (spring and fall), and especially after severe storms, visually inspect your roof from the ground with binoculars. Look for curled, cracked, broken, or missing shingles. Pay attention to valleys and edges.
- Clean Gutters: Clogged gutters can cause water to back up under shingles, leading to water damage and premature shingle deterioration. Keep them clear of debris.
- Trim Overhanging Branches: Trees with branches rubbing against or hanging directly over your roof can cause abrasion, dislodge granules, and deposit debris, increasing the risk of damage during storms.
- Understand Shingle Lifespan: Know the rated lifespan of your shingles. While often under warranty for 20-30 years, factors like direct sun exposure, climate, and ventilation can shorten this. Plan for eventual replacement.
- Ensure Proper Ventilation: Good attic ventilation helps regulate roof deck temperatures, preventing shingles from
Related Articles
Keep troubleshooting with these hand-picked guides from FixlyGuide:
- The #1 Mistake Homeowners Make After Finding Missing Shingles (And How to Fix It Right) — Discover the crucial steps to take after a storm rips shingles from your roof, ensuring a proper, lasting repair and preventing costly futu…
- The One Overlooked Mistake After Storm Damage: Finding Missing Roof Shingles Fast — Storms can rip off roof shingles, exposing your home to further damage. Learning how to safely assess and temporarily patch your roof is cr…
- Wind Tore Off Your Shingles? The 7 Critical Steps Most Homeowners Miss — Discover the essential steps to take when roof shingles go missing after a storm, from immediate safety checks to temporary repairs and ins…
- The One Mistake Homeowners Make When Shingles Blow Off (And How to Fix It Fast) — When shingles blow off your roof after a storm, the biggest mistake is waiting; quick, decisive action can prevent far more expensive damag…
- The Post-Storm Mystery: Where Did Your Shingles Go? (And the $50 Fix) — High winds can rip shingles clean off your roof, leaving your home vulnerable to leaks; learn how to safely assess and repair the damage yo…
- The Silent Destroyer: 7 Hidden Signs Your Roof Has a Leak (Before You Need a New Ceiling) — Catching roof leaks early can save your home from extensive damage and costly repairs. Learn the subtle indicators that reveal hidden water…
Frequently asked questions
How do you temporarily fix a missing shingle?+
For a very temporary fix, you can cover the exposed area with a heavy-duty tarp, secured with weights or battens, until permanent repairs can be made. For a slightly more robust temporary fix, a piece of sheet metal or plywood covered with roofing felt can be slid under the overlapping shingles and secured with roofing cement along its edges to bridge the gap and shed water. This should only be done if immediate permanent repair isn't possible, as it's not a long-term solution.


Discussion
Loading comments…