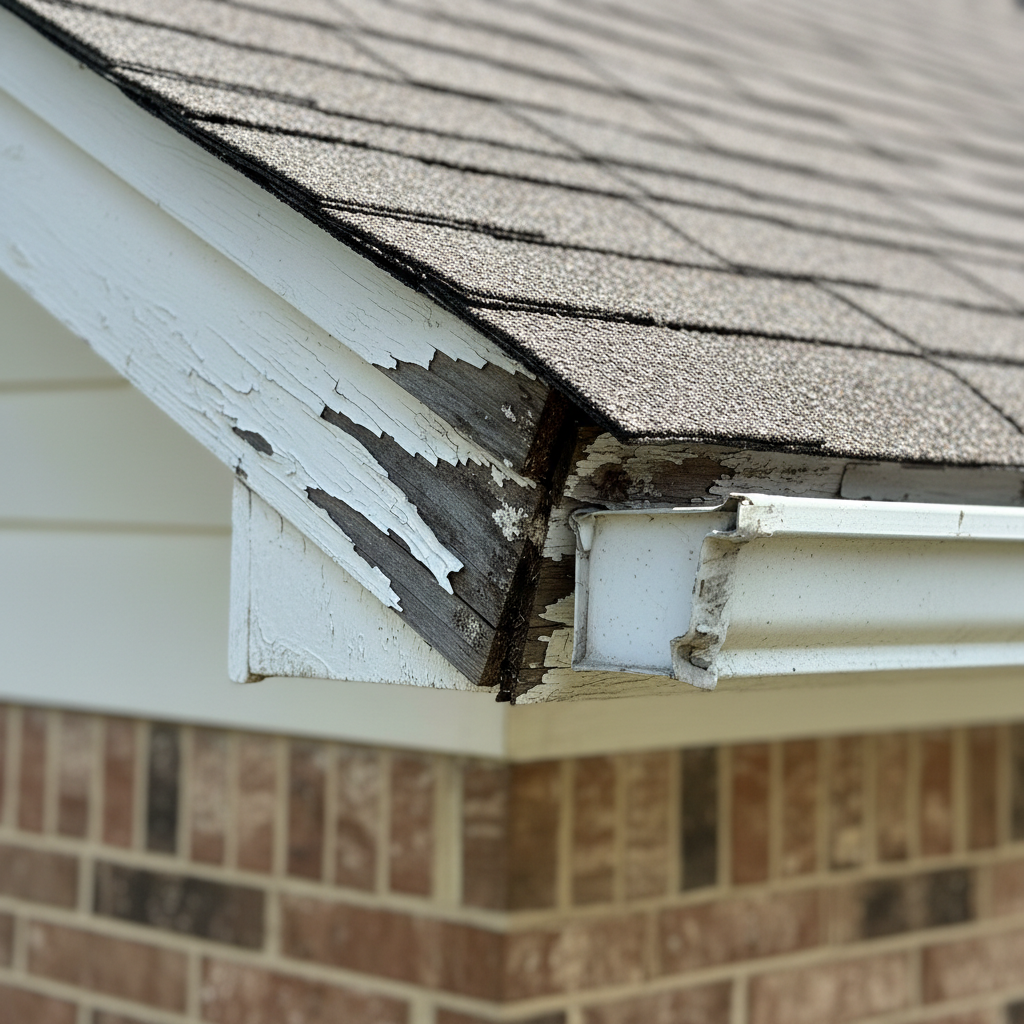
- 100°F+ Summers: The intense sun bakes the paint on the fascia, causing it to crack and lose its elasticity. This creates tiny fissures for water to penetrate.
- Sudden 2-3" Downpours: Our spring storms don't drizzle; they dump immense volumes of water in a short time. This overwhelms the roof edge, forcing water into any available gap.
- Expansive Clay Soil: While subtle, the constant shifting of our infamous clay soil can cause the entire house to move slightly. This can tug on the fascia, open joints, and widen the very gap that allows water to seep in.
Roofing · Aging roof
| Project category | Roofing |
|---|---|
| Problem type | Aging roof |
| Trade required | Roofing |
| Urgency | Planned project |
| Safety risk | Low safety risk |
| DIY suitability | Pro recommended |
| Cost category | High cost |
| Typical timeline | Plan 4–12 weeks ahead for scheduling and material lead time |
| Contractor type | Licensed roofing contractor |
Repair option
Maintenance repairs to buy a season or two while you budget.
Replacement option
Planned replacement, which is almost always cheaper than a leak-driven emergency.
Common causes
- Normal weathering past the shingle service life
- Poor attic ventilation cooking the shingles from below
- Repeated repairs on the same slopes
Relevant tools:repair or replace roofproject cost estimatorhome improvement material prices
Published June 12, 2026Last updated August 17, 2026
Tools & materials you'll need
Affiliate links- AmazonExtension LadderEnsure it's rated for your weight and tall enough to extend 3ft past the roofline.
- AmazonPry BarA 12-15 inch flat bar is ideal.
- AmazonHammerFor both prying and nailing.
- AmazonMiter SawFor clean, accurate cuts on the new fascia board. A circular saw with a guide can also work.
- AmazonCordless Drill/DriverFor removing and re-installing gutter fasteners.
- AmazonCaulking Gun
- AmazonPVC, Cedar, or Primed Pine Fascia Board (1x6 or 1x8)10-12 feet · PVC is the most durable, rot-proof option for the DFW climate.
- AmazonF-Style (or Hemmed) Drip Edge1-2 sections · Standard 10-foot sections. Match the color to your trim if possible.
- AmazonGalvanized or Stainless Steel Finishing Nails (8d)1 box · Corrosion resistant nails are essential for exterior work.
- AmazonGalvanized Roofing Nails (1.5 inch)1 box · For securing the drip edge to the roof deck.
As an Amazon Associate FixlyGuide earns from qualifying purchases — at no extra cost to you. Prices and availability are accurate as of publication and subject to change.
Quick Answer
Fascia boards on many 1990s Irving homes rot prematurely because they lack a crucial piece of flashing called a drip edge. Builders in that era often omitted it, allowing rainwater from the roof to run behind the gutter and soak directly into the fascia wood. This constant moisture, amplified by DFW's heavy downpours, causes peeling paint, wood rot, and eventual structural decay.
The Problem
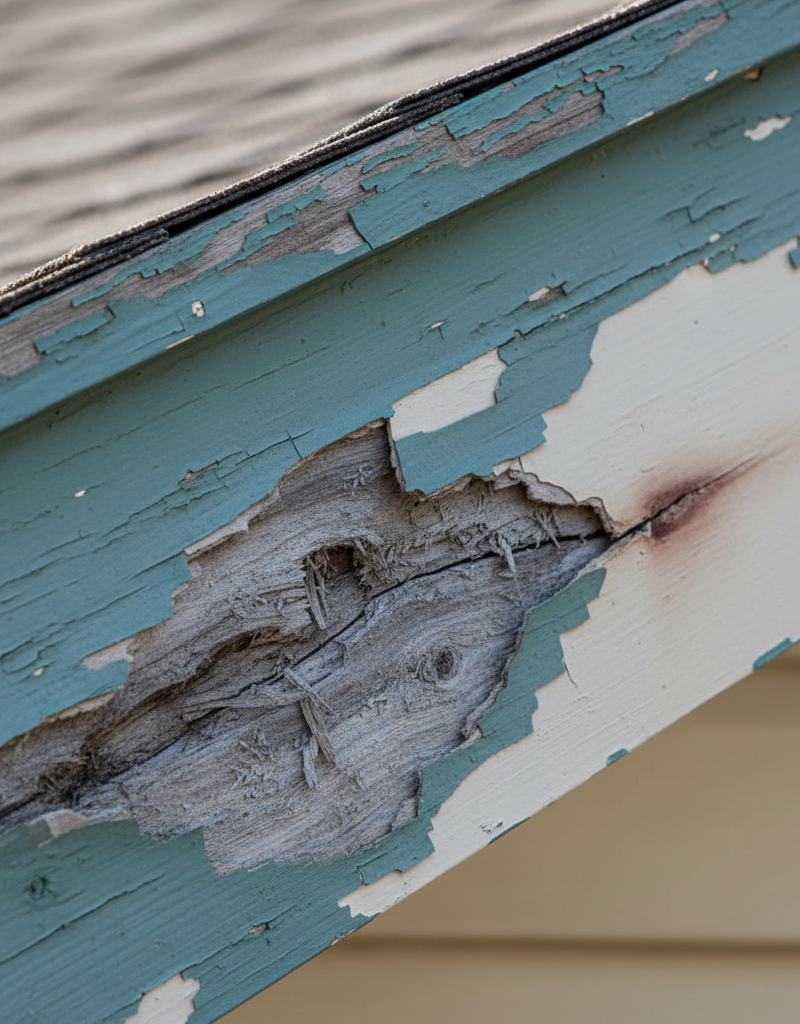
You see it on a Sunday afternoon walk through your Irving neighborhood—the tell-tale peeling paint along the roofline of a neighbor’s house. Maybe you’ve seen it on your own home. It starts as a few innocent-looking blisters on the white trim board that your gutters are attached to. You figure it’s a simple paint failure, a casualty of the brutal North Texas sun. You might even blame the gutters, thinking they’re clogged or leaking.
The real problem, however, is often hidden just out of sight, a silent flaw engineered into thousands of North Texas homes built during the boom years of the 1990s. The wood itself, the fascia board, is slowly turning to mush. You might press a finger against a dark, stained spot and find it surprisingly soft. This isn’t just a cosmetic issue of peeling paint; it’s the beginning of wood rot that can lead to insect infestations, compromised soffits, and even damage to the underlying rafter tails. The culprit isn’t bad paint or faulty gutters—it’s a missing, paper-thin piece of metal that should be there but isn’t.
How It Works
To understand why your fascia is failing, you need to visualize the edge of your roof as a tiny, intricate water management system. It’s not just shingles and gutters; several components must work in perfect harmony, especially against DFW's weather onslaught.
First, you have the roof deck, the plywood or OSB base layer. On top of that is the underlayment (felt paper or a modern synthetic), which acts as a secondary water barrier. Finally, you have your asphalt shingles. When rain hits the roof, it flows down the shingles, and gravity should carry it over the edge and cleanly into the gutter.
Here is where the system fails on so many 1990s Irving-area homes. Due to a combination of lax building codes and cost-cutting measures of the era, a critical component was frequently omitted: the drip edge. A drip edge is an L-shaped piece of metal flashing. Its top section slides under the shingles and underlayment, and its front face extends down, over the fascia board. Its purpose is simple but essential: it provides a clean, non-pourous path for water to leave the roof deck and underlayment, bridging the gap and directing water into the gutter.
Without a drip edge, a phenomenon called "capillary action" takes over. Water clings to the edge of the shingles and, instead of dripping freely into the gutter, it wicks backward, flowing behind the gutter and directly onto the face and top of the wooden fascia board.
Now, factor in the North Texas climate:
- 100°F+ Summers: The intense sun bakes the paint on the fascia, causing it to crack and lose its elasticity. This creates tiny fissures for water to penetrate.
- Sudden 2-3" Downpours: Our spring storms don't drizzle; they dump immense volumes of water in a short time. This overwhelms the roof edge, forcing water into any available gap.
- Expansive Clay Soil: While subtle, the constant shifting of our infamous clay soil can cause the entire house to move slightly. This can tug on the fascia, open joints, and widen the very gap that allows water to seep in.
So, every time it rains, that unprotected fascia board gets a little drink. It rarely has time to dry out completely before the next downpour. Over years, this constant moisture saturation leads directly to wood rot, creating the peeling paint, dark stains, and soft spots you see.
Step-by-Step Fix
This guide covers replacing a small, rotted 8-10 foot section of fascia on a single-story house.
SAFETY WARNING: This job requires working comfortably and safely on a ladder. If your roof is steep (a pitch above 6:12), wet, or on a two-story home, DO NOT attempt this. Falls from ladders are a leading cause of injury. When in doubt, call a professional roofing or carpentry contractor.
-
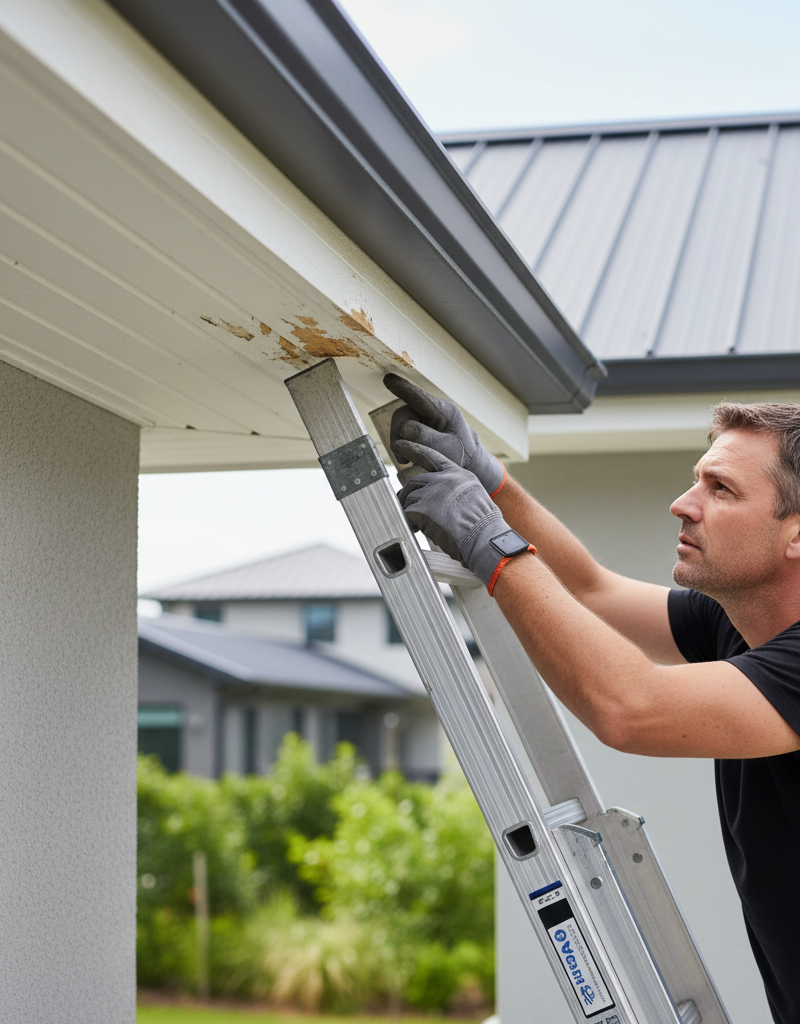
Safety First & Assessment — Place your extension ladder on firm, level ground. Ensure it extends three feet above the roofline and is set at a safe 4:1 angle (one foot out for every four feet up). Secure the ladder. Inspect the work area for overhead power lines. Do not work on a windy or wet day.
-
Detach the Gutter Section — Using a drill or driver, remove the screws holding the gutter hangers or spikes for the section you're replacing. The gutter will be full of shingle granules and debris, so be prepared for the weight. Gently lower the section to the ground. This is easier with a helper.
-
Perform Demolition — Use a flat pry bar and hammer to carefully pry the rotted fascia board away from the rafter tails. Start at one end and work your way along. Once the board is off, meticulously inspect the wooden rafter tails it was attached to. If they are soft, dark, or show any sign of rot, the problem is more severe, and you must call a professional.
-
Measure and Cut the New Board — Measure the opening precisely. Fascia is typically 1x6 or 1x8 lumber. For longevity in North Texas, opt for pre-primed finger-jointed pine, cedar, or the ultimate solution, PVC trim board, which is impervious to rot. Cut your new board to length using a miter saw for clean, square cuts.
-
Install the New Fascia — Position the new fascia board, ensuring it’s flush with the top of the rafter tails. Using 8d galvanized or stainless steel finishing nails, nail the board securely into each rafter tail. Drive two nails per rafter.
-
Install the Critical Drip Edge — This is the most important step. Purchase "F-style" or "Hemmed" drip edge from a local supplier. You will gently lift the existing shingles and slide the top flange of the metal flashing underneath the shingles and the felt paper. The front face of the drip edge MUST hang down in front of the new fascia board you just installed. It should not be behind it.
-
Secure the Flashing — Once the drip edge is in place, fasten it to the roof deck every 18-24 inches with roofing nails. To fully seal the system, you can apply a thin bead of roofing cement to the underside of the shingle edge before pressing it down over the drip edge, but do not overuse it.
-
Re-hang the Gutter — With the drip edge now covering the fascia, reinstall your gutter section. The back of the gutter should tuck in neatly behind the front lip of the new drip edge. This ensures any water coming off the roof edge is now directed harmlessly into the gutter system.
-
Caulk and Seal — Using a high-quality, paintable exterior sealant, caulk the nail holes, the corner joints, and any seams. This prevents any incidental water intrusion.
-
Prime and Paint — Even if you used a pre-primed board, apply another coat of high-quality exterior primer. Finish with two topcoats of durable exterior paint. Do not skip this step; it is the fascia’s first line of defense against the sun.
Common Causes
- Missing Drip Edge: The number one cause, a direct result of cost-cutting and lax codes during the 1990s housing boom in Irving and surrounding suburbs.
- Clogged Gutters: When gutters are packed with leaves from live oaks and pecans, water backs up and overflows, saturating the fascia board from the front.
- Improper Shingle Overhang: Shingles should extend about ¼ to ⅜ inch past the roof edge. If they are cut too short, they can’t effectively direct water away from the fascia.
- Damaged Shingles: Hail-bruised, cracked, or missing shingles at the roof's edge allow water to get underneath and onto the decking, eventually running down to the fascia.
- Face-Nailing: Driving nails through the front face of the fascia instead of into the rafter tails. These nail heads eventually fail, allowing moisture to penetrate the wood directly.
Common Mistakes
- The "Paint-and-Pray" Method: Simply scraping and painting over stained or peeling fascia without addressing the underlying water intrusion. The rot continues, and the paint will fail again in a year.
- Replacing Fascia, Forgetting Drip Edge: Going through all the work of replacing the rotted board but failing to install the drip edge, which guarantees the problem will return.
- Incorrect Gutter Placement: Re-installing the gutter in front of the drip edge lip instead of tucked behind it, defeating its entire purpose.
- Using Interior-Grade Materials: Using interior caulk or paint on the exterior. These products are not formulated to withstand UV rays and temperature swings and will fail quickly.
- Ignoring Rafter Tail Damage: Covering up rotted rafter tails with a new piece of fascia. This is a serious structural mistake that compromises the integrity of your roof overhang.
Cost & Time Breakdown
Costs are estimates for a 10-foot section in the Dallas-Fort Worth area.
| Task | DIY Cost | Pro Cost (Labor & Materials) | Time (DIY / Pro) |
|---|---|---|---|
| Gutter Detach/Reattach (10ft) | $0 | $75 - $150 | 1 hr / 0.5 hr |
| Rotted Fascia Removal | $0 | $50 - $100 | 0.5 hr / 0.25 hr |
| PVC Fascia Board & Fasteners | $50 - $80 | $150 - $250 | 1 hr / 0.5 hr |
| Drip Edge & Roofing Nails | $15 - $25 | $100 - $150 | 1 hr / 0.5 hr |
| Primer, Paint, Caulk | $40 - $60 | $125 - $200 (as part of job) | 1.5 hr / 1 hr |
| Total | $105 - $165 | $500 - $850 | 5-6 hrs / 2.5-3 hrs |
Tips & Prevention
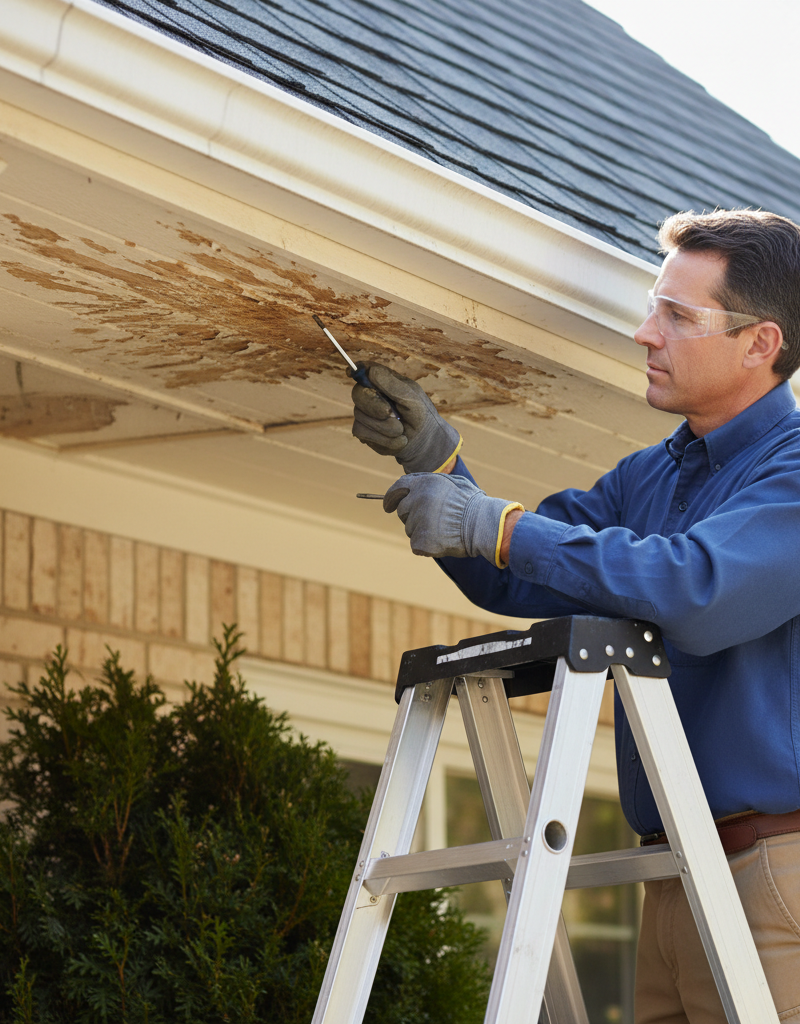
- Inspect Annually: Twice a year (spring and fall), walk the perimeter of your home and look specifically at the roofline for peeling paint, dark stains, or dripping behind the gutter during rain.
- Prioritize Gutter Cleaning: In North Texas, clogged gutters are a primary contributor to fascia rot. Clean them after the spring pollen drop and after the fall leaf drop.
- Demand Drip Edge on New Roofs: If you’re getting a roof replacement, get it in writing that "F-style" (or "T-style") drip edge will be installed correctly under the new underlayment along all eaves. A reputable DFW roofer does this as standard practice.
- Upgrade to 6" Gutters: Many DFW homes have 5" gutters that are simply undersized for the volume of water our modern storms produce. Upgrading to 6" seamless gutters can dramatically improve water management.
- Ensure Proper Attic Ventilation: A properly vented attic (using the 1:300 rule) helps dissipate the intense heat that builds up under your roof deck. This prevents shingles from "cooking" from below and extends the life of all wooden components.
When to Call a Professional
While replacing a small section of fascia is a manageable DIY project for some, it's critical to know when to pick up the phone. Call a licensed and insured roofing or carpentry professional immediately if you encounter any of the following:
- Widespread Rot: If you find rot along more than one roof edge, or if it extends more than 15-20 feet, this indicates a systemic problem that needs a professional eye.
- Structural Damage: If you remove the fascia and find the underlying rafter tails are soft, damp, or rotted, this is a structural repair. A carpenter will need to sister or replace these framing members.
- Two-Story or Steep Roofs: The risk of falling is too great. Professional crews have the required safety harnesses, scaffolding, and insurance to perform this work safely. Any roof with a pitch steeper than 6:12 (meaning it rises 6 inches for every 12 inches of horizontal run) is considered non-walkable and is a job for pros.
- Hail Damage is Involved: If you suspect the roof edge damage is part of a larger hail claim, call a reputable DFW roofing contractor first. They can document the damage properly for your insurance carrier and help you navigate the claims process, including understanding your policy's coverage for things like ACV vs. RCV and the need for code-upgrade supplements (like adding drip edge where it was previously missing).
What should this project cost?
Enter your project details for a realistic cost range before you call anyone.
Spot repairs commonly run $400–$1,800; full replacement typically $9,000–$18,000 for an average home.
- Regional adjustment
- National average
- Labor share (typical)
- ~$2,948
- Quotes to collect
- 3 written estimates
Educational estimate based on national averages — not a binding quote. Always confirm with written local estimates.
Fixly Project Decision Box
- DIY difficulty
- Professional Recommended
- Estimated time
- Inspection 1–2 hours · repairs 1–3 days
- Cost level
- High
Main tools / materials
- Binoculars for a ground-level look
- Flashlight for attic checks
- Moisture meter
- Roofing cement (temporary patch only)
When to stop and call a pro
- Active leak near lights, fans, or any wiring
- Sagging, bulging, or water-filled ceiling
- Steep, wet, or two-story roof — do not climb it
- Storm or hail damage you plan to claim on insurance
Need professional help?
Free roof assessment first — no phone calls until you ask for them.
Get Local Roofing HelpDecide what your roof needs
Two minutes of questions turns "something is wrong up there" into a clear next step.
- Repair or replace your roof?Answer 10 questions about age, leaks, and damage to get a clear next step.Open
- Compare contractor quotesScore up to four bids on price, warranty, licensing, and timeline.Open
- Get local estimatesSend one request and compare written estimates from vetted pros.Open
Free, no signup required. Estimates are educational guidance, not a quote or an inspection.
Get the print-ready PDF of this guide
A clean, ad-free, printable version you can keep on your phone or pin to the workshop wall. Free with a FixlyGuide account.
- Print-optimized layout
- Tools, materials & every step included
- Saved to your account
Frequently asked questions
Can't I just use wood hardener and paint over the rotted fascia?+
No, this is a temporary fix at best. Wood hardener cannot restore the structural integrity of rotted wood. The core problem is water intrusion, and unless you stop the water (by installing a drip edge), the rot will continue to progress underneath the patch, leading to a much more expensive repair later.
Is drip edge required by building code in Irving, Texas now?+
Yes. While it may not have been consistently enforced in the 1990s, the International Residential Code (IRC), which is the basis for modern Texas building codes, now requires drip edge to be installed at the eaves and gables of shingle roofs to protect underlying building components.
My whole house needs new fascia. Is this a roofing job or a painter's job?+
For widespread fascia replacement that also involves installing a proper drip edge system, you should hire a professional roofing contractor or a specialized carpentry/siding contractor. A painter may be able to replace a board, but they often lack the specific expertise to integrate the new wood correctly with the roof's water-management system (shingles, underlayment, and flashing).
How can I tell if I have a drip edge without getting on a ladder?+
On a sunny day, stand back from your house and look at the edge of the roof just behind the gutter. You should be able to see a thin, straight line of metal (usually white, brown, or silver) that the shingles overhang slightly. If you see the edge of the shingles and then what looks like a wood or painted surface directly behind the gutter, you likely do not have a drip edge.
Discussion
Loading comments…