
Tools & materials you'll need
Affiliate linksAs an Amazon Associate FixlyGuide earns from qualifying purchases — at no extra cost to you. Prices and availability are accurate as of publication and subject to change.
How it works
A residential gutter system is a gravity-fed network designed for one purpose: to capture rainwater from the roof and direct it safely away from the house's foundation. The system consists of horizontal troughs, known as gutters or eavestroughs, which are mounted to the fascia boards along the roof's edge. These gutters are installed with a slight, specific pitch—typically a 1/4-inch drop for every 10 feet of length—to encourage water to flow towards vertical pipes called downspouts. At the bottom of the downspouts, elbows and extensions direct the collected water several feet away from the foundation walls.
The "hidden mistake" that destroys countless roofs is allowing this system to fail due to clogs. When gutters fill with leaves, twigs, pine needles, and asphalt shingle granules, a solid dam forms. Rainwater can no longer drain. It backs up, overflowing the sides of the gutter. This overflowing water saturates the wooden fascia boards and soffits, leading to rot and structural decay. More critically, the pooled water can wick back up under the first courses of roof shingles, saturating the roof decking and underlayment. This intrusion leads to attic leaks, ruined insulation, and interior water stains. In cold climates, this trapped water freezes, forming destructive ice dams that can pry shingles loose and cause catastrophic water intrusion during a thaw.
Step-by-Step Fix
1. Perform a Ground-Level Inspection — Before retrieving a ladder, walk the perimeter of your home, ideally during or after a rain. Look for obvious signs of failure like waterfalls cascading over gutter edges, dark water stains on fascia or siding, and pooling water near the foundation. Note any sagging gutter sections or disconnected downspouts to target during your cleaning.
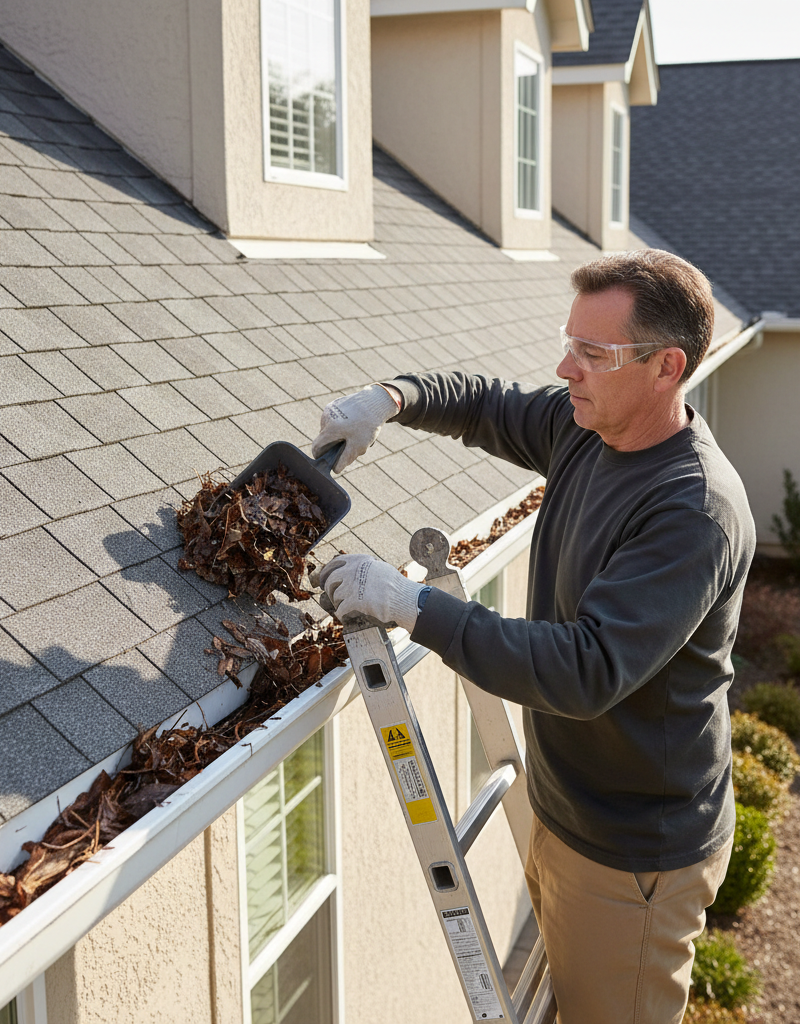
2. Assemble Safety Gear & Tools — Safety is non-negotiable for this task. You must use a sturdy, correctly sized extension ladder equipped with a ladder stabilizer (standoff). This device rests on the roof, preventing gutter damage and increasing stability. Essential personal protective equipment (PPE) includes thick, waterproof gloves, non-slip footwear, and safety glasses.
- Tools:
- Ladder with stabilizer/standoff arms
- Bucket with a wire hook to hang from the ladder
- Gutter scoop or small garden trowel
- Garden hose with a high-pressure or pistol-grip nozzle
- Plumber's auger (snake), approximately 25 feet
- Large tarp to protect landscaping
3. Position the Ladder Safely — Place the ladder on stable, level ground. Follow the 4-to-1 rule for the correct angle: for every four feet of height to the ladder's resting point, the base should be one foot away from the wall. Extend the ladder at least three feet above the roof edge and secure the stabilizer arms against the roof surface, not the gutter itself. Always maintain three points of contact (two feet and one hand, or two hands and one foot) when climbing or descending.
4. Remove Bulk Debris from Gutters — Starting at a position near a downspout, use your hands or a gutter scoop to remove the large, loose debris like leaves and twigs. Place the debris into your bucket, not on the roof or ground. Working from the downspout outward prevents you from pushing debris into the downspout opening and creating a worse clog. Move the ladder frequently; never overreach.
5. Scrape Out Caked-On Sediment — After the loose material is gone, you will likely find a dense layer of decomposing organic matter and shingle granules caked to the bottom of the gutter. Use a narrow trowel to scrape this sludge free. This heavy material holds moisture against the metal, promoting corrosion, and is the primary source of downspout clogs.
6. Flush the Gutter Sections — Take your garden hose up the ladder. Starting at the end opposite the downspout, spray a stream of water into the gutter. This will flush out the remaining fine sediment and allows you to test for proper flow and slope. The water should flow cleanly and drain completely through the downspout without pooling or overflowing.
7. Identify and Locate Downspout Clogs — If water backs up and fills the gutter when you flush it, the downspout is clogged. Confirm the clog's location by tapping on the outside of the downspout from top to bottom. A dull thud indicates where the compacted debris is located, while a hollow sound means that section is clear. Often, clogs are located in the curved elbow sections.
8. Dislodge the Downspout Clog — First, try to clear the clog from above. Insert the hose nozzle directly into the downspout opening and turn the water on at full pressure for 30 seconds. If this doesn't work, feed a plumber's auger down into the pipe. Turn the crank to break up the clog.
- If the auger fails: You may need to disassemble the downspout. Use a screwdriver or drill to remove the screws holding the elbows and sections together. This will allow direct access to remove the blockage by hand.
9. Inspect Gutter Hardware and Seams — With the gutters clean, perform a detailed visual inspection. Look for loose or pulled-out gutter spikes (the large nails used on older systems) or loose hidden hangers. Check all seams, corner joints, and end caps for cracked or peeling sealant that could cause leaks. Gently wiggle the gutter to check for excessive movement.
10. Execute Minor Repairs — Use a hammer to drive loose gutter spikes back into the fascia. If the hole is stripped, remove the old spike and replace it with a long, threaded gutter screw, which provides superior holding power. For leaking seams, use a wire brush to clean the old sealant and any corrosion from the area, wipe it dry, and apply a continuous bead of high-quality polyurethane or elastomeric gutter sealant.
11. Verify Proper Slope — After flushing and cleaning, there should be no standing water left in the gutters. Small puddles less than 1/2 inch deep may be acceptable, but anything more indicates an improper slope. To correct a minor sag, you may be able to bend the hanger slightly or, for screw-in hangers, remove and reinstall it slightly higher or lower to adjust the gutter's pitch towards the downspout.
12. Clean Up and Final Rinse — Collect all debris from your tarp and dispose of it. Use the hose to rinse any mud or grime that splattered onto your siding, windows, or walkways. A thorough cleanup prevents this acidic debris from staining surfaces or killing your lawn.
Common mistakes
- Using a Pressure Washer. The high-pressure stream can strip protective granules from your asphalt shingles, effectively aging your roof prematurely. It can also force water behind fascia boards, dent aluminum gutters, and dislodge sections entirely. Always use a standard garden hose with a spray nozzle.
- Leaning a Ladder on the Gutter. Leaning an extension ladder directly against an aluminum or vinyl gutter will dent, deform, or crack it. This compromises its function and aesthetics. The only correct method is to use a ladder stabilizer (standoff) that rests on the roof surface, bridging over the gutter.
- Forgetting Downspout Extensions. Cleaning the gutters is only half the job. If downspouts discharge water directly at the foundation, you are simply redirecting the problem. Ensure extensions are connected and channel water at least 4 to 6 feet away from the home onto ground that slopes away from the structure.
- Ignoring the Heavy Sludge. Many DIYers only scoop out the dry leaves, leaving behind the heavy, wet layer of dirt and shingle granules at the bottom. This "sludge" is the primary cause of downspout clogs and holds moisture that accelerates gutter corrosion. The trough must be scraped clean down to the bare metal.
- Working Near Power Lines. The single most dangerous mistake is failing to notice the overhead electrical service drop from the utility pole to your house. Never position a ladder where you or your tools could come within 10 feet of this line. Contact with it can be fatal.
- Wearing Improper Gloves. Gutters often contain sharp metal edges, screw points, and potentially hazardous bacteria from decaying debris and animal droppings. Thin garden gloves are insufficient. Use heavy-duty, puncture-resistant, waterproof work gloves to protect your hands.
Cost & time breakdown
The cost and time for gutter maintenance vary based on house size, height, and the extent of neglect.
| Task | DIY Cost | Pro Cost | Average Time |
|---|---|---|---|
| Basic Gutter Cleaning (1,500 sq ft home) | $30–$80 (gloves, scoop, stabilizer rental) | $175–$375 (1-story), $275–$575 (2-story) | 2–5 hours |
| Clearing a Stubborn Downspout Clog | $25–$50 (plumber's auger purchase) | $50–$125 (if a separate, complex task) | 30–90 minutes |
| Resealing Leaky Seams (per corner/seam) | $10–$25 (tube of gutter sealant, brush) | $85–$175 | 30–60 minutes |
| Replacing a Gutter Section (10 ft) | $50–$100 (section, hangers, sealant, screws) | $250–$450 | 2–3 hours |
| Adjusting Gutter Slope (per 20-30 ft run) | $0 (if just bending hangers) | $150–$300 | 1–2 hours |
| Installing Gutter Guards (150 linear feet) | $300–$1,800 (materials vary greatly by type) | $1,200–$4,500 | 1–2 days |
When to call a pro
While cleaning gutters is a common DIY task, certain situations warrant calling a professional gutter cleaning or roofing service. The risk of serious injury or causing more significant damage outweighs any potential savings.
Call a professional if your house is three or more stories high, or if your roof has a particularly steep pitch (greater than 6/12, or a 6-inch rise for every 12 inches of run). Working at these heights and angles requires specialized safety equipment and training. If your inspection reveals that multiple gutter sections are pulling away from the house or that the fascia boards behind them feel soft and spongy, you are dealing with wood rot. This is a structural problem that requires a carpenter or roofer to replace the damaged wood before new gutters can be properly secured. Similarly, if entire gutter runs are holding water, they likely need to be completely removed and re-hung to correct the slope—a job demanding precision. If you are not comfortable with heights or do not own the proper ladder and safety gear, hiring an insured professional is the wisest choice.
Prevention & maintenance
Proactive maintenance is far less costly and time-consuming than reactive repairs. A disciplined approach will protect your roof and foundation for years.
- Schedule Biannual Cleanings. The absolute minimum is to clean gutters thoroughly twice a year. The first cleaning should be in late spring after trees have dropped their seeds and pollen. The second, more critical cleaning should happen in late fall after all surrounding trees have shed their leaves.
- Trim Overhanging Tree Branches. The most effective prevention is source control. Annually trim back any tree limbs that hang directly over your roof. Maintaining a clearance of at least 8-10 feet between branches and your roofline will drastically reduce the amount of debris that lands in your gutters.
- Invest in Quality Gutter Guards. While not a "no-maintenance" solution, gutter guards are a powerful deterrent. High-quality micro-mesh systems are particularly effective at keeping out all but the finest sediment. They reduce full cleanouts from a biannual chore to a simple surface brushing every year or two, but they are a significant upfront investment.
- Perform Post-Storm Visual Checks. After any major rain or wind storm, take five minutes to walk your property. Look for any visible debris overflowing or signs of poor drainage. A quick inspection can help you spot a developing clog before it becomes a major blockage.
- Monitor Shingle Granule Accumulation. It's normal to find a small amount of asphalt shingle granules in your gutters. However, if you suddenly notice a significant increase in this coarse, sandy material, it is a key indicator that your roof's surface is deteriorating and nearing the end of its functional life. This warrants a professional roof inspection.
- Ensure Proper Downspout Drainage. At least once a year, verify that your downspout extensions are securely attached and are discharging water onto a surface that slopes away from your home. Water should be deposited a minimum of 4-6 feet away from the foundation to prevent soil saturation and hydrostatic pressure.
Related Articles
Keep troubleshooting with these hand-picked guides from FixlyGuide:
- Prevent Roof Damage: Gutter Cleaning & Maintenance for Homeowners — Clogged and neglected gutters can lead to significant roof damage, but regular cleaning and maintenance can prevent costly repairs and prot…
- The HVAC Maintenance Myth: Why "Annual Service" Can Cost You More (and 3 Things to Check Instead) — Discover why strict annual HVAC servicing isn't always necessary and learn the essential checks that can save you money and extend your sys…
- The Dryer Vent Fire Trap: 3 Hidden Signs Your Home Is at Risk — Learn the critical signs your dryer vent is clogged and how to safely clean it to prevent a dangerous house fire.
- The #1 Dryer Fire Cause Most Homeowners Miss (and How to Fix It in 30 Minutes) — Lint buildup in dryer vents is the leading cause of dryer fires. Learn how to clean your dryer vent thoroughly to prevent this hidden dange…
- Stop Wasting 30% on HVAC: Your System's Dirty Secret — Regular HVAC servicing is crucial for efficiency and longevity. Learn when and why to schedule professional maintenance for your heating an…
- The #1 Gutter Mistake That Causes Overflow (And How to Fix It in 20 Minutes) — Overflowing gutters during heavy rain are usually caused by a readily fixable clog, often due to a common cleaning mistake.
Frequently asked questions
How often should I clean my gutters?+
You should clean your gutters at least twice a year: once in late spring after trees have finished blooming and once in late fall after most leaves have fallen. Homes surrounded by many trees may require more frequent cleaning.
What happens if I don't clean my gutters?+
Neglecting gutter cleaning can lead to clogged gutters, causing water to overflow and potentially damage your roof, fascia boards, foundation, and landscaping. It can also lead to basement flooding and attract pests.
Can I install gutter guards myself?+
Yes, many types of gutter guards can be installed by a homeowner with basic DIY skills. However, they still require occasional inspection and cleaning to remove debris that may accumulate on top of the guards.
When should I call a professional for gutter issues?+
Call a professional if your gutters are on a multi-story home and are difficult or unsafe to access, if you notice significant damage like detached sections or persistent leaks, or if you suspect foundation damage from prolonged water overflow.


Discussion
Loading comments…