
Tools & materials you'll need
Affiliate links- AmazonVacuum cleanerWith hose and crevice attachment
- AmazonDryer vent cleaning brush kitWith extendable rods, suitable for your vent length
- AmazonScrewdriver setFor removing exterior vent cover, if applicable
- AmazonGloves
- AmazonDust mask
- AmazonWork light or flashlightFor better visibility in the vent
- AmazonFoil tape1 roll · If existing connections are loose or damaged
As an Amazon Associate FixlyGuide earns from qualifying purchases — at no extra cost to you. Prices and availability are accurate as of publication and subject to change.
How it works
A clothes dryer's primary function is to remove moisture from laundry using heated air and tumbling action. The exhaust system is a critical component of this process. It begins with an internal blower, typically a squirrel-cage fan, which draws ambient air into the dryer. This air is then forced across a heating element (for electric dryers) or through the heat generated by a gas burner (for gas dryers).
This superheated air enters the rotating drum, where it absorbs moisture from the tumbling clothes. As the clothes release water vapor, they also shed tiny fibers, creating lint. The resulting hot, moist, lint-filled air must be exhausted from the appliance and the home. The blower motor pushes this air through a lint screen, which is designed to capture the majority of these fibers. However, finer particles inevitably bypass the screen and are carried into the exhaust vent system.
This system consists of several parts: the dryer's internal exhaust port, a flexible transition duct connecting the dryer to the wall, the rigid ductwork running through walls or floors, and an exterior termination hood. The entire pathway is designed to be a sealed, low-resistance conduit to maintain strong airflow. When lint accumulates within this system, it acts like cholesterol in an artery, narrowing the passage and restricting airflow. This forces the dryer to work harder, run hotter, and presents a significant and well-documented fire hazard.
Step-by-Step Fix
This procedure details a thorough cleaning of the entire dryer vent system, from the appliance to the exterior termination point.
-
Safety Shutdown and Preparation — Disconnect the dryer from its power source. For an electric dryer, unplug the heavy-duty cord from the wall outlet. For a gas dryer, shut off the gas supply via the dedicated valve located on the pipe behind the unit, then unplug the standard 120V power cord. Carefully pull the dryer away from the wall to provide at least 2-3 feet of working space.
- Tools: Gather a vacuum with hose attachments (crevice tool, brush), a power drill, a dryer vent cleaning kit (with flexible rods and an auger brush), screwdrivers or a nut driver, work gloves, and metal foil tape.
- Safety: Wear a dust mask to avoid inhaling lint particles. If you have a gas dryer, have a solution of soapy water ready to test for leaks upon reconnection.
-
Disconnect the Transition Duct — The transition duct is the flexible hose connecting the dryer's exhaust port to the duct in the wall. Loosen the circular clamp securing the duct to the dryer's rear port and the clamp securing it to the wall pipe. These are typically spring clamps (squeeze with pliers) or worm-gear clamps (loosen with a screwdriver or nut driver). Gently pull the duct free from both connections.
-
Clean the Dryer's Interior Exhaust Path — Reach inside the dryer and remove the lint screen. Use your vacuum's crevice tool to thoroughly clean the lint trap housing—the cavity where the screen slides in. Significant amounts of lint bypass the screen and accumulate here. Next, move to the rear of the dryer and use the vacuum to clean the exhaust port where the transition duct was connected, reaching as far inside as you can.
-
Inspect and Clean or Replace the Transition Duct — Examine the flexible transition duct. If it is a white vinyl or flimsy foil accordion-style duct, it should be replaced. These materials are a fire hazard, are not compliant with most modern building codes, and their ribbed design traps lint. Replace it with a UL 2158A listed semi-rigid or rigid metal duct. If you have a metal duct, take it outside and clean it thoroughly with a brush or by tapping it to dislodge lint, followed by a vacuum.
-
Assemble the Cleaning Kit — A dryer vent cleaning kit consists of several flexible rods that screw together to reach the full length of your vent. Start by attaching the auger brush head to the first rod. Attach this assembly to your power drill, ensuring the drill is set to a low speed and in the forward (clockwise) direction.
- Critical Note: Running the drill in reverse will cause the rod sections to unscrew inside your vent, potentially leaving the brush head lodged deep inside the wall. Always rotate clockwise.
-
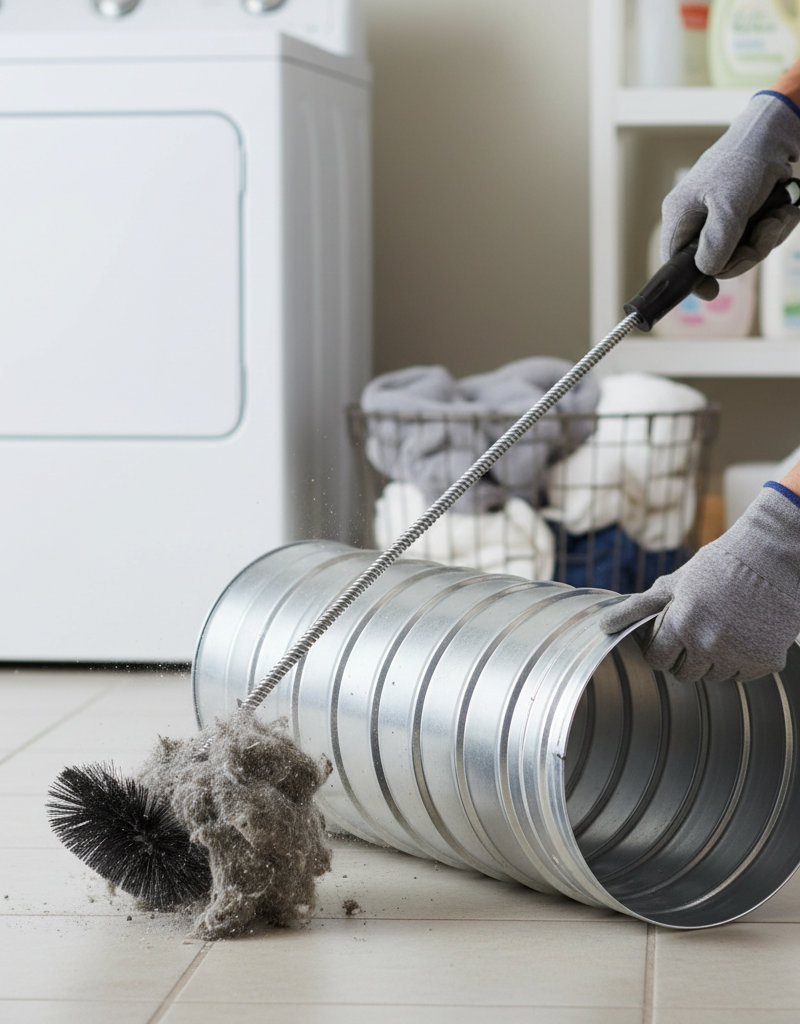
Clean the Duct from the Interior — Insert the auger brush into the vent opening in the wall. Turn on the drill at a low speed and slowly push the rod into the duct. As you advance, add more rod sections one at a time. Use a gentle push-and-pull motion to scrub the interior walls of the duct. You will feel resistance as the brush works through compacted lint. Have a partner hold a shop vacuum hose over the opening to capture the dislodged debris as you work.
-
Clean from the Exterior Vent Hood — Go outside and locate where your dryer vent terminates. It will be a small hood with a flap or louvers. Remove any external screens (these are often against code as they trap lint) and open the cover. Use a brush and your hands to clear any visible lint, leaves, or pest nests from the hood and damper flap, ensuring it can move freely. If accessible, insert your cleaning brush assembly from this end as well, working it back toward the interior to ensure the entire length of the duct is clear.
-
Purge the Duct System — After scrubbing from both ends, perform a final purge. From the inside, use a leaf blower or a shop vacuum set to "blow" mode to force a high-velocity stream of air through the entire duct system. This will blow any remaining loose lint and dust out through the exterior vent hood. Visually confirm from the outside that a large plume of lint is expelled.
-
Reassemble All Connections Securely — Reconnect your cleaned or new transition duct. Slide the clamps over the duct ends, push the duct firmly onto the dryer port and the wall pipe, and tighten the clamps for an airtight seal. Do not use screws to connect duct sections, as the tips will protrude into the duct and catch lint. Use UL-listed metal foil tape to seal any joints in rigid ductwork.
-
Position Dryer and Test System — Carefully push the dryer back into its position, being mindful not to crush or kink the transition duct. A minimum of 4-6 inches of clearance is ideal. Reconnect the power cord. For a gas dryer, reconnect the flexible gas line, turn the gas valve back on, and brush the soapy water solution over the connections; bubbles indicate a gas leak that must be fixed immediately. Run the dryer on a no-heat or "air fluff" cycle for 15 minutes. Go outside and confirm you feel a strong, steady stream of air exiting the vent hood.
Common mistakes
- Using the wrong duct material. Many homes still use flammable white vinyl or flimsy foil accordion-style transition ducts. These are significant fire hazards as they are easily crushed, and their deep ridges trap lint. Solution: Replace any vinyl or foil ducting with a UL 2158A-listed semi-rigid or rigid metal duct, which provides a smooth interior for better airflow and improved fire safety.
- Running the cleaning brush drill in reverse. Operating a power drill in reverse (counter-clockwise) while using a threaded-rod cleaning kit will cause the rod sections to unscrew from each other inside the vent. This is the most common cause of getting a brush head stuck deep within the ductwork, often requiring a professional to retrieve. Solution: Always set your drill to the forward (clockwise) direction and confirm it before inserting the brush.
- Forgetting to clean the exterior vent hood. A large percentage of blockages occur at the final foot of the system. Lint, debris, and animal nests can jam the damper flap, preventing it from opening and effectively sealing the vent shut. Solution: Always remove the exterior cover, clean the termination point thoroughly, and manually check that the damper flap opens and closes without obstruction.
- Connecting duct sections with screws. It seems intuitive to use sheet metal screws to join sections of rigid duct, but this is a critical error. The tips of the screws protrude into the airflow path, acting as anchors that snag fibers and initiate a new lint buildup. Solution: Connect all rigid metal duct sections using clamps and seal the seams with high-quality, UL 181B-FX listed metal foil tape (not cloth duct tape).
- Pushing the dryer back too far. After cleaning, homeowners often push the dryer flush against the wall to save space. This crushes the flexible transition duct, creating sharp bends and restricting airflow just as much as a lint clog. Solution: Leave at least 4-6 inches of space behind the dryer. If space is extremely tight, install a slim, telescoping metal periscope vent.
Cost & time breakdown
This table outlines the typical investment in terms of cost and time for various levels of dryer vent service. Professional costs can vary based on location and job complexity.
| Task | DIY Cost | Pro Cost | Time |
|---|---|---|---|
| Basic Lint Trap & Rear Port Vacuum | $0 (using existing vacuum) | N/A | 15-20 minutes |
| Full Vent Cleaning (Brush Kit) | $25 - $60 (for kit and tape) | $125 - $250 | 1 - 2 hours |
| Transition Duct Replacement | $15 - $40 (for UL-listed metal duct) | Incl. in service | 30 minutes |
| Rigid Duct Reroute/Replacement | $75 - $200+ (materials vary) | $400 - $800+ | 4 - 8 hours |
| Emergency Clog Removal (Stuck Brush) | N/A | $200 - $450 | 1 - 3 hours |
When to call a pro
While standard dryer vent cleaning is a manageable DIY task, certain situations warrant professional service to avoid causing damage or creating a more hazardous situation.
Call a professional if your dryer vent run is exceptionally long—generally over 35 feet, including deductions for bends (subtract 5 feet for every 90-degree elbow). Professionals have more powerful equipment to effectively clean these longer distances. You should also hire a pro if the vent duct runs through inaccessible areas like a finished ceiling, attic, or crawlspace where you cannot inspect or service it. If you suspect a duct has become disconnected inside a wall—signs include a sudden accumulation of dust in the home, a musty smell, or a wall that feels warm or damp near the vent path—a professional is needed for diagnosis and repair. If your vent terminates on the roof and you are not comfortable or equipped for safe roof work, delegate the job. Finally, if you attempt a DIY cleaning and your brush kit becomes stuck, stop immediately. Do not use excessive force; call a service that has specialized retrieval tools.
Prevention & maintenance
Consistent, proactive maintenance is the key to preventing dangerous lint buildup and ensuring your dryer operates efficiently.
- Clean the lint screen after every load. This is the single most important habit. A clogged screen restricts airflow from the start. Once a month, wash the screen with warm, soapy water and a soft brush to remove invisible residue from fabric softeners and dryer sheets that can impede airflow even when the screen looks clean.
- Schedule a full vent cleaning every 12 months. Set a recurring calendar reminder. For households with large families, pets, or very heavy laundry volume, shorten this interval to every 6 months. Regular cleaning prevents the minor buildup from becoming a major, compacted blockage.
- Visually inspect the exterior vent hood quarterly. Check that the damper flap is not stuck, damaged, or obstructed by landscaping, snow, or debris. Ensure that birds or rodents have not built nests inside, which is a common cause of sudden blockages.
- Upgrade to rigid metal ductwork. If your home has flexible vinyl or foil ducting, make a plan to replace it. Smooth-walled rigid metal ducting offers the least resistance to airflow and is the safest material available. Use the shortest and straightest path possible, minimizing 90-degree turns.
- Monitor dryer performance. Pay attention to warning signs. If clothes consistently take more than one cycle to dry, feel unusually hot at the end of a cycle, or if the outside of the dryer is hot to the touch, it indicates poor ventilation that needs immediate attention.
Related Articles
Keep troubleshooting with these hand-picked guides from FixlyGuide:
- The #1 Dryer Fire Cause Most Homeowners Miss (and How to Fix It in 30 Minutes) — Lint buildup in dryer vents is the leading cause of dryer fires. Learn how to clean your dryer vent thoroughly to prevent this hidden dange…
- The Dryer Vent Fire Trap: 3 Hidden Signs Your Home Is at Risk — Learn the critical signs your dryer vent is clogged and how to safely clean it to prevent a dangerous house fire.
- Stop Wasting 30% on HVAC: Your System's Dirty Secret — Regular HVAC servicing is crucial for efficiency and longevity. Learn when and why to schedule professional maintenance for your heating an…
- Furnace Keeps Turning On and Off? Here's Why. — Is your furnace running in short, frequent bursts instead of steady cycles? This is called short cycling. Discover the common causes, like…
- That August Chill: Why Your AC Freezes Up & How to Fix It — Is your air conditioner a block of ice in the middle of a heatwave? It seems counterintuitive, but an AC that freezes up is a common August…
- The Silent Fire Hazard Lurking In Your Laundry Room — Don't let a clogged dryer vent become a silent fire starter. Learn why this common oversight is so dangerous, the clear warning signs to lo…
Get the print-ready PDF of this guide
A clean, ad-free, printable version you can keep on your phone or pin to the workshop wall. Free with a FixlyGuide account.
- Print-optimized layout
- Tools, materials & every step included
- Saved to your account
Frequently asked questions
How often should I clean my dryer vent?+
You should clean your dryer vent at least once a year, and more frequently (every 6 months) if you use your dryer heavily, have a large family, or notice your clothes taking longer to dry.
What are the signs of a clogged dryer vent?+
Signs include clothes taking longer to dry, clothes feeling unusually hot after a cycle, a burning smell, excessive lint buildup around the dryer's edges, and the outdoor vent flap not opening when the dryer is running.
Can a clogged dryer vent cause a fire?+
Yes, absolutely. Lint is highly flammable, and when it accumulates in a dryer vent, it can ignite due to the heat generated by the dryer, leading to a serious house fire. This is the primary reason for regular cleaning.
What tools do I need to clean a dryer vent?+
You'll typically need a vacuum cleaner with attachments, a dryer vent cleaning brush kit (with extendable rods), a screwdriver (if your exterior vent cover is screwed on), and potentially new foil tape if connections are loose. Always wear gloves and a dust mask.


Discussion
Loading comments…