
Tools & materials you'll need
Affiliate linksAs an Amazon Associate FixlyGuide earns from qualifying purchases — at no extra cost to you. Prices and availability are accurate as of publication and subject to change.
How it works
A central air conditioner operates on a closed-loop refrigeration cycle, moving heat from inside your home to the outside. This process relies on four primary components connected by copper tubing: the evaporator coil (inside), the compressor and condenser coil (outside), and an expansion device.
The cycle begins at the indoor unit, called the air handler. A fan blows warm household air across the cold evaporator coil. The liquid refrigerant inside the coil absorbs the heat from the air, causing the refrigerant to turn into a low-pressure gas. This newly cooled and dehumidified air is then distributed throughout your house via ductwork.
This low-pressure gas flows to the outdoor unit (the condenser), where the compressor pressurizes it, dramatically increasing its temperature. The hot, high-pressure gas then moves through the condenser coil. A large fan pulls outdoor air across the coil's fins, dissipating the heat absorbed from your home. As the refrigerant cools, it condenses back into a high-pressure liquid.
This liquid then travels back inside to an expansion device, which rapidly lowers its pressure and temperature before it enters the evaporator coil again, restarting the cycle. A failure at any point—restricted airflow from a clogged filter, an inability to release heat because of a dirty condenser, or an electrical issue preventing the compressor from running—will stop the cooling process, even if the fans are still spinning.
Step-by-Step Fix
Follow these diagnostic steps in order. They progress from simple, common issues to more complex problems. Do not proceed with any step involving electrical components unless you are comfortable and have turned off all related power sources.
-
Verify Thermostat Settings and Power — This basic check resolves a surprising number of service calls. First, ensure the thermostat is set to COOL mode, not HEAT, OFF, or FAN. Second, confirm the set temperature is at least 5°F below the current room temperature to actively call for cooling.
- Batteries: If the thermostat display is blank, dim, or flashing a low-battery icon, replace the batteries. Most models use two AA or AAA batteries, accessible by pulling the faceplate off its base.
- Troubleshooting: If settings are correct and the screen is on, a communications error between the thermostat and the air handler is possible, but less common. Try resetting the system via the circuit breaker (Step 3) before suspecting a faulty thermostat.
-
Inspect and Replace the Air Filter — A clogged air filter is the single most common cause of an AC system running but not cooling. It chokes the system, preventing the blower from pulling enough warm air over the evaporator coil. This can cause the coil to freeze solid.
- Location: The filter is typically located either in a slot on the side of the indoor air handler/furnace or inside a large return air grille in a central wall or ceiling.
- Inspection: Slide the filter out. If you cannot easily see light through it, it is clogged and needs immediate replacement. A pleated filter should be white or light gray; if it’s dark gray, brown, or coated in a blanket of dust, it is long overdue.
- Replacement: Note the size printed on the filter's cardboard frame (e.g., 20x25x1). Purchase a replacement with the same dimensions. A MERV rating between 8 and 11 offers a good balance of filtration and airflow for most residential systems.
-
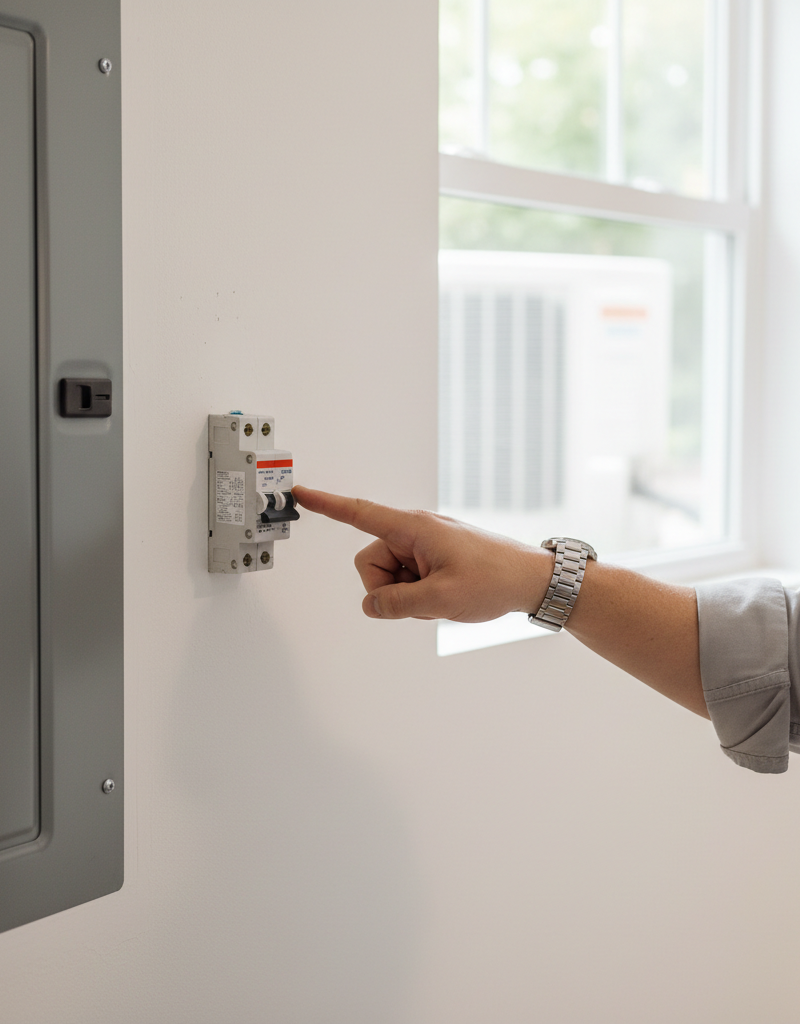
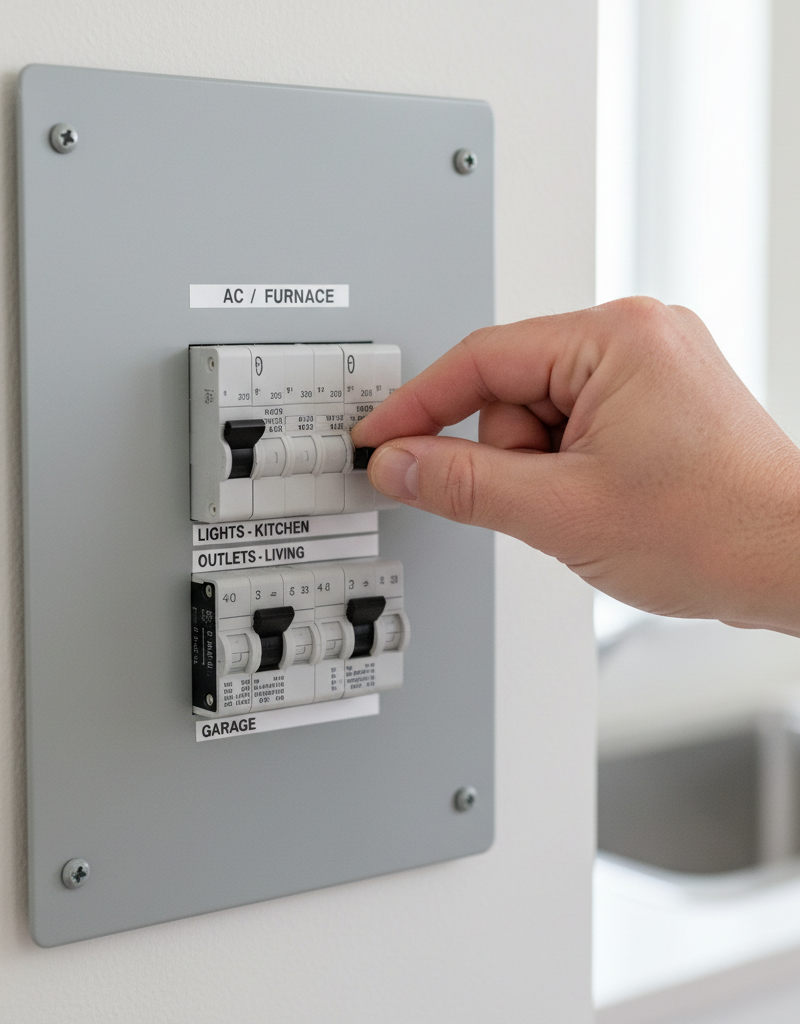
Check for System Power at the Breakers — Your AC system is powered by two separate circuit breakers in your main electrical panel. One controls the indoor air handler (often labeled "FURNACE" or "AHU") and the other controls the outdoor condenser (labeled "AC," "COND," or "HP").
- Procedure: Locate the two breakers. They are usually double-pole breakers, meaning they are twice as wide as standard breakers and linked together. Flip both breakers firmly to the OFF position, wait 30 seconds, then flip them back to the ON position. This resets the system's control logic.
- Outdoor Disconnect: Next to the outdoor condenser unit, there is a smaller gray metal box mounted to the wall. This is the disconnect or service switch. Open the cover and ensure the switch is in the "ON" position or that the pull-out block is inserted correctly (it can often be inserted upside down in the "OFF" position).
-
Thaw a Frozen Evaporator Coil — If you completed step 2 and found a very dirty filter, there is a high probability the evaporator coil is frozen. A frozen coil completely blocks airflow, resulting in warm air from the vents.
- Diagnosis: Open the access panel on your indoor air handler. If you see ice or frost covering the A-shaped coil or the larger of the two copper pipes leading into it, the unit is frozen.
- Thawing Process: Go to your thermostat. Set the system mode to OFF and the fan setting to ON. This shuts down the cooling cycle but allows the indoor fan to run, blowing room-temperature air over the coil to melt the ice. Do not use a heat gun or try to chip the ice away, as you can easily damage the coil.
- Patience: The thawing process can take anywhere from 1 to 4 hours, or even longer in severe cases. Place towels on the floor around the air handler to catch melting water. Only after the coil is completely free of ice and dry should you restart the AC system (with a new, clean filter installed). If it refreezes, you likely have a refrigerant leak.
-
Clear the Condensate Drain Line — As your AC dehumidifies the air, it produces water (condensate) that collects in a pan and drains away through a PVC pipe. If this line clogs with algae and sludge, a safety float switch will trigger, shutting down the entire system to prevent water damage.
- Location: Find the white PVC pipe exiting your indoor air handler. It may run to a floor drain, a utility sink, or outside near the condenser unit.
- Clearing: Find the termination point of the pipe outside your house. Use the hose of a wet/dry vacuum to create a tight seal around the pipe's opening. Let the vacuum run for 2-3 minutes to suck the clog out. You may hear a "thump" as the obstruction is pulled free.
- Maintenance: To prevent future clogs, pour one cup of distilled white vinegar down the condensate line's access port (a T-fitting with a cap near the air handler) every 1-2 months during the cooling season.
-
Clean the Outdoor Condenser Coils — The outdoor unit acts as the heat exchanger for the entire system. Its fins become clogged with dirt, grass clippings, cottonwood seeds, and dust, which insulates the coil and prevents it from releasing heat outside. The system will run continuously but will be unable to cool the house effectively.
- Safety First: Turn off the power to the condenser at both the main circuit breaker and the outdoor disconnect switch.
- Cleaning: Use a garden hose with a spray nozzle. Gently spray the fins from the outside to remove loose debris. For a thorough cleaning, remove the top grille and fan assembly (consult your owner's manual) and spray the coils from the inside out, pushing the trapped debris away from the unit.
- Caution: Never use a pressure washer. The high-pressure stream will bend the delicate aluminum fins, severely restricting airflow and requiring a costly repair.
-
Ensure Proper Airflow Around the Condenser — The outdoor unit needs breathing room to function. Obstructions prevent the fan from pulling in enough ambient air to cool the refrigerant.
- Clearance: Ensure there are at least 24 inches of clear space on all sides of the unit and 5 feet of clearance above it.
- Action: Trim back any shrubs, bushes, or tall grass. Move garbage cans, patio furniture, and other items away from the unit. Rake away any leaves, grass, or debris that has accumulated around the base.
-
Inspect All Vents and Registers — Blocked or closed vents can create high pressure zones within your ductwork, reducing overall system performance and potentially causing air leaks.
- Supply Registers: Walk through your home and confirm that all supply registers (where cold air blows out) are open and not blocked by furniture, rugs, or drapes.
- Return Grilles: Ensure the main return air grilles (where air is sucked back into the system) are clean and unobstructed. These are often larger than supply vents and may hold the air filter.
-
Listen to the Outdoor Unit Startup — The sounds the condenser makes can provide valuable diagnostic clues. With the thermostat calling for cooling, stand near the outdoor unit.
- Normal Sounds: You should hear a near-instant "click" as the contactor engages, followed by the low, steady hum of the compressor and the whirring of the fan motor.
- Abnormal Sounds:
- Fan spins, no compressor hum: The fan is running, but the compressor is not. This often points to a failed run capacitor for the compressor.
- Humming or buzzing, but fan won't start: The motor is receiving power but cannot turn. This is often a failed fan motor or its specific run capacitor.
- Loud clanking or grinding: Shut the system off immediately. This indicates a severe internal mechanical failure in the compressor.
-
Visually Inspect the Run Capacitor — For the advanced and safety-conscious DIYer, a visual inspection of the capacitor can confirm a common failure. The capacitor provides the startup jolt of electricity for the fan and compressor motors.
- EXTREME CAUTION: Shut off all power at the breaker and outdoor disconnect. Capacitors can hold a lethal electrical charge even when the power is off.
- Location: Remove the electrical access panel on the condenser unit. The capacitor is a large, cylindrical or oval-shaped metal can.
- Inspection: A failed capacitor will often bulge or dome on the top, and may leak an oily substance. If the top of the can is swollen instead of perfectly flat, it has failed and needs to be replaced. Note the specifications printed on the side (e.g., 45/5 μF, 440 VAC) to purchase an exact replacement. If you are not 100% confident in discharging the old capacitor and wiring the new one, do not attempt this repair.
Common mistakes
Avoiding these frequent errors can save you from costly repairs and dangerous situations.
- Restarting a Frozen System Too Soon: If you find the indoor coil frozen, you must let it thaw completely by running the fan only. Restarting the AC while it is still partially frozen can send liquid refrigerant back to the compressor, a condition known as "slugging," which can destroy the compressor in seconds.
- Using a Pressure Washer on Condenser Fins: The aluminum fins on the outdoor coil are extremely fragile. A high-pressure water stream will fold them over flat, blocking airflow permanently. The only fix is to manually comb them straight with a specialty fin comb, a tedious and often imperfect process. Always use a standard garden hose.
- Attempting to Add Refrigerant: DIY refrigerant recharge kits (often called "AC Pro" for cars) are not suitable for home AC systems. Home systems are critically charged, and adding the wrong amount or type of refrigerant can cause severe damage. Furthermore, handling refrigerants without EPA 608 certification is illegal.
- Working on Electrical Components Without Killing Power: Always turn off the breakers and the local disconnect switch. Never assume the system is off just because the thermostat is. Capacitors, in particular, can store a deadly charge and must be safely discharged with an insulated screwdriver by a knowledgeable person before handling.
- Closing Vents to Save Money: Closing off registers in unused rooms does not save energy. It increases static pressure in your ductwork, which can cause leaks, strain the blower motor, and lead to a frozen evaporator coil due to reduced airflow. Keep at least 80% of your home's vents open.
- Ignoring a Tripped Breaker: If a breaker trips immediately after you reset it, it is a sign of a serious electrical problem, such as a short-circuited motor or a grounded compressor. Do not keep resetting it. This is a fire hazard and requires a professional electrician or HVAC technician.
Cost & time breakdown
This table outlines typical costs and time commitments for common AC repairs. "Pro Cost" includes the service call fee, labor, and parts.
| Task | DIY Cost | Pro Cost | Time (DIY) |
|---|---|---|---|
| Air Filter Replacement | $5 – $30 | $75 – $150 (as part of a call) | 5 minutes |
| Cleaning Condenser Coils | $0 – $10 (for coil cleaner) | $100 – $250 | 30 – 45 minutes |
| Clearing Condensate Drain Line | $0 | $75 – $200 | 20 minutes |
| Run Capacitor Replacement | $15 – $50 | $175 – $400 | 20 – 40 minutes |
| Condenser Fan Motor Replacement | $100 – $250 | $450 – $750 | 1 – 2 hours |
| Refrigerant Leak & Recharge | N/A | $500 – $1,800+ | 2 – 5 hours (Pro only) |
When to call a pro
While many "no-cool" situations are fixable, certain symptoms indicate a problem that is beyond the scope of safe DIY repair. Call a qualified HVAC technician immediately if you encounter any of the following:
- Refrigerant-Related Issues: If you suspect a refrigerant leak (hissing sounds, oily residue on copper lines, or a system that repeatedly freezes despite a clean filter and good airflow), you must call a pro. Handling refrigerant requires EPA certification and specialized equipment.
- Major Electrical Faults: If a circuit breaker trips repeatedly, or if you see evidence of burnt wires or smell an acrid, electrical burning odor near any HVAC component, shut down the system and call for service. This indicates a dangerous short circuit.
- Compressor Failure: The compressor is the sealed "heart" of the system located in the outdoor unit. If it makes loud grinding, clanking, or screeching noises, or if it buzzes but fails to start (and you've ruled out the capacitor), it has likely failed. This is a major, non-DIY replacement.
- System Has Not Been Serviced in Years: If these troubleshooting steps don't resolve the issue and the system is over 10 years old or has not had a professional tune-up in several years, it's best to call a technician who can perform a comprehensive diagnostic.
Prevention & maintenance
Consistent maintenance is the most effective way to prevent emergency breakdowns and ensure your system runs efficiently for its entire lifespan.
- Change Air Filters Routinely: This is the most critical maintenance task. For standard 1-inch pleated filters, replace them every 60-90 days (or monthly if you have pets or allergies). For larger 4-5 inch media filters, replace them every 6-12 months. Write the installation date on the new filter's frame.
- Annual Condenser Cleaning: Every spring, before the cooling season begins, shut off power to the outdoor unit and thoroughly clean the condenser coils with a garden hose.
- Maintain the Condensate Drain: Every one to two months during summer, pour a cup of distilled white vinegar (or use specific condensate pan tablets) into the primary drain line access port. This prevents the buildup of algae and sludge that causes clogs and water damage.
- Schedule Annual Professional Tune-Ups: A professional technician will perform checks you cannot, including measuring refrigerant pressures, testing capacitor strength, measuring motor amperage draws, cleaning indoor components, and verifying all electrical connections are tight and safe. This service can catch failing parts before they cause a system-wide breakdown.
- Keep the Outdoor Unit Clear: Maintain a 2-foot clearance around the condenser year-round. Trim back vegetation and prevent leaves, snow, or debris from accumulating against the unit.
- Listen to Your System: Pay attention to the normal operating sounds of your AC. If you hear new noises like buzzing, rattling, or squealing, it’s an early warning sign that a component may be failing.
Related Articles
Keep troubleshooting with these hand-picked guides from FixlyGuide:
- Why Your AC is Blowing Warm Air: Troubleshooting and Fixes — If your AC is blowing warm air, it's often due to a clogged air filter, dirty condenser coils, or a tripped circuit breaker, all of which y…
- AC Blowing Warm Air? Easy Fixes for Common AC Problems — Discover the most common reasons your AC is blowing war
Get the print-ready PDF of this guide
A clean, ad-free, printable version you can keep on your phone or pin to the workshop wall. Free with a FixlyGuide account.
- Print-optimized layout
- Tools, materials & every step included
- Saved to your account
Frequently asked questions
Why is my AC running but blowing warm air?+
The two most common causes are a frozen evaporator coil (turn off the unit and run fan-only for 2 hours to thaw) or low refrigerant from a leak. A clogged filter is the underlying cause about 40% of the time.
How long does it take for a frozen AC coil to thaw?+
2–3 hours with the AC off and the thermostat fan set to ON. Once thawed, replace the filter and check that all supply and return vents are unblocked before turning cooling back on.
Should I cover my outdoor AC unit in winter?+
No. Modern condensers are built for year-round outdoor exposure, and a cover traps moisture that promotes rust and rodent nests. A small piece of plywood weighted on top to deflect falling icicles is fine.
How often should I have my AC serviced?+
Once a year, ideally in spring before peak cooling season. A pro tune-up runs $80–$150 and includes coil cleaning, refrigerant pressure check, and electrical inspection.
Why does my AC short cycle (turn on and off rapidly)?+
Usually an oversized system, a dirty filter restricting airflow, low refrigerant, or a thermostat placed in direct sunlight. Short cycling burns out compressors fast — diagnose it quickly.

Discussion
Loading comments…