- Inspect and Clean Evaporator Coil (Indoor Unit) — This coil, located in your furnace or air handler, can get dirty over time, hindering heat exchange.
- Tools: Phillips head screwdriver, soft brush, coil cleaner (HVAC safe).
- If this doesn't work: If the coil is heavily caked or corroded, professional cleaning might be necessary.
Plumbing · Clog
| Project category | Plumbing |
|---|---|
| Problem type | Clog |
| Trade required | Plumbing |
| Urgency | Soon — within weeks |
| Safety risk | Low safety risk |
| DIY suitability | DIY friendly |
| Cost category | Low cost |
| Typical timeline | Same-day DIY attempt; pro visit within a day or two |
| Contractor type | Licensed plumber |
Repair option
Plunger, hand auger, or trap cleanout before chemicals.
Replacement option
Line replacement when clogs return in the same spot repeatedly.
Common causes
- Hair and soap buildup in the trap
- Grease cooling in the branch line
- Flushed wipes or foreign objects
Relevant tools:diy difficultydiy or hire a pro
Published July 21, 2026Last updated August 18, 2026
Tools & materials you'll need
Affiliate linksAs an Amazon Associate FixlyGuide earns from qualifying purchases — at no extra cost to you. Prices and availability are accurate as of publication and subject to change.
Quick Answer
Your AC unit freezing up is a common problem often caused by restricted airflow or low refrigerant. The good news is that many common causes can be diagnosed and fixed by a homeowner, such as replacing a dirty air filter or cleaning the outdoor condenser coil. Addressing these issues promptly can prevent costly professional repairs and improve your system's efficiency.
The Problem
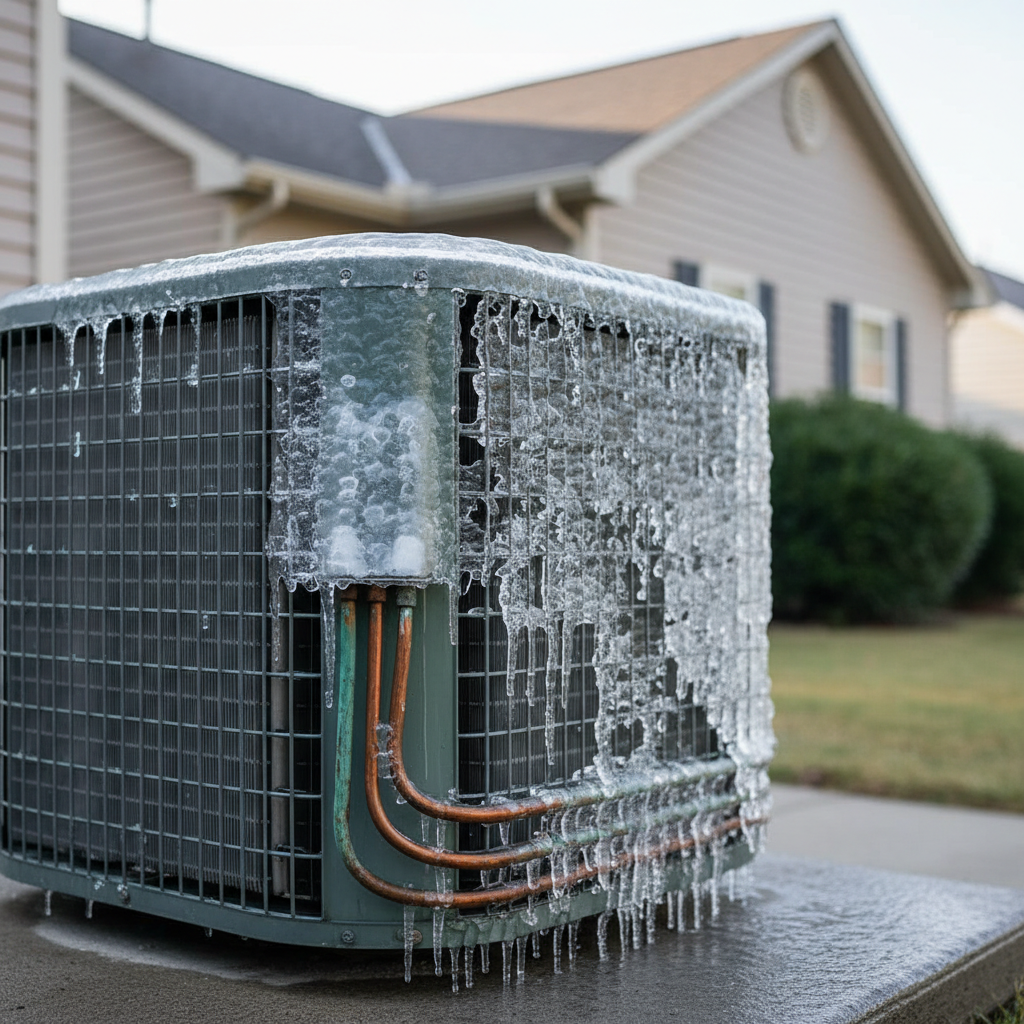
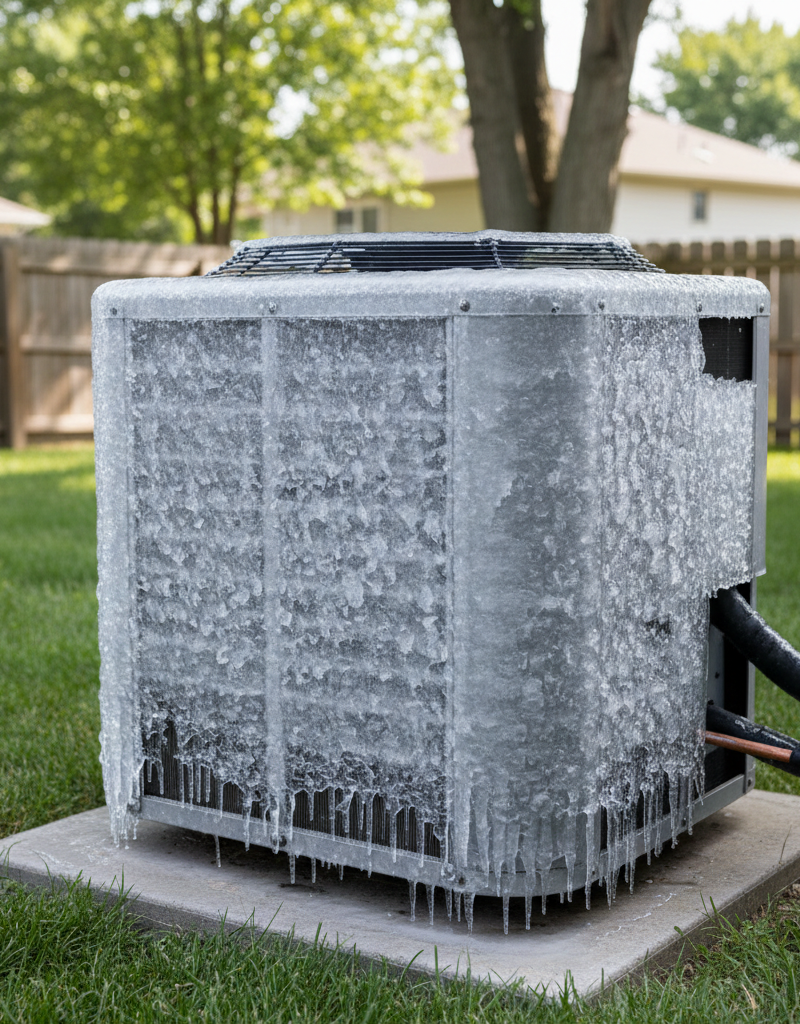
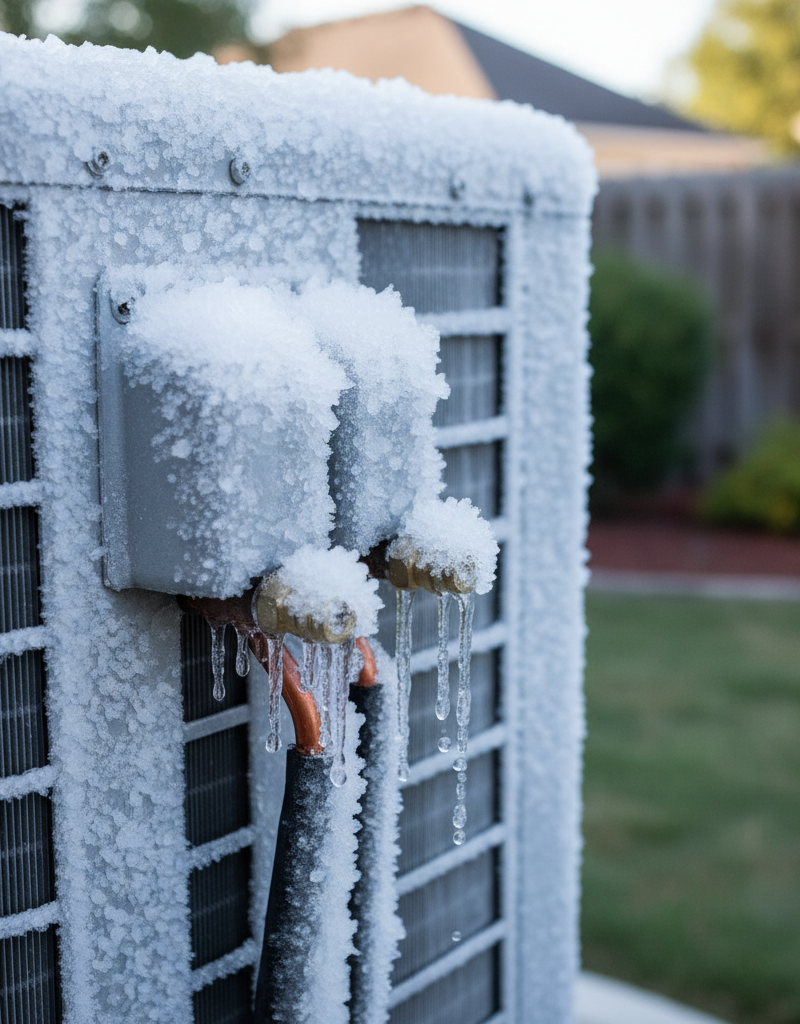
Imagine this: it's a sweltering summer day, your AC is running constantly, but instead of cool air, you feel a trickle of warm, humid air—or worse, nothing at all. You walk outside to your condenser unit, and there it is: a thick layer of ice encasing the refrigerant lines, the coils, or even the fan itself. This isn't just inconvenient; a frozen AC unit can lead to serious damage to your compressor, an expensive component that often costs upwards of $1,000 to replace. Many homeowners immediately jump to the conclusion that a frozen AC means they're low on refrigerant, but while that's a possibility, it's far from the only cause. Indeed, many less obvious culprits often precede refrigerant issues, making a simple, quick fix possible if you know where to look. Ignoring a frozen unit allows ice to expand, potentially stressing components and even leading to water damage from a blocked or overflowing condensate pan. Tackling this issue proactively can save you hundreds, if not thousands, of dollars in professional repair costs.
How It Works
To understand why your AC freezes, it helps to know how it cools your home. An air conditioning system moves heat from inside your house to the outside. It uses a chemical refrigerant, which cycles between a liquid and a gas state. Inside your home, the warm, humid air from your living space is drawn into the indoor unit (evaporator coil) by the blower fan. The refrigerant, in its low-pressure, cool gaseous state, absorbs heat from this air as it passes over the evaporator coil. This process cools and dehumidifies the air before the blower pushes it back into your rooms through your ductwork. As the refrigerant absorbs heat, it warms up and turns into a low-pressure gas. This gas then travels to the outdoor unit (condenser). The compressor compresses the refrigerant, increasing its pressure and temperature significantly. It then flows through the condenser coil, where a fan blows outdoor air over the hot coil, releasing the absorbed heat to the outside. As it releases heat, the refrigerant cools and condenses back into a high-pressure liquid. Finally, this high-pressure liquid refrigerant passes through an expansion valve (or metering device), which lowers its pressure and temperature, preparing it to re-enter the evaporator coil and repeat the cycle.
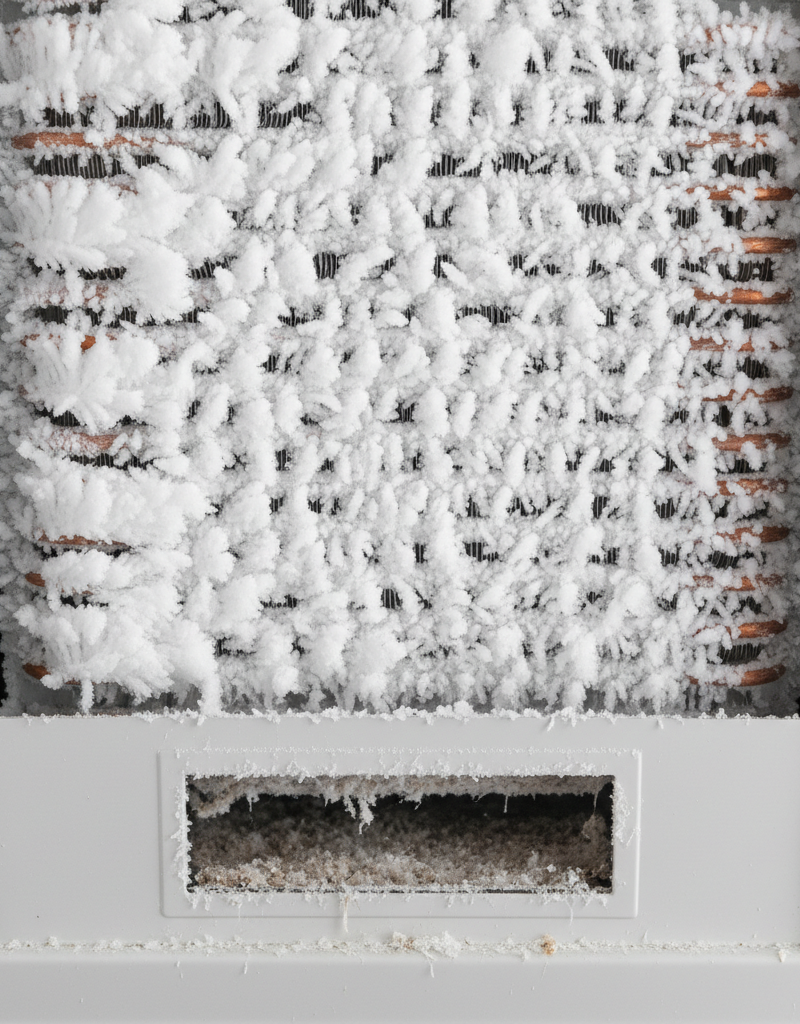
Freezing occurs when the temperature of the evaporator coil drops below 32°F (0°C). This can happen if not enough warm indoor air flows over the coil to adequately warm the cold refrigerant, or if the refrigerant itself gets too cold due to a problem in the refrigeration cycle. If the coil gets too cold, any moisture in the air passing over it will condense and freeze onto the coil's surface. This layer of ice then insulates the coil, making it even less efficient at absorbing heat, which exacerbates the problem and leads to more ice buildup. Eventually, the entire coil, and sometimes even the drain pan and refrigerant lines, can become a solid block of ice, bringing your cooling to a halt. The proper balance of refrigerant pressure, airflow over the coil, and heat exchange is crucial to prevent freezing.
Step-by-Step Fix
Before you start, turn off your AC at the thermostat and the outdoor unit's disconnect switch. This allows the ice to melt and prevents further damage.
-
Safety First, Power Off — Before touching any part of your AC system, always turn off the power at the thermostat AND the main electrical disconnect switch located near your outdoor condenser unit. This prevents accidental startup and electrical shock. Allow the unit to defrost completely, which can take anywhere from 2 to 24 hours depending on the extent of the ice. You can speed this up by operating the fan-only mode on your thermostat, if available.
-
Inspect and Replace Air Filter — A clogged air filter is the most common cause of restricted airflow. Locate your air filter, usually in the return air duct, furnace, or air handler.
- Action: Pull out the old filter. Hold it up to a light source. If you can't see light through it, it's clogged. Replace it with a new filter of the correct size and MERV rating, ensuring the airflow arrow points towards the furnace/air handler. Filters should be checked monthly and replaced every 1-3 months.
-
Check for Blocked Return Air Vents — Closed or blocked return air vents restrict the amount of air your AC can pull from your home, leading to freezing.
- Action: Walk through your home and ensure all return air vents (the larger grilles that usually don't have adjustable louvers) are clear of furniture, rugs, or drapes. Open any closed vents.
-
Inspect and Clean Evaporator Coil (Indoor Unit) — This coil, located in your furnace or air handler, can get dirty over time, hindering heat exchange.
- Tools: Phillips head screwdriver, soft brush, coil cleaner (HVAC safe).
- Action: Turn off power. Open the access panel to your indoor unit. Carefully locate the evaporator coil. If it's covered in dust, dirt, or mold, gently brush off loose debris. Spray with an approved no-rinse evaporator coil cleaner, following product instructions. Allow it to air dry.
- If this doesn't work: If the coil is heavily caked or corroded, professional cleaning might be necessary.
-
Clean Outdoor Condenser Coils — The outdoor coils can become laden with dirt, leaves, grass clippings, and other debris, preventing efficient heat dissipation.
- Tools: Garden hose with spray nozzle, fin comb (optional).
- Action: With power still off, use a garden hose to gently spray the condenser fins from the inside out to push debris outwards. Be careful not to bend the delicate fins. For very stubborn dirt, a mild detergent mixed with water can be applied and rinsed thoroughly. If fins are bent, a fin comb can carefully straighten them.
-
Check for Kinked Refrigerant Lines — The insulated copper lines running between your indoor and outdoor units can sometimes get kinked or damaged.
- Action: Visually inspect the refrigerant lines. If you see any severe kinks or dents, this restricts refrigerant flow and will likely require a professional repair. A minor bend might not be an issue, but a sharp kink will be.
-
Ensure Proper Blower Fan Operation — The indoor blower fan pushes air across the evaporator coil. If it's running too slowly or intermittently, it can cause freezing.
- Action: Once the system is defrosted and power is restored, set your thermostat to "fan ON" (not "auto"). Listen and observe if the blower fan spins freely and forcefully. If it's weak, noisy, or doesn't run, it may indicate a motor issue or a dirty blower wheel. This often requires professional attention.
-
Clear Condensate Drain Line — While not a direct cause of coil freezing, a clogged condensate drain can lead to water backup, which can freeze in the pan if temperatures are low enough, or cause your unit to shut down due to a safety float switch.
- Tools: Wet/dry vac, white vinegar.
- Action: Locate the condensate drain line (usually a PVC pipe) exiting your indoor unit. If you see standing water in the drain pan, the line is likely clogged. Use a wet/dry vac to suction out the clog from the outdoor end of the pipe. You can also pour a cup of white vinegar down the access port of the drain line to dislodge algae and prevent future clogs.
Common Causes
- Dirty Air Filter: The most frequent culprit. A clogged filter blocks vital airflow over the evaporator coil, causing its temperature to drop dangerously low. Think of it like trying to breathe through a pillow; your AC unit struggles in the same way. The dirty filter restricts the absorption of heat from the air, allowing the refrigerant to get too cold.
- Low Refrigerant (Refrigerant Leak): While often the first thought, this is a less common (and more serious) DIY fix. If your system is low on refrigerant, it impacts the pressure balance within the coils. Without enough refrigerant, the pressure drops too low, leading to an excessive temperature drop in the evaporator coil and subsequent freezing. This almost always indicates a leak somewhere in the sealed system, which requires professional diagnosis and repair.
- Restricted Airflow (Closed Vents, Blocked Returns): Any impediment to the flow of air back to the AC system or through the supply registers reduces the heat available to the evaporator coil. This can include furniture blocking return vents, closed supply registers, or even excessive dirt in your ductwork. The effect is similar to a dirty air filter: inadequate heat transfer causes the coil to get too cold.
- Dirty Evaporator Coil: Over time, the indoor coil can accumulate a layer of dust, pet dander, and other airborne particles. This layer acts as an insulator, preventing the coil from absorbing heat effectively. The refrigerant then gets colder than it should, leading to ice formation.
- Dirty Condenser Coil: The outdoor coil needs to release heat efficiently. If it's caked with dirt, leaves, or debris, it cannot dissipate heat. This causes the system to work harder, leading to improper pressures and temperatures elsewhere in the system, potentially impacting the indoor coil and causing it to freeze.
- Malfunctioning Blower Fan: If the indoor blower fan motor is weak, dirty, or damaged, it won't move enough air across the evaporator coil. Insufficient airflow means insufficient heat absorption, leading to a freezing coil.
- Continuous Operation in Cold Weather: While less common for summer AC units, if your system is forced to run when outdoor temperatures are consistently below 60°F (or if it's a heat pump used for cooling in very mild conditions), the outdoor ambient temperature might not be warm enough to adequately warm the refrigerant, leading to freezing.
Common Mistakes
- Ignoring a Frozen Unit: The biggest mistake is running your AC while it's frozen. This puts immense strain on the compressor, which is the heart of your system. Continuing to run it can cause the compressor to overheat and permanently fail, leading to a very expensive repair.
- Assuming Low Refrigerant Immediately: Many homeowners immediately jump to adding refrigerant. A frozen coil is often an effect of another problem, like poor airflow. Adding refrigerant to a system that isn't actually low can overcharge it, creating new and equally damaging problems.
- Using a "Stop Leak" Product: These products often contain sealants that can clog refrigerant lines, expansion valves, and even the compressor itself, leading to costly damage and often voiding warranties. Always opt for a professional leak detection and repair.
- Not Changing Air Filters Regularly: Neglecting air filter replacement is a common oversight that directly leads to freezing and reduces overall system efficiency. It's an easy, inexpensive fix that many homeowners overlook.
- Bending Condenser Fins While Cleaning: Being too aggressive with a pressure washer or stiff brush during condenser coil cleaning can bend the delicate aluminum fins, further restricting airflow and reducing efficiency. Use a garden hose and a gentle spray from the inside out.
- Failing to Clear the Condensate Drain: While not a direct cause of frozen coils, a clogged condensate drain can cause water to back up, potentially tripping a safety switch that shuts off the unit, or even overflowing and causing water damage. Regularly flush the drain line.
Cost & Time Breakdown
| Task | DIY Cost | Pro Cost | Time |
|---|---|---|---|
| Air Filter Replacement | $10–$40 | Included in service | 5 minutes |
| Evaporator Coil Cleaning | $15–$30 | $150–$400 | 30–60 minutes |
| Condenser Coil Cleaning | $0 (hose only)–$20 | $100–$250 | 20–40 minutes |
| Defrosting System | $0 | $0 (wait time) | 2–24 hours |
| Diagnosing Refrigerant Leak | Not DIY | $200–$600 (diagnosis) | 2–4 hours (pro) |
| Refrigerant Recharge/Repair | Not DIY | $300–$1,500+ | 3–6 hours (pro) |
Tips & Prevention
- Regular Filter Changes: This is the absolute easiest and most cost-effective prevention. Check your air filter monthly and replace it every 1-3 months, or more often if you have pets or allergies.
- Annual Professional Tune-Ups: Schedule an HVAC professional to inspect and service your system once a year, ideally in the spring before heavy cooling season. They can catch minor issues before they become major problems, check refrigerant levels, and clean components you can't easily reach.
- Keep Vents Clear: Ensure all supply and return air vents inside your home are unobstructed by furniture, rugs, or drapes. Keep interior doors open to allow for proper air circulation.
- Maintain Outdoor Unit Cleanliness: Regularly trim shrubs and clear away leaves, grass clippings, and other debris from around your outdoor condenser unit. Ensure there's at least 2 feet of clear space on all sides for proper airflow.
- Monitor for Warning Signs: Pay attention to reduced airflow, unusual noises, constantly running AC, or higher-than-normal energy bills. These can be indicators of an impending issue.
- Avoid Over-Cooling: Setting your thermostat too low, particularly below 70°F (21°C), can stress your system and contribute to freezing, especially in humid conditions. Aim for a comfortable yet efficient temperature, generally between 72-78°F (22-26°C).
When to Call a Professional
While many freezing issues can be resolved with DIY steps, there are critical times when calling a licensed HVAC professional is essential. If you suspect a refrigerant leak (indicated by a persistent frozen coil despite good airflow, weak cooling, or a hissing sound), do not attempt to add refrigerant yourself. Refrigerant is a regulated chemical that requires specialized tools and training to handle safely and legally. Only a licensed technician can accurately assess refrigerant levels, locate and repair leaks, and properly recharge the system. Similarly, if you've cleaned your filters and coils, ensured proper airflow, and your unit still freezes, or if you hear grinding noises from the blower or compressor, it's time to call a pro. Issues with the compressor, expansion valve, or a stuck contactor require advanced diagnostic skills and specialized equipment. Attempting these repairs yourself can lead to further damage, void warranties, and pose significant safety risks due to high voltages and pressurized refrigerant.", meta_title=
Related Articles
Keep troubleshooting with these hand-picked guides from FixlyGuide:
- The Hidden Reason Your AC Freezes — And Why Most Homeowners Get It Wrong — Your outdoor AC unit freezing solid is a common, frustrating problem often caused by airflow issues or low refrigerant, leading to system i…
- The #1 Reason Your AC Freezes Solid (It's Not What You Think) — A frozen AC unit often points to poor airflow, which can be a simple fix if you know where to look.
- The #1 Reason Your AC Won't Turn On (And It's Not the Thermostat) — Discover the most common, overlooked reason your AC won't power on and how a simple reset can get your cool air flowing again.
- That August Chill: Why Your AC Freezes Up & How to Fix It — Is your air conditioner a block of ice in the middle of a heatwave? It seems counterintuitive, but an AC that freezes up is a common August…
- The #1 Reason Your AC Blows Warm Air (And It's Not What You Think) — Discover the most common and often overlooked reason your AC might be blowing warm air, and how a simple capacitor fix can restore cool air.
- The Hidden Reason Your AC Isn't Cooling (And Why Most Homeowners Get It Wrong) — When your central AC unit isn't cooling, the culprit often isn't what you think, leading to frustration and unnecessary repair calls.
Get the print-ready PDF of this guide
A clean, ad-free, printable version you can keep on your phone or pin to the workshop wall. Free with a FixlyGuide account.
- Print-optimized layout
- Tools, materials & every step included
- Saved to your account
Frequently asked questions
How long does it take for a frozen AC unit to defrost?+
It can take anywhere from 2 to 24 hours for an AC unit to completely defrost, depending on the amount of ice buildup. Turning off the cooling and running only the fan can speed up the process.
Can I pour hot water on a frozen AC unit?+
No, you should never pour hot water on a frozen AC unit. The sudden temperature change can damage delicate components, especially the evaporator coil. Allow it to defrost naturally by turning off the system.
How often should I change my AC filter to prevent freezing?+
You should check your AC filter monthly and replace it every 1 to 3 months, or more frequently if you have pets, allergies, or live in a dusty environment. A clean filter is crucial for proper airflow and preventing freezing.
What does low refrigerant feel like in an AC unit?+
Low refrigerant typically results in warm or lukewarm air blowing from your vents, a frozen evaporator coil (indoor unit), unusually high energy bills as the system struggles, and sometimes a hissing or bubbling sound from the refrigerant lines.
Can a clogged drain line cause AC to freeze?+
While a clogged condensate drain line doesn't directly cause the *evaporator coil* to freeze, it can lead to water backing up into the drain pan. If the ambient temperature is low enough or a safety switch is triggered due to the backup, it might cause the system to shut down or appear to have related issues.
Discussion
Loading comments…