
Tools & materials you'll need
Affiliate links- AmazonNew HVAC filter1
As an Amazon Associate FixlyGuide earns from qualifying purchases — at no extra cost to you. Prices and availability are accurate as of publication and subject to change.
Quick Answer
Most homeowners should change their HVAC filter every 30-90 days, but this isn't a one-size-fits-all rule. Factors like pets, allergies, the number of occupants, and the type of filter you use significantly impact the ideal replacement schedule. A dirty filter restricts airflow, forcing your HVAC system to work harder, which drives up energy costs, degrades indoor air quality, and can even shorten the lifespan of your unit.
The Problem
Every homeowner knows they should change their HVAC filter, but the question of how often remains a persistent mystery. "Monthly? Quarterly? When it looks dirty?" This uncertainty leads to two main problems: either filters are changed too frequently, wasting money and resources, or more commonly, they are neglected for too long, leading to a cascade of negative effects. A clogged filter is like trying to breathe through a thick blanket – your HVAC system struggles, energy bills climb, indoor air quality suffers, and the lifespan of expensive components like the blower motor and compressor can be drastically reduced. Many homeowners also fall for common myths about filter lifespan, often based on manufacturer recommendations that don't account for real-world conditions.
How It Works
Your HVAC system relies on the air filter to protect its internal components, primarily the evaporator coil and blower motor, from dust, dirt, and other airborne particles. When your thermostat calls for heating or cooling, the blower motor pulls air from your home through the return air ducts. This air first passes through the filter, which traps contaminants. The now-cleaned air then flows over the evaporator coil (for cooling) or heat exchanger (for heating) before being pushed back out into your home through the supply ducts.
The filter's effectiveness is measured by its MERV (Minimum Efficiency Reporting Value) rating. A higher MERV rating means the filter can trap smaller particles, improving indoor air quality but potentially restricting airflow more. As particles accumulate on the filter media, the resistance to airflow increases. This "pressure drop" forces the blower motor to work harder to pull air through, consuming more electricity. Furthermore, restricted airflow can cause the evaporator coil to freeze in cooling mode, leading to inefficient operation and potential damage. In heating mode, poor airflow can cause the heat exchanger to overheat, posing a safety risk and reducing efficiency. Understanding this delicate balance between filtration and airflow is key to appreciating why regular, appropriate filter changes are so crucial.
Step-by-Step Fix
While "fixing" how often you change your filter isn't a mechanical repair, it involves establishing a routine and making informed decisions. Here's how to optimize your HVAC filter schedule and ensure proper installation.
1. Identify Your Filter Type and Size — Your current filter will have its size (e.g., 20x25x1) and MERV rating printed on the frame. Note these down. Different MERV ratings (ranging from 1 to 20) offer varying levels of filtration and have different recommended lifespans. * Lower MERV (1-4): Basic filtration, good for protecting equipment, typically lasts 90 days. * Mid-Range MERV (5-8): Good balance of filtration and airflow, recommended for most homes, typically lasts 60-90 days. * High-Range MERV (9-12): Better for allergy sufferers, may require more frequent changes, typically lasts 30-60 days. * Premium MERV (13+): Hospital-grade filtration, significantly restricts airflow, often requires specialized HVAC systems, change every 30 days.
2. Assess Your Home's Specific Conditions — Your lifestyle dictates actual filter lifespan more than any general rule. * Pets: Dogs and cats shed fur and dander, clogging filters faster. Change every 30-60 days. * Allergies/Asthma Sufferers: More sensitive individuals benefit from cleaner air, requiring higher MERV filters and more frequent changes (30-60 days). * Occupants: More people generate more dust and particles. A single person might get away with 90 days, a family of four might need 30-60. * Smoking/Candles/Fireplace: These activities introduce significant particulate matter. Change every 30 days. * Construction/Renovation: Localized dust will shorten filter life dramatically. Check weekly during projects. * Open Windows Frequently: More outdoor dust and pollen enters your home. Consider more frequent changes.
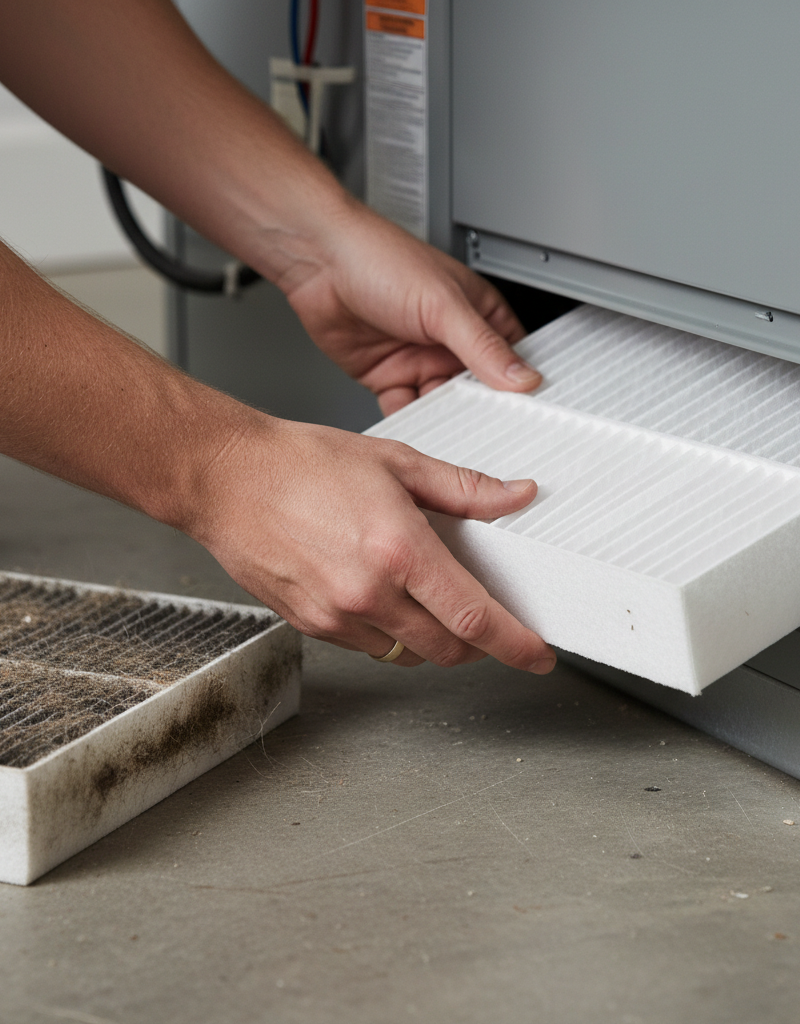
3. The Visual Inspection Trick — Pull out your filter and hold it up to a light source. If you can't see light easily through the filter material, it's time for a change, regardless of how long it's been installed. This is your best real-world indicator. * Safety Note: Always turn off your HVAC system at the thermostat before handling the filter. This prevents the blower from accidentally starting and ensures no dust is pulled into the system while the filter is out.
4. Setting a Reminder Schedule — Based on your assessment, set a recurring reminder on your phone, calendar, or smart home device. For most homes with average conditions, a 60-day schedule is a good starting point. Adjust as needed based on visual inspections.
5. Proper Filter Installation — This step is often overlooked but critical for filter effectiveness. * Locate the Airflow Arrow: Every filter has an arrow printed on its frame indicating the direction of airflow. This arrow MUST point towards your furnace/air handler, not away from it. * Slide In Completely: Ensure the filter slides fully into its slot with no gaps around the edges. Gaps allow unfiltered air to bypass the filter. * Secure Any Clips/Covers: Some systems have clips or covers that need to be secured to hold the filter firmly in place.
6. If This Doesn't Work / System Issues — If you are changing your filter regularly and still experiencing excessive dust, poor airflow, or system issues, it could indicate other problems. These might include leaky ductwork, a dirty evaporator coil (which a filter protects, but can still get dirty over time), or a malfunctioning blower motor. In these cases, it's best to consult an HVAC professional.
Common Causes
The primary "cause" of needing a filter change is simply the accumulation of airborne particulates from daily life and outdoor sources. However, certain factors accelerate this process:
- Pet Dander and Hair: Our furry friends are major contributors to filter clogging.
- Dust and Dirt: Everyday activities, foot traffic, and even simply opening windows introduce dust.
- Pollen and Allergens: During allergy season, outdoor allergens significantly load filters.
- Cooking Fumes and Grease: Small grease particles can cling to filter media.
- Construction or Renovation Dust: Construction dust is incredibly fine and can rapidly overwhelm filters.
- Smoking/Vaping: These activities release microscopic particles that impact air quality and filter life.
- High Occupancy: More people in a home equate to more skin flakes, clothing fibers, and general particulate matter.
Common Mistakes
Homeowners often make several critical mistakes regarding HVAC filters that undermine their system's efficiency and indoor air quality.
- Ignoring the Airflow Arrow: Installing a filter backward (arrow pointing the wrong way) can reduce its effectiveness and even push debris into the clean air side of your system.
- Buying the Wrong Size: A filter that doesn't fit snugly allows air to bypass it, rendering it useless. Always double-check your system's required dimensions.
- Assuming a Higher MERV is Always Better: While higher MERV filters trap more particles, they also restrict airflow more. For older or less powerful HVAC systems, a MERV too high can overwork the blower motor and lead to system inefficiency or even damage. Stick to what your system is rated for, generally MERV 8-12 for residential units.
- Waiting Until the Filter Looks "Black": By the time a filter looks significantly dark or completely clogged, it has long passed its prime effectiveness. Regular inspection (holding to light) and scheduled changes are better.
- Forgetting to Change Filters After Home Projects: During renovations, painting, or heavy cleaning, filters get saturated much faster. Neglecting to change them immediately after such projects can push fine dust into your ducts.
- Stocking Up on Cheap, Basic Filters: While a cheap filter is better than no filter, pleated filters with a MERV of at least 6-8 offer much better protection and air quality for a marginal cost difference.
Cost & Time Breakdown
| Task | DIY Cost | Pro Cost | Time |
|---|---|---|---|
| Basic Filter Change | $5–$25 | N/A | 5 minutes |
| Troubleshooting Airflow | $0 (DIY) | $150–$300 | 15–30 minutes |
| Duct Cleaning (if needed) | N/A | $300–$700 (avg home) | 2–4 hours |
| Coil Cleaning (if DIY possible) | $20–$50 (coil cleaner) | $200–$500 | 1–2 hours |
Tips & Prevention
- Regular Visual Checks: Make it a habit to visually inspect your filter every 30 days, especially if you have pets or allergies. The "light test" is your most accurate indicator.
- Keep Your Home Clean: Vacuuming regularly, dusting surfaces, and cleaning pet bedding reduces the amount of particulate matter that ends up in your HVAC system.
- Seal Ductwork Leaks: Leaky ducts pull unfiltered air from attics, crawl spaces, and wall cavities, introducing more dirt into your system and diminishing air quality. Professional duct sealing can improve efficiency and reduce filter load.
- Use Proper MERV Rating: Don't just buy the highest MERV. Consult your HVAC system's manual or a professional to ensure you're using a filter that provides adequate filtration without unduly restricting airflow. Most residential systems perform best with MERV 8-12.
- Consider Smart Thermostats with Reminders: Many modern smart thermostats offer programmable reminders for filter changes, taking the guesswork out of the schedule.
When to Call a Professional
While changing an HVAC filter is a simple DIY task, persistent issues related to airflow or air quality, even with regular filter changes, warrant a professional inspection. You should call a licensed HVAC technician if you notice significantly reduced airflow from your vents, strange noises coming from your furnace or air handler, or if your system is running constantly without reaching the set temperature. If you find your evaporator coil is completely frozen in the summer, or if you suspect your ductwork is severely clogged or leaky, a professional can accurately diagnose and repair these more complex issues. Additionally, if your home consistently feels dusty despite frequent cleaning and filter changes, a professional can assess your ductwork and overall system for underlying problems or suggest solutions like duct cleaning or whole-home air purification systems. Do not attempt to clean deeply embedded evaporator coils or diagnose complex electrical issues within your HVAC unit yourself, as these tasks can be dangerous and lead to further damage to expensive components.
Related Articles
Keep troubleshooting with these hand-picked guides from FixlyGuide:
- The 3 Hidden Reasons Your HVAC Filter Needs Changing More Often (Beyond 90 Days) — Discover the crucial factors that dictate how often you truly need to change your HVAC filter, extending system life and improving air qual…
- The #1 HVAC Mistake Making Your Energy Bills Soar (It's Not What You Think) — Discover the crucial HVAC filter mistake that's quietly inflating your energy bills and damaging your system, and how a simple change can s…
- The #1 HVAC Mistake Costing You Hundreds (And How Often to Really Change Your Filter) — Discover the crucial mistake most homeowners make with HVAC filters, leading to higher energy bills, poor air quality, and system damage. L…
- That 'Energy-Saving' HVAC Trick Is Costing You Money — You've heard the advice: close HVAC vents in unused rooms to save on heating and cooling. But this common practice is a myth. It actually h…
- Why Your Heat Pump Auxiliary Heat Won't Turn Off — Discover why your heat pump's auxiliary heat keeps running, driving up your energy bills. Learn to troubleshoot common issues and know when…
- The Surprising Trick to Cutting Your Dryer Bill By $100 Per Year — Installing a clothesline can significantly reduce your energy bills and add a fresh scent to your laundry. This guide covers how to choose…
Frequently asked questions
How often should I change my HVAC filter if I have pets?+
If you have pets that shed, you should generally plan to change your HVAC filter every 30-60 days. Pet dander and hair can clog filters much faster than in homes without pets, requiring more frequent replacement to maintain good air quality and system efficiency.
What happens if I don't change my HVAC filter?+
Neglecting to change your HVAC filter can lead to several problems: higher energy bills due to reduced airflow, decreased indoor air quality, reduced heating/cooling performance, and increased wear and tear on your HVAC system's components, potentially shortening its lifespan and leading to expensive repairs.
Can a dirty HVAC filter make me sick?+
While a dirty filter itself doesn't typically 'make you sick' in the way a virus does, it can contribute to poor indoor air quality by allowing allergens, dust, and other irritants to circulate. For individuals with allergies, asthma, or respiratory sensitivities, this can exacerbate symptoms and lead to discomfort.
What MERV rating is best for my home?+
For most residential homes, a MERV rating between 8 and 12 offers a good balance of air filtration and airflow. Higher MERV ratings (13+) are excellent for trapping microscopic particles but can restrict airflow too much for older or less powerful HVAC systems, potentially causing damage. Always check your HVAC system's manual for its recommended MERV range.
How do I know which way to put the air filter in?+
Every HVAC filter has an arrow printed on its frame. This arrow indicates the direction of airflow. You must install the filter so that this arrow points towards your furnace or air handler (the unit itself), meaning it points in the direction the air flows into the system.


Discussion
Loading comments…