
Tools & materials you'll need
Affiliate linksAs an Amazon Associate FixlyGuide earns from qualifying purchases — at no extra cost to you. Prices and availability are accurate as of publication and subject to change.
How it works
A central air conditioning system operates on a principle called the refrigeration cycle, a continuous loop that moves heat from inside your home to the outside. It consists of two primary units—the indoor evaporator and the outdoor condenser—connected by copper tubing filled with a chemical refrigerant.
The process begins at the indoor unit. Warm, humid air from your home is pulled through a return vent and passes over the frigid evaporator coil. The refrigerant inside the coil absorbs the heat from the air, causing the refrigerant to turn from a cold liquid into a cool gas. A fan then blows this newly chilled, dehumidified air through your ductwork.
This refrigerant gas, now carrying your home's heat, travels to the outdoor condenser unit. There, a component called the compressor pressurizes the gas, intensely concentrating the heat and raising its temperature significantly. This superheated gas is then circulated through the condenser coils. A large fan on the top of the outdoor unit pulls ambient air across these coils, transferring the heat from the refrigerant to the outdoors. As the refrigerant sheds its heat, it condenses back into a high-pressure liquid. This liquid then flows through an expansion valve, which lowers its pressure and temperature, turning it back into a cold liquid before it returns to the indoor evaporator coil to repeat the cycle. When this cycle is interrupted—by blocked airflow, a dirty coil, or an electrical fault—the system can no longer effectively remove heat, resulting in warm air from your vents.
Step-by-Step Fix
Safety First: Before performing any maintenance, turn your thermostat to the "Off" position. Then, shut off power to both the indoor air handler and the outdoor condenser unit at your main electrical panel. The outdoor unit often has an additional exterior disconnect box with a pull-out fuse or a shutoff lever; use it as well.
-
Verify Thermostat Settings — The simplest oversight is an incorrect setting. Ensure the thermostat is set to "Cool," not "Heat" or "Off." Verify the set temperature is at least 5°F below the current room temperature to actively call for cooling. If the fan is set to "On," it will circulate air continuously, even when the cooling cycle is off, which can feel like warm air; switch it to "Auto" so the fan runs only when the AC is cooling.
-
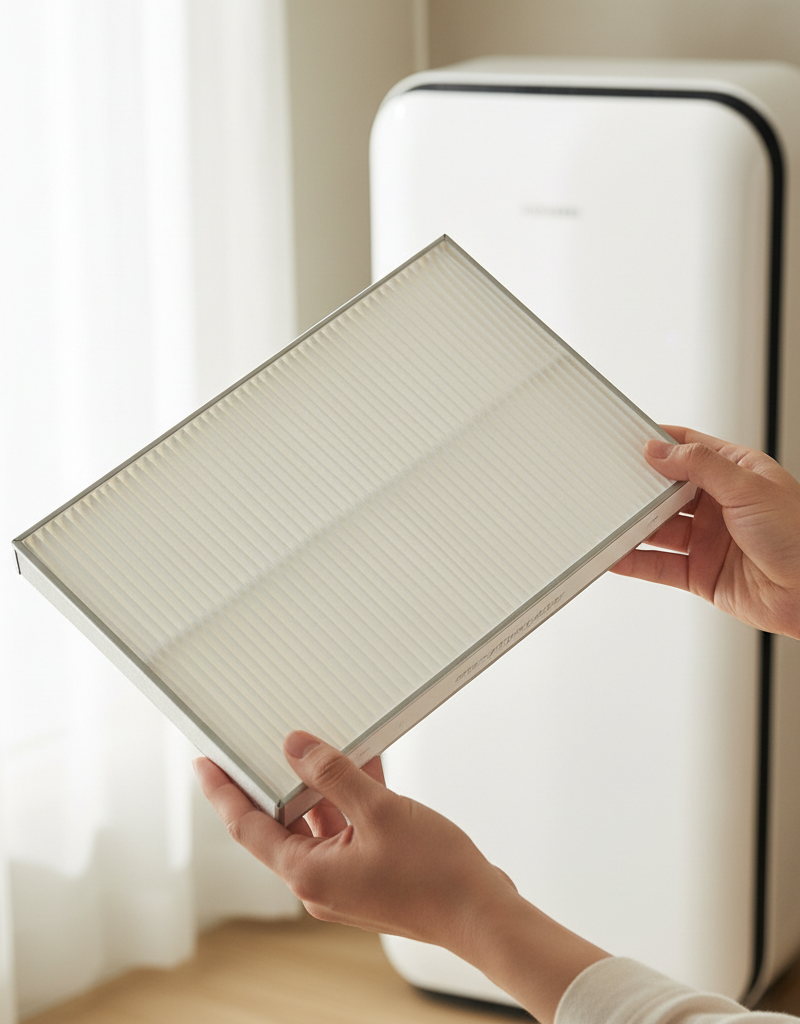
Inspect the Air Filter — A clogged filter is the most common cause of cooling problems. It restricts airflow over the evaporator coil, which can cause the coil to freeze into a block of ice, completely blocking air movement.
- Location: The filter is typically located in a slot in the return air duct near the indoor air handler or inside the furnace cabinet.
- Action: Slide the filter out and hold it up to a light. If you cannot see light through it, it is too dirty. Replace it with a new filter of the exact same dimensions. Note the airflow arrow printed on the filter's frame and ensure it points toward the air handler/furnace.
-
Check for a Frozen Evaporator Coil — If you found a severely clogged filter, your evaporator coil may be frozen. Signs include visible ice or frost on the copper refrigerant lines leading into the indoor unit or significantly reduced airflow from your vents.
- Action: If you suspect a freeze, turn the AC system to "Off" at the thermostat, but switch the fan setting to "On." This will circulate room-temperature air over the coil to speed up the thawing process.
- Caution: Do not attempt to chip or melt the ice with a sharp object or heat gun, as this can easily puncture the coil and cause a costly refrigerant leak. The coil may take several hours to fully thaw. Place a towel under the unit to catch any dripping water.
-
Clear the Condensate Drain Line — As your AC dehumidifies the air, it produces water (condensate) that is drained away through a PVC pipe. If this line becomes clogged with algae and sludge, a safety float switch will often trip and shut down your AC to prevent water damage.
- Location: Find the white or gray PVC pipe exiting your indoor unit. A "T" fitting with a cap often serves as the access point for cleaning.
- Action: Use a wet/dry shop vacuum to clear the clog. Secure the vacuum hose to the outdoor termination of the drain line (usually a pipe stub near the ground by your condenser unit). Let the vacuum run for 2-3 minutes to pull the blockage out. You can also try pouring one cup of distilled white vinegar down the indoor access port to dissolve any buildup.
-
Reset Circuit Breakers — An AC system uses a significant amount of power and is typically on two separate circuits: one for the indoor air handler and a larger, 240-volt circuit for the outdoor condenser. A power surge or component fault can cause one of these to trip.
- Location: Find your main electrical panel. Look for two breakers labeled "AC," "Condenser," "Air Handler," or "Furnace."
- Action: A tripped breaker will be in the middle or "Off" position. To reset it properly, flip the switch firmly to the full "Off" position, then back to "On." If it trips again immediately, you have an electrical fault that requires a professional.
-
Check the Outdoor Disconnect Switch — The outdoor condenser has a dedicated weather-proof power disconnect box mounted on the wall nearby for service safety. This can be accidentally shut off or have a blown fuse.
- Type 1 (Lever): If it's a simple lever, ensure it is in the "On" position.
- Type 2 (Pull-out): Open the box door and find the pull-out handle. Pull it straight out, flip it over, and re-insert it in the "On" position (it should be labeled). Some pull-outs contain cartridge fuses; if you have a multimeter, you can test them for continuity.
-
Clean the Outdoor Condenser Coils — The outdoor unit acts as a heat exchanger. If its coils are caked with dirt, grass clippings, or cottonwood fluff, it cannot effectively release heat to the outside, drastically reducing cooling efficiency.
- Tools: Garden hose with a spray nozzle, commercial coil cleaner (optional), soft brush.
- Action: With all power off, gently spray the coils from the outside with your garden hose to remove loose debris. For deep cleaning, apply a foaming coil cleaner according to the product directions and let it sit for 5-10 minutes. Rinse thoroughly from top to bottom, being careful not to bend the delicate aluminum fins. Never use a pressure washer.
-
Inspect the Outdoor Unit for Obstructions — The condenser needs ample space to breathe. Ensure there is at least 24 inches of clearance on all sides and above the unit. Trim back any encroaching bushes, weeds, or tree branches. Remove any tarps, toys, or yard equipment that may be blocking airflow.
-
Check the Condenser Fan and Capacitor — When you turn the AC back on, observe the outdoor unit. The large fan on top should be spinning. If you hear a humming or buzzing noise but the fan isn't moving, or it needs a push-start with a stick, you likely have a failed dual-run capacitor.
- Warning: Replacing a capacitor is a common but dangerous repair. Capacitors store a powerful electrical charge even when the power is off. While a cheap part, this task is best left to a professional unless you are experienced in safely discharging capacitors.
Common mistakes
- Forgetting to Shut Off All Power. Many DIYers turn off the thermostat but forget the circuit breakers or the exterior disconnect box. Always turn off power at all three locations before touching any part of the system, especially the high-voltage outdoor unit.
- Using a Pressure Washer on Coils. The high-pressure stream will bend and flatten the delicate aluminum fins on your condenser or evaporator coils. Damaged fins block airflow as effectively as dirt, crippling your system's efficiency and requiring a fin comb or professional repair to fix. Use a garden hose with a gentle nozzle.
- Adding Refrigerant Yourself. If your system is low on refrigerant, it means there is a leak. "Topping it off" with a DIY canister from an auto parts store is not a solution. It doesn't fix the leak, can introduce the wrong type of refrigerant or contaminants, and is illegal if you are not EPA certified. This is strictly a job for a licensed technician.
- Picking Ice Off the Evaporator Coil. Using a screwdriver or other sharp tool to remove ice is a recipe for disaster. It is very easy to puncture the soft copper tubing, causing an immediate and complete loss of refrigerant and necessitating a very expensive repair. Let the ice melt on its own by running the fan.
- Mismatching Breaker or Fuse Sizes. If you find a blown fuse in your disconnect or a chronically tripping breaker, do not replace it with a higher-amperage one. Fuses and breakers are safety devices sized to protect your equipment. An oversized one can allow a component to overheat and cause a fire.
- Ignoring a Repeatedly Tripping Breaker. If you reset a breaker and it trips again within seconds or minutes, do not keep resetting it. This indicates a dead short or a locked-up motor. Forcing it can cause severe damage to the compressor or start an electrical fire.
Cost & time breakdown
| Task | DIY Cost | Pro Cost | Time |
|---|---|---|---|
| Verify Thermostat Settings / Reset Breaker | $0 | $100 - $175 (service call fee) | 5 minutes |
| Replace Air Filter | $5 - $30 (for a new filter) | $100 - $200 (includes filter & labor) | 10 minutes |
| Clear Condensate Drain Line | $0 - $10 (if you need vinegar) | $125 - $250 | 30-60 minutes |
| Clean Outdoor Condenser Coils | $0 - $20 (for coil cleaner spray) | $150 - $350 (as part of a tune-up) | 45-90 minutes |
| Replace Dual Run Capacitor | $20 - $50 (part only; DIY not advised) | $175 - $450 | 30 minutes |
| Locate & Repair Refrigerant Leak / Recharge | Not a DIY task | $500 - $2,500+ | 2-6 hours |
When to call a pro
While many issues can be resolved with simple DIY steps, certain symptoms point to a problem that requires professional expertise and specialized tools. Call a licensed HVAC technician if you encounter any of the following:
- Loud, Unusual Noises: Grinding, squealing, or clanking from the outdoor unit often indicates a failing compressor motor or fan bearings. A humming or buzzing sound combined with a fan that won't start points to a bad capacitor or motor, which involves high-voltage components.
- Signs of a Refrigerant Leak: Refrigerant is a hazardous chemical. If you see oily residue on the copper lines, notice a persistent hissing sound, or find ice buildup on the outdoor refrigerant lines, you have a leak. This requires an EPA-certified technician to locate the leak, repair it, and correctly recharge the system.
- Repeated Electrical Trips: If a circuit breaker trips immediately after you reset it, stop. This signifies a serious electrical short that could be a fire hazard.
- No Power to the Unit: If you have confirmed the breakers and disconnects are on but the unit still shows no signs of life (no lights on the thermostat, no sounds from any unit), you may have a failed transformer, control board, or wiring issue.
- All DIY Fixes Fail: If you have run through all the steps—cleaned the filter and coils, cleared the drain line, and confirmed power—and your AC still blows warm air, the problem is deeper within the system and needs professional diagnosis.
Prevention & maintenance
Consistent maintenance is the most effective way to prevent AC failures and ensure efficient operation throughout the hottest months.
- Change Air Filters Regularly: Mark your calendar. Check your air filter monthly and replace it every 1-3 months. Homes with pets, smokers, or in dusty areas may require monthly changes. This is the single most important maintenance task.
- Keep the Outdoor Unit Clear: Before and during peak season, ensure the outdoor condenser is free of debris. Trim all vegetation to provide at least 24 inches of clearance on all sides for proper airflow. In the fall, cover the top of the unit with a piece of plywood to keep leaves out, but never wrap the sides, which can trap moisture and cause corrosion.
- Maintain the Condensate Line: Once every spring, and again mid-summer, pour a solution of one part distilled white vinegar to one part water down your condensate drain's access port. This prevents the buildup of algae and sludge that leads to clogs and water backups.
- Annual Professional Tune-Up: Schedule an HVAC professional to perform a full system tune-up each spring. They will perform a comprehensive check of electrical components, clean and lubricate motors, test refrigerant levels (without adding any unless a leak is found and fixed), and inspect the entire system for safety and efficiency. This modest investment can prevent costly emergency repairs.
- Listen for Changes: Pay attention to your system's sounds. If you notice new noises, less powerful airflow, or longer run times to cool your home, investigate early. These are often the first signs of a developing problem.
Related Articles
Keep troubleshooting with these hand-picked guides from FixlyGuide:
- Why Your AC is Blowing Warm Air: Troubleshooting and Fixes — If your AC is blowing warm air, it's often due to a clogged air filter, dirty condenser coils, or a tripped circuit breaker, all of which y…
- The Secret Culprit Behind Your AC Blowing Warm Air (It’s Not What You Think) — Discover the unexpected reason your air conditioner is blowing warm air and how a simple, often overlooked fix can restore your home’s cool…
- The #1 Mistake Homeowners Make When Their AC Won't Turn On (And the Easy Fix) — Learn the most common reason your air conditioner won't turn on and how to diagnose and fix it with simple steps.
- Your Thermostat Isn't Broken — It's These 3 Culprits — If your thermostat isn't hitting the mark, it could be a simple fix. Learn how to troubleshoot common issues and get your home comfortable…
- AC Not Cooling? 12 Things to Check Before Calling HVAC — Before you spend $150 on a service call, run through these 12 quick checks. Most no-cool AC problems are solved in under 15 minutes with no…
- Why Are My Tree Leaves Turning Brown in Summer? Fixes for Common Issues — Discover the common reasons your tree leaves are browning in summer and learn actionable steps to revive your trees and prevent future dama…
Get the print-ready PDF of this guide
A clean, ad-free, printable version you can keep on your phone or pin to the workshop wall. Free with a FixlyGuide account.
- Print-optimized layout
- Tools, materials & every step included
- Saved to your account
Frequently asked questions
How often should I change my AC filter?+
You should change your AC filter every 1-3 months, depending on factors like pet ownership, allergies, and the level of air pollution in your area. Regular changes ensure optimal airflow and efficiency.
Why does my AC keep tripping the breaker?+
An AC unit repeatedly tripping its breaker can indicate a more serious electrical issue, such as a short circuit, an overloaded circuit, or a failing motor in the unit. If resetting the breaker doesn't solve it, or it trips again quickly, call a licensed electrician or HVAC technician.
Can a clogged drain line cause warm air?+
Yes, a severely clogged condensate drain line can cause the condensate pan to fill and trigger a safety float switch, which shuts down the outdoor condensing unit. When the outdoor unit is off, the indoor fan might continue to blow, but it will be blowing warm, unconditioned air.
What if my outdoor unit isn't running?+
If your outdoor AC unit (condenser) isn't running at all, check the circuit breaker for the unit first. If the breaker is on and not tripped, the issue could be a faulty capacitor, a problem with the thermostat wiring, or the unit's contactor. These typically require a professional HVAC technician to diagnose and repair.


Discussion
Loading comments…