
Tools & materials you'll need
Affiliate links- AmazonAdjustable wrench1 · For packing nuts and supply lines
- AmazonPhillips and flathead screwdrivers1 each · For handle screws and decorative caps
- AmazonAllen wrench set1 · Many modern faucets use Allen screws
- AmazonNeedle-nose pliers1 · For retaining clips
- AmazonCartridge puller1 · For stubborn cartridges
As an Amazon Associate FixlyGuide earns from qualifying purchases — at no extra cost to you. Prices and availability are accurate as of publication and subject to change.
How it works
A faucet controls water flow using simple mechanical principles, but the specific design dictates the repair. Understanding the mechanism is the first step to a successful fix.
Two-Handle Faucets (Compression, Double-Handle Cartridge): The most traditional design is the compression faucet. Each handle connects to a threaded stem. Turning the handle drives the stem down, causing a rubber washer at its base to press against a metal orifice called a valve seat. This compression stops the flow of water. When the faucet drips from the spout, it is almost always because this rubber washer has hardened, cracked, or become misshapen from repeated pressure, allowing water to seep past. If a leak occurs at the base of the handle itself, the culprit is usually the packing—either a graphite-impregnated string or a series of rubber O-rings—that seals the stem against the faucet body.
A more modern two-handle design uses individual cartridges for hot and cold. These function similarly to single-handle cartridges but control only one temperature.
Single-Handle Faucets (Cartridge, Ball, Ceramic Disc): Most modern single-handle faucets use a cartridge. This self-contained unit, typically made of plastic with rubber seals, has internal channels that align as you move the handle. Lifting the handle opens these channels for flow, while moving it left or right adjusts the proportion of hot and cold water. A spout drip indicates the internal seals are worn. A leak around the handle base points to failed O-rings on the exterior of the cartridge.
Less common today are ball faucets, identifiable by a dome-shaped cap and a handle base that pivots on a ball. They use a slotted metal or plastic ball, spring-loaded rubber seats, and O-rings. Finally, high-end faucets often use a ceramic disc cartridge, which contains two highly polished ceramic discs. One is fixed, while the other rotates with the handle. The seal is nearly perfect, but hard water deposits can score the discs or damage the rubber seals at their perimeter, causing leaks.
Step-by-Step Fix
Follow this universal workflow to address drips from nearly any common kitchen or bathroom faucet. The process diverges based on your faucet type, but the core principles of disassembly, replacement, and reassembly are the same.
-
Prepare the Workspace — First, clear everything from under the sink to access the water supply lines. Look for two small oval or round handles connected to the wall; these are the shutoff valves (angle stops). Turn both handles fully clockwise until snug to stop the flow of water. Turn the faucet on to drain any residual water and confirm the supply is off. Finally, place a towel in the sink basin and plug the drain with a rag. This prevents small, essential parts like set screws or retaining clips from disappearing down the drain.
- Tools: Rag, flashlight.
- Safety: If the shutoff valves are seized or start dripping when you turn them, do not force them. Stop and call a plumber or shut off the main water supply to the house.
-
Remove the Handle(s) — The handle is held onto the valve stem or cartridge by a small set screw. This screw is almost always hidden beneath a decorative cap on the top or front of the handle, often marked with a red and blue temperature indicator. Carefully pry this cap off with a small flathead screwdriver or a utility knife. Look inside to identify the screw type—it will typically be a Phillips head or a hexagonal Allen key. Unscrew it completely and lift the handle straight off.
- Tools: Small flathead screwdriver, Phillips screwdriver, Allen key set.
- If it's stuck: If the handle won't lift off due to mineral buildup, do not pry it with a screwdriver. Gently tap upwards around the base with the plastic handle of a screwdriver or a rubber mallet. For truly seized handles, a specialized "faucet handle puller" (~$15) is the correct tool to use, preventing damage to the faucet body.
-
Expose the Faucet Internals — With the handle removed, you can access the core mechanism.
- For single-handle cartridge faucets: You may see a decorative dome or cone-shaped cap. This usually unscrews by hand (counter-clockwise). Underneath, you will find either a large threaded packing nut (requiring an adjustable or basin wrench) or a brass or plastic retaining clip that holds the cartridge in place.
- For two-handle compression faucets: You will see a large hexagonal nut, called the packing nut, around the base of the stem you just exposed. This is what you will loosen to remove the entire stem assembly.
-
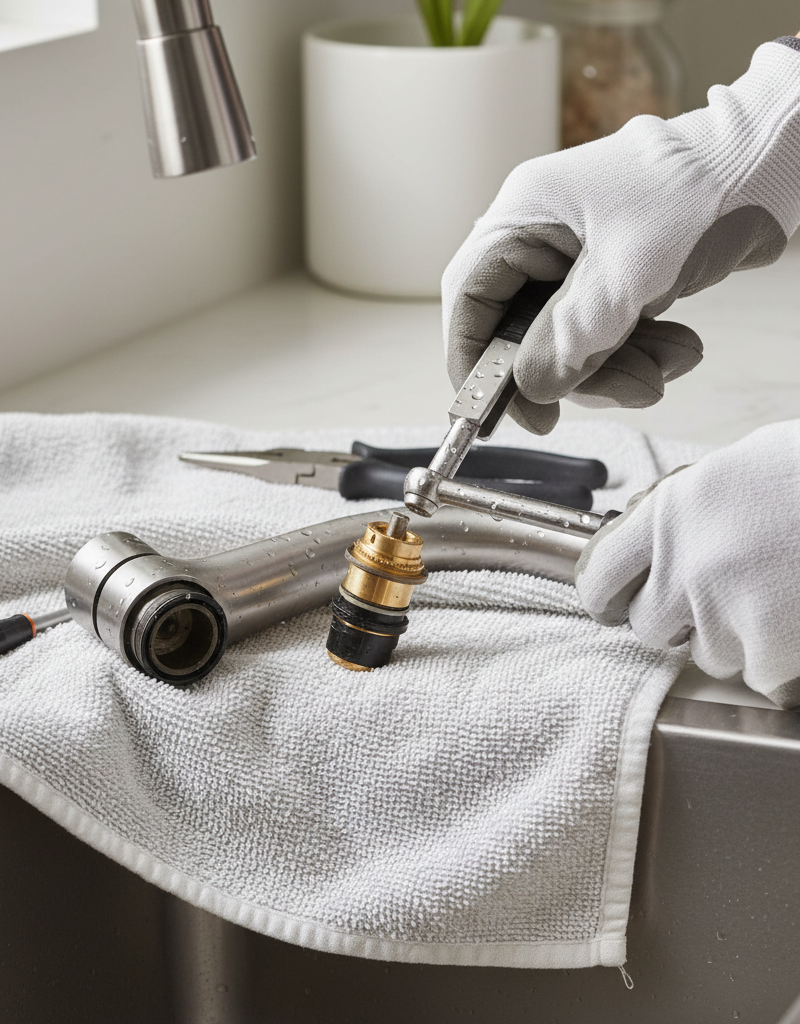
Extract the Core Mechanism — This is the critical step where you remove the part causing the leak.
- Cartridge Faucets: If there is a retaining clip (often U-shaped), use needle-nose pliers to pull it straight out. If there is a large nut, use channel-lock pliers or an adjustable wrench to turn it counter-clockwise. Once the retainer is removed, grip the top of the cartridge stem with pliers and pull it straight up and out of the faucet body. Note its orientation—there are often tabs or notches that must be aligned correctly upon reinstallation.
- Compression Faucets: Use an adjustable wrench or a deep-well socket to grip the packing nut. Turn it counter-clockwise to loosen and remove it. The stem beneath it might lift straight out, or you may need to turn it counter-clockwise as if you were turning the water on, "unscrewing" it from the faucet body.
-
Identify and Procure the Correct Replacement Parts — Do not discard the old parts. Take the entire cartridge or stem assembly with you to a hardware or plumbing supply store. Faucet manufacturers use hundreds of proprietary, non-interchangeable parts. Trying to identify it from a photo often fails. Matching the old part in-hand is the only guaranteed way to get the correct replacement. For compression faucets, you may be able to buy a universal washer kit, but it is still wise to bring the old stem to match the O-rings and the seat washer size.
- Pro Tip: While at the store, buy a small tub of silicone-based "plumber's grease." This lubricant protects rubber O-rings and makes installation easier without contaminating the water supply.
-
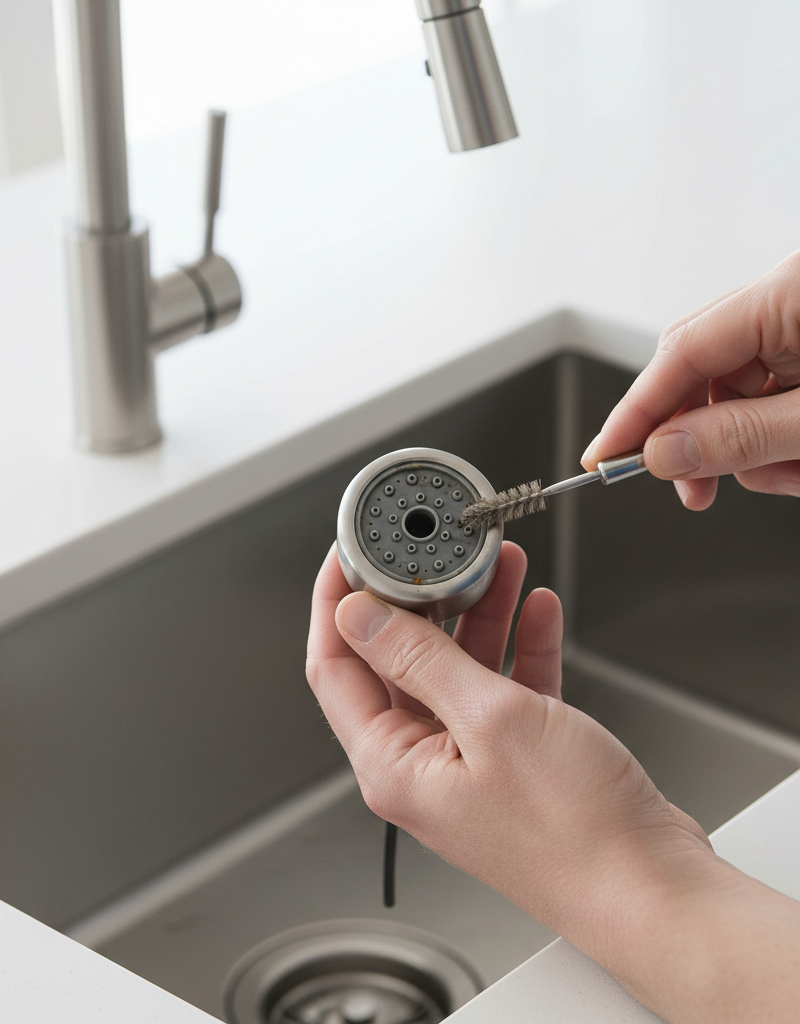
Clean and Inspect the Faucet Body — With the cartridge or stem removed, use a flashlight to look inside the faucet body. You will see the machined cavity where the part sits. Check for mineral deposits (limescale), debris, or bits of deteriorated rubber. Use a cloth or a small nylon brush (an old toothbrush works well) to clean the interior thoroughly. A little white vinegar can help dissolve stubborn mineral buildup. A clean surface is essential for the new seals to work properly.
-
Inspect and Replace the Valve Seat (Compression Faucets Only) — Look down into the faucet body where the stem was removed. You will see the small brass valve seat that the stem washer presses against. Feel its surface with your finger or the tip of a screwdriver. If it feels rough, jagged, or pitted, simply replacing the washer will not stop the leak for long. To replace it, insert a "seat wrench" (a simple, inexpensive tool) into the seat's square or hex opening and turn it counter-clockwise to remove it. Install the new, identical seat, applying a small amount of plumber's grease to the threads, and tighten it until snug. Do not overtighten.
-
Install the New Cartridge or Stem — Lightly coat the rubber O-rings on your new cartridge or stem with plumber's grease.
- Cartridge Faucets: Align the tabs on the new cartridge with the notches in the faucet body and press it firmly into place. It should seat fully with a solid feel. Reinstall the retaining clip or threaded nut, tightening it until just snug.
- Compression Faucets: Install the new washer and brass screw onto the bottom of the stem. Insert the stem into the faucet body and screw it in clockwise until it stops. Reinstall the packing nut and tighten it with your wrench—snug it, then give it another 1/8 to 1/4 turn. Over-tightening will make the handle difficult to turn.
-
Reassemble the Handle — Place the handle back onto the stem, ensuring it's oriented correctly (e.g., pointing to "off"). Install and tighten the set screw, then press the decorative cap back into place.
-
Slowly Restore Water and Test — Go back under the sink and turn the shutoff valves counter-clockwise slowly. Opening them too fast can cause "water hammer" and damage pipes or seals. Open the faucet to the middle/mixed position to allow air to bleed from the lines. Once water flows smoothly, turn it off and thoroughly inspect the spout and the base of the handle(s) for any drips. Use a dry paper towel to wipe around the base, which makes it easy to spot even the tiniest amount of moisture.
Common mistakes
Avoiding these frequent errors is the difference between a quick 30-minute fix and a frustrating afternoon.
- Buying Parts from Memory. Never assume you know the part you need. A "Moen kitchen faucet cartridge" is not specific enough; Moen has dozens. Always take the old part with you to the store for a physical match. Taking a photo of the faucet brand and the removed part is a good backup.
- Using Excessive Force on Seized Parts. Corrosion can weld handles and cartridges in place. Using a large wrench to pry or brute force to yank a part can crack the faucet body or twist the supply lines underneath, turning a small leak into a flood. Use penetrating oil, gentle tapping, and the correct puller tools instead.
- Not Cleaning the Faucet Interior. Dropping a new cartridge into a valve body lined with grit and limescale is a common cause of immediate failure. The new O-rings cannot seal against a rough, dirty surface. Take 60 seconds to wipe the interior clean with a rag or nylon brush.
- Over-tightening Nuts and Screws. More torque is not better. Over-tightening a cartridge retaining nut can crack the plastic cartridge body. Over-tightening the packing nut on a compression faucet will crush the packing, making the handle extremely stiff and potentially causing a leak at the stem. Tighten until snug, then add a slight additional turn (about 1/8).
- Forgetting to Replace the Valve Seat. On a compression faucet, the rubber washer and the brass seat are a matched pair. If the seat is pitted or has a groove worn into it, a new washer will be destroyed in a matter of weeks, and the drip will return. Always inspect the seat and replace it if it's anything but perfectly smooth.
- Misaligning the Cartridge. Most cartridges have small plastic tabs that must fit into corresponding notches inside the faucet body. If you install it rotated incorrectly, the hot and cold water supplies may be reversed, or the faucet may not shut off at all. Confirm the alignment before reinstalling the retaining clip or nut.
Cost & time breakdown
Repairing a faucet is one of the most cost-effective DIY jobs. A plumber's minimum service charge is often more than the total cost of parts and specialty tools combined.
| Task | DIY cost | Pro cost | Time |
|---|---|---|---|
| Replace compression faucet washers/O-rings | $2–$8 | $125–$200 | 20–40 minutes |
| Replace single-handle faucet cartridge | $10–$35 | $150–$250 | 20–30 minutes |
| Replace compression faucet valve seats | $5–$15 | $175–$275 | 45–60 minutes |
| Purchase specialty tool (puller/wrench) | $10–$20 | N/A | N/A |
| Full faucet replacement (basic model) | $75–$250 | $250–$500+ | 1–2 hours |
| Plumber diagnostic visit (no repair) | N/A | $75–$150 | 30 minutes |
When to call a pro
While most faucet repairs are straightforward, certain situations warrant professional help to avoid causing more significant damage.
Stop and call a plumber if you encounter any of the following:
- Seized or Leaky Shutoff Valves: The angle stops under your sink are the most critical safety component. If you cannot turn one, or if it begins to drip from its stem or joint when you try, do not apply more force. A broken shutoff valve can cause an uncontrollable leak.
- Visible Corrosion or Cracks in the Faucet Body: If the metal of the faucet itself (not just the handle or finish) is bubbling, covered in green or white corrosion, or has a visible crack or pinhole leak, the unit has reached the end of its service life. It needs full replacement, not just a new cartridge.
- A Part Breaks During Removal: If you attempt to pull a stuck cartridge and the plastic housing snaps, leaving part of it inside the faucet body, it can be extremely difficult to extract without damaging the faucet. Plumbers have specialized extraction tools for this exact scenario.
- Old, Brittle, or Corroded Supply Lines: If the flexible or rigid tubes running from the shutoff valves to the faucet are originals from the 1980s or earlier, leave them alone. They can easily crack or snap during a faucet repair, leading to a major water damage event. A pro will replace them as a standard part of any faucet job.
Prevention & maintenance
A few simple habits can dramatically extend the life of your faucets and make future repairs easier.
- Exercise the Shutoff Valves. Twice a year, turn the shutoff handles under the sink all the way closed and then all the way back open. This prevents them from seizing due to mineral buildup, ensuring they will work when you need them.
- Clean the Aerator. Every three to four months, unscrew the aerator from the tip of the faucet spout. Rinse out any sediment or grit that has accumulated. Clogged aerators increase back-pressure inside the faucet, putting extra stress on internal seals and O-rings.
- Address Drips Immediately. A slow drip isn't just wasting water; it means water is constantly forcing its way past a seal or washer. This continuous flow can erode a groove into a brass valve seat or wear out a cartridge seal, turning a simple repair into a more complex one.
- Use a Gentle Touch. Avoid snapping the faucet handle off or on with force. Smooth, deliberate movements are especially important for ceramic disc faucets, as a forceful shutoff can slam the discs together and potentially chip them over time.
- Consider a Water Softener. If you live in an area with very hard water (high mineral content), you will experience faucet, toilet, and appliance failures more frequently. Limescale buildup is abrasive to rubber seals and causes parts to seize. A whole-house water softener is a significant investment but will save money on plumbing repairs in the long run.
- Keep a Spare. Once you successfully identify and replace a cartridge or a set of washers, buy a second set immediately. Store them in a labeled bag under the sink. For a small cost, you eliminate a trip to the store and the entire part-matching process the next time a drip appears.
Related Articles
Keep troubleshooting with these hand-picked guides from FixlyGuide:
- Why Is My Toilet Running? 7 Quick Fixes Before Calling a Plumber — A constantly running toilet wastes up to 200 gallons of water a day. Here are the 7 most common causes and how to fix each one yourself in…
- How to Fix a Leaky Single-Handle Faucet: A DIY Guide — Fixing a leaky single-handle faucet
Get the print-ready PDF of this guide
A clean, ad-free, printable version you can keep on your phone or pin to the workshop wall. Free with a FixlyGuide account.
- Print-optimized layout
- Tools, materials & every step included
- Saved to your account
Frequently asked questions
Why is my faucet leaking from the base when I turn it on?+
That's an O-ring failure on a single-handle cartridge faucet. The O-rings are inexpensive ($2 for an assortment) and replacing them while you have the cartridge out is good preventive maintenance.
How do I know what brand of cartridge to buy?+
Look for a logo on the faucet itself (often on the spout or handle base) — Moen, Delta, Pfister, Kohler, etc. Then take the old cartridge to the hardware store. Big-box stores carry brand-specific cartridge identifiers in the plumbing aisle.
Can I use plumber's tape on faucet threads?+
Yes for the supply line connections. No for the cartridge itself — the cartridge seals are designed to work without tape, and adding it can prevent proper seating.
How long should a faucet cartridge last?+
5–10 years for quality brands like Moen or Delta. Cheap big-box faucets sometimes need cartridge replacement in 2–3 years, especially in hard-water areas.

Discussion
Loading comments…