
Tools & materials you'll need
Affiliate linksAs an Amazon Associate FixlyGuide earns from qualifying purchases — at no extra cost to you. Prices and availability are accurate as of publication and subject to change.
How it works
A standard gravity-fed toilet operates on a simple, elegant mechanical system contained within its tank. Understanding this system is the key to diagnostics. When you press the flush handle, it lifts a lever arm inside the tank. This arm is connected by a lift chain to a rubber or silicone seal called a flapper, which covers the opening of the large flush valve at the bottom of the tank. Lifting the flapper allows the 2-3 gallons of water stored in the tank to rush down through the flush valve and into the toilet bowl, creating the siphon effect that clears the bowl's contents.
As the tank water level plummets, two things happen simultaneously. First, the now-buoyant flapper settles back down onto the flush valve seat, sealing the tank. Second, a float connected to the fill valve drops. This drop opens the fill valve, which begins refilling the tank with fresh water from the supply line. The fill valve also directs a small stream of water through a thin refill tube down the overflow pipe; this is critical for refilling the bowl to its proper standby level. Once the water in the tank rises to the preset level, it lifts the float, which in turn shuts off the fill valve. A running toilet occurs when this cycle is interrupted—most often by a faulty seal at the flapper or a fill valve that fails to shut off completely.
Step-by-Step Fix
Follow these steps in order. Most running toilet issues are solved within the first four steps. Do not skip a step, even if you believe you have identified the problem.
1. Observe and Diagnose — Lift the tank lid and spend 60 seconds observing a full flush cycle. Listen for a constant hiss after the tank fills, which points to a fill valve issue. Look for a constant, gentle trickle of water running down the inside of the bowl or down the overflow tube, which indicates a flapper or flush valve seat problem. If the toilet is silent but refills on its own every 15-60 minutes (a "phantom flush"), you almost certainly have a slow leak at the flapper.
- Tools: Your eyes and ears.
- Safety: Tank water is clean tap water, but exercise caution with a cracked porcelain lid, which can have sharp edges.
2. Perform a Dye Test — Place 5-10 drops of dark food coloring or a specialized dye tablet into the tank water. Do not flush. Wait for 15-20 minutes. After the wait, inspect the water in the toilet bowl. If any color has appeared in the bowl, it confirms that water is leaking from the tank, past the flapper, and into the bowl. This is the most common failure. If no color appears in the bowl but you can hear the toilet running, the problem is likely with the fill valve allowing water to drain directly into the overflow tube.
- Tools: Food coloring or toilet dye tablets.
- Pro Tip: This test is definitive. If color appears, focus your efforts on Steps 3, 4, and 5. If no color appears, skip to Step 6.
3. Inspect the Lift Chain and Flush Handle — An improperly adjusted lift chain is a frequent and simple-to-fix culprit. The chain should have about ½ inch of slack when the flapper is closed. If the chain is too tight, it will hold the flapper slightly open, causing a constant leak. If it's too loose, it can get caught underneath the flapper, preventing a seal. Also, jiggle the exterior flush handle. If it feels sticky or doesn't return to its resting position easily, it may be holding the lift arm and chain up.
- To Adjust: Most chains have a clip that can be moved to a different link to shorten or lengthen it.
- For Sticky Handles: Unscrew the plastic locknut on the inside of the tank (note: this nut is often reverse-threaded, meaning you turn it clockwise to loosen). Pull the handle assembly out, clean any corrosion or mineral buildup from the threads and shank, and reinstall.
4. Clean the Flapper and Flush Valve Seat — Mineral deposits and biofilm can build up on the flapper and the rim of the flush valve it sits on (the valve seat), preventing a perfect seal. Turn off the water supply using the shut-off valve behind the toilet. Flush the toilet to drain the tank. Unhook the flapper from the ears of the overflow tube and lift it out. Feel the underside of the flapper for warping, blistering, or a hardened, non-pliable texture; if it's not soft and flexible, it needs replacement. Use a non-abrasive sponge or cloth with a gentle cleaner to thoroughly wipe the valve seat until it is perfectly smooth.
- Tools: Sponge or Scotch-Brite non-scratch pad, gloves.
- Warning: Never use steel wool, sandpaper, or harsh abrasive cleaners on the plastic valve seat. These will create micro-scratches that will cause a permanent leak.
5. Replace the Flapper — If the flapper is warped, brittle, or cleaning the valve seat did not stop a dye-test-confirmed leak, replace the flapper. Take the old flapper to a hardware store to find an exact match. Toilets use either a 2-inch or 3-inch flapper, and using the wrong size will not work. While "universal" flappers exist, an exact-match model is far more reliable.
- Tools: New flapper.
- Installation: Hook the new flapper's ears onto the overflow tube's posts. Attach the chain to the flush lever arm, ensuring about ½ inch of slack. Turn the water supply back on.
6. Check and Adjust the Float Height — If the water level in the tank is too high, it will continuously spill into the overflow tube, causing a constant run even with a perfect flapper seal. The proper water level is approximately 1 inch below the top of the overflow tube.
- For ball floats (an older style with a ball on a metal arm): Gently bend the metal arm downward to lower the shut-off level.
- For cup floats (a modern style that slides up and down the fill valve shaft): Locate the adjustment clip or screw. On most Fluidmaster-style valves, you pinch a spring clip and slide the entire float cup down the shaft. On other models, you may need a screwdriver to turn an adjustment screw. Make small, ½-inch adjustments and allow the tank to refill to check the new level.
7. Inspect and Clean the Fill Valve — If the toilet hisses constantly or the dye test was negative, the fill valve is likely the problem. Debris from your water line can get caught in the valve's diaphragm seal, preventing it from closing fully. Most modern fill valves (like the common Fluidmaster 400A) can be flushed out. Turn off the water and flush the tank. Place an inverted cup over the top of the fill valve stem to prevent splashing. While holding the cup, turn the water supply on for a few seconds to flush debris out of the valve.
- Instructions: To access the valve, turn off water. On a Fluidmaster 400A, press down on the valve cap and turn it counter-clockwise to remove it. Carefully lift out the seal. Rinse it and check for damage. Before reinstalling, place a cup over the open valve and briefly turn the water on to flush it. Reassemble.
8. Check the Refill Tube — The small, flexible refill tube must be positioned so that it empties into the overflow tube, but the end of the tube must remain above the tank's water line. If the tube is too long and dips down into the tank water, it can create a siphon that slowly drains water from the tank, causing a phantom flush.
- The Fix: The tube should be secured to the top of the overflow tube with a clip (often included with a new fill valve). If it is too long, simply trim it with scissors so its end is above the water level.
9. Replace the Fill Valve — If cleaning the fill valve doesn't stop the hissing or leaking, the entire unit needs to be replaced. This is a straightforward job. A universal replacement kit like the Fluidmaster 400A is a reliable choice for most toilets.
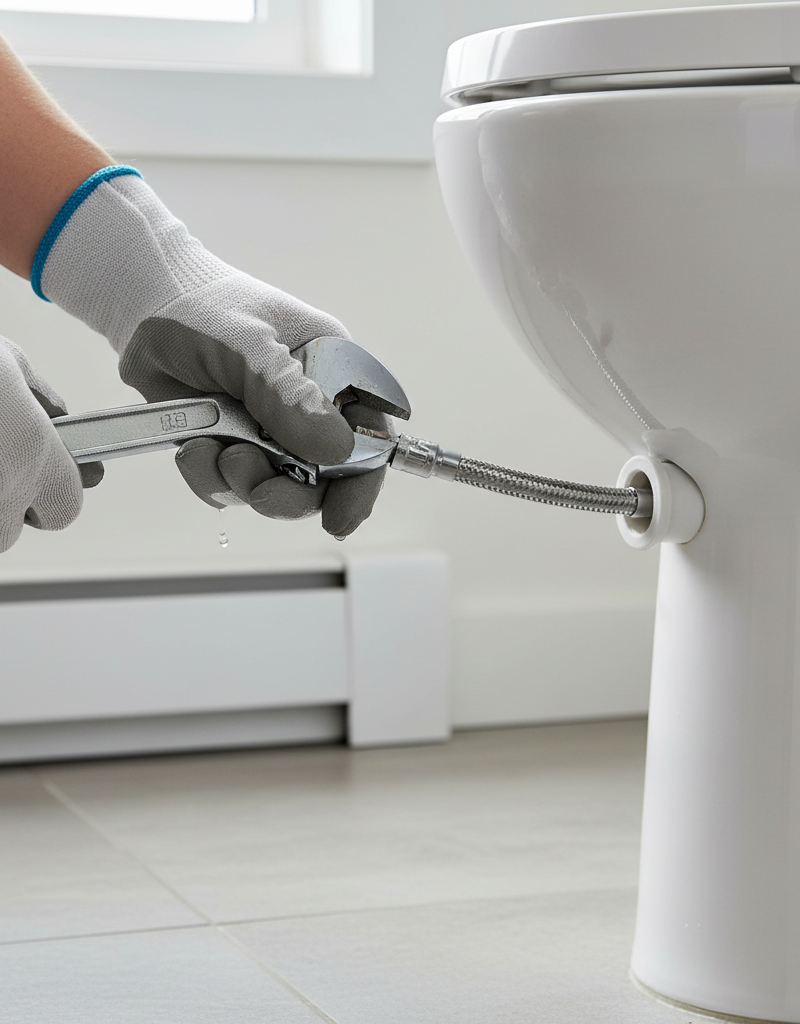
- Tools: Sponge, bucket, adjustable wrench or channel-lock pliers.
- Process: Turn off water and drain the tank completely (use a sponge for the last bit). Place a bucket under the tank connection. Unscrew the water supply line and the fill valve locknut from the underside of the tank. Remove the old valve. Install the new valve, making sure gaskets are seated correctly. Hand-tighten the plastic locknuts, then give a final quarter-turn with a wrench. Reconnect the supply line, turn on the water, and adjust the float to the correct height.
Common mistakes
- Buying a "Universal" Flapper Blindly. Not all flappers are created equal. Modern high-efficiency toilets often use 3-inch flush valves, while older models use 2-inch valves. A universal flapper designed for both may not provide a perfect seal on your specific model. Always take the old part with you to the store for a direct comparison.
- Overtightening Plastic Connections. The locknuts for the fill valve and flush valve, as well as the coupling for the water supply line, are typically made of plastic. Overtightening them with a wrench can easily crack the nut or even the toilet tank itself. The standard is to hand-tighten until snug, then give a final one-quarter to one-half turn with pliers or a wrench.
- Setting the Water Level Too High. It is tempting to raise the water level in the tank thinking it will provide a more powerful flush. In reality, setting it above the designed level (about 1" below the overflow tube) just wastes water as it constantly drains down the overflow. This is a primary cause of a running toilet that is not related to a bad flapper.
- Ignoring the Valve Seat. Many DIYers replace the flapper but neglect to clean the flush valve seat where the flapper rests. Even a small amount of mineral buildup or sediment on this rim will prevent the new flapper from creating a watertight seal, leading to continued frustration.
- Cutting the Refill Tube Too Short. While a refill tube that is too long can cause a siphon, cutting it too short or removing it entirely is also a mistake. The water from this tube is what refills the toilet bowl after a flush. Without it, the bowl will have insufficient water, leading to weak flushes and potential sewer gas odors.
Cost & time breakdown
| Task | DIY cost | Pro cost | Time |
|---|---|---|---|
| Diagnose & Adjust Chain/Float | $0 | $100 - $200 (service call) | 10 minutes |
| Replace Toilet Flapper | $5 - $15 | $120 - $225 | 20 minutes |
| Replace Fill Valve | $12 - $25 | $150 - $275 | 30-45 minutes |
| Replace Complete Flush Valve | $25 - $50 | $250 - $400+ | 1.5 - 2.5 hours |
| Plumber Service Call (Diagnosis Only) | N/A | $75 - $150 | 30 minutes |
When to call a pro
While most running toilet issues are simple DIY fixes, certain situations warrant a call to a professional plumber. If you have attempted the steps above and the toilet continues to run, there may be a more complex issue, such as a hairline crack in the flush valve assembly or the tank itself.
The most critical sign to call a pro is a faulty shut-off valve. If the valve behind the toilet is rusted shut, spins freely without stopping the water flow, or begins to leak when you try to turn it, do not force it. Breaking this valve can lead to a significant, uncontrollable water leak. A plumber has the tools and experience to replace the shut-off valve safely. Additionally, if the toilet is leaking from its base onto the floor, this points to a failed wax ring seal, a separate issue that requires removing the entire toilet. If you discover major corrosion on any parts or are uncomfortable with the prospect of removing the tank from the bowl to replace the flush valve, it is wise to call for professional service.
Prevention & maintenance
- Annual Dye Test. Once a year, drop food coloring into your tank and wait 20 minutes without flushing. It is the fastest way to detect a silent, wasteful leak before it shows up on your water bill.
- Avoid Corrosive In-Tank Cleaners. Do not use drop-in tablets that contain bleach or other harsh chemicals. While they may keep the bowl clean, they significantly accelerate the deterioration of the rubber flapper and plastic valve components, causing them to fail prematurely.
- Exercise the Shut-Off Valve. Every six months, turn the water shut-off valve behind the toilet fully off and then back on again. This prevents minerals from seizing the valve, ensuring it will work when you need it.
- Periodic Internal Inspection. Every few months, lift the tank lid and look for signs of wear. Check if the flapper chain is tangled, look for visible mineral buildup on moving parts, and listen for any new hissing sounds after the tank fills.
- Know Your Water. If you have very hard water, expect to replace internal components like the flapper and fill valve seal more frequently—perhaps every 2-3 years instead of the typical 4-5.
Related Articles
Keep troubleshooting with these hand-picked guides from FixlyGuide:
- Your running toilet wastes 72,000 gallons. The fix? — A running toilet is usually caused by a faulty flapper valve, wasting water and creating annoying noise, but it's a fix you can often do yo…
- How to Fix a Leaky Faucet (Single-Handle and Two-Handle) — A dripping faucet wastes 3,000+ gallons a year. Whether you have a single-handle cartridge or an old two-handle compression faucet, here's…
- Refrigerator Leaking Water? Easy Fixes for Common Causes — A refrigerator leaking water on the floor is a common household problem often caused by a clogged defrost drain or a misaligned drain pan,…
Frequently asked questions
How much water does a running toilet waste?+
A leaking flapper can waste up to 200 gallons per day, adding $20–$30 to a monthly water bill. A continuously running fill valve can waste even more — over 1 gallon per minute.
Why does my toilet randomly run for 10 seconds every few minutes?+
That is a 'phantom flush.' Water is slowly leaking from the tank into the bowl through a worn flapper, and the fill valve briefly turns on to refill the tank. Replace the flapper.
Can I just replace the flapper without turning off the water?+
Technically yes, but turning off the supply valve and flushing first makes the job much cleaner — there is no water spraying when you remove the old flapper.
How long should a toilet flapper last?+
4–5 years on average. Chlorinated water and tank cleaners (especially the blue tablets) shorten flapper life significantly.


Discussion
Loading comments…