
Tools & materials you'll need
Affiliate linksAs an Amazon Associate FixlyGuide earns from qualifying purchases — at no extra cost to you. Prices and availability are accurate as of publication and subject to change.
Quick Answer
If your home was constructed before 1978, there's a high probability that some of its painted surfaces contain lead-based paint. While intact lead paint generally poses a low risk, disturbing it through activities like sanding, scraping, drilling, or demolition can release microscopic lead-filled dust particles into the air. These particles are highly toxic if inhaled or ingested, especially for young children and pregnant women. The safest DIY approach involves testing for lead if possible, enacting stringent containment measures during any work, and strictly adhering to lead-safe work practices such as wet sanding, proper ventilation, and thorough cleanup to prevent exposure.
The Problem
You're embarking on a home improvement project – perhaps updating an old window, refinishing a doorframe, or patching a wall. The house has character, built in a charming era before 1978. What you might not realize is that the very paint giving your home that historical charm could also be hiding a serious health hazard: lead. When this paint is disturbed, it doesn't just create regular dust; it creates lead dust. This lead dust is insidious. It's invisible to the naked eye, can travel far, settle on surfaces throughout your home, and remain a danger for years if not properly contained and cleaned. Ingesting or inhaling even small amounts of lead dust can cause lead poisoning, leading to severe developmental, neurological, and behavioral problems, particularly in children under six. Adults are also at risk, facing issues like high blood pressure, joint pain, and memory difficulties. The problem isn't just direct exposure during work; it's the long-term contamination of your living space if precautions aren't taken.
How It Works
Lead was a common additive in paint before 1978 because it made paint more durable, vibrant, and resistant to moisture. After 1978, its use in residential paint was banned due to overwhelming evidence of its toxicity. The danger with lead paint isn't primarily from paint that is in good condition on a wall. The real threat emerges when the paint deteriorates or is disturbed. As paint ages, it can chip, peel, or chalk, releasing small lead particles. However, the most significant release of lead dust occurs during activities that abrade or break the paint surface.
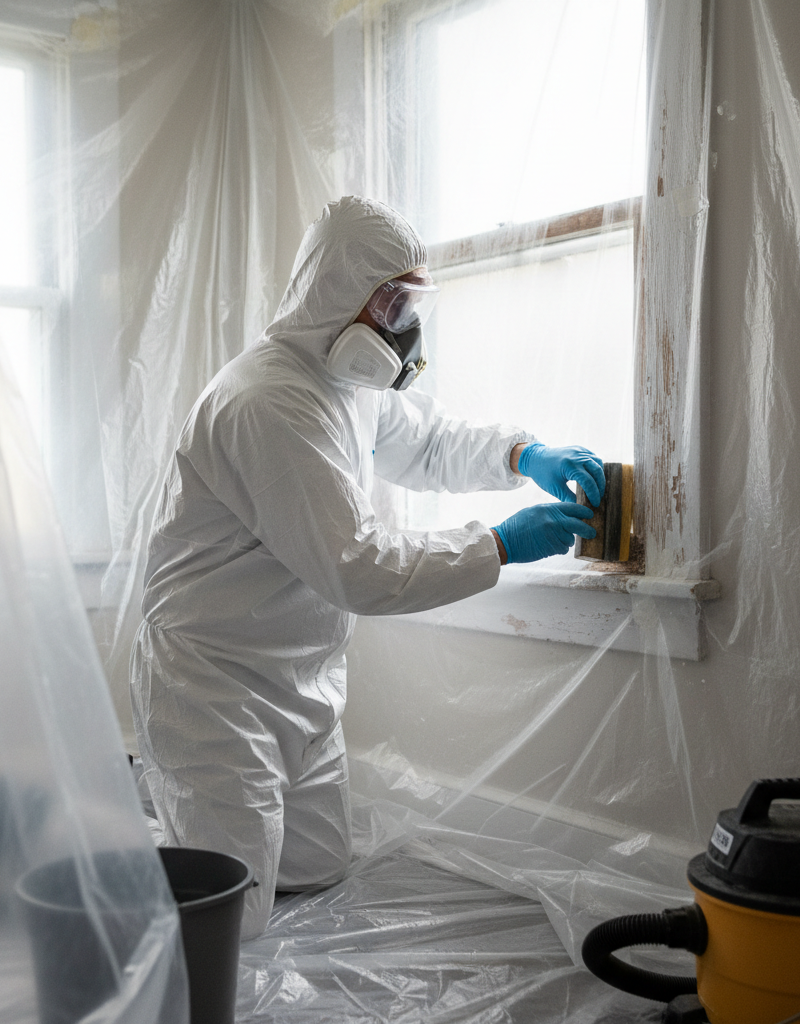
When you sand a painted window sill, for instance, the friction grinds the lead paint into a fine, respirable dust. Drilling into a wall coated with lead paint creates lead-laden shavings and dust. Scraping loose paint generates flakes and dust. Even simply opening and closing a painted window or door can create friction points that release dust over time, especially if the paint layers have built up. This microscopic dust, measured in micrometers, can easily become airborne and be inhaled deep into the lungs. Once inhaled or ingested (e.g., from touching a contaminated surface and then putting hands in the mouth), lead enters the bloodstream and can accumulate in bones and organs. Because children's brains are still developing and they tend to put their hands in their mouths more often, they are far more susceptible to lead's devastating effects at lower exposure levels than adults. Understanding this mechanism – that the danger comes from dust created by mechanical disturbance – is critical for mitigating risk.
Step-by-Step Fix
For the purposes of this guide, we are focusing on containing and cleaning lead dust after a small, unavoidable disturbance, or for general prevention during minor work. For any significant renovation, demolition, or large-scale paint removal in a pre-1978 home, always consult with a certified lead abatement professional. This DIY section is for small-scale, carefully controlled tasks. Your "fix" here is really a "prevention and cleanup" strategy.
-
Understand Your Risk and Test — Before you even think about starting, know if you're working with lead. If your home was built before 1978, assume lead is present unless testing proves otherwise.
- Testing: Purchase a lead paint test kit from a hardware store. These kits usually involve rubbing a chemical swab on the painted surface; a color change indicates lead. Test multiple layers and areas, as lead paint might be covered by newer, lead-free coats. For more definitive results, consider professional testing by a certified inspector, especially for larger projects.
- "If this doesn't work": If your test kit is inconclusive or you can't reach certain areas, err on the side of caution and treat all suspect paint as if it contains lead.
-
Prepare Your Workspace — Containment is your first line of defense against lead dust spreading.
- Clear the Room: Remove all furniture, curtains, rugs, and anything else removable from the work area. If items can't be removed, cover them completely with two layers of 6-mil plastic sheeting and seal the edges with painter's tape.
- Seal Off the Area: Close and seal all doors, windows, and HVAC vents in the workroom with 6-mil plastic sheeting and painter's tape. The goal is to create a negative pressure environment (drawing air into the room, not out) or at least prevent dust from escaping.
- Floor Protection: Cover the entire floor of the work area with two layers of 6-mil plastic sheeting, extending it up the walls by at least 6 inches. Tape all seams and edges securely.
-
Gear Up for Safety — Personal protective equipment (PPE) is non-negotiable for lead-safe work.
- Respirator: A NIOSH-approved N100 or P100 respirator is essential. Dust masks are not sufficient. Ensure it fits properly to create a tight seal.
- Disposable Coveralls: Wear disposable coveralls over your regular clothes to prevent lead dust from contaminating your clothing. Duct tape the cuffs of the coveralls over your gloves and boots.
- Gloves and Eye Protection: Heavy-duty work gloves and safety glasses or goggles are necessary. Do not remove them until after you've completed the initial cleanup.
-
Embrace Wet Methods — Dry sanding or scraping aggressively aerosolizes lead dust. Wet methods significantly reduce airborne dust.
- Wet Sanding: Lightly mist the painted surface with water before sanding. Use a sanding sponge or fine-grit sandpaper that can be kept damp.
- Wet Scraping: Use a spray bottle to wet the paint surfaces you intend to scrape. Scrape carefully, focusing on small sections and keeping the area damp.
- "If this doesn't work": Some tasks, like drilling, cannot be done wet. In these cases, use local exhaust ventilation (e.g., a HEPA vacuum hose held next to the drill bit) and be extra diligent with containment and cleanup.
-
Clean as You Go — Don't let dust accumulate. Frequent interim cleaning reduces overall contamination.
- HEPA Vacuum: Use a HEPA-filtered vacuum cleaner (not a standard shop vac or household vacuum, as these will re-distribute lead dust) to collect all visible debris and dust regularly during your work.
- Wet Wiping: After vacuuming, wet-wipe all surfaces repeatedly with heavy-duty cleaning wipes or disposable cloths saturated with a general all-purpose cleaner. Change wipes/cloths frequently.
-
Decontaminate Your Tools and Person — Before leaving the contained area, prevent tracked contamination.
- Tool Clean-up: Lightly mist your tools with water and wipe them down with damp, disposable cloths. Place all contaminated tools in a heavy-duty plastic bag to prevent spread.
- "PPE Doffing": While still inside the contained area, carefully remove your disposable coveralls by peeling them off inside out. Place them into a heavy-duty trash bag. Remove gloves and place them in the bag. Finally, remove your respirator and eye protection. Exit the contained area, then immediately shower and wash your hair thoroughly.
-
Double-Bag and Dispose Properly — Lead waste cannot be treated like regular trash.
- Seal All Waste: Place all plastic sheeting, used wipes, cloths, gloves, and coveralls into heavy-duty trash bags. Double-bag them (one bag inside another) and seal tightly with duct tape.
- Local Regulations: Contact your local waste management facility or health department for specific guidance on disposing of lead-contaminated waste. Regulations vary by municipality and state.
-
Final Clean-up and Re-occupancy — The area isn't safe until meticulously cleaned.
- HEPA Vacuum Again: After removing all plastic and waste, HEPA vacuum the entire work area, focusing on corners, crevices, and any surfaces that might have accumulated dust.
- Triple Wet-Wipe: Perform at least two, preferably three, thorough wet-wipes of all surfaces (walls, floors, windowsills, trim) using fresh, damp cloths for each wipe. Overlap your wiping strokes.
- Re-test (Optional but Recommended): Consider conducting another lead test or hiring a professional to ensure the area is truly lead-safe, especially if children will occupy the space.
Common Causes
The primary "cause" of lead paint becoming a hazard is human activity that disturbs it. Here are the most common scenarios:
- Sanding Painted Surfaces: Dry sanding is arguably the biggest culprit, turning solid lead paint into fine, breathable dust that can travel throughout a home.
- Scraping Peeling Paint: Attempting to remove old, peeling paint with dry scrapers or wire brushes creates significant lead dust and chips.
- Drilling or Cutting into Painted Walls: Activities like installing shelves, running new wiring, or cutting into drywall for renovations can release lead particles from underlying paint layers.
- Demolition: Tearing down walls, removing old trim, or any other destructive renovation activity in a pre-1978 home will inevitably create substantial amounts of lead dust and debris.
- Impact or Friction Surfaces: Windows and doors that stick, rub, or are frequently opened and closed can generate lead dust from painted sashes and frames over time. Floors beneath these areas often become contaminated.
- Paint Deterioration: Simply allowing lead-based paint to crack, chip, or peel due to age, moisture, or poor surface preparation can release lead-laden flakes and dust into the environment.
- Aggressive Cleaning: Using abrasive sponges or harsh chemicals on lead-painted surfaces can degrade the paint and release lead particles.
Common Mistakes
Amateur DIYers often make critical errors when dealing with suspected lead paint. Avoid these common pitfalls to protect your health and your home:
- Assuming No Lead if Paint Looks New: Just because the top layer of paint is modern doesn't mean older, lead-based layers aren't underneath. Always test or assume lead if the house is pre-1978.
- Using Standard Vacuums: Regular shop vacuums or household vacuums do not have HEPA filters and will simply spread lead dust into the air, making the problem worse.
- Dry Sanding or Scraping: This is the most dangerous mistake. Dry methods create huge amounts of airborne lead dust. Always use wet methods or specialized tools with HEPA dust collection.
- Inadequate PPE: Relying on simple dust masks or no protection at all. A NIOSH-approved N100 or P100 respirator is critical; standard paper masks offer almost no protection against lead dust.
- Poor Containment: Failing to seal off the work area properly allows lead dust to escape and contaminate other parts of the house, often unknowingly.
- Improper Disposal: Throwing lead-contaminated waste into regular household trash. This can contaminate landfills and expose waste handlers. Always double-bag and follow local disposal guidelines.
- Skipping Post-Project Cleaning: Thinking the job is done once the visible debris is gone. Microscopic lead dust requires meticulous, multi-stage wet cleaning and HEPA vacuuming to truly remove.
Cost & Time Breakdown
| Task | DIY cost | Pro cost | Time |
|---|---|---|---|
| Lead Test Kit | $20–$50 | Included in insp | 5–10 min |
| PPE (Respirator, coveralls) | $40–$80 | Included | 5 min to don |
| Plastic Sheeting & Tape | $20–$40 | Included | 30–60 min |
| HEPA Vacuum Rental (daily) | $40–$70/day | Included | N/A |
| Wet Cleaning Supplies | $10–$20 | Included | 30–60 min |
| Total for Small Project | $130–$260 | $300–$1,000+ | 2–4 hours |
Note: Professional lead abatement for larger projects (e.g., window replacement, whole-room renovation) can range from several thousand to tens of thousands of dollars, depending on the scope.
Tips & Prevention
- Regular Inspections: Periodically check painted surfaces in older homes for chipping, peeling, or chalking paint, especially in high-friction areas like windows and doors. Address issues promptly by carefully sealing or encapsulating the paint, rather than disturbing it.
- Keep Surfaces Clean: Routinely wet-wipe floors, windowsills, and other surfaces in older homes with an all-purpose cleaner to remove any settled dust, even if you haven't done recent work. This is particularly important in homes with young children.
- Wash Hands Frequently: Encourage all household members, especially children, to wash their hands often, particularly before eating. This helps prevent accidental ingestion of lead dust.
- Plant-Based Paint Strippers: If paint stripping is absolutely necessary on a small, contained item, research less aggressive, chemical-free, or plant-based strippers. Always test in an inconspicuous area and use extreme caution, wet methods, and full PPE.
- Consider Encapsulation: For intact lead paint, "encapsulation" (covering it with a specialized coating or new material like drywall) can be a safer alternative to removal. This should only be done if the underlying lead paint is stable.
- Landscaping Precautions: If lead paint was disturbed outdoors, the soil around the house might be contaminated. Prevent children from playing in bare soil near the house; consider planting ground cover or installing barriers like mulch or gravel.
When to Call a Professional
While small-scale, highly contained tasks can be managed by a diligent DIYer, there are clear situations where a licensed and certified lead abatement professional is not just recommended, but essential. If a lead test confirms widespread lead-based paint, especially in deteriorating condition, or if your project involves large-scale disturbing activities like replacing windows, major demolition, or extensive paint removal (more than a few square feet), do not attempt it yourself. Any work on lead components of the plumbing system or situations involving visible dust clouds during attempted DIY should also immediately prompt a call to a professional. These experts have the specialized equipment, training, and certifications required to safely contain, remove, and dispose of lead hazards, ensuring your home is truly safe without risking your family's health or facing legal penalties for improper lead-safe work practices.
Related Articles
Keep troubleshooting with these hand-picked guides from FixlyGuide:
- 7 Inspection Red Flags That Secretly Signal a $20,000 Bill — Don't let your dream home become a money pit. Many buyers and even some inspectors overlook subtle home inspection red flags that lead to f…
- 7 Hidden Equity Drains Costing You Thousands Annually — Your home is an asset, but silent problems like minor leaks, poor insulation, and deferred maintenance can drain its value. Discover the se…
- The 12 Checks That Prevent 80% of Costly Home Repairs — Don't wait for a disaster. Our comprehensive monthly home maintenance checklist reveals the surprising, simple tasks that catch small issue…
- The 3 Hidden Ways Your — Uncover the surprising habits and hidden household issues that are silently increasing your homeownership costs and learn how to fix them.
- The Hidden Reason Your AC Isn't Cooling (And 7 Fixes Homeowners Miss) — If your central AC isn't cooling your home, the culprit often lies in an overlooked issue that's simple to fix, preventing costly professio…
- Why Your Wall Switch Feels Hot: The Hidden Danger Most Homeowners Miss — A hot light switch isn't just uncomfortable; it's a critical warning sign of potential electrical hazards that demand immediate attention.
Get the print-ready PDF of this guide
A clean, ad-free, printable version you can keep on your phone or pin to the workshop wall. Free with a FixlyGuide account.
- Print-optimized layout
- Tools, materials & every step included
- Saved to your account
This article was independently written by FixlyGuide based on the source topic.
Frequently asked questions
How do I know if my home has lead paint?+
The simplest way is to use a lead paint test kit, available at hardware stores. For a more definitive answer, especially for extensive projects, hire a certified lead inspector to test various surfaces in your home. Assume lead is present if your home was built before 1978.
What are the common health risks of lead paint exposure?+
Lead exposure can cause serious health problems, particularly in young children and pregnant women. Risks include developmental delays, learning difficulties, nervous system damage, kidney damage, and behavioral issues. In adults, it can lead to high blood pressure, joint pain, and memory problems.
Can I simply paint over lead-based paint?+
Yes, if the lead-based paint is in good condition (not chipping, peeling, or chalking), painting over it (encapsulation) can be a temporary solution to contain the lead. However, this doesn't remove the lead hazard, and future disturbance of the underlying layers will still be problematic. For long-term solutions, professional abatement is best.
What's the difference between a regular vacuum and a HEPA vacuum for lead dust?+
Standard vacuums, including most shop vacs, have filters that are too coarse and will simply allow microscopic lead dust particles to pass through and become airborne. A HEPA (High-Efficiency Particulate Air) vacuum has a specialized filter designed to capture 99.97% of particles 0.3 micrometers in size, effectively trapping lead dust without recirculating it.


Discussion
Loading comments…