
Tools & materials you'll need
Affiliate linksAs an Amazon Associate FixlyGuide earns from qualifying purchases — at no extra cost to you. Prices and availability are accurate as of publication and subject to change.
Quick Answer
Replacing a deadbolt lock is a simple, yet impactful, DIY project that can be completed in about 15-30 minutes with basic tools. It's a key security upgrade that doesn't require specialized skills. This guide will walk you through the process, ensuring your home is more secure with a fresh deadbolt.
The Problem
You arrive home one day, and your key doesn't turn smoothly in the deadbolt. Or perhaps, after years of use, the lock feels loose, the finish is worn, or you've simply moved into a new home and want to rekey for security. An aging or failing deadbolt isn't just an inconvenience; it's a significant security vulnerability. Worn internal mechanisms can make a lock easier to pick or force open, and older locks may lack modern anti-bumping or anti-drilling features. Even a slightly sticky lock, while seemingly minor, can indicate internal wear that compromises its integrity. Replacing it promptly is a smart, proactive step to safeguard your home and loved ones.
How It Works
Understanding how a deadbolt functions makes replacing it much clearer. A deadbolt, unlike a spring latch, operates with a solid metal bolt that extends deep into the door frame, providing superior security. When you turn the key (or thumb turn), it manipulates a cam mechanism inside the cylinder. This cam, in turn, engages a tailpiece (a flat metal bar) that rotates to push or pull the bolt. The bolt itself is housed within a main body that's secured to the door with long through-bolts. An outside escutcheon plate, the cylinder, and the interior thumb turn assembly all work in concert. The strike plate, a metal reinforcement plate, is mortised into the door frame to provide a sturdy receptacle for the bolt. When swapping a deadbolt, you're essentially replacing these components – the exterior cylinder, interior thumb turn, the bolt mechanism, and sometimes the strike plate – ensuring all parts are fresh, aligned, and optimized for security and smooth operation. Modern deadbolts often feature hardened steel rollers orPins to resist drilling and picking, a significant improvement over older designs.
Step-by-Step Fix
1. Gather Your Tools and New Deadbolt – Preparation is key for a smooth swap.
Before you begin, ensure you have your new deadbolt ready. Most residential deadbolts are standard size, fitting doors with a cross-bore hole of 2 1/8 inches and a backset of 2 3/8 or 2 3/4 inches. The backset is the distance from the edge of the door to the center of the cross-bore hole. Check your existing deadbolt's backset when purchasing a replacement; most new deadbolts come with an adjustable backset mechanism.
- Tools: Phillips head screwdriver, flathead screwdriver (optional, for prying).
- New Deadbolt: Ensure it matches the finish and handing (if applicable for lever-style locks, though less critical for deadbolts) of your existing hardware.
2. Remove the Interior Thumb Turn Assembly – Exposing the inner workings.
On the interior side of the door, locate the two visible screws that secure the thumb turn assembly to the door. These screws typically go directly through the door and into the exterior cylinder assembly. Using a Phillips head screwdriver, loosen and remove both screws. Keep them in a safe place, though you'll likely use new screws provided with your new deadbolt. Once the screws are out, the interior thumb turn assembly should pull straight off the door. You might need to wiggle it gently.
3. Remove the Exterior Cylinder – Freeing the outside portion.
With the interior assembly removed, the exterior cylinder will likely be loose. It might still be connected by the tailpiece passing through the bolt mechanism. Gently pull the exterior cylinder away from the door. If it's a bit stubborn, use a flathead screwdriver to carefully pry it from the edge, being mindful not to scratch the door's finish. The tailpiece should slide out of the bolt mechanism easily.
4. Remove the Deadbolt Latch/Bolt Mechanism – Taking out the core.
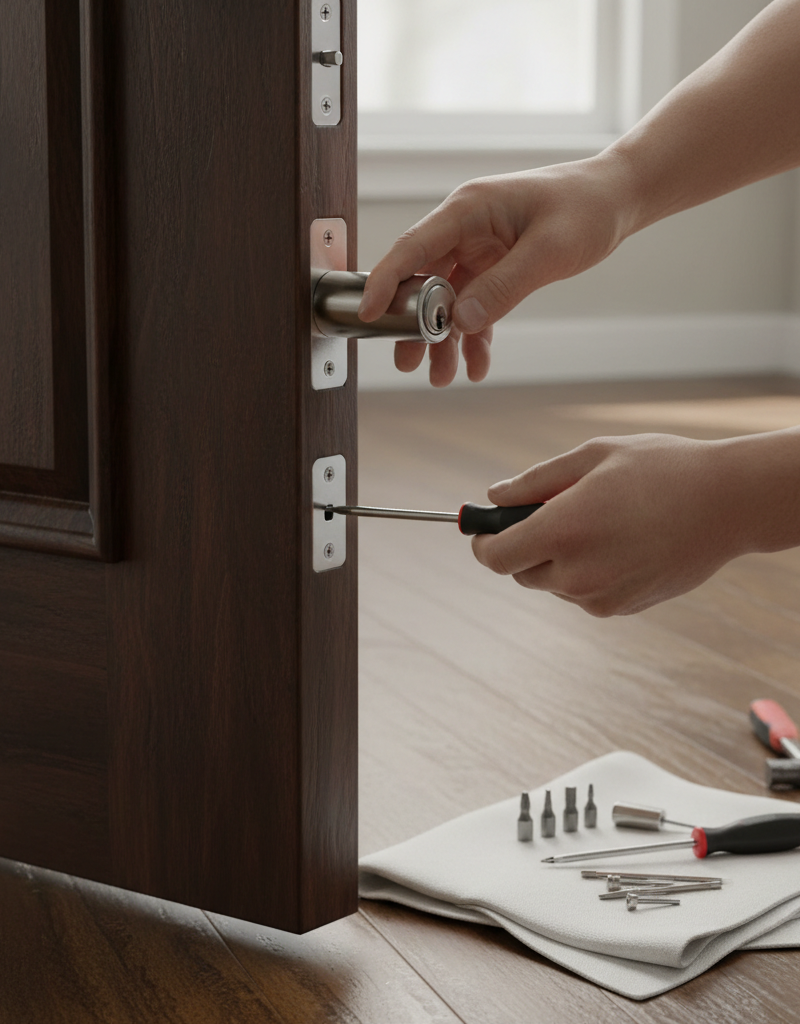
Now, focus on the bolt mechanism located on the edge of the door. There will be two smaller screws (often Phillips head) securing the faceplate of the bolt mechanism to the door's edge. Remove these screws. Once both screws are out, slide the entire bolt assembly out of the door's edge. You may need to pull it firmly. Note the orientation of the bolt – specifically, whether the rounded or beveled edge faces the door frame, as this is important for smooth closing.
5. Install the New Deadbolt Latch/Bolt Mechanism – Inserting the new heart of the lock.
Take your new deadbolt's latch/bolt mechanism. Many new deadbolts feature an adjustable backset; twist or slide the mechanism to select either 2 3/8 inches or 2 3/4 inches, matching your existing door's backset. Ensure the beveled side of the bolt faces the direction the door closes. Slide the new bolt mechanism into the bore hole on the edge of the door. Secure it with the two smaller screws provided with your new deadbolt. Tighten them snugly, but do not overtighten, as this can impede the bolt's movement.
6. Install the Exterior Cylinder – Connecting the outside world.
Insert the exterior cylinder of the new deadbolt into the cross-bore hole from the outside of the door. Make sure the long, flat tailpiece correctly aligns with the slot in the new bolt mechanism. It should slide in without force. If it doesn't align, gently rotate the tailpiece or the bolt mechanism slightly until they mate.
7. Install the Interior Thumb Turn Assembly – Bringing it all together.
Align the interior thumb turn assembly with the cross-bore hole, ensuring the tailpiece from the exterior cylinder passes through the central opening on the interior assembly. Also, pay attention to the two screw posts extending from the exterior cylinder assembly – these need to pass through the corresponding holes in the interior assembly. Once aligned, slide the interior assembly onto the door. Secure it with the two long screws provided with your new deadbolt, passing them through the interior assembly and into the screw posts of the exterior cylinder. Alternate tightening each screw a little at a time to ensure even pressure and proper alignment. Do not overtighten; stop when the assembly is firm against the door and the lock operates smoothly.
8. Test the Deadbolt Operation – Crucial final check.
Before closing the door, test the deadbolt several times with both the thumb turn and your new key. The bolt should extend and retract smoothly without sticking or requiring excessive force. Close the door and test again. The bolt should slide easily into the strike plate hole in the door frame. If it snags, you may need to adjust the strike plate (see Step 9).
9. Inspect and Adjust the Strike Plate (If Necessary) – Ensuring perfect alignment.
If your new deadbolt snags or struggles to extend fully into the door frame when the door is closed, the problem might be with the existing strike plate's alignment. Remove the two screws holding the old strike plate in the door frame. If the new deadbolt came with a new strike plate, compare it to the old one. Often, newer strike plates offer more robust security. Install the new strike plate, ensuring it's flush with the mortise in the door frame. If realignment is needed, you might need to slightly enlarge the mortise or the hole in the door frame using a chisel or file. Always test operation thoroughly after any adjustment.
Common Causes
- Worn Internal Mechanisms: Over years of use, the springs, pins, and cam within a deadbolt can wear out, leading to sticking, difficult key turning, or a loose feeling. This is the most common reason for deadbolt failure.
- Misalignment: The bolt may not align perfectly with the strike plate in the door frame due to door or frame shifting, or loose hinges. This can cause the lock to bind.
- Security Upgrade: Homeowners often replace deadbolts simply to enhance security, moving from basic locks to those with anti-pick, anti-bump, or drill-resistant features.
- Lost Keys/Rekeying: Rather than rekeying an old, potentially worn lock, many choose to replace the entire unit for guaranteed new keys and renewed functionality.
- Aesthetics: A desire to update the hardware's finish to match new decor is a common, albeit non-mechanical, reason for replacement.
- Damaged Lock: A lock might be damaged from an attempted break-in, requiring full replacement for security restoration.
Common Mistakes
- Ignoring Backset Measurement: Failing to measure the backset (distance from door edge to center of the cross-bore) leads to purchasing an incompatible deadbolt. Always check this before buying a new lock, though most modern deadbolts are adjustable.
- Overtightening Screws: Tightening the mounting screws too much can warp the lock's internal mechanism, causing it to bind, stick, or operate roughly. Tighten until snug, then test operation.
- Incorrect Latch Orientation: Installing the bolt mechanism with the beveled side facing the wrong direction will make the door difficult to close and latch smoothly. The bevel should always face the door frame when the door is closing.
- Skipping the Strike Plate Check: Assuming the old strike plate is fine without checking alignment or upgrading to a new, potentially stronger one. A misaligned or flimsy strike plate undermines the security of even the best deadbolt.
- Forcing Components: If parts don't slide together easily, don't force them. This usually indicates misalignment of the tailpiece, bolt, or screw posts. Forcing can bend or break components. Realign gently.
- Disregarding Door Handing (for some levers): While less critical for deadbolts, some keyed entry levers require specific handing. Always check product specifications if you're also replacing a handle set.
Cost & Time Breakdown
| Task | DIY Cost | Pro Cost | Time |
|---|---|---|---|
| New Deadbolt Purchase | $20–$100 | Included | 15–30 min (shopping) |
| Remove Old Deadbolt | $0 | Included | 5–10 minutes |
| Install New Deadbolt | $0 | Included | 10–20 minutes |
| Test & Adjust | $0 | Included | 5–10 minutes |
| Total | $20–$100 | $75–$200+ | 15–45 minutes |
Tips & Prevention
- Lubricate Annually: Use a graphite-based lubricant (not oil-based sprays) annually to keep the internal mechanisms smooth and prevent sticking. Spray a small amount into the keyway and turn the key several times. Avoid WD-40 or similar, which can attract dirt.
- Check Door Alignment: Periodically inspect your door hinges and frame. A sagging door or loose hinges can cause the deadbolt to misalign with the strike plate, leading to binding. Tighten hinge screws as needed.
- Upgrade for Security: Consider upgrading to a deadbolt with anti-pick, anti-bump, and drill-resistant features. Look for locks that meet ANSI/BHMA Grade 1 or Grade 2 standards for residential security.
- Correct Backset: When purchasing a new deadbolt, ensure it matches your door's backset (2 3/8 inches or 2 3/4 inches). Most new deadbolts come with an adjustable latch, but it's good to confirm.
- Test After Installation: Always thoroughly test the deadbolt with the door open and closed after installation. Pay attention to how smoothly the bolt extends and retracts.
- Match Finishes: If replacing only the deadbolt, try to match the finish of your existing door hardware for a cohesive look. Common finishes include satin nickel, antique brass, and bronze.
When to Call a Professional
While replacing a deadbolt is a straightforward DIY task, there are specific situations where calling a licensed locksmith or professional handyman is advisable. If you encounter significant damage to the door itself, such as a severely splintered or rotted cross-bore hole that prevents proper mounting, a professional can repair the door or recommend a specialized solution. Similarly, if your door frame is damaged, preventing the secure installation of the strike plate, a professional can properly reinforce or repair the frame. If, after following all steps, the lock still binds, doesn't operate smoothly, or you're unsure about the security of your installation, a locksmith can diagnose the issue and ensure the deadbolt is correctly and securely fitted, providing peace of mind that your home is adequately protected. Do not compromise on security if you're unsure.
Related Articles
Keep troubleshooting with these hand-picked guides from FixlyGuide:
- The 5-Minute Secret to a Smooth-Turning Door Lock (Stop Jiggling That Key!) — Restore your sticky door lock to butter-smooth operation with this simple, five-minute lubricant trick, saving you frustration and potentia…
- The 3 Hidden Reasons Your Door Won't Latch (And the Easy Fixes) — Discover the surprising reasons your interior door isn't latching and how to quickly diagnose and fix the issue with simple tools.
- The 3 Hidden Reasons Your Door Won't Latch (And the Easy Fixes) — A door that won't latch properly is a common household nuisance, often caused by simple issues that are easy to diagnose and repair.
- The 3 Hidden Reasons Your Door Won't Latch (And the Easy DIY Fixes) — Frustrated by a door that refuses to latch? Discover the common culprits behind this annoying problem and learn simple, effective DIY fixes…
- The 3 Hidden Reasons Your Window Won't Stay Up (And the Easy Fixes) — Before you call a repairman, learn the three most common reasons your double-hung window won't stay open and how to fix them yourself.
- Is Your Gutter Sagging After Every Storm? The Hidden Flaw Most Homeowners Miss — Discover the overlooked reason your gutters sag after every storm and learn the lasting fix that most homeowners miss.
Recommended for DIYers & woodworkers
Sponsored
The Top 20 Tools for Workshops of Any Budget
No stationary machines or power tools required — plus 3 fundamental tools that can't be bought at any price.
Get the free guide
Ted's Woodworking — The #1 Woodworking Resource
Detailed instructions, dimensioned drawings, materials & cutting lists, and 3D schematics for every skill level.
See the plansSponsored: links above are affiliate links. FixlyGuide may earn a commission on qualifying purchases — at no extra cost to you.
Frequently asked questions
How long does it take to replace a deadbolt?+
On average, replacing a deadbolt takes about 15-30 minutes for most homeowners. It's a quick and simple DIY project that can significantly improve your home's security.
Do all deadbolts fit all doors?+
Most residential deadbolts are designed to fit standard door preparations (2 1/8-inch cross-bore hole and 1-inch edge bore hole). Many new deadbolts feature an adjustable backset (2 3/8 inches or 2 3/4 inches) to accommodate different door configurations.
What tools do I need to replace a deadbolt?+
You'll primarily need a Phillips head screwdriver. A flathead screwdriver might be useful for prying if components are stuck. Your new deadbolt will come with all necessary screws.
When should I replace, not rekey, a deadbolt?+
You should generally replace a deadbolt if it's old, worn out, sticky, or lacks modern security features like anti-bump or anti-drill protection. Replacement ensures you get a completely new, fully functional, and often more secure locking mechanism, rather than just changing the internal pins.
Can a loose deadbolt be fixed without replacing it?+
A loose deadbolt can sometimes be fixed by tightening the mounting screws on the interior thumb turn assembly. However, if the looseness is due to worn internal parts or a damaged door, replacement is often the better and more secure solution.


Discussion
Loading comments…