
Tools & materials you'll need
Affiliate links- AmazonFlathead screwdriverCommonly used for most adjustments
- AmazonSprinkler adjustment keyMay be required for specific brands like Hunter or Rain Bird
- AmazonGarden spade or trowelTo clear debris or expose buried heads
- AmazonWater pressure gaugeOptional, for advanced diagnostics if spray is consistently weak
As an Amazon Associate FixlyGuide earns from qualifying purchases — at no extra cost to you. Prices and availability are accurate as of publication and subject to change.
How it works
Your sprinkler system relies on water pressure and precisely engineered heads to distribute water. There are two primary types of residential sprinkler heads: fixed spray heads and rotary heads (rotors). Understanding their distinct mechanisms is key to proper adjustment.
Fixed spray heads are simple and have no moving parts during operation. Water flows up through the body and is forced out through a stationary nozzle. The nozzle itself determines the spray pattern, which is a fixed arc, such as a 90-degree quarter circle, 180-degree half circle, or a full 360-degree circle. The distance of the spray (throw) is primarily governed by the system's water pressure and a small radius adjustment screw on top. Turning this screw into the water stream obstructs the flow, reducing the spray distance. Beneath the nozzle sits a small filter basket that prevents debris from clogging the orifice.
Rotary heads (rotors) are more complex. Pressurized water enters the body and drives an internal turbine. This turbine powers a set of gears that cause the head's turret to rotate slowly. The water is forced out of a single, concentrated stream through a nozzle. The arc of rotation is set by adjusting two mechanical stops. One stop is fixed, establishing the starting point of the spray pattern. The other is adjustable, determining where the head reverses direction. The throw distance is controlled by a radius reduction screw, which partially intersects the water stream, or more significantly, by swapping out the entire nozzle with one that has a different flow rate (GPM) and trajectory.
Step-by-Step Fix
Before starting, run the specific sprinkler zone for a few minutes. Observe which heads are misaligned, overspraying, or underspraying. Place small flags or stakes to mark the heads that require adjustment so you don't lose track of them when the system is off.
1. Identify Your Sprinkler Head Type — Determine the adjustment method. Observe the head in action. If it emits a continuous, fan-shaped spray without moving, it is a fixed spray head. If it rotates and projects a single stream of water across the lawn, it is a rotary head. This distinction is critical as the adjustment procedures for arc and distance are entirely different.
2. Gather Your Tools — Prepare for the specific head model. Your tool requirements will vary by brand and type.
- Tools (Spray Heads): Typically a small flathead screwdriver. Some older models may have textured collars that can be adjusted by hand.
- Tools (Rotor Heads): A brand-specific adjustment key is best (e.g., the green Hunter key or the Rain Bird key/screwdriver tool). A small flathead screwdriver can work for many adjustments, but the key is often required to access recessed settings or lift the riser.
- Tools (General): A pair of sprinkler head pliers or a small spade can be useful for holding the riser steady or digging out impacted dirt.
3. Clear Debris from the Sprinkler Head — Ensure the head can operate freely. With the system off, use your hands or a small trowel to clear any grass, mulch, or soil that has built up around the sprinkler head. The top of the head should be flush with the soil level and able to pop up and retract without obstruction. Packed dirt is a common cause of a head failing to pop up or rotate properly.
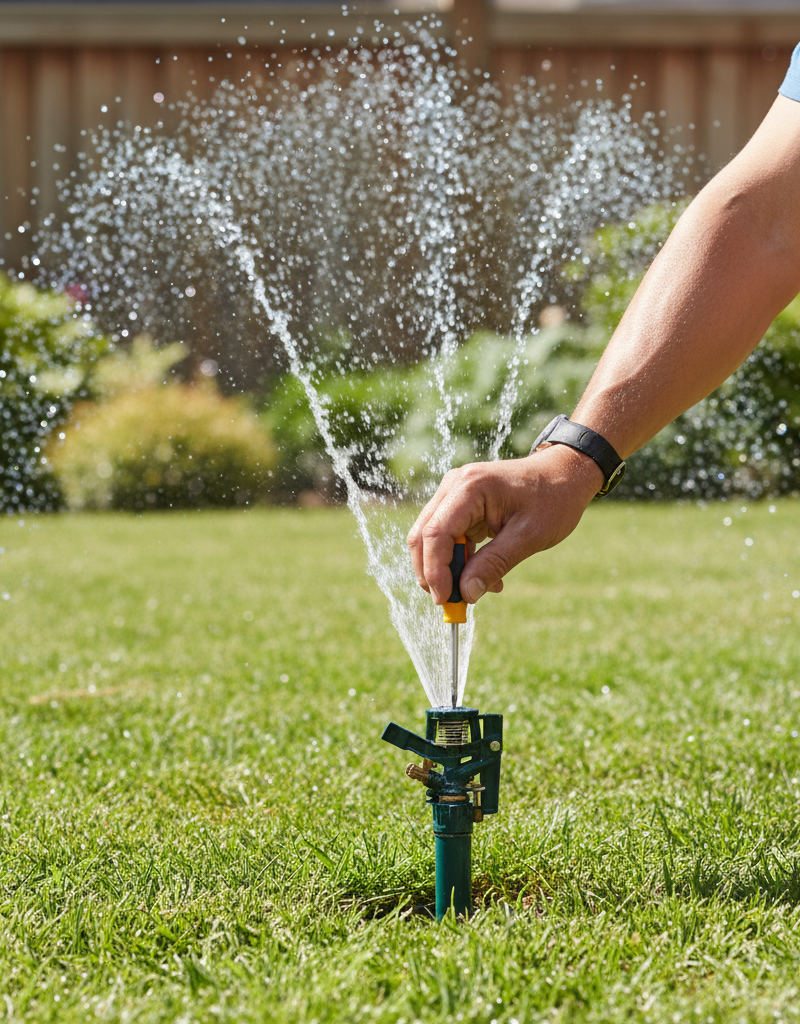
4. Adjusting a Fixed Spray Head — Set the pattern and distance for fan-style spray. These adjustments are typically made with the system off. To check your work, you will need to run the zone briefly.
- To adjust the spray pattern (arc position): Firmly grasp the pop-up riser stem with one hand. With the other hand, twist the entire stem until the nozzle's spray pattern is aimed in the correct direction. For most models, the entire stem rotates. For some, you may need to unscrew and reposition a ratcheting collar just below the nozzle.
- To adjust the spray distance (throw): Locate the small metal screw in the center of the nozzle. Using a flathead screwdriver, turn the screw clockwise to decrease the spray distance. Turning it counter-clockwise will increase the distance, but do not unscrew it completely, as it can pop out under water pressure. Limit this adjustment to a 25% reduction in radius; more than that will disrupt the spray pattern and cause poor coverage.
- If this doesn't work: If the spray is weak or distorted, the filter may be clogged. Unscrew the entire nozzle assembly (the top piece) from the pop-up stem. Below it is a small filter basket. Remove the basket, rinse it thoroughly, and reinstall it before reattaching the nozzle.
5. Locating the Fixed Left Stop on a Rotor Head — Establish the starting point of the arc. This is the most important step for adjusting rotors. With the system off, use your fingers to twist the turret all the way to the right until it stops. Then, twist it all the way to the left until it stops. This hard stop on the left is the fixed starting point of its arc. To align it, grasp the entire pop-up riser body (below the turret) and rotate the whole assembly until the nozzle points toward the left-most edge of your desired watering area (e.g., the edge of a driveway). All arc adjustments are made relative to this fixed left edge.
6. Adjusting the Arc on a Rotor Head — Set the watering pattern from 40° to 360°. With the left stop set, you can now adjust the right stop to define the total arc of rotation. This adjustment is made while the sprinkler is running.
- Tools: Use the brand-specific key or a small flathead screwdriver.
- Action (Hunter Models): Insert the plastic end of the Hunter key into the "ARC" adjustment socket on top of the head. While the head is rotating, turn the key clockwise to increase the arc and counter-clockwise to decrease it. You will see the right stop change its position relative to the fixed left one.
- Action (Rain Bird Models): Use a flathead screwdriver in the arc adjustment slot (marked with +/- arrows). Turn the screw towards the plus symbol (+) to increase the arc and towards the minus symbol (-) to decrease it.
- Safety: Keep your face away from the top of the sprinkler head while it's running, as the stream of water is powerful and can contain small debris.
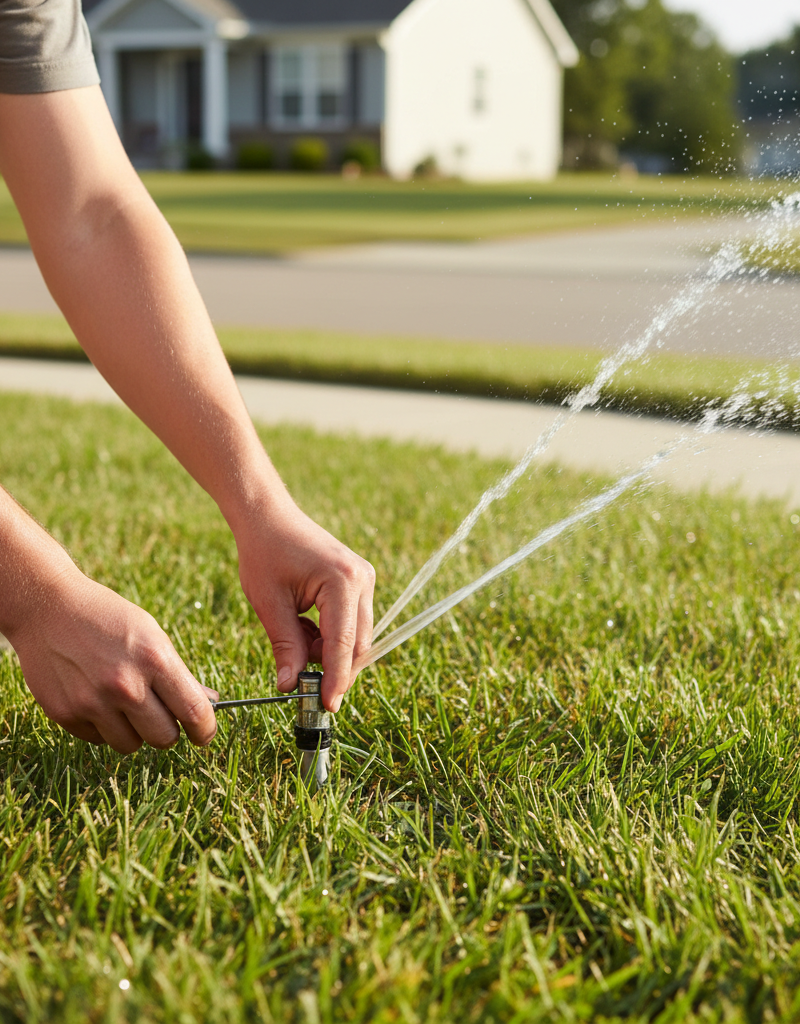
7. Adjusting the Spray Distance on a Rotor Head — Control the throw radius. This adjustment controls how far the stream of water shoots.
- Tools: Small flathead screwdriver or rotor key.
- Action: Locate the radius reduction screw, which is a metal screw sitting directly in the path of the water stream as it exits the nozzle. Turn this screw clockwise to push it further into the water stream, which diffuses the spray and reduces the throw distance. You can typically reduce the radius by up to 25% before the pattern becomes too distorted. Turning it counter-clockwise pulls it out of the stream, increasing distance up to the nozzle's maximum potential.
- If this doesn't work: If you need a significant change in distance (more than 25%), you must change the nozzle.
8. Changing a Rotor Nozzle for Major Distance Changes — The professional method for throw adjustment. If the radius screw isn't enough, replacing the nozzle is the correct solution. Rotors come with a "nozzle tree" containing multiple options with different GPM and distance ratings.
- Tools: Rotor key with hex driver or a flathead screwdriver.
- Action: Use the key or a screwdriver to turn the radius reduction screw clockwise until it pins the nozzle in place. Then, use needle-nose pliers or the "prongs" on the adjustment key to pry the old nozzle out. Select a new nozzle from the tree—lower numbers typically mean shorter distance and lower GPM. Slide the new nozzle in, ensuring it aligns correctly, and then turn the radius reduction screw counter-clockwise to release it. Run the system to verify the new distance.
9. Checking for Head-to-Head Coverage — Ensure a uniform watering pattern. The goal of an irrigation system is not for one head to cover an entire area, but for the spray from one head to reach the next head in the zone. This overlap ensures even water distribution and prevents dry spots from forming between sprinklers. As you make adjustments, verify that the throw of each head reaches its neighbors.
10. Run a Final System Test — Verify all adjustments. Turn the zone on one last time and watch each adjusted head run through a full cycle. Look for overspray onto pavement, buildings, or fences. Check for dry spots between heads. Make minor final tweaks to the radius or arc settings as needed.
Common mistakes
- Adjusting arc instead of radius. Homeowners often try to shorten the spray distance by drastically reducing the arc. This just waters a smaller slice of the lawn more intensely. Use the radius reduction screw for distance and the arc adjustment for the sweep pattern.
- Over-tightening the radius reduction screw. Cranking the screw down more than 25-30% of the way ruins the spray pattern, causing misting close to the head and poor coverage at the far end. For major distance reductions, change the nozzle itself.
- Misaligning the fixed left stop on rotors. If you adjust a rotor's arc without first setting its fixed left starting point, the entire pattern will be aimed in the wrong direction. Always hold the riser and physically rotate the entire body to aim the left stop first.
- Forcing a rotor's turret by hand. Twisting a rotor's turret against its gears while it's operating or stationary can strip the internal gear drive. Always rotate the turret gently by hand with the system off to find the stops.
- Ignoring a clogged filter or nozzle. If performance is poor, always check for debris before making adjustments. A partially clogged nozzle or filter screen is often the real culprit behind weak spray or a distorted pattern. Unscrew the nozzle and clean the components before adjusting settings.
- Using the wrong tool. Jamming a screwdriver into a key-only adjustment slot can strip the plastic mechanism, making future adjustments impossible. Use the manufacturer-provided key for a proper fit and function.
Cost & time breakdown
This table assumes a basic understanding of the system and that no major repairs are needed. Costs reflect typical retail prices for parts.
| Task | DIY Cost | Pro Cost | Time |
|---|---|---|---|
| Adjusting a single sprinkler head | $0 - $8 | $85 - $125 (service call) | 5-10 minutes |
| Adjusting an entire 5-head zone | $0 - $8 | $95 - $150 | 30-45 minutes |
| Replacing a rotor nozzle | $1 - $3 | Included in service call | 5 minutes per head |
| Cleaning a head filter | $0 | Included in service call | 5 minutes per head |
| Replacing a broken spray head | $3 - $7 | $100 - $160 | 15-20 minutes |
| Replacing a broken rotor head | $12 - $25 | $120 - $185 | 20-30 minutes |
Note: The "Pro Cost" typically includes a minimum service call fee and covers the first hour of labor.
When to call a pro
While adjusting sprinkler heads is a manageable DIY task, certain symptoms point to larger system issues that require professional diagnosis. Contact an irrigation specialist if you encounter:
- An entire zone will not turn on. This often indicates a problem beyond the sprinkler head, such as a faulty solenoid on the zone valve, a cut wire between the controller and the valve, or a problem with the controller itself.
- Persistent low pressure across a whole zone. If all the heads in one zone have weak spray or fail to pop up fully, you may have a leak in the underground lateral line for that zone or a malfunctioning zone valve that isn't opening completely. A single head with low pressure is a clog; a whole zone with low pressure is a system fault.
- Heads that will not pop up or retract. If clearing debris doesn't solve the problem, the head's internal seal or spring may have failed. More seriously, low system-wide pressure from a mainline leak or failing pump could be the cause.
- Water continuously leaks from one or more heads after the zone shuts off. This is known as "low-head drainage" and can be fixed with check valves. However, if water leaks constantly even when the system is off, it signals a zone valve that is stuck partially open and needs to be rebuilt or replaced.
Prevention & maintenance
Proactive maintenance prevents most adjustment issues and extends the life of your irrigation system.
- Perform seasonal checks. At the beginning and end of the watering season, run each zone and walk your property. Look for clogged nozzles, misaligned heads, leaks, and heads that have been damaged by lawnmowers or foot traffic.
- Clean filters annually. At least once a year, unscrew the nozzles on your spray heads and pull out the filter screens. Rinse them of sediment and grit to ensure maximum flow and prevent blockages.
- Observe a full watering cycle monthly. Don't just rely on a green lawn as proof the system is working. Once a month, watch your system run. Landscaping grows, soil settles, and heads get knocked askew. A quick visual inspection can catch overspray and coverage gaps before they cause problems.
- Flag your sprinkler heads. Before aerating or dethatching your lawn, place small flags at each sprinkler head location. This simple step can prevent costly damage from heavy equipment.
- Proper winterization. In climates with freezing temperatures, it's critical to have your system professionally blown out with an air compressor each fall. This removes water from the lines, valves, and heads, preventing cracks from ice expansion.
- Keep grass trimmed around heads. Use a string trimmer to carefully clear grass away from sprinkler heads. This ensures they can pop up fully and rotate without being obstructed by thick turf.
Related Articles
Keep troubleshooting with these hand-picked guides from FixlyGuide:
- Your Sprinkler: Losing $1,000s in 5 Common Goofs? — Adjusting sprinkler spray patterns ensures efficient watering, prevents water waste, and promotes a healthy lawn by directing water precise…
- The 3 Hidden Reasons Your Sprinkler Head Won't Pop Up (And How to Fix Them) — Frustrated by a sprinkler head that won't rise? Discover the top three culprits behind this common irrigation issue and how to resolve them…
- The #1 Mistake Homeowners Make Adjusting Sprinklers (and How to Fix It in 5 Minutes) — Even advanced sprinkler heads can go rogue, wasting water and harming your lawn. Learn to quickly diagnose and adjust their spray patterns.
- How Often to Water Your Lawn in Summer: A Homeowner's Guide — Watering your lawn correctly in summer is crucial for its health and appearance, preventing common issues like browning and shallow root gr…
- The #1 Mowing Mistake That Starves Your Lawn (And How to Fix It in Minutes) — Learn the surprising reason your lawn might be struggling despite regular mowing and how a simple adjustment can lead to healthier, more vi…
- The #1 Mistake Homeowners Make After Finding Missing Shingles (And How to Fix It Right) — Discover the crucial steps to take after a storm rips shingles from your roof, ensuring a proper, lasting repair and preventing costly futu…
Frequently asked questions
How do I know if my sprinkler heads need adjustment?+
Look for dry patches in your lawn, water spraying onto sidewalks, driveways, or your house, or areas that are consistently oversaturated. These are all signs your sprinkler pattern needs attention.
What tools do I need to adjust sprinkler heads?+
For most adjustments, a flathead screwdriver is sufficient. Some brands, like Rain Bird or Hunter, provide a special plastic adjustment key with their heads. Check the manufacturer's instructions for your specific model.
Can I adjust the water pressure at the sprinkler head?+
While you can't directly adjust the main system pressure at the head, adjusting the throw screw on a sprinkler head effectively creates resistance, reducing the distance the water travels. For true pressure regulation, you might need pressure-regulating sprinkler bodies or a master pressure regulator for the entire zone.
How often should I check my sprinkler adjustments?+
It's a good practice to check your sprinkler patterns at least once or twice a year, especially at the beginning of the watering season. Also, re-check them if you notice any landscape changes, like new plantings blocking spray, or after any work around the sprinkler heads.

Discussion
Loading comments…