
Tools & materials you'll need
Affiliate linksAs an Amazon Associate FixlyGuide earns from qualifying purchases — at no extra cost to you. Prices and availability are accurate as of publication and subject to change.
Quick Answer
Achieving a professional, long-lasting paint finish starts long before you open a can of paint. The quick answer to flawless walls lies in meticulous preparation: cleaning away dirt and grease, repairing every crack and hole, smoothing out rough patches with sanding, and applying the right primer. Neglecting any of these steps will not only compromise the final look of your paint but also its adhesion and durability, potentially leading to a frustrating redo much sooner than expected.
The Problem
You've spent hours agonizing over paint swatches, picked the perfect color, and you're ready to transform your living space. But pause for a moment. Have you considered the canvas you're about to paint? Most homeowners jump straight into painting, only to be disappointed by a finish that looks less than professional. Bumps, cracks, peeling paint, or a patchy appearance after a fresh coat are not usually due to the paint itself or your brushing technique, but rather a lack of proper wall preparation. These imperfections show through or even cause adhesion issues, ruining the aesthetic appeal and longevity of your hard work.
How It Works
Paint adheres best to a clean, dry, smooth, and uniformly porous surface. When you apply paint to a wall, the liquid vehicle (water or solvent) evaporates, leaving behind solid pigments and binders that form a film. This film needs to bond mechanically and chemically with the substrate (your wall). Dirt, grease, and grime act as release agents, preventing proper adhesion. Old, loose paint chips provide an unstable surface that will peel off, taking your new paint with it. Cracks and holes create shadows and uneven textures that readily show through even multiple coats of paint. Glossy surfaces are too smooth for paint to grip effectively, leading to poor adhesion. Primer, on the other hand, creates a uniform, slightly textured surface that paint can readily bond to. It also seals porous surfaces (like new drywall or patched areas) to prevent the paint from soaking in unevenly, which would result in patchy, dull spots. By taking the time to prepare the walls, you are essentially creating the ideal foundation for the paint to perform as intended, ensuring maximum adhesion, an even sheen, and a beautiful, durable finish.
Step-by-Step Fix
Proper wall preparation involves several essential steps that build upon each other. Skipping a step means compromising the results of the next, so follow them in order for the best outcome.
Step 1: Clear the Room & Protect Surfaces — Create a safe, accessible workspace.
Before any wall prep begins, remove all furniture, decor, and wall hangings from the room. If large furniture cannot be removed, move it to the center of the room and cover it completely with plastic sheeting. Lay drop cloths or old sheets on the floor to protect against dust, paint drips, and spills. Remove all outlet covers and switch plates, placing their screws in a small, labeled bag so you don't lose them. Use painter's tape to cover any light fixtures, window frames, or trim you don't intend to paint.
- Safety Note: Ensure adequate ventilation when cleaning and painting by opening windows. If working with strong cleaners or oil-based paints, wear a respirator mask.
Step 2: Inspect Walls & Remove Old Fasteners — Identify all imperfections and obstacles.
Walk around the room and inspect every wall section thoroughly. Look for nail holes, cracks, peeling paint, stains, and any loose debris. Use a flat-head screwdriver or a pair of pliers to remove any old picture hooks, anchors, or nails left in the wall. Be gentle to avoid creating larger holes. If paint has peeled or bubbled, use a paint scraper to carefully remove all loose material. The goal is to have only firmly adhered paint remaining.
- If you find lead paint: If your home was built before 1978, there's a possibility of lead-based paint. Do not sand or scrape lead paint yourself as it releases hazardous dust. Consult a lead abatement professional.
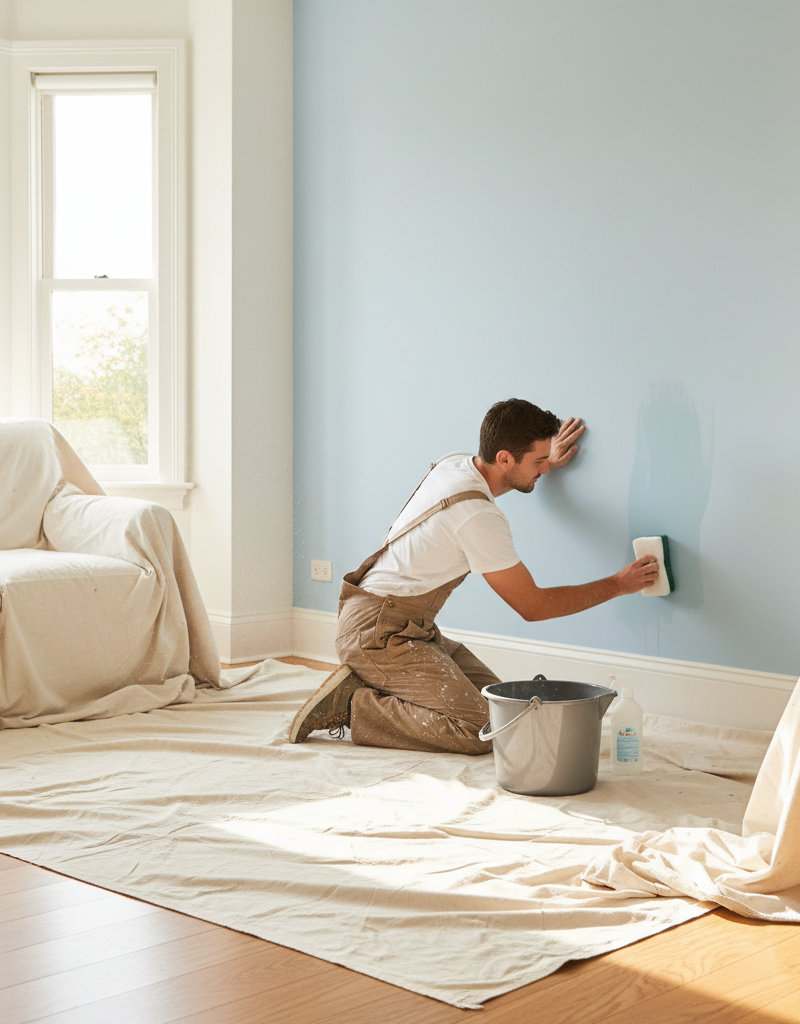
Step 3: Clean the Walls Thoroughly — Remove dirt, grease, and grime for optimal adhesion.
Mix a solution of warm water and a mild all-purpose cleaner or a specialized paint-prep cleaner (like TSP substitute) in a bucket. Dip a sponge into the solution, wring it out so it's damp, not dripping, and wipe down the walls from top to bottom. Pay extra attention to high-traffic areas, kitchens, and bathrooms, where grease and grime can accumulate. For stubborn stains, a slightly more concentrated solution or a scrub brush might be needed. After cleaning, rinse the walls with a second sponge dipped in clean water, wiping away any cleaner residue. Allow the walls to dry completely, which can take several hours depending on humidity and ventilation. You can use a fan to speed up the process.
- Tools: Two buckets, two large sponges, clean rags.
- If walls are exceptionally greasy (e.g., kitchen): Use a degreaser specifically designed for kitchen surfaces before your general cleaning solution.
Step 4: Patch Holes & Cracks — Create a smooth, uniform surface.
For small nail holes, use lightweight spackle. Apply a small amount with a putty knife, pressing it into the hole, and then scrape away any excess, leaving a smooth surface. For larger holes or cracks (up to about 1/2 inch), use joint compound or a heavier-duty spackling paste. Apply it in thin layers, allowing each layer to dry completely before applying the next, until the patch is flush with the wall. For wider or deeper cracks, you may need to widen them slightly with the corner of a putty knife to ensure the compound fully fills the void. For drywall damage larger than 1/2 inch, you will need to use a drywall patch kit or cut out and replace a section of drywall; this is beyond the scope of a basic guide and warrants a professional or a dedicated drywall repair tutorial.
- Material Tip: Keep a damp rag handy to clean your putty knife frequently, ensuring smooth application.
Step 5: Sand Patches & Rough Areas — Achieve a perfectly smooth canvas.
Once all patched areas are completely dry (check manufacturer's instructions, but typically 2-24 hours), it's time to sand. Use 120-grit or 150-grit sandpaper on a sanding block. Gently sand the patched areas until they are perfectly smooth and flush with the surrounding wall. Feather the edges of the patch slightly into the existing wall to eliminate any abrupt transitions. Also, lightly sand any glossy areas (like old oil-based paint or semi-gloss trim) to de-gloss them, which helps new paint adhere better. Don't press too hard; let the sandpaper do the work. The goal is smoothness, not removal of significant material.
- Safety Note: Always wear a dust mask or respirator when sanding to avoid inhaling fine dust particles.
Step 6: Dust the Walls — Remove all sanding residue.
Sanding creates fine dust that, if left on the walls, will mix with your paint and create a gritty finish or prevent proper adhesion. After sanding, use a dry, soft cloth, a tack cloth, or the brush attachment of your vacuum cleaner to thoroughly remove all dust from the walls, baseboards, and any protected trim. Start from the top and work your way down. A final wipe with a slightly damp (almost dry) cloth can help pick up any remaining microscopic dust particles, but ensure the wall dries completely afterward before proceeding to priming.
Step 7: Apply Primer — The essential final prep for a flawless finish.
Priming is often overlooked but is critical for a professional result. Choose the right primer for your situation: a stain-blocking primer for water stains or smoke damage, a bonding primer for glossy surfaces, or a standard all-purpose primer for new drywall or previously painted walls in good condition. Apply a thin, even coat of primer using a roller for large areas and a brush for edges and corners, just as you would apply paint. Ensure full coverage, but avoid thick spots or drips. Allow the primer to dry completely according to the manufacturer's instructions. In some cases, especially when covering dark colors with a light one, or heavily repaired walls, a second coat of primer might be beneficial.
- Primer Type: Don't skip a stain-blocking primer if you have any water stains or smoke residue, even if you cleaned them. They will bleed through regular primer and paint.
- Pro Tip: Tint your primer if you're painting a dark color over a light wall, or vice versa, to reduce the number of paint coats needed.
Common Causes
- Dust & Grime: Over time, walls accumulate dust, dirt, cooking grease, and general household grime. Painting over these contaminants prevents the new paint from bonding properly, leading to peeling or an uneven finish.
- Unrepaired Imperfections: Small nail holes, nail pops, chips, and hairline cracks are common in walls. Leaving these unrepaired means they will be glaringly obvious once the new paint job is complete, diminishing the aesthetic.
- Glossy or Uneven Surfaces: Old paint with a high sheen (like semi-gloss or high-gloss) doesn't provide enough
Related Articles
Keep troubleshooting with these hand-picked guides from FixlyGuide:
- The 7 Mistakes That Ruin a Paint Job (Before You Even Open the Can) — Proper wall preparation is the unseen foundation of a flawless interior paint job, preventing issues like peeling, uneven finishes, and vis…
- The 7 Critical Mistakes Almost Everyone Makes When Painting a Room — Unlock the secrets to a flawless, professional-looking paint job by avoiding common pitfalls and mastering essential techniques for perfect…
- The 4-Inch Drywall Hole Fix: Why Spackle Alone Always Fails — Fix a small drywall hole (up to 4 inches) properly with a simple patch kit and avoid common mistakes that lead to visible repairs.
- The 1 Common Mistake That Makes Drywall Patches Obvious (And How to Fix It) — Learn the common pitfall in drywall repair that leaves unsightly patches and how to achieve a seamless, invisible fix every time.
- The 15-Minute Drywall Patch Secret (No Mudding Skills Required) — Discover how to quickly and easily patch a small hole in drywall using a simple method that doesn't require advanced mudding skills.
- The 3 Hidden Mistakes That Make Your Deck Sealer Fail (And How to Fix Them) — Resealing your wood deck protects it from weather and extends its life. Learn how to avoid common mistakes for a long-lasting finish and vi…
Recommended for DIYers & woodworkers
Sponsored
The Top 20 Tools for Workshops of Any Budget
No stationary machines or power tools required — plus 3 fundamental tools that can't be bought at any price.
Get the free guide
Ted's Woodworking — The #1 Woodworking Resource
Detailed instructions, dimensioned drawings, materials & cutting lists, and 3D schematics for every skill level.
See the plansSponsored: links above are affiliate links. FixlyGuide may earn a commission on qualifying purchases — at no extra cost to you.
Frequently asked questions
How long should walls dry after cleaning before painting?+
Walls should be completely dry, which can take anywhere from 2 to 24 hours depending on the humidity and temperature in the room. Using fans or opening windows can help speed up the drying process. Any moisture left on the wall can compromise paint adhesion.
Do I always need to prime walls before painting?+
While not always strictly necessary for walls in perfect condition with a similar existing paint color, priming is highly recommended. It ensures better paint adhesion, provides a uniform surface for an even finish, helps to cover stains, and can reduce the number of paint coats needed, saving you time and money in the long run. It's essential for new drywall, patched areas, or when changing drastically dark to light colors.
What kind of caulk should I use for gaps before painting?+
For interior gaps around trim, windows, or doors before painting, use an acrylic latex caulk that is paintable. Choose one that is flexible and mildew-resistant, especially in bathrooms. Apply a thin, even bead and smooth it with a wet finger or tool before it dries.
Can I paint over existing wallpaper?+
Painting over wallpaper is generally not recommended as it rarely yields a professional or long-lasting finish. Adhesion can be poor, and seams or textures of the wallpaper will likely show through. Plus, moisture from the paint can reactivate wallpaper adhesive, causing bubbles or peeling. It's best to remove wallpaper before painting.
What grit sandpaper should I use for walls?+
For sanding patched areas to make them smooth and flush with the wall, use 120-grit or 150-grit sandpaper. For very lightly de-glossing existing glossy paint, you can use 180-grit or 220-grit. Always use a sanding block for even pressure.


Discussion
Loading comments…