
Tools & materials you'll need
Affiliate linksAs an Amazon Associate FixlyGuide earns from qualifying purchases — at no extra cost to you. Prices and availability are accurate as of publication and subject to change.
Quick Answer
A chimney leaking during rain is most often caused by a damaged or deteriorated chimney cap or flashing, allowing water to penetrate the structure. Less common causes include masonry issues or a clogged chimney crown, but cap and flashing are the usual suspects. Addressing these issues promptly is crucial to prevent extensive water damage to your chimney, attic, and interior spaces.
The Problem
There's a distinct dread that comes with seeing water stains on your ceiling or walls near the fireplace after a rainstorm. A leaky chimney isn't just an unsightly nuisance; it's a silent destroyer that can lead to significant structural damage, mold growth, and costly repairs if left unaddressed. Many homeowners immediately suspect roof damage, but the chimney itself is often the primary point of failure. Water can infiltrate through several components: the chimney cap, the crown, the flashing, or even the masonry itself. Each drip you see or stain you discover represents water that has bypassed your home's defenses, working its way through your attic and potentially compromising rafters, insulation, and drywall. Ignoring a leaky chimney means inviting rot, mildew, and a substantial repair bill down the line, not to mention creating a fire hazard if the flue liner becomes compromised.
How It Works
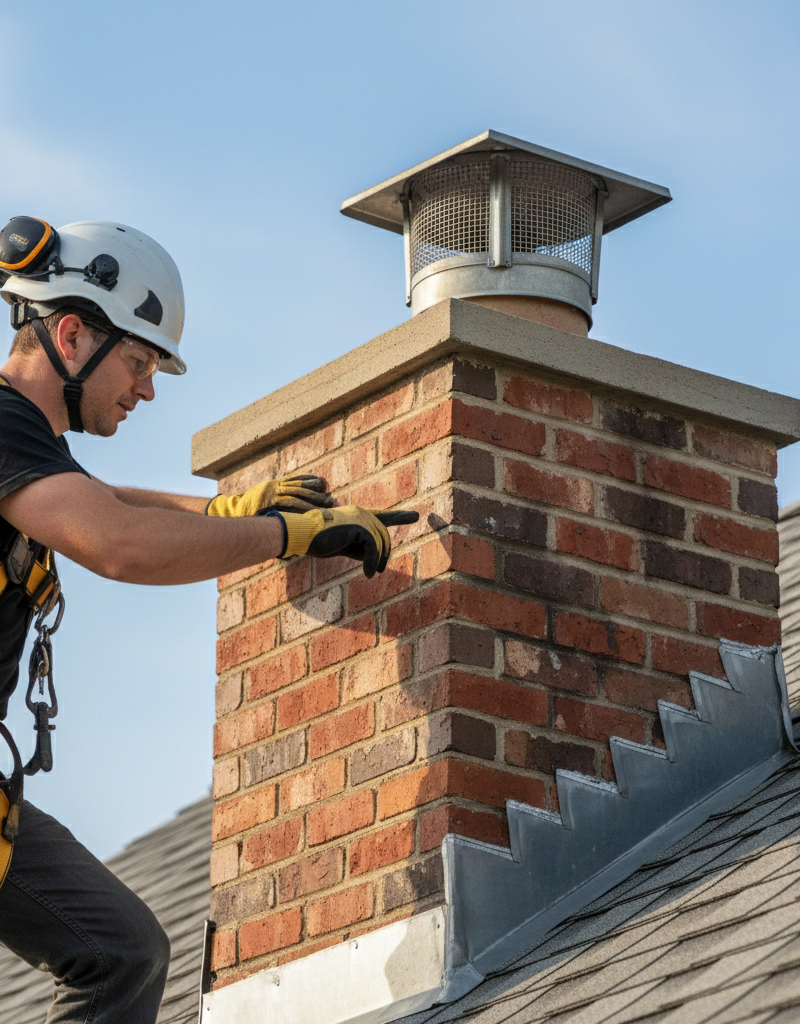
The chimney, despite its robust appearance, is a complex system designed to safely vent combustion byproducts while also standing as a weather-resistant structure on your roof. Its vulnerability to water lies in several key areas. At the very top, the chimney cap acts like a hat, preventing rain, snow, and animals from entering the flue. Below the cap, the chimney crown is a concrete slab that slopes away from the flue, directing water off the top of the masonry. If the cap is missing or damaged, or if the crown has cracks, water can easily seep directly into the flue or down into the brickwork.
Further down, where the chimney penetrates the roofline, flashing is the critical component. Flashing consists of thin sheets of metal (typically aluminum or copper) that are interwoven with the roofing shingles and sealed to the chimney's sides. This creates a watertight seal, preventing water from running down the chimney and slipping under the shingles into your attic. There are several types of flashing, including step flashing (bent at 90-degree angles and interleaved with shingles) and counter flashing (embedded in the chimney's mortar joints and bent down over the step flashing). Both must be intact and properly sealed. Over time, caulk or sealant around the flashing can degrade, metal can corrode, or movement from thermal expansion and contraction can cause the flashing to pull away from the chimney, creating tiny gaps that become major entry points for water. Even seemingly minor cracks in the mortar joints between bricks or deteriorated brick faces (spalling) can absorb water, which then travels inward.
Step-by-Step Fix
1. Safety First — Before you do anything, ensure your ladder is stable on a firm, level surface. Have a spotter if possible. Never go on a wet or icy roof. Wear sturdy, non-slip shoes. If you're uncomfortable on a ladder or roof, this is a job best left to professionals. Your safety is paramount.
2. Prepare Your Workspace — Gather all necessary tools and materials before ascending. Place a tarp on the ground below your work area to catch any debris. Ensure good weather conditions are expected for several hours.
3. Inspect the Chimney Cap — Visually examine the chimney cap for damage. Look for missing sections, bent metal, significant rust, or gaps where it meets the flue. A damaged cap is a very common entry point for water. If the cap is beyond repair, it will need to be replaced. For minor rust, a wire brush and rust-inhibiting paint can offer a temporary solution.
4. Check the Chimney Crown — Look for cracks, erosion, or missing chunks in the concrete crown. If the crown isn't sloped correctly, water can pool instead of draining. Small hairline cracks can sometimes be sealed with a high-quality, flexible concrete sealant designed for exterior use. Larger cracks or crumbling crowns require a professional to resurface or replace.
5. Examine the Flashing — This is often the primary culprit. Check the metal flashing around the base of the chimney where it meets the roof. Look for: * Loose or bent sections: Wind can lift or bend metal flashing, creating gaps. * Cracked or deteriorated caulk/sealant: The sealant along the top edge of the counter flashing or around exposed nail heads can dry out and crack. * Rust or corrosion: Holes can form in rusted metal. * Incorrect installation: Sometimes, flashing isn't properly interwoven with shingles, leaving it vulnerable to leaks.
6. Clean and Prepare Flashing for Repair — Use a wire brush to remove any loose caulk, rust, or debris from around the flashing and chimney base. A clean, dry surface is essential for proper adhesion of new sealant. If the flashing is merely loose, gently try to press it back into place. For bent or damaged sections, you might be able to carefully reshape them with pliers if the metal isn't too brittle.
7. Apply New Sealant — For minor gaps or deteriorated caulk, apply a generous bead of high-quality, exterior-grade polyurethane sealant specifically designed for roofing and masonry. Ensure the sealant completely fills the gap and creates a continuous, watertight bond between the flashing and the chimney, and between the flashing and the roof shingles. Smooth the sealant with a wet finger or a caulk tool for a professional finish. Re-seal around any exposed nail heads.
8. Inspect Masonry and Mortar Joints — Examine the bricks and mortar for cracks, crumbling, or spalling (flaking/peeling brick surfaces). Water can penetrate porous or damaged mortar. Small cracks can be repaired with a mortar repair caulk or by repointing (removing old mortar and applying new), but extensive damage often indicates a larger issue requiring a chimney sweep or mason.
9. Test the Repair — After the sealant has cured (check product instructions, usually 24-48 hours), observe the chimney during the next rainstorm. If the leak persists, you may have missed a spot, or the problem is more severe than a simple sealant issue, likely requiring professional assessment.
Common Causes
- Damaged or Missing Chimney Cap: The most common entry point for rain directly down the flue.
- Cracked Chimney Crown: Allows water to penetrate the top masonry structure.
- Deteriorated or Improperly Installed Flashing: The primary cause of leaks where the chimney meets the roof, allowing water to enter the attic.
- Cracked Mortar Joints: Over time, weathering can cause mortar to erode or crack, creating pathways for water.
- Spalling Bricks: Bricks that have absorbed water and then frozen and thawed can begin to flake, compromising their integrity and allowing moisture in.
- Condensation: Sometimes, what appears to be a leak is actually condensation forming inside the flue due to inadequate insulation or furnace exhaust issues.
Common Mistakes
- Ignoring the problem: A small leak usually gets worse, leading to much more expensive repairs like rotted rafters or mold.
- Using the wrong sealant: Standard silicone caulk applied to roofing materials often degrades quickly. Use a high-quality, flexible polyurethane roofing/masonry sealant.
- Attempting repairs on a wet roof: This is extremely dangerous and compromises proper adhesion of sealants or patches.
- Spot-treating without full inspection: Sealing one visible leak point without checking the entire chimney for other vulnerabilities means the issue will likely resurface elsewhere.
- Assuming it's a roof issue: While tempting, many roof leaks near chimneys originate from the chimney components themselves. A plumber won't solve this!
- Not understanding the chimney's anatomy: Guessing where the leak is rather than systematically inspecting each component (cap, crown, flashing, masonry) can lead to wasted effort.
Cost & Time Breakdown
| Task | DIY cost | Pro cost | Time |
|---|---|---|---|
| Inspect & Diagnose | $0 | $150–$300 | 30–60 minutes |
| Chimney Cap Replacement | $50–$250 | $300–$800 | 1–2 hours |
| Flashing Repair (Sealant) | $10–$30 | $200–$500 | 30–60 minutes |
| Crown Repair (Minor) | $20–$50 | $400–$1,000 | 1–3 hours |
| Repointing (Small Area) | $30–$70 | $500–$1,500 | 2–4 hours |
| Full Flashing Replacement | $100–$300 | $800–$2,500 | 4–8 hours |
Tips & Prevention
- Annual Chimney Inspection: Have a certified chimney sweep inspect your chimney annually. They can spot small issues before they become major leaks or hazards.
- Routine Visual Checks: From the ground, occasionally look up at your chimney after heavy storms. Note any obvious damage to the cap or visible cracks.
- Trim Overhanging Branches: Branches rubbing against the chimney can damage the cap or flashing over time.
- Maintain Sealants: Every few years, inspect the caulk and sealant around your flashing and crown. Reapply as needed before it deteriorates.
- Install a Quality Chimney Cap: Invest in a durable, stainless steel or copper chimney cap that will withstand the elements better than galvanized steel.
- Ensure Proper Crown Slope: When a crown is replaced or repaired, ensure it has a proper overhang and a slight slope to shed water effectively.
When to Call a Professional
If you're experiencing a persistent chimney leak, particularly after you've attempted minor sealed repairs, it's crucial to call a professional. A certified chimney sweep or a licensed mason specializes in these types of repairs. You should always call a pro if you discern larger structural cracks in the chimney masonry, widespread spalling bricks, or if the chimney flashing requires complete replacement (which involves working with roofing shingles). Any sign of water damage inside your attic (rotting wood, extensive mold) or within the chimney flue itself (deteriorated liner) indicates a serious problem that demands expert assessment. Professionals have the specialized tools, knowledge, and insurance to safely and effectively diagnose and repair complex chimney and roof issues, ensuring the long-term integrity and safety of your home. Do not attempt extensive masonry work, flashing replacement, or work on very tall or steep roofs without professional experience. This is not strictly a plumbing issue, despite the water element; it falls under the purview of chimney and roofing specialists.
Related Articles
Keep troubleshooting with these hand-picked guides from FixlyGuide:
- The Secret Culprit Behind Your Leaky Chimney (It's Not Always the Obvious Fix) — Discover the often-overlooked causes of a leaky chimney during rain and learn how to diagnose and fix these common problems yourself.
- The Secret Cause of Your Leaky Chimney (It's Not Always the Obvious Suspect) — A leaking chimney during rain can signify several issues, often stemming from a deteriorated crown rather than just flashing.
- The Tiny Stain That Betrays a $10,000 Roof Leak (And 5 Ways to Find It) — Discover how to identify subtle signs of a roof leak early, saving your home from extensive and costly water damage before it escalates.
- Is a frozen pipe about to burst? 3 ways to fix it fast — Safely thawing a frozen pipe can prevent costly damage. This guide provides step-by-step instructions for homeowners to resolve a common pl…
- The #1 Mistake Homeowners Make When Their AC Drain Clogs (And The $5 Fix) — Discover the most common error homeowners make when tackling a clogged AC drain line and learn a simple, inexpensive solution to prevent co…
- The Secret Culprit Behind Your AC Blowing Warm Air (It’s Not What You Think) — Discover the unexpected reason your air conditioner is blowing warm air and how a simple, often overlooked fix can restore your home’s cool…
Frequently asked questions
Why does my chimney leak only when it rains heavily?+
Heavy rain can exploit even the smallest, hairline cracks or deteriorated seals that lighter rain might not penetrate. Usually, it points to issues with the chimney cap, crown, or flashing that are overwhelmed by a greater volume of water.
Can a chimney leak affect my furnace or water heater?+
Yes, if the leak allows water into the flue liner system, it can corrode the metal flue, leading to dangerous carbon monoxide leaks from your furnace or water heater. It can also damage the appliance itself, especially if it's a high-efficiency model with specific venting requirements.
How do I know if the leak is from the chimney or the roof?+
Often, if the leak is directly around the chimney structure, it's a chimney issue, particularly with the flashing or masonry. A roof leak usually appears as a wider wet patch on the ceiling, not necessarily concentrating around the chimney. A professional can conduct a water test to pinpoint the exact source.
What's the difference between a chimney cap and a chimney crown?+
The chimney cap is a cover that sits on top of the flue (the 'hat'). The chimney crown is the concrete slab that covers the entire top of the chimney masonry, sloped to shed water away from the flue and exterior walls.


Discussion
Loading comments…