
How it works
Your home's plumbing is a pressurized system designed to deliver water on demand. Noisy pipes are a symptom of a mechanical or hydraulic issue within that system. The sounds you hear—banging, rattling, or thudding—stem from two primary causes: unsecured pipes and hydraulic shock.
First, mechanical vibration occurs when water flows through pipes that are not properly secured to the house's structure. Water has mass and momentum, and as it changes direction at elbows or passes through valves, it exerts force on the pipe. If pipe hangers or clamps are loose, missing, or spaced too far apart, the pipe is free to vibrate, sway, or shudder. This movement causes it to strike against wood studs, joists, or subflooring, creating a rattling or rhythmic thudding sound that persists as long as water is flowing. Hot water lines are particularly susceptible due to thermal expansion and contraction, which can cause ticking and creaking sounds as the pipe lengthens and moves against its supports.
Second, the more dramatic single "BANG" is caused by hydraulic shock, commonly known as water hammer. This happens when a fast-closing valve—like the electric solenoid in a washing machine, dishwasher, or ice maker—abruptly stops the flow of water. The moving column of water crashes to a halt, and its kinetic energy instantly converts into a high-pressure acoustic shockwave. This wave travels backward through the pipe at over 4,000 feet per second, creating pressures that can exceed 500 PSI. This intense pressure spike flexes and shakes the entire pipe run, causing it to slam against framing with significant force, producing the signature loud bang.
Step-by-Step Fix
1. Isolate the Noise Trigger — Systematically identify which appliance or fixture causes the noise. Run the washing machine, flush each toilet, turn faucets on and off one by one, and run the dishwasher. Note if the sound occurs when the water is turned on, while it's running, or precisely when it's shut off. This initial diagnosis is critical for determining the cause.
2. Characterize the Sound — Listen carefully to distinguish between the two main types of pipe noise.
- A rattle, chatter, or rhythmic thumping that continues while water is flowing strongly indicates loose pipes vibrating against a surface.
- A single, sharp "BANG" or "THUD" that happens the instant a valve closes is the classic sign of water hammer (hydraulic shock).
- A faint ticking or creaking, especially when using hot water, is usually due to thermal expansion as the pipe heats up and moves against its supports.
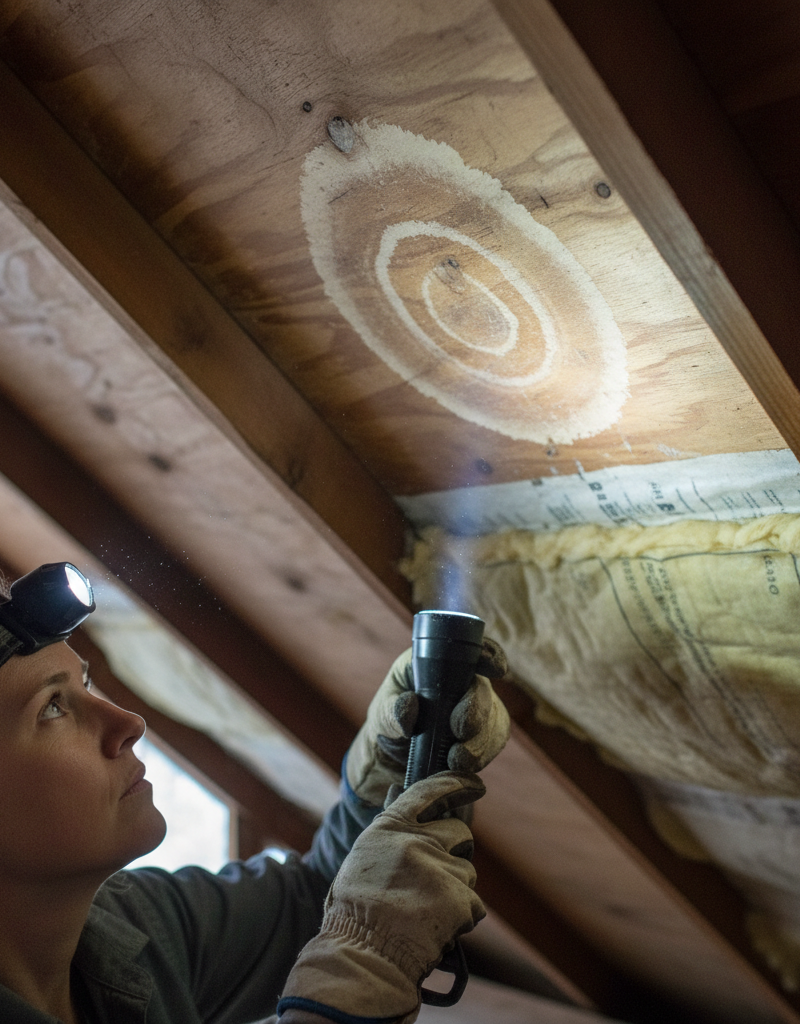
3. Trace the Pipe Route — Once you know the problem fixture, trace the path of its supply lines back toward the main. In basements or crawlspaces, this is straightforward. For pipes inside walls, use a deep-scanning stud finder to locate studs and listen closely against the drywall to follow the sound to its loudest point. This helps you identify the area that needs securing or where an access panel may be required.
4. Check and Adjust House Water Pressure — Before attempting other fixes, verify your home's static water pressure.
- Tools: Water pressure gauge (available at home improvement stores for about $15).
- Attach the gauge to an exterior hose bibb or washing machine cold water valve. Ensure no water is running inside the house. Open the valve fully. The pressure should be between 40 and 60 PSI. If it reads above 80 PSI, it is too high and must be addressed. High pressure exacerbates all pipe noises and damages appliances. To fix this, locate your home’s Pressure Reducing Valve (PRV), usually near the main shutoff, and adjust it or have it replaced.
5. Access the Problem Area — Gain access to the pipes you identified in step 3. This is often in an unfinished basement, crawlspace, or attic. If the noisy pipe is inside a finished wall, you will need to cut a small, exploratory access panel in the drywall.
- Safety: Before cutting drywall, turn off the breaker for that circuit and use a non-contact voltage tester to confirm there is no live wiring. Use a drywall saw and make clean, rectangular cuts that are easy to patch later. Aim for an opening between two studs.
6. Secure Loose Pipes — Examine the pipes for movement. Have a helper trigger the noise while you observe. Secure any pipe that vibrates or moves using the correct type of clamp or strap.
- For copper pipes, use copper-plated or plastic-insulated clamps to prevent galvanic corrosion. Do not use galvanized steel clamps directly on copper.
- For PEX or CPVC pipes, use plastic talon clamps or hangers designed for plastic tubing.
- Space clamps every 3-4 feet on horizontal runs and every 4-6 feet on vertical runs, with extra support near every change in direction (elbows). The pipe should be snug but not crushed.
7. Cushion Pipe Penetrations — Where pipes pass through holes in floor joists or wall studs, they often rattle against the wood. This is a common source of noise. Wrap the pipe at the penetration point with foam pipe insulation or a piece of rubber. Secure the insulation with zip ties or electrical tape. Alternatively, install plastic pipe isolators/insulators, which snap onto the pipe and cushion it within the wood framing.
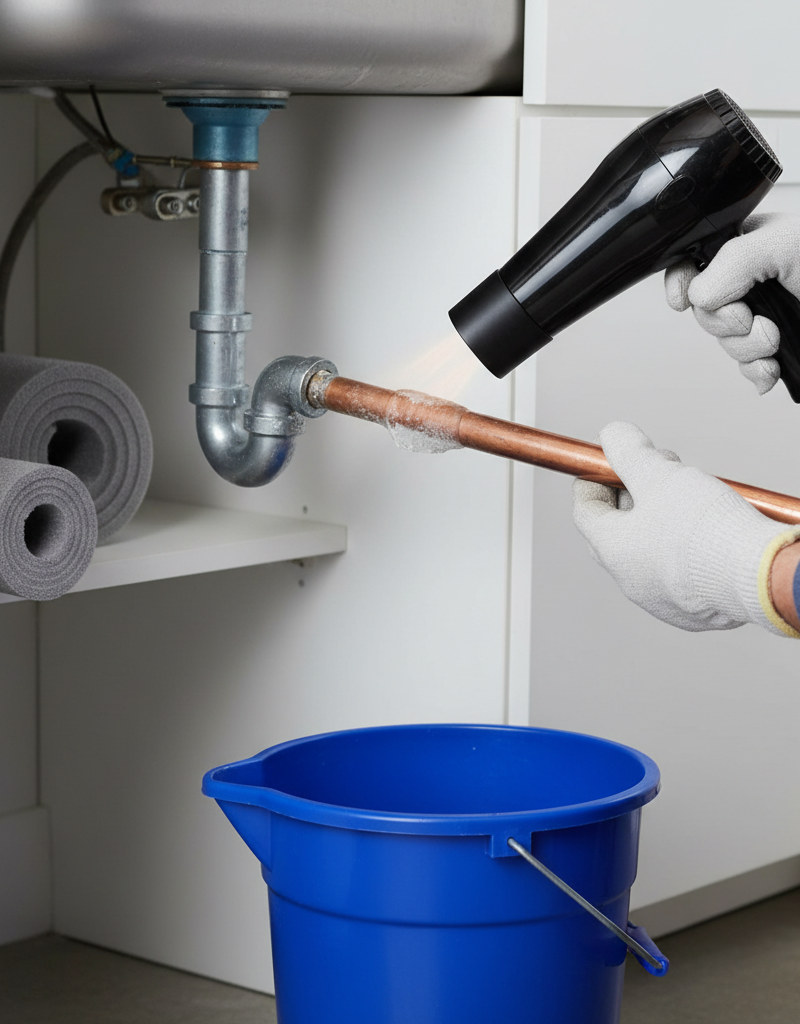
8. Install a Water Hammer Arrestor for Hydraulic Shock — If your issue is a distinct "bang" from a quick-closing valve, installing an arrestor is the definitive solution. These devices contain a piston and a sealed air or gas chamber that absorbs the pressure shockwave.
- For Washing Machines: The easiest fix. Purchase two screw-on arrestors (one for hot, one for cold). Shut off the water supply valves, disconnect the washer hoses, screw an arrestor onto each valve, and then reattach the hoses to the arrestors.
- For Dishwashers or Ice Makers: This requires more work. Install a T-fitting in the water supply line as close to the appliance's inlet valve as possible. Screw a 1/2-inch threaded water hammer arrestor into the open port of the T-fitting. This may require cutting the pipe and using compression or push-to-connect fittings.
9. Address Thermal Expansion Noise — For ticking hot water lines, ensure the clamps are not overtightened. The pipe needs to slide longitudinally as it expands and contracts. Replacing a standard clamp with a plastic-insulated or felt-lined suspension clamp can allow for this movement without noise. Wrapping the pipe in foam insulation can also muffle the sound.
10. Recharge Older Air Chambers (If Applicable) — Homes built before the 1990s may have old-fashioned air chambers—vertical pipes capped off near fixtures. These can become waterlogged and ineffective over time. To recharge them, shut off the main water supply to the house. Open the highest faucet and the lowest faucet (usually in a basement or outdoors) to completely drain the system. The water draining out will be replaced by air in the chambers. Close the lowest faucet first, then turn the main water supply back on slowly. Air will be pushed out of the open faucets; close them once water flows steadily.
11. Repair the Access Hole — If you cut into drywall, you will need to patch it. Attach backing strips (small pieces of wood or plywood) inside the wall opening with screws. Cut a new piece of drywall to fit the hole and screw it to the backing strips. Apply drywall tape over the seams, cover with joint compound, let dry, sand, prime, and paint to match the wall.
Common mistakes
- Ignoring a High-Pressure Reading. Many DIYers jump straight to installing clamps or arrestors without first checking the home's static pressure. If your pressure is over 80 PSI, it is the root cause. It will eventually damage fixture seals, appliance valves, and the water hammer arrestors themselves. Fix the pressure issue first by adjusting or replacing your PRV.
- Using the Wrong Clamp Material. Using a standard galvanized steel clamp directly on a copper pipe will cause galvanic corrosion over time. The two dissimilar metals create a weak electrical current in the presence of moisture, corroding the pipe and leading to pinhole leaks. Always use copper-plated, nylon, or plastic-insulated clamps for copper and brass pipes.
- Overtightening Pipe Clamps. The goal is to prevent movement, not to crush the pipe. Overtightening a clamp, especially on softer copper or PEX tubing, can deform the pipe, restrict water flow, and create a stress point that may fail years later. The clamp should be snug, allowing the pipe to expand and contract lengthwise.
- Installing Water Hammer Arrestors Too Far from the Source. A water hammer arrestor is most effective when installed as close as technologically possible to the quick-closing valve causing the shockwave. Installing it 10 feet down the line significantly reduces its ability to absorb the initial pressure spike. For a washing machine, it must be right at the wall valve.
- Mistaking Thermal Expansion for Water Hammer. A ticking or creaking sound from a hot water pipe is caused by thermal expansion, not hydraulic shock. Attempting to fix it with a water hammer arrestor will have no effect. The solution is to use insulated hangers or slightly loosen clamps to allow for slight linear movement.
- Forgetting to Cushion Penetrations. You can secure a pipe with clamps every two feet, but if it still rests directly on wood where it passes through a joist, it will vibrate and make noise at that contact point. Wrapping the pipe with foam insulation or using plastic isolators at every penetration is a critical and often-overlooked step.
Cost & time breakdown
| Task | DIY Cost | Pro Cost | Time |
|---|---|---|---|
| Diagnose & Secure Accessible Loose Pipes | $15 - $30 (clamps, straps, insulation) | $150 - $300 (1-2 hours labor) | 1 - 3 hours |
| Install Screw-On Washer Arrestors | $25 - $50 (for a pair) | $120 - $200 (minimum service fee) | 15 - 30 minutes |
| Install In-Line Arrestor (T-fitting) | $30 - $60 (arrestor, fittings) | $200 - $400 (parts + 1-2 hours labor) | 1 - 2 hours |
| Check Pressure & Adjust PRV | $15 (pressure gauge) | $120 - $250 (inspection & adjustment) | 30 minutes |
| Replace Pressure Reducing Valve (PRV) | $60 - $120 (valve) | $350 - $600 (parts + labor) | 2 - 4 hours |
| Cut & Repair Drywall Access Panel | $25 - $50 (patch kit, paint) | $250 - $500 (handyman/drywall pro) | 4 - 8 hours (plus drying time) |
When to call a pro
While many pipe noise issues are manageable for a DIYer, certain situations warrant a professional plumber. Call a professional if the banging or rattling is widespread and not isolated to a single fixture, as this points to a systemic issue like improperly sized main lines or a failing whole-house component. If you test your home’s water pressure and it is above 80 PSI, and you are not comfortable locating, adjusting, or replacing the Pressure Reducing Valve (PRV) yourself, this is a job for a pro. The PRV is critical to the safety of your entire plumbing system.
Furthermore, if the noisy pipes are buried deep within a load-bearing wall, floor system, or other structurally sensitive area, it is best to have a plumber and potentially a carpenter assess the situation before cutting. If you hear any hissing, dripping, or see water stains accompanying the noise, stop immediately and call for emergency service, as you likely have an active leak. Finally, if you have methodically secured all visible pipes and installed arrestors on the correct fixtures but the noise persists, a plumber can bring advanced diagnostic experience to identify more obscure problems.
Prevention & maintenance
- Check Water Pressure Annually. Purchase an inexpensive water pressure gauge and test your home's static pressure from an outdoor spigot once a year. It should remain between 40-60 PSI. If it creeps up toward 75-80 PSI, adjust your home's Pressure Reducing Valve or have it serviced.
- Inspect Visible Pipe Supports. Whenever you're in your basement, crawlspace, or attic, take a moment to visually inspect the pipe runs. Look for any clamps that have loosened, fallen off, or broken. Ensure that insulation around pipe penetrations is still in place.
- Recharge Old-Style Air Chambers. If your home was built before the 1990s and has vertical capped pipes near fixtures, they are likely old air chambers. Plan to recharge them once a year by shutting off the main water supply and draining the entire system to allow the chambers to refill with air.
- Choose Appliances with Soft-Close Valves. When purchasing a new washing machine or dishwasher, inquire about models that feature slow-closing or "soft-close" inlet valves. This technology is specifically designed to prevent water hammer at the source.
- Use High-Quality Braided Hoses. For connections to washing machines, dishwashers, and toilets, use braided stainless steel supply lines instead of basic rubber hoses. They are more rigid and durable, providing better resistance to pressure surges and vibrations.
- Ensure Correct Installation During Remodels. If you undertake any plumbing work or a remodel, insist that all new water lines are supported according to modern plumbing codes. This typically means a support every 3-4 feet for horizontal copper pipe, at every floor for vertical pipe, and within 12 inches of any change in direction.
Related Articles
Keep troubleshooting with these hand-picked guides from FixlyGuide:
- Refrigerator Leaking Water? Easy Fixes for Common Causes — A refrigerator leaking water on the floor is a common household problem often caused by a clogged defrost drain or a misaligned drain pan,…
- The $5 Secret to Fixing Your Drip: Why Single-Handle Faucets Leak (and the O-Ring Trick) — A persistent drip from your single-handle faucet is often caused by worn-out O-rings or seals, a common issue with a simple, inexpensive DI…
- Dishwasher Not Draining? Easy Fixes for a Clogged Drain — A dishwasher that won't drain at the end of a cycle is a common problem, often caused by simple clogs or blockages that homeowners can fix…
- The Secret Culprit Behind Your Waning Kitchen Sprayer Pressure (It’s Not Clogging) — Low water pressure from your kitchen sink sprayer often stems from a surprisingly simple issue: a clogged diverter valve or a faulty O-ring…
- Is a frozen pipe about to burst? 3 ways to fix it fast — Safely thawing a frozen pipe can prevent costly damage. This guide provides step-by-step instructions for homeowners to resolve a common pl…
- One Shower, No Hot Water? The Hidden Mixing Valve Trick Plumbers Use — Discover why only one shower in your home might lack hot water and the simple internal fix for a common mixing valve issue, saving you a pl…
Frequently asked questions
What causes water pipes to make banging noises?+
Banging noises in water pipes are usually caused by either loose pipes vibrating against framing or by a phenomenon called 'water hammer,' where sudden changes in water pressure create shockwaves in the pipes.
Can noisy pipes cause damage?+
Yes, persistently noisy pipes, especially those experiencing water hammer, can put stress on fittings and joints over time, potentially leading to leaks or premature wear of your plumbing system.
Do I need a water hammer arrestor?+
If securing loose pipes doesn't stop the banging, particularly when a faucet or appliance quickly shuts off water, a water hammer arrestor can effectively solve the problem by absorbing the pressure shock.

Discussion
Loading comments…