
Tools & materials you'll need
Affiliate links- AmazonRoof rakelong-handled for reaching eaves from the ground
- AmazonSturdy extension ladderensure it's stable on level ground
- AmazonSafety glasses
- AmazonWork gloves
- AmazonUtility knifefor opening chemical bags
- AmazonCaulk gun and sealantfor attic air sealing
- AmazonMeasuring tapefor insulation checks
As an Amazon Associate FixlyGuide earns from qualifying purchases — at no extra cost to you. Prices and availability are accurate as of publication and subject to change.
Quick Answer
Removing ice dams safely and effectively requires a two-pronged approach: immediate, gentle removal of existing ice, and long-term prevention by improving attic insulation and ventilation. Avoid aggressive methods like chipping with hammers or applying rock salt, as these can severely damage your roof, gutters, and landscaping. Focus on creating melt channels with calcium chloride stockings or using a steam cleaner. The most common mistake homeowners make is only treating the symptom (the ice dam) without addressing the root cause: heat escaping into the attic, warming the roof, and melting snow that refreezes at the colder eaves.
The Problem
Ice dams are a common and destructive winter phenomenon. They form when snow on a warmer upper roof melts, drips down to the colder eaves (the overhangs that extend beyond the exterior walls), and refreezes, creating a ridge of ice. This ridge acts like a dam, preventing subsequent meltwater from draining off the roof. The trapped water then backs up under the shingles, leading to leaks, damaged insulation, saturated ceilings, peeling paint, and even structural issues. The weight of large ice dams can also damage gutters, soffits, and fascia, or even pose a falling hazard. Understanding how they form is the first step to preventing and safely removing them.
How It Works
Ice dams are a direct consequence of an imbalance in roof temperature. Here’s the typical sequence:
- Heat Loss from the House: Warm air from your living space, inadequate attic insulation, or unsealed attic bypasses (gaps around light fixtures, plumbing stacks, or electrical wiring) rises into the attic.
- Warming the Roof Deck: This escaping heat warms the underside of the roof deck, causing the snow on the upper parts of the roof to melt, even if the ambient air temperature is below freezing.
- Water Flow to Eaves: The meltwater flows down the roof slope under the blanket of snow.
- Refreezing at Cold Eaves: As this water reaches the unheated eaves – which are typically colder because they extend beyond the heated living space and are not directly warmed by attic heat – it refreezes, forming a barrier of ice.
- Dam Formation and Water Backup: This initial ice buildup acts as a dam. Subsequent meltwater accumulates behind it, unable to drain. This trapped water then backs up, potentially seeping underneath shingles and into the roof sheathing, attic, and walls.
Factors like prolonged cold temperatures, heavy snowfall, and sunny/cloudy cycles can exacerbate ice dam formation. For instance, a sunny day can accelerate melting on the roof surface, only for the water to refreeze quickly once the sun goes down or hits the colder eaves.
Step-by-Step Fix
Safety Note: Working on a snowy or icy roof is inherently dangerous. Always use extreme caution. If possible, work from a safe ladder or invest in professional help, especially if you have a multi-story home or a steeply pitched roof. Wear non-slip footwear and consider using a safety harness.
-
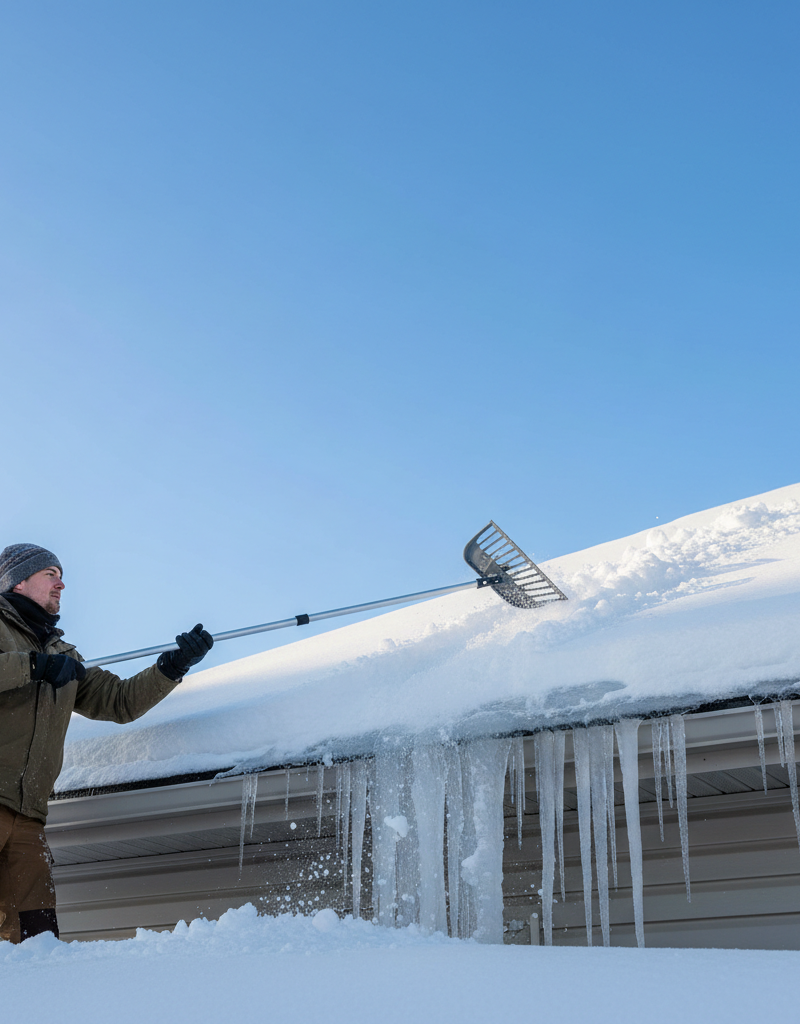
Clear Snow from the Roof Edge – Create a clear zone
- Use a long-handled roof rake to carefully pull snow off the first few feet of the roof, starting from the eaves and working your way up. Avoid removing snow directly over the ice dam itself initially, as this can increase the pooling effect. Aim to clear about 2-4 feet of snow above the ice dam.
- Pro Tip: Be gentle. Do not scrape the rake against the shingles, which can damage them. Stand on solid ground or a stable ladder that is secured or spotted by another person.
-
Prepare Calcium Chloride Socks – Formulate a safe melting agent
- Fill old pantyhose, tube socks, or cloth bags with calcium chloride ice melt (NOT rock salt, which can damage roofing materials and landscaping). Ensure the material is permeable but holds the calcium chloride securely.
- Safety Tip: Wear gloves when handling calcium chloride, as it can be irritating to skin.
-
Position the Calcium Chloride Socks – Initiate controlled melting channels
- Carefully place the calcium chloride-filled socks across and perpendicular to the ice dam. You want them to sit directly on the ice, ideally extending slightly beyond the dam on both sides.
- The goal is for the calcium chloride to slowly melt channels through the ice dam, allowing the trapped water behind it to drain off the roof.
- If this doesn't work: If the ice dam is very thick or the temperatures are extremely low, you may need to reapply socks or consider a steaming method.
-
Monitor Melting Progress – Observe and adjust
- Check the socks periodically. As they melt through the ice, they will sink. You want to see channels forming that allow water to flow freely under the dam.
- If a channel forms but then refreezes, you might need to add more calcium chloride or gently widen the channel with a garden hose (if temperatures are above freezing and staying that way) or a small amount of warm water.
-
Consider Steam Removal (Pro-Level Tool or Rental) – More aggressive but safe alternative
- For very stubborn or large ice dams, a specialized low-pressure steam generator designed for ice removal is effective. This equipment gently melts the ice without damaging shingles.
- DO NOT use: High-pressure washers, which can blast granules off shingles and force water under them.
- Professional Callout: Steam removal often requires specialized equipment and expertise. If renting or using a steamer, ensure you understand its operation and safety precautions. Consider hiring a professional service that offers steam removal.
-
Address the Underlying Cause: Air Leaks and Insulation – Long-term prevention is key
- Once immediate ice dam removal is underway, focus on preventing future occurrences. The primary cause is heat escaping into the attic.
- Inspect and Seal Air Leaks: In your attic, locate and seal any gaps or cracks that allow warm indoor air to rise into the attic space. Common culprits include penetrations around plumbing stacks, electrical wiring, light fixtures, attic hatches, and chimney chases. Use expanding foam sealant for larger gaps and caulk for smaller ones.
- Improve Attic Insulation: Ensure your attic has adequate insulation. The recommended R-value varies by region, but generally, 12-15 inches of fiberglass or cellulose insulation is a good target for most climates.
- Check Ventilation: Proper attic ventilation creates a continuous flow of outside air, keeping the attic temperature closer to the outdoor temperature. Ensure soffit vents are not blocked by insulation and that ridge vents or other exhaust vents are clear and unobstructed. A balanced system (equal intake and exhaust) is crucial.
Common Causes
- Inadequate Attic Insulation: This is the leading cause. If insulation is insufficient, heat from the living space readily transfers into the attic, warming the roof deck.
- Unsealed Air Leaks: Gaps and penetrations in the attic floor (around light fixtures, exhaust fans, plumbing vents, pull-down stairs) allow warm, moist air to bypass insulation and directly enter the attic.
- Poor Attic Ventilation: Lack of proper ventilation prevents the attic from staying cold, which is essential to keep the entire roof surface at or near the outdoor ambient temperature. Blocked soffit vents are a common issue.
- Heavy Snowfall: A thick blanket of snow acts as an insulating layer, trapping any heat escaping from the attic and accelerating melting at the roof deck.
- Fluctuating Outdoor Temperatures: Cycles of freezing and thawing, especially when coupled with sunny days and cold nights, are ideal conditions for ice dam formation.
Common Mistakes
- Using Rock Salt (Sodium Chloride): Rock salt can corrode aluminum gutters, damage shingles (especially asphalt shingles by eating away at granules), kill plants below, and leave unsightly white stains. Always use calcium chloride, which is less damaging.
- Chipping or Hacking at Ice Dams: Using hammers, axes, or other sharp tools to break up ice dams can severely damage shingles, gutters, and the underlying roof structure, leading to costly leaks.
- Using a High-Pressure Washer: While it might seem effective, a high-pressure washer will not only tear off shingle granules but can also force water under shingles, creating worse water damage than the ice dam itself.
- Ignoring the Root Cause: Only removing the ice dam without addressing why it formed (heat loss from the attic) means you'll be dealing with the same problem repeatedly throughout the winter.
- Getting on the Roof Without Safety Gear: Snowy and icy roofs are extremely slippery. Falls from roofs can result in severe injury or death. Always use proper fall protection and a stable ladder, or hire a professional if you're not comfortable.
- Blocking Attic Vents with Insulation: Over-insulating without proper vent baffles can block crucial soffit vents, restricting airflow and exacerbating heat buildup in the attic.
Cost & Time Breakdown
| Task | DIY Cost | Pro Cost | Time |
|---|---|---|---|
| Roof Raking Snow | $0 (if owned) | $150–$300 | 30–60 min |
| Calcium Chloride Application | $20–$50 | Included in service | 1–2 hours |
| Sealing Air Leaks (Attic) | $30–$100 | $200–$500 | 2–4 hours |
| Adding Attic Insulation | $300–$1,000 | $1,000–$3,000+ | 4–8 hours |
| Professional Steam Removal | N/A | $500–$1,500+ | 2–6 hours |
Tips & Prevention
- Prioritize Attic Sealing and Insulation: This is the single most effective long-term solution. Aim for an R-value appropriate for your climate zone (check energy.gov for recommendations). Seal all penetrations from the living space into the attic.
- Ensure Proper Attic Ventilation: A combination of continuous soffit (intake) and ridge (exhaust) vents creates a cold roof, preventing snow from melting prematurely. Ensure soffit vents are never blocked by insulation.
- Clear Gutters Regularly: Clogged gutters can contribute to ice dam formation by obstructing meltwater drainage, even if your attic is well-sealed and insulated. Clean them in late fall before the first snow.
- Install Heat Cables (as a last resort): While not addressing the root cause, self-regulating heat cables installed along the eaves and in gutters can keep meltwater flowing. Use these judiciously and ensure proper electrical installation.
- Regular Roof Raking After Snowfall: For homes prone to ice dams, regularly raking the first few feet of snow off the roof after each snowfall can prevent the initial snowmelt that leads to dam formation.
- Inspect Your Roof Annually: Before winter, inspect your roof for damaged or missing shingles, deteriorated flashing, or other issues that could allow water intrusion once an ice dam forms.
When to Call a Professional
While some ice dam issues can be tackled by a diligent homeowner, there are clear instances when professional intervention is not just recommended, but necessary. If ice dams are extensive, span multiple levels, or form on a steeply pitched roof, the risk of a fall is simply too high for DIY work. Professional roofers or ice dam removal specialists have the proper safety equipment, including harnesses and specialized ladders, and are insured against accidents. Furthermore, if you suspect water has already penetrated your roof and caused interior damage (such as water stains on ceilings or walls), a professional can accurately diagnose the extent of the damage and recommend appropriate repairs to both the roof and the interior of your home. They can also perform comprehensive attic inspections and upgrades to address insulation and ventilation—the true long-term solutions—more effectively than a homeowner might be able to. Never attempt extensive ice dam removal or roof work if you are uncomfortable with heights, lack the necessary safety gear, or if structural damage seems apparent. Ignoring these signs can lead to costly repairs and personal injury. If you have any doubt, call a professional.
Related Articles
Keep troubleshooting with these hand-picked guides from FixlyGuide:
- The #1 Mistake Homeowners Make with Ice Dams (and How to Fix It SAFELY) — Most homeowners approach ice dam removal incorrectly, creating more damage or safety risks. Learn the right, safe methods to protect your r…
- The $30 Secret to Banishing Ice Dams From Your Roof (Before They Destroy It) — Learn safe and effective methods to remove ice dams from your roof and prevent costly damage to your home's structure and interior.
- The $20 Trick That Melts Ice Dams (and Saves Your Roof) — Discover a surprisingly simple, budget-friendly method to safely remove ice dams and prevent costly roof damage to your home.
- The $30 Trick to Melting Ice Dams (Before They Destroy Your Roof) — Discover how to safely remove ice dams from your roof instantly with common household items, preventing costly damage. Stay safe while tack…
- The $30 Secret to Banishing Ice Dams Without Damaging Your Roof — Discover how a simple, inexpensive trick can safely eliminate dangerous ice dams from your roof and prevent costly damage to your home.
- The #1 Mistake Homeowners Make Unclogging a Shower Drain (and 5 Better Ways) — Learn the safest and most effective ways to clear a clogged shower drain using common household tools and avoiding harsh chemicals.
Get the print-ready PDF of this guide
A clean, ad-free, printable version you can keep on your phone or pin to the workshop wall. Free with a FixlyGuide account.
- Print-optimized layout
- Tools, materials & every step included
- Saved to your account
Recommended for DIYers & woodworkers
Sponsored
The Top 20 Tools for Workshops of Any Budget
No stationary machines or power tools required — plus 3 fundamental tools that can't be bought at any price.
Get the free guide
Ted's Woodworking — The #1 Woodworking Resource
Detailed instructions, dimensioned drawings, materials & cutting lists, and 3D schematics for every skill level.
See the plansSponsored: links above are affiliate links. FixlyGuide may earn a commission on qualifying purchases — at no extra cost to you.
Frequently asked questions
What causes ice dams to form on a roof?+
Ice dams form when heat escaping from your home into the attic warms the roof deck, melting snow. This meltwater then flows down to the colder eaves (overhangs) where it refreezes, creating a block of ice that traps more water.
Is rock salt safe to use on ice dams?+
No, rock salt (sodium chloride) is generally not safe for roofs. It can damage shingles, corrode metal gutters, and harm landscaping. Always use calcium chloride as a safer alternative for melting ice dams.
Can I use a hammer or axe to break up an ice dam?+
Absolutely not. Using hammers, axes, or other blunt/sharp tools to chip away at ice dams will almost certainly damage your shingles, gutters, and potentially the underlying roof structure, leading to expensive repairs.
How can I prevent ice dams from forming in the first place?+
The most effective prevention methods involve improving your attic's insulation to prevent heat loss, sealing air leaks from your living space into the attic, and ensuring proper attic ventilation to keep the roof deck uniformly cold.
When should I call a professional for ice dam removal?+
You should call a professional if the ice dams are extensive, on a multi-story or steep roof, or if you're uncomfortable with heights and working on an icy surface. Professionals have specialized tools like steam removers and proper safety equipment, and can assess underlying causes.


Discussion
Loading comments…