
Tools & materials you'll need
Affiliate linksAs an Amazon Associate FixlyGuide earns from qualifying purchases — at no extra cost to you. Prices and availability are accurate as of publication and subject to change.
Quick Answer
For homes built before 1978, assume painted surfaces contain lead. The biggest danger isn't intact paint, but the invisible dust created when paint is disturbed through sanding, scraping, drilling, or demolition. Always test for lead before starting a project, and if lead is present, implement strict dust control, wear appropriate personal protective equipment (PPE), and follow specific cleanup protocols to protect yourself and your family from lead exposure.
The Problem
You've decided to tackle that peeling window sill or repaint a nursery, and your home was built before the late 1970s. What you might not realize is that beneath those layers of modern paint lies a potential silent hazard: lead-based paint. While seemingly innocuous when intact, disturbing this older paint can release microscopic lead particles into the air, creating a significant health risk. This invisible dust can settle on surfaces, be inhaled, or ingested, particularly by young children who often put their hands and toys in their mouths. The consequences of lead exposure, even at low levels, can be severe and long-lasting, affecting neurological development in children and causing various health issues in adults. This article isn't about fear-mongering; it's about empowering you with the knowledge and practical steps to safely navigate home repairs in older homes, ensuring your DIY projects enhance your home without compromising your family's well-being. Understanding where lead paint is typically found, how it becomes dangerous, and the specific precautions to take are crucial for any homeowner planning renovations or even minor paint disturbances in older properties.
How It Works
Lead was a common additive in household paints up until the late 1970s, primarily used to enhance durability, accelerate drying, and produce vibrant colors. Its prevalence ceased after the federal government banned its use in residential paint in 1978 due to widespread health concerns. The danger of lead paint isn't from its mere presence on walls or trim, but from its degradation and disturbance. As lead paint ages, it can chip, peel, or chalk, releasing tiny paint fragments and dust. More significantly, activities like sanding, scraping, drilling, cutting, or even aggressively cleaning painted surfaces can aerosolize microscopic lead particles, creating an invisible, toxic dust cloud. These particles are too small to see but easily inhaled or ingested. Once lead dust settles, it can contaminate carpets, furniture, and soil around the home, persisting for years if not properly cleaned. Imagine a microscopic, toxic dust motes spreading throughout your living space. Children are particularly vulnerable because their developing bodies absorb lead more readily, and their hand-to-mouth behaviors increase the likelihood of ingestion. Even low levels of lead exposure can lead to learning disabilities, behavioral problems, and developmental delays. In adults, lead exposure can cause kidney damage, reproductive issues, and high blood pressure. Understanding this mechanism—that intact lead paint is generally benign, but disturbed lead paint is highly hazardous—is fundamental to safe renovation practices in older homes.
Step-by-Step Fix
1. Test Before You Touch — Before any renovation involving painted surfaces in homes built before 1978, test for lead. This is the single most important preventative step. * Tools: Lead test kits (EPA recognized), utility knife (optional, for exposing underlying layers) * Procedure: Follow the kit instructions carefully. Typically, this involves swabbing a painted surface, sometimes after lightly scoring to reach older layers, and observing a color change. Test multiple areas, especially those prone to wear like windows, doors, and trim. * If this doesn't work: If unsure about the results or dealing with a large-scale renovation, consider hiring an EPA-certified lead inspector to conduct professional testing.
2. Isolate the Work Area — Prevent lead dust from spreading to other parts of your home. * Materials: 6 mil plastic sheeting, painter's tape, heavy-duty drop cloths * Procedure: Seal off the work area completely. Remove all furniture, carpets, and drapes if possible. If not, cover them with two layers of 6 mil plastic sheeting. Close windows and doors, and cover doorways with plastic sheeting, secured with painter's tape to create an airtight seal. Turn off central HVAC systems or seal vents in the work area to prevent dust circulation.
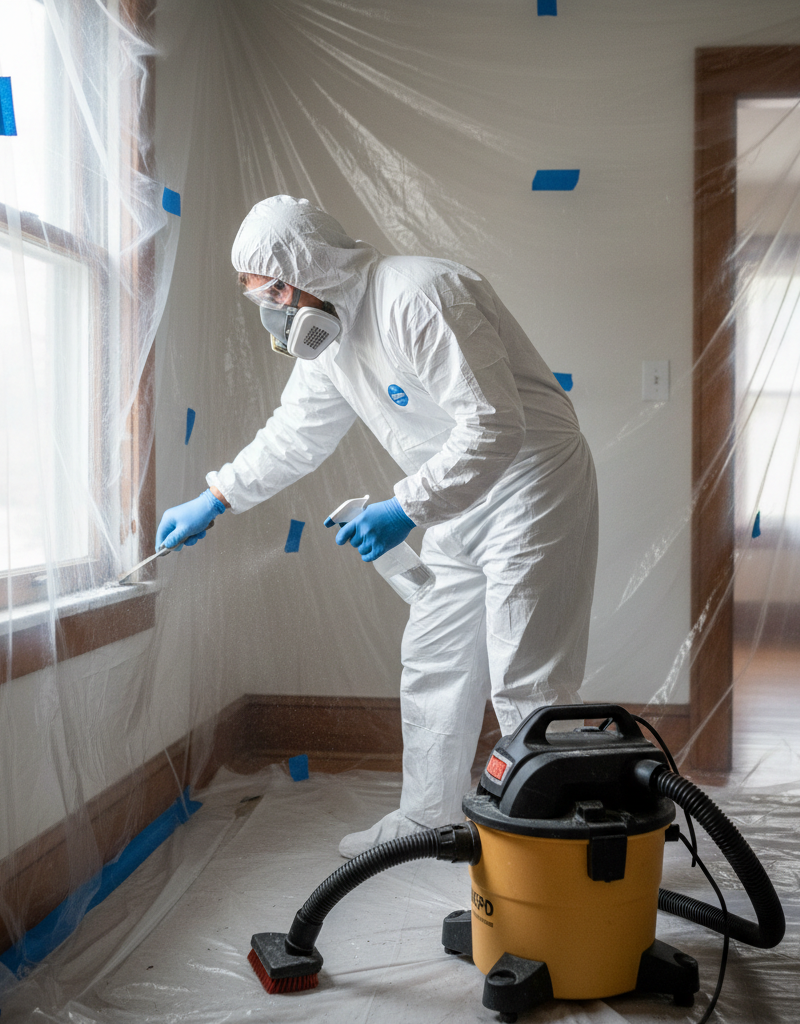
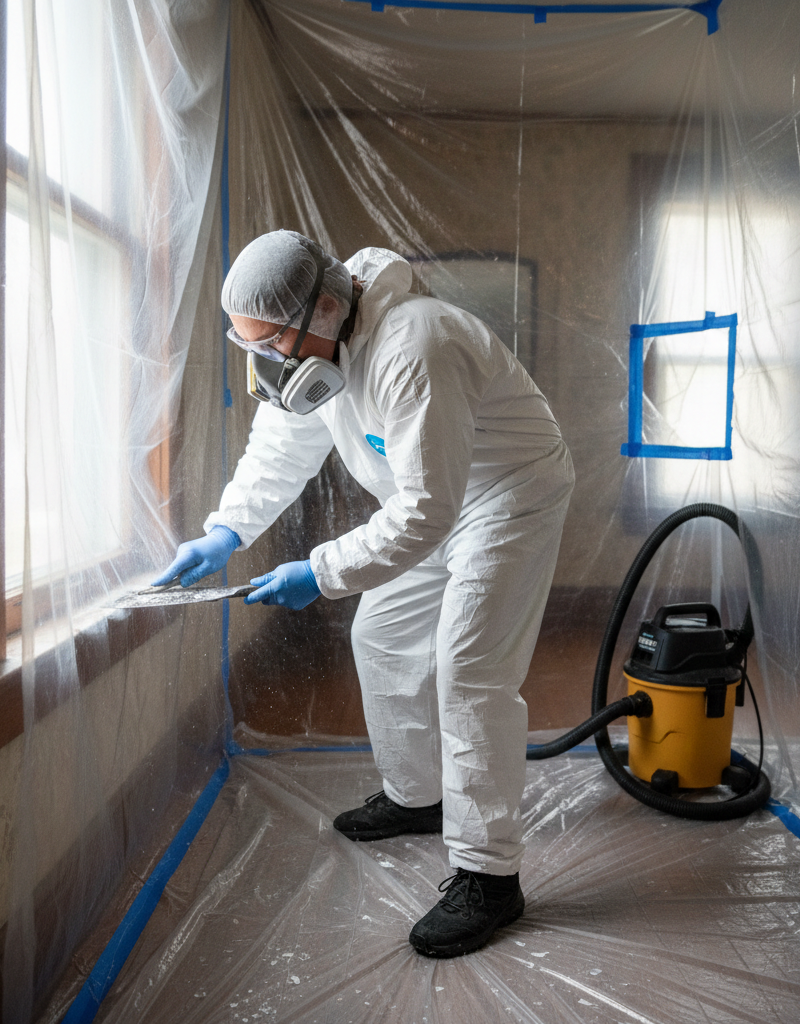
3. Gear Up with Proper PPE — Protect yourself from inhaling or ingesting lead dust. * Tools: N95 or P100 respirator, disposable coveralls, disposable shoe covers, safety glasses/goggles, latex or nitrile gloves. * Safety: Never use a paper dust mask; it won't filter lead particles. Ensure your respirator fits properly (perform a seal check). Dispose of all PPE as lead-contaminated waste after use.
4. Minimize Dust Generation — This is the core principle of lead-safe work practices. * Techniques: Wet scraping (mist surfaces with water to dampen dust), chemical paint removers (use with extreme caution as per manufacturer instructions and ensure good ventilation), heat guns (use on low setting, never above 1,100°F to avoid vaporizing lead; best avoided if possible as it can scorch wood and release lead fumes). Avoid power sanding, grinding, or abrasive blasting at all costs. * If this doesn't work: For complex paint removal, consider encapsulating the lead paint with a new, lead-specific encapsulate or covering it with new, non-lead materials like plasterboard.
5. Contain Debris Meticulously — Collect all paint chips and debris as work progresses. * Materials: Heavy-duty plastic bags (6 mil), duct tape * Procedure: Lay heavy-duty drop cloths directly under the work area. Regularly mist surfaces and sweep up debris into plastic bags. Double-bag all lead-contaminated waste and seal them with duct tape. Label bags clearly as "Lead Contaminated Waste."
6. Perform a Two-Stage Clean-Up — Thorough cleaning is essential to remove all lead dust. * Tools: HEPA vacuum, disposable wipes, all-purpose cleaner, two buckets (one with detergent, one with rinse water), new mop heads/rags for each stage. * Stage 1 (Initial Clean): Use a HEPA vacuum (regular vacuums spread lead dust) to vacuum all surfaces, including walls, floors, and horizontal surfaces. Wipe all hard surfaces with disposable wet wipes or a damp cloth and all-purpose cleaner. Change wipes/cloths frequently. Mop floors with a damp mop and a fresh solution of cleaner. Dispose of all cleaning materials as lead waste.
7. Second Clean & Inspection — Don't assume the first clean got everything. * Procedure: After the initial clean, let the area dry completely (at least an hour). Then, repeat the entire cleaning process (HEPA vacuum, wet wipe, wet mop) with fresh cleaning supplies. Visually inspect the area for any remaining dust or debris. If visible dust is found, repeat the cleaning process again.
8. Dispose of Waste Properly — Lead-contaminated waste cannot go into regular household trash. * Procedure: Contact your local waste management facility or health department for specific instructions on lead waste disposal in your area. Many municipalities designate specific hazardous waste collection sites or events. Never burn lead-contaminated materials.
Common Causes
The primary cause of lead exposure in homes built before 1978 is the disturbance of lead-based paint during renovation, repair, or even daily activities. Here are the most common scenarios:
- Sanding or Scraping: Aggressively removing old paint layers without dust control measures. This generates fine, airborne lead dust that can travel throughout the home.
- Demolition: Tearing down walls, removing windows, or gutting rooms when lead paint is present. Large-scale disturbance releases significant amounts of lead dust and chips.
- Drilling or Cutting: Creating holes or sawing through painted wood or plaster. The friction and abrasion release lead particles.
- Impact or Friction Surfaces: Windows and doors that are opened and closed frequently, and floors under high traffic areas. Constant rubbing can slowly abrade lead paint, releasing dust over time. This is especially true for older sash windows.
- Deteriorating Paint: Peeling, chipping, or chalking paint on interior or exterior surfaces. Weathering and age cause paint to flake off, creating lead-laden dust and chips that can accumulate in soil around the home.
- Poor Renovation Practices: Hiring contractors who are not RRP (Renovation, Repair, and Painting) certified or attempting DIY projects without proper lead-safe training and equipment. Uninformed practices can inadvertently create a widespread contamination problem.
Common Mistakes
- Assuming No Lead: Failing to test for lead paint because the house "looks fine" or has been repainted multiple times. Lead paint can be buried under many layers.
- Using a Standard Vacuum: Normal household vacuums lack HEPA filters and will simply redistribute microscopic lead dust particles into the air, making the problem worse.
- Dry Sanding/Scraping: The absolute worst mistake. Dry methods create vast amounts of fine lead dust that is easily inhaled and spreads quickly.
- Inadequate Containment: Not fully sealing off the work area, allowing lead dust to escape into other living spaces, contaminating furniture, carpets, and air ducts.
- Wearing Inadequate PPE: Relying on a flimsy paper dust mask (which offers no protection against lead dust) instead of an N95 or P100 respirator, or not wearing full disposable coveralls.
- Improper Waste Disposal: Throwing lead-contaminated debris directly into household trash or burning it, which can expose sanitation workers and contaminate the environment.
- Ignoring Exterior Lead Paint: Forgetting that exterior paint also poses a risk, particularly when it peels and contaminates surrounding soil where children might play.
Cost & Time Breakdown
| Task | DIY cost | Pro cost | Time |
|---|---|---|---|
| Lead Test Kits | $20–$50 | N/A | 10–30 minutes |
| Lead Inspection (professional) | N/A | $300–$600 | 1–3 hours |
| PPE & Containment Materials | $50–$150 | Included in bid | 1–2 hours |
| Small-Scale Paint Removal | $0–$100 (materials) | N/A | 2–8 hours |
| Professional Lead Abatement | N/A | $1,000–$10,000+ | Days to weeks |
| HEPA Vacuum Rental | $30–$60/day | N/A | As needed |
Tips & Prevention
- Regular Visual Inspection: Periodically check painted surfaces, especially windows, doors, and areas with high wear, for signs of chipping, peeling, or chalking paint. Address issues promptly and safely.
- Maintain Intact Paint: If lead paint is present but in good condition, the safest approach is often to leave it undisturbed. Keep it clean and monitor its condition. Consider encapsulating it with a new layer of non-lead paint or other materials.
- Wet Cleaning: Regularly wet mop and wet wipe hard surfaces with an all-purpose cleaner to pick up any dust, even if you don't suspect lead exposure. This is good general practice for dust control.
- Control Soil Contamination: If exterior paint is peeling, address it safely. Plant shrubs or groundcover around the foundation to minimize soil exposure, especially in play areas. Consider having your soil tested if children play in the yard.
- Educate Occupants: Inform all household members, especially those involved in cleaning or minor repairs, about the risks of lead paint and the importance of lead-safe practices.
- Wash Hands Frequently: Encourage frequent handwashing for everyone, especially children, to reduce involuntary lead ingestion.
When to Call a Professional
While this guide provides comprehensive steps for safe DIY lead paint management, certain situations absolutely warrant calling a qualified, EPA-certified Lead Abatement Contractor. If you are planning extensive renovations or demolition that will disturb large areas of suspected lead paint, the scope of work often exceeds DIY capabilities and the risk of significant contamination is too high. You should also call a professional if lead test results indicate high lead levels in critical areas like children
Related Articles
Keep troubleshooting with these hand-picked guides from FixlyGuide:
- 7 Inspection Red Flags That Secretly Signal a $20,000 Bill — Don't let your dream home become a money pit. Many buyers and even some inspectors overlook subtle home inspection red flags that lead to f…
- The 12 Checks That Prevent 80% of Costly Home Repairs — Don't wait for a disaster. Our comprehensive monthly home maintenance checklist reveals the surprising, simple tasks that catch small issue…
- The 7 Critical Household Filters You're Forgetting (And What They Cost You) — Neglected household filters are quietly costing you money, diminishing air quality, and paving the way for expensive repairs. Discover the…
- 7 Hidden Equity Drains Costing You Thousands Annually — Your home is an asset, but silent problems like minor leaks, poor insulation, and deferred maintenance can drain its value. Discover the se…
- The Surprising Trick to Cutting Your Dryer Bill By $100 Per Year — Installing a clothesline can significantly reduce your energy bills and add a fresh scent to your laundry. This guide covers how to choose…
- The Giant Drywall Hole: 3 Hidden Mistakes That Make Fixing It Worse — Don’t just spackle over that huge drywall hole; learn the right way to repair it and avoid common mistakes that lead to an even bigger head…
This article was independently written by FixlyGuide based on the source topic.
Frequently asked questions
How do I know if my house has lead paint?+
The most reliable way to determine if your house has lead paint is to use an EPA-recognized lead test kit on painted surfaces or hire an EPA-certified lead inspector. Homes built before 1978 are highly likely to contain lead-based paint.
Is intact lead paint dangerous?+
Intact lead paint that is not peeling, chipping, or chalking generally poses a low risk. The danger primarily arises when the paint is disturbed through activities like sanding, scraping, drilling, or demolition, which release invisible lead dust.
What kind of mask do I need for lead paint work?+
You need at least an N95 respirator, but a P100 respirator provides even greater protection. Standard paper dust masks are ineffective against microscopic lead particles and should never be used for lead paint work.
Can I remove lead paint myself?+
While minor, small-scale lead paint removal on non-friction surfaces can be attempted by DIYers with strict lead-safe practices, significant removal or disturbance of lead paint, especially on windows or doors, is best left to an EPA-certified lead abatement professional to prevent widespread contamination.
How do I dispose of lead-contaminated waste?+
Lead-contaminated waste, such as paint chips, dust, and used PPE, must be double-bagged in heavy-duty plastic and sealed. Contact your local waste management facility or health department for specific instructions on hazardous waste disposal in your area.

Discussion
Loading comments…