
Tools & materials you'll need
Affiliate linksAs an Amazon Associate FixlyGuide earns from qualifying purchases — at no extra cost to you. Prices and availability are accurate as of publication and subject to change.
Quick Answer
When your oven struggles to reach or maintain its set temperature, the most common suspects are a failing igniter (for gas ovens), a burnt-out heating element (for electric ovens), or a faulty temperature sensor. Other potential issues include a complete failure of the control board or a miscalibrated thermostat. Most of these problems can be diagnosed with a visual inspection and a multimeter for electrical checks, often leading to a straightforward parts replacement.
The Problem
Few things are more frustrating in the kitchen than an oven that refuses to cooperate with your culinary ambitions. You preheat for what seems like an eternity, only to find your dishes undercooked, your roasts still rare, or your baked goods stubbornly refusing to rise. This isn't just an inconvenience; it can ruin meals, waste food, and make baking a complete gamble. The core issue is that your oven isn't accurately reaching or sustaining the temperature you've selected, leading to uneven cooking and extended cooking times. This problem can stem from a variety of components, some inexpensive and easy to replace, others more complex and potentially requiring professional help.
How It Works
Understanding how your oven heats is crucial for troubleshooting.
Electric Ovens: Electric ovens rely on electrical resistance to generate heat. When you set a temperature, the control board sends power to the heating elements – typically a bake element at the bottom and a broil element at the top. These elements are essentially coils of resistive wire (often nichrome) encased in metal sheathing. As electricity flows through the wire, it encounters resistance, converting electrical energy into heat. A temperature sensor, usually a thermistor or probe inside the oven cavity, continuously monitors the internal temperature. It sends resistance readings back to the control board. The control board then cycles the power to the bake and broil elements on and off as needed to maintain the set temperature. The insulation around the oven cavity helps retain this heat.
Gas Ovens: Gas ovens work by igniting natural gas or propane. When you set a temperature, the control board energizes a glow bar igniter (or sometimes a spark electrode, though less common for bake cycles). This igniter heats up, drawing current. Once it reaches a certain temperature and glows hot enough, it signals a safety valve to open, allowing gas to flow to the main burner. The radiant heat from the glowing igniter then ignites the gas, producing a flame that heats the oven cavity. Like electric ovens, a temperature sensor monitors the internal temperature, and the control board cycles the gas valve and igniter to maintain the desired heat. The flame also heats a metal heat exchanger which helps distribute the warmth evenly within the oven.
In both types, the thermostat or temperature sensor is the "brain" that tells the heating elements or gas burner when to turn on and off, ensuring the oven cavity stays at the programmed heat. If any of these essential components—igniter, element, sensor, or control board—fail, your oven's ability to regulate temperature is compromised.
Step-by-Step Fix
Before attempting any repairs, always unplug your electric oven or turn off the gas supply and disconnect power to a gas oven at the circuit breaker.
-
Safety First — Electrical and Gas Safety
- Electric Oven: Unplug the oven from the wall outlet. If it's hardwired, turn off the dedicated circuit breaker in your home's electrical panel.
- Gas Oven: Turn off the gas supply valve, usually located behind the oven or where the gas line enters your kitchen. Then, similar to an electric oven, unplug it or cut power at the breaker to ensure no electrical components are live.
- Important: Wear work gloves to protect your hands from sharp edges.
-
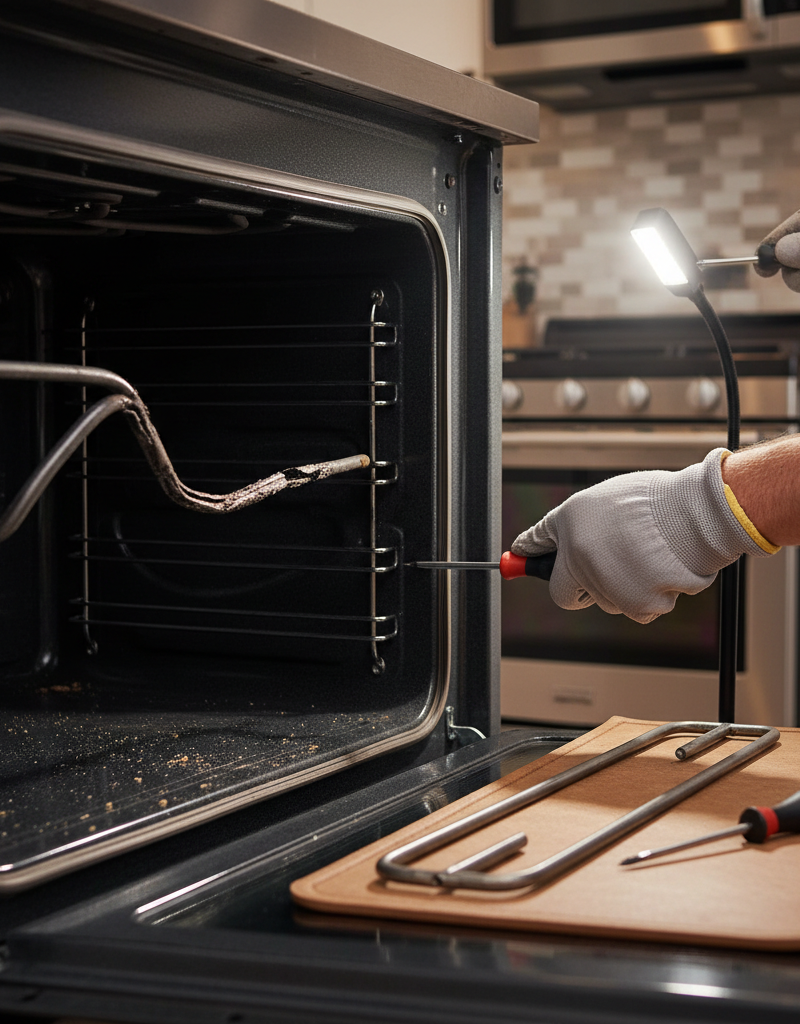
Visual Inspection of Heating Elements (Electric Oven) — Check for damage
- Open the oven door and visually inspect both the bake element (bottom) and the broil element (top).
- Look for: Any signs of damage, such as breaks, cracks, blisters, or areas that look discolored, burnt, or exploded. A healthy element should appear uniformly dark gray or black. If an element is broken, it won't heat.
- If damaged: Note which element is damaged. You'll need to replace it.
-
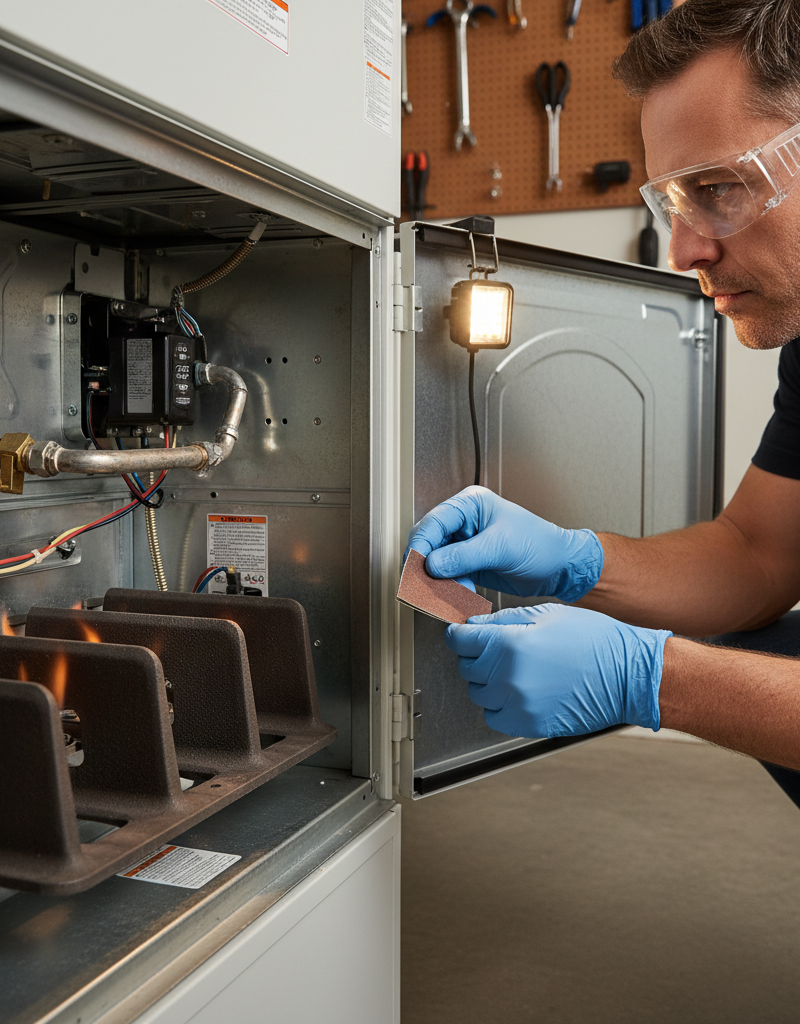
Visual Inspection of Igniter and Burner (Gas Oven) — Check for proper glow and flame
- This step requires caution as you'll briefly restore power/gas to observe. Reconnect power and turn on the gas supply. Set the oven to bake at 350°F (175°C).
- Observe the igniter: It's usually a small, thin, glowing bar near the main burner tube at the bottom of the oven. It should steadily glow bright orange-red.
- Observe the flame: After 30-90 seconds, if the igniter is working correctly, you should see gas ignite into a steady, blue flame around the burner. The flame should be even and not flickering excessively or weak.
- Troubleshooting observations:
- Igniter glows, but no flame: The igniter might be weak, not drawing enough current to open the gas valve. This is a common failure.
- Igniter doesn't glow at all: No power to the igniter, or the igniter is completely failed.
- Weak or erratic flame: Could indicate a partial clog in the burner tube or orifice, or low gas pressure (less common to suddenly occur).
- Once done observing, IMMEDIATELY turn off the gas supply and disconnect power again.
-
Test Heating Elements with a Multimeter (Electric Oven) — Check for continuity
- With power OFF and oven unplugged: Locate the terminals for the bake and broil elements. You may need to remove a metal cover or unscrew the element from its mounting points.
- Set multimeter: Set your multimeter to the Rx1 or ohms (Ω) setting.
- Test: Touch one probe to each terminal of the element.
- Expected reading: A working element should show a resistance reading between 10-50 ohms. If the reading is infinitely high (O.L. or "open circuit"), the element is broken and needs replacement.
-
Test Gas Oven Igniter with a Multimeter — Check for current draw
- Power OFF and gas OFF: Access the igniter wires, usually by removing the bottom oven panel.
- Set multimeter: Set your multimeter to measure current (A) in the AC milliamp range (mA). This can be tricky and requires disconnecting one of the igniter wires to place the multimeter in series.
- Connect probes: Disconnect one of the wires leading to the igniter. Connect one multimeter probe to the igniter terminal and the other probe to the wire you just disconnected.
- Restore power/gas briefly (with extreme caution): With the multimeter in series, turn on power and gas.
- Observe reading: A functional igniter (one that is hot enough to open the gas valve) usually draws between 3.2 and 3.6 amps. If it draws significantly less (e.g., below 2.5 amps) but still glows, it's too weak to open the gas valve and needs replacement. If it draws 0 amps, it's completely dead.
- Immediately disconnect power and turn off gas after getting a reading.
-
Test the Temperature Sensor — Check for resistance over temperature
- Power OFF, oven unplugged/gas OFF: The sensor is a small probe, usually located at the top-rear or side of the oven cavity. It's held by one or two screws. Disconnect its wiring harness.
- Set multimeter: Set your multimeter to ohms (Ω).
- Test resistance at room temperature: Touch the multimeter probes to the two terminals of the sensor. At room temperature (around 70°F/21°C), a working sensor should typically read between 1000-1100 ohms (1k-1.1kΩ). Consult your oven's service manual or a parts diagram for the exact specification.
- Test resistance with heat (optional but recommended): Carefully remove the sensor from the oven. Place the sensor tip in a cup of ice water, then in a cup of hot water (not boiling). You should see the resistance change: decrease with cold, increase with heat. If the resistance doesn't change significantly, or reads open circuit (O.L.) or short circuit (0 ohms) at any point, the sensor is faulty.
-
Check for Fan Issues (Convection Ovens) — Uneven heating
- If your oven has a convection fan, uneven heating could be due to a faulty fan motor or an obstruction.
- Power OFF: Visually inspect the fan blade for any obstructions. Try gently spinning it by hand. It should move freely.
- Listen: When you turn on the convection setting, listen for the fan to operate smoothly. If it's noisy or doesn't turn on, the motor might be failing. While not directly preventing heating, a non-working fan on a convection oven will cause significant temperature inconsistencies.
-
Calibrate the Oven Thermostat — Simple adjustment
- Many ovens allow for minor temperature calibration. Before replacing major parts, check if your oven's temperature can be adjusted.
- Refer to your owner's manual: The procedure varies greatly by make and model. Often it involves a setting in the electronic control panel (e.g., holding down "Bake" or "Temp" for a few seconds) to enter calibration mode, or a physical screw behind the temperature knob on older models.
- Use an oven thermometer: Place a reliable oven thermometer inside the oven and run it at 350°F (175°C) for 20-30 minutes. If the reading on the thermometer consistently differs from the oven's display, adjust the calibration as per the manual.
-
Consider the Control Board (Last Resort) — Complex failure
- If all other components (elements/igniter, sensor) test fine, but the oven still doesn't heat or completely fails to operate, the electronic control board or relay board might be at fault.
- Appearance: Look for burnt or damaged spots, swollen capacitors, or loose connections on the board.
- Professional help: Replacing a control board can be expensive and complex. If you've ruled out everything else, consider calling a professional, as the cost of the part combined with the labor might be significant.
Common Causes
- Failed Bake/Broil Element (Electric Ovens): The most frequent culprit. Over time, the resistive wire inside the element can break, preventing heat generation.
- Weak or Failed Igniter (Gas Ovens): Gas oven igniters gradually lose their ability to draw enough current to open the gas safety valve, even if they still glow faintly. This is a very common failure point.
- Faulty Temperature Sensor (Both Types): If the sensor provides inaccurate readings to the control board, the oven will either overheat or, more commonly, underheat because the board thinks it's already at temperature.
- Malfunctioning Control Board: The "brain" of the oven can fail, leading to incorrect signals to the heating components or a complete shutdown. This is less common than element/igniter/sensor issues but can happen.
- Loose Wiring Connections: Vibrations or heat cycles can loosen electrical connections to igniters, elements, or the control board, interrupting power.
- Oven Thermostat Calibration: Sometimes the thermostat simply needs to be recalibrated, especially after years of use, leading to consistent temperature discrepancies.
Common Mistakes
- Mistake 1: Not Disconnecting Power/Gas First. Dangerously neglecting crucial safety steps before beginning any inspection or repair.
- Instead: Always, without exception, unplug the electric oven or turn off the gas supply and circuit breaker for a gas oven before touching any internal components.
- Mistake 2: Assuming a Gas Igniter is Good if it Glows. A common misconception; a weak glow bar igniter may still glow but won't draw enough current to open the gas valve, leading to a "no heat" situation.
- Instead: If you have a gas oven and the igniter glows but there's no flame within 90 seconds, it's highly likely the igniter is weak and needs replacement. Confirm with a current (amp) test if you have the right multimeter.
- Mistake 3: Replacing the Most Expensive Part First. Many DIYers jump to replacing the control board without ruling out simpler, cheaper fixes.
- Instead: Always troubleshoot methodically: elements/igniter, then temperature sensor, then calibration, and only then consider the control board.
- Mistake 4: Not Using an Independent Oven Thermometer. Relying solely on the oven's display can be misleading, especially if the sensor or control board is faulty.
- Instead: Invest in a cheap, reliable oven thermometer. Leave it in the oven for at least 20 minutes at a set temperature to get an accurate reading of the actual internal temperature.
- Mistake 5: Pulling Parts Without Documenting Connections. Wires and screws can go in many places, and forgetting how they were connected can lead to more problems.
- Instead: Take photos with your phone at each stage before disconnecting wires or removing components. This provides a visual reference for reassembly.
Cost & Time Breakdown
| Task | DIY Cost | Pro Cost | Time |
|---|---|---|---|
| Diagnose & Inspect | $0 (multimeter) | $100–$200 | 20–45 mins |
| Replace Electric Element | $30–$80 | $150–$300 | 30–60 mins |
| Replace Gas Igniter | $40–$100 | $180–$350 | 45–90 mins |
| Replace Temperature Sensor | $20–$60 | $120–$250 | 20–40 mins |
| Control Board Replacement | $150–$400 | $300–$600+ | 1–2 hours |
| Oven Calibration (DIY) | $0 | (N/A) | 5–15 mins |
Tips & Prevention
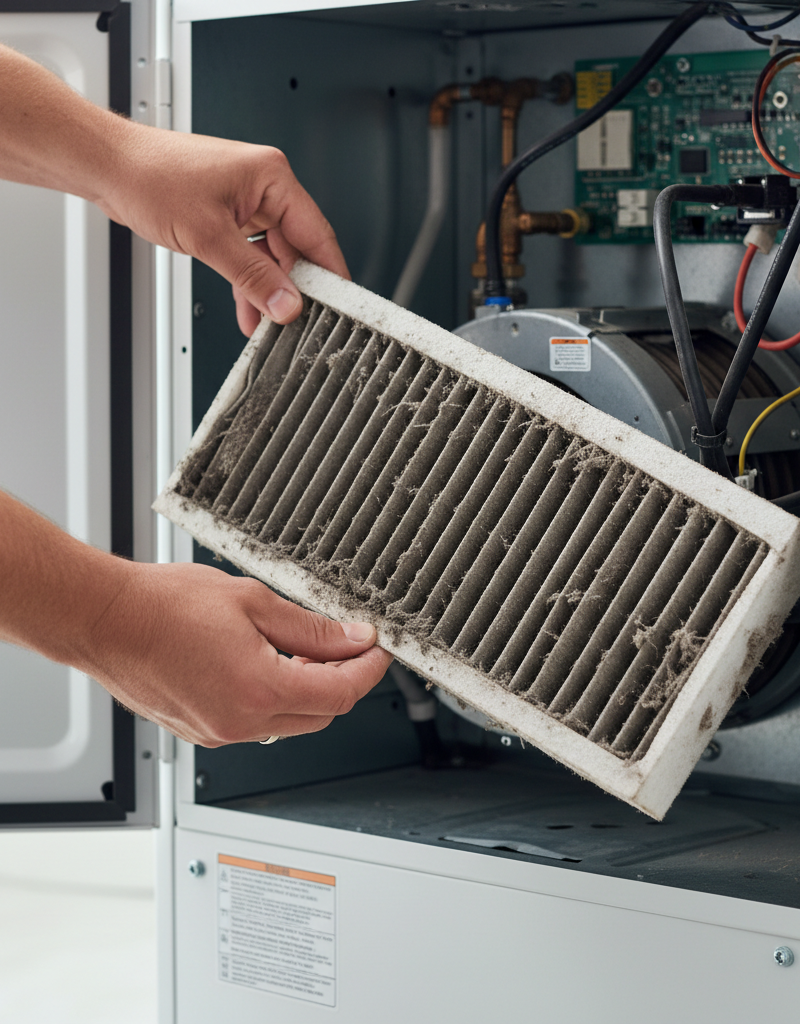
- Regular Cleaning: Food spills and debris can sometimes interfere with sensor readings or block burner ports. Keep your oven clean, especially around the sensor and burner area.
- Avoid Harsh Cleaners: Be careful with oven cleaners, as some can damage specific components or wiring if not used properly. Never spray directly onto elements or sensors.
- Use an Oven Thermometer: Keep an inexpensive, good quality oven thermometer inside your oven at all times. This provides a continuous, independent check of your oven's internal temperature and can alert you to issues early.
- Check Vents: Ensure the oven's exhaust vents (usually at the back or top) are not blocked, as proper airflow is necessary for efficient heating and temperature regulation.
- Record Model Number: Keep your oven's make and model number handy. This will be essential when ordering replacement parts to ensure compatibility.
When to Call a Professional
While many oven heating issues are DIY-friendly, certain situations warrant calling a licensed appliance technician. If you suspect a gas leak (smell of rotten eggs), immediately turn off the gas supply and call a professional and your gas company. If you are uncomfortable working with electricity, even after disconnecting power, or if the problem involves complex wiring or the main control board, a professional can diagnose and repair safely. Also, if you've replaced the common parts and the issue persists, or if you're dealing with an older, hard-to-diagnose oven, a technician has specialized tools and experience that can save you time and prevent further damage. Electrical problems beyond simple continuity testing, especially those involving the main power supply or relay boards, are best left to licensed electricians or appliance repair professionals to ensure safety and proper function.
Pro-Callout: If you smell gas at any point, immediately shut off the gas supply to the oven and contact a licensed appliance technician or your gas utility. For complex electrical diagnostics beyond simple element or sensor replacement, or if you've performed basic troubleshooting without success, call a professional.
Related Articles
Keep troubleshooting with these hand-picked guides from FixlyGuide:
- Oven Not Heating to Correct Temperature? How to Diagnose and Fix — An oven that doesn't heat to the correct temperature can ruin meals. This guide helps you diagnose common issues like a faulty igniter or h…
- Why Your Thermostat Lies: The Real Reason Your Home Won't Hit the Set Temperature — Discover why your thermostat struggles to reach the set temperature and learn actionable steps to diagnose and fix common HVAC issues.
- The Secret Culprit Behind Your Dead AC (And How to Revive It in 10 Minutes) — Discover how a common, easily replaceable part might be preventing your air conditioner from turning on, and learn to fix it yourself in un…
- The Secret Culprit Behind Your AC Blowing Warm Air (It’s Not What You Think) — Discover the unexpected reason your air conditioner is blowing warm air and how a simple, often overlooked fix can restore your home’s cool…
- The #1 Reason Your AC Blows Warm Air (And It's Not What You Think) — Discover the most common and often overlooked reason your AC might be blowing warm air, and how a simple capacitor fix can restore cool air.
- The Secret Culprit Behind Your Leaking Refrigerator (It’s Not Always a Big Fix) — Discover the most common and often overlooked reasons why your refrigerator is leaking water on the floor, and how to fix them yourself.
Get the print-ready PDF of this guide
A clean, ad-free, printable version you can keep on your phone or pin to the workshop wall. Free with a FixlyGuide account.
- Print-optimized layout
- Tools, materials & every step included
- Saved to your account
Frequently asked questions
Why is my electric oven not heating up to temperature?+
The most common reasons an electric oven isn't heating to temperature are a burnt-out bake element, a faulty broil element (which assists in heating), or a defective temperature sensor. Less frequently, it could be an issue with the control board or a loose wire connection.
Why is my gas oven not getting hot enough?+
For gas ovens, the primary cause of not reaching temperature is a weak or failing igniter. The igniter must glow hot enough to draw sufficient current to open the gas safety valve. Other culprits include a faulty temperature sensor, a clogged burner orifice, or a defective gas valve or control board.
How long should it take for my oven to preheat to 350°F?+
Most ovens should preheat to 350°F (175°C) within 10 to 15 minutes, depending on the oven's size and power. If your oven takes significantly longer (20-30 minutes or more), it's a sign that a component like the heating element, igniter, or temperature sensor might be failing.
Can I fix an oven that's not heating properly myself?+
Many common oven heating problems, such as replacing a broken electric heating element, a weak gas igniter, or a faulty temperature sensor, are relatively straightforward DIY fixes. However, for issues involving the main gas valve, complex electrical control boards, or if you're uncomfortable with the repair, it's always best to call a licensed professional for safety and proper diagnosis.
How do I test if my oven temperature sensor is bad?+
You can test an oven temperature sensor with a multimeter set to the ohms (Ω) setting. At room temperature, a typical sensor should read around 1000-1100 ohms. You can further test by placing the sensor in ice water and hot water; the resistance should change significantly. If it reads open circuit (O.L.) or no change in resistance, it's likely faulty.
Discussion
Loading comments…