
Tools & materials you'll need
Affiliate links- AmazonOven Thermometer1 · A reliable digital or liquid-filled model is essential for accurate diagnosis.
- AmazonScrewdriver or Nut Driver1 · For removing the panel to access the temperature sensor.
- AmazonMultimeter1 · Optional, but required for definitively testing the temperature sensor's resistance.
- AmazonReplacement Temperature Sensor1 · Ensure it is the correct part for your oven's specific make and model.
As an Amazon Associate FixlyGuide earns from qualifying purchases — at no extra cost to you. Prices and availability are accurate as of publication and subject to change.
Quick Answer
If your oven temperature is off by 50 degrees, the most common causes are a drifted calibration or a faulty temperature sensor. You can diagnose this by placing a reliable oven thermometer in the center of the oven, setting it to 350°F, and comparing the readings after 30 minutes. A simple recalibration, done via a screw on the temperature knob or a sequence on the digital keypad, can often correct this drift and restore accurate cooking temperatures.
The Problem
You’ve followed the recipe to the letter. The cookies should be golden brown, the chicken should be juicy and cooked through, the cake should be perfectly risen. Instead, you’re left with burnt edges and a raw center, or a meal that takes 30 minutes longer than expected. The culprit isn’t your recipe or your skills; it’s your oven. The number you see on the dial or digital display is a promise, not a guarantee. When your oven temperature is off by 50°F or more, it’s not a minor inconvenience—it’s the difference between culinary success and frustrating failure.
A 15-20 degree variance can be annoying. But a 50-degree offset is a major appliance malfunction that makes reliable cooking impossible. At 300°F instead of 350°F, Maillard reactions and caramelization slow dramatically, leaving food pale and underdeveloped. At 400°F instead of 350°F, delicate baked goods burn before they can cook through. You can't trust your appliance, and every meal becomes a gamble. The problem is that most homeowners trust the display implicitly, leading them to blame the recipe when the oven is the one at fault. Understanding and fixing this temperature gap is fundamental to getting the performance you paid for.
How It Works
Your oven’s temperature regulation is a closed-loop system managed by three key components: the temperature sensor, the control board (or mechanical thermostat), and the heating elements (bake and broil). Understanding this trio is the key to diagnosing why your oven’s temperature is inaccurate.
-
The Temperature Sensor: This is the oven's thermometer. In most modern electric ovens, it’s a thermistor—a small resistor whose electrical resistance changes predictably with temperature. It's typically a thin, 6- to 9-inch metal probe located inside the oven cavity, near the top back wall. As the oven heats up, the thermistor's resistance decreases. In older or gas models, you might find a hydraulic thermostat with a long, fluid-filled capillary tube and bulb. As the bulb gets hot, the fluid expands, mechanically tripping the gas valve or an electrical switch.
-
The Control (The Brains): In a digital oven, this is the Electronic Oven Control (EOC) or control board. It’s a small computer that constantly reads the resistance value from the thermistor. It has been programmed with a specific temperature-to-resistance curve. For example, it knows that 1,080 ohms from the sensor means the oven is at 350°F. In an analog (knob-controlled) oven, the "brain" is a simpler mechanical thermostat. You turn the dial, which physically moves a bimetallic strip or diaphragm that will switch the power off when a certain temperature is reached.
-
The Heating Elements: These are the large, black resistive coils at the bottom (bake element) and top (broil element) of your oven. The control board sends voltage to these elements based on the sensor's feedback.
Here’s how they work together in a typical preheat cycle set to 350°F:
- You set the temperature to 350°F.
- The control board sees the current temperature is low and sends 240 volts to the bake and broil elements to heat the cavity quickly.
- The temperature sensor continuously reports the rising temperature back to the control board (as a changing resistance value).
- When the sensor reports a value corresponding to 350°F, the control cuts power to the elements.
- To maintain the temperature, the oven doesn't just stay on. It cycles. The temperature will naturally drop. The control allows it to fall to a lower threshold (e.g., 325°F) and then re-energizes the bake element to bring it back up to a higher threshold (e.g., 375°F). This cycling aims for an average temperature of 350°F. An inaccurate system occurs when this average is off-center due to a component failure.
An oven temperature off by 50 degrees is usually caused by a flaw in this loop. If the temperature sensor ages, its resistance curve can drift. It might now report 1,080 ohms at 400°F instead of 350°F. The control board, not knowing any better, will let the oven overheat by 50 degrees before shutting the elements off. Conversely, if the sensor is reading high, the oven will underheat. Calibration is simply a way of telling the control board, "The sensor is off; please apply an offset of + or - X degrees to its reading before making a decision." If the drift is too large for this software fix to handle, the sensor itself must be replaced.
Step-by-Step Fix
This guide will walk you through accurately testing your oven's temperature and performing a recalibration. For anything involving part replacement, ensure you are comfortable with basic electrical safety.
SAFETY NOTE: Before performing any physical adjustments or parts replacement (Steps 6 onwards), you MUST disconnect the oven from power at the circuit breaker. Ovens run on a 240V circuit, which is extremely dangerous.
1. Get an Accurate Baseline
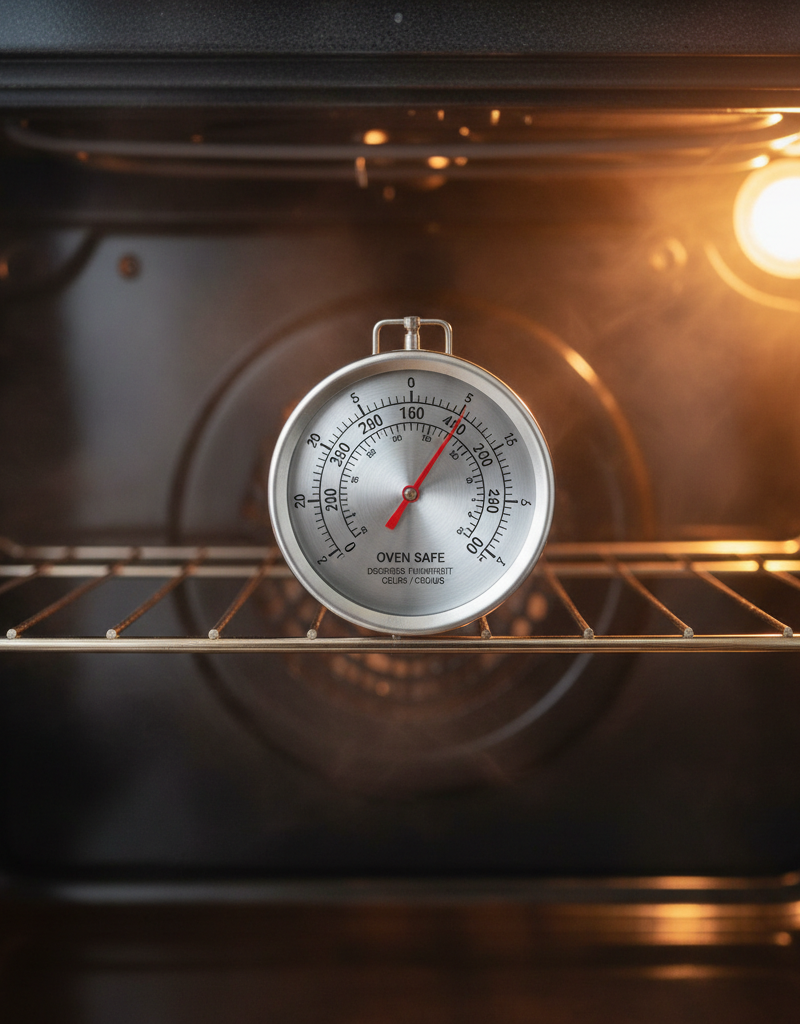
- The Right Tool: Don't trust a cheap, old dial thermometer. Purchase a quality digital or liquid-filled oven thermometer. Place it on a rack in the absolute center of the oven cavity. It should not be touching the walls, floor, or ceiling.
2. Run the Temperature Test
- The Method: Remove any bakeware, foil, or trays from the oven. Set your oven to bake at 350°F (or another commonly used temperature). Let it preheat fully—wait for the preheat chime or light, and then wait an additional 15-20 minutes for the internal temperature to stabilize as the elements cycle.
3. Average the Readings
- Track the Cycles: An oven's temperature is not static; it swings above and below the setpoint. Over a period of 10 minutes, take a temperature reading from your independent thermometer every 2-3 minutes. Note the highest and lowest temperatures you see. The true average temperature of your oven is the midpoint between these high and low peaks.
4. Calculate the Temperature Offset
- The Math: Compare the average temperature from your test to the 350°F setpoint. For example, if your oven swings between 365°F and 395°F, your average temperature is 380°F. The offset is +30 degrees. If it swings between 290°F and 320°F, your average is 305°F, and your offset is -45 degrees.
5. Identify Your Calibration Type
- Look at your oven controls. Do you have a physical knob that you turn to set the temperature (Analog), or do you press buttons on a digital display (Digital)? The calibration method is different for each.
6. Recalibrate an Analog (Knob) Oven
- Access the Screw: Turn off the oven and let it cool completely. Pull the temperature knob straight off its stem. On the back of the knob, you should see a small plate with one or two tiny adjustment screws. Sometimes, the screw is on the stem itself.
- Make the Adjustment: If your oven is running hot, turn the adjustment screw towards "Cooler" or "Decrease" by a small amount. If it's running cold, turn it towards "Warmer" or "Increase." The amount to turn is approximate; a 1/8th turn might correspond to 25°F. Make a small adjustment first.
7. Recalibrate a Digital Oven
- Find the Mode: This process is model-specific. Consult your user manual (search online for "[Your Oven Model Number] manual calibration"). The general process is usually to press and hold a button for several seconds.
- Common Procedures: Try one of these (or a similar combination):
- Press and hold the "Bake" or "Cook Temp" button for 5-8 seconds until the display shows "00," "0," or "CAL."
- Press "Bake" and "Broil" simultaneously for a few seconds.
- Enter the Offset: Once in calibration mode, use the arrow keys or number pad to enter the offset you calculated. If your oven was 30 degrees too hot, you would enter "-30." If it was 45 degrees too cold, you would enter "+45." Most ovens allow a maximum offset of 35°F. If your offset is greater, you likely have a bad sensor.
- Save the Setting: Press "Start" or "Self Clean" to save the new setting.
8. Handle Offsets Over 35°F: Check the Sensor
- If your oven is off by 50°F or more, calibration is unlikely to fix it. The problem is almost certainly a faulty temperature sensor.
- Visual Inspection: With the power off, look at the sensor probe inside the oven. Is it coated in heavy grease or burnt-on food? Is it physically bent and touching the oven wall? A dirty or misplaced sensor can cause inaccurate readings. Clean it gently with a mild degreaser and a non-abrasive pad. Ensure it is not touching any part of the oven interior.
9. (Advanced) Test the Temperature Sensor
- Tools: Multimeter, nut driver or screwdriver.
- Procedure: Turn off the breaker. Unscrew the two screws holding the sensor to the back wall of the oven. Carefully pull the sensor and its wire connector through the hole. Disconnect the wire harness. Set your multimeter to measure resistance (Ohms, Ω). Touch the multimeter probes to the two metal prongs on the sensor's connector. At room temperature (~70-75°F), a standard sensor should read around 1080-1100 Ω. If you get a reading of 0 (a short) or infinite resistance (an open circuit), the sensor is dead and must be replaced.
10. Replace the Temperature Sensor
- The Part: Order a replacement sensor specific to your oven model. They are typically inexpensive ($20-$40).
- Installation: Connect the new sensor to the wire harness, push the harness back through the hole, and screw the new sensor into place. It’s the reverse of removal.
11. Retest Your Oven
- Confirmation: After any calibration adjustment or part replacement, turn the power back on. Repeat the temperature test from Step 2 to confirm your fix was successful. You may need to make a final, smaller calibration adjustment to dial it in perfectly.
Common Causes
While improper calibration is a primary suspect, several other issues can cause your oven temperature to be wildly inaccurate.
- Drifted Calibration (Most Common): Over time, the electronic components in the sensor and control board age, causing their values to shift. This is the most frequent reason for an oven to be off by 25-50°F and is the easiest to fix.
- Faulty Temperature Sensor: This is the second most common cause. The sensor is the oven's nerve ending. If it's sending the wrong electrical signal to the brain (the control board), the oven will consistently run too hot or too cold. An offset of 50°F or more strongly points to a bad sensor.
- Leaking Door Gasket: The woven gasket around your oven door traps heat. If it becomes torn, brittle, or compressed, hot air escapes. This forces the oven to run its heating elements longer and more frequently to maintain temperature, leading to poor regulation, hot/cold spots, and roasted cabinet faces.
- Failing Heating Element: While a completely dead element is obvious (the oven won't heat), a failing element can be more subtle. It might have a weak spot that heats poorly, causing the oven to struggle to reach temperature and take an excessively long time to preheat. This can fool the sensor and lead to wide, unpredictable temperature swings.
- Defective Control Board (EOC): The "brain" itself can fail. A relay on the board might stick in the "on" position, causing the oven to overheat uncontrollably, or a processing error could misinterpret the sensor's signal. This is one of the most expensive repairs and should only be considered after ruling out the sensor and elements.
- Blocked Air Vents: Most ovens have a vent (often near the back of the cooktop) to release moisture and maintain proper air circulation. If this vent is blocked by pans or other items, it can trap heat and moisture, disrupting the oven's ability to regulate its temperature evenly.
Common Mistakes
Avoid these pitfalls when trying to diagnose and recalibrate your oven.
- Trusting the "Preheat" Light: The preheat signal often indicates that the oven has reached the setpoint for the first time. It does not mean the oven walls, racks, and air have stabilized. Always wait an additional 15-20 minutes after the preheat signal for a true temperature reading.
- Using an Inaccurate Thermometer: Don't try to diagnose a 50-degree problem with a $3 thermometer that could be 25 degrees off itself. Invest in a quality, reliable oven thermometer as your source of truth.
- Calibrating Based on One Reading: Don't just take one temperature snapshot. You must measure the high and low peaks of the oven's natural heating cycle to find the true average temperature.
- Ignoring the Door Gasket: Homeowners often jump straight to the sensor or control board. Run your hand (carefully!) around the edge of the door. If you feel significant heat escaping, you’ve found a major problem that no amount of calibration can fix.
- Forgetting the Manual for Digital Ovens: The button combination to enter calibration mode is unique to each brand and sometimes each model. Trying random button presses is frustrating and ineffective. A quick online search for your model's manual is the fastest path to success.
- Replacing Parts without Diagnosis: Don't assume the most expensive part (the control board) is the problem. A multimeter test of the temperature sensor costs nothing and can definitively confirm or deny its failure before you spend money on a replacement.
Cost & Time Breakdown
Here's a realistic look at what it costs and how long it takes to fix an inaccurate oven, whether you do it yourself or hire a professional.
| Task | DIY Cost | Pro Cost | Time Required |
|---|---|---|---|
| In-Oven Thermometer | $10 - $25 | N/A | 5 minutes to place |
| DIY Oven Calibration | $0 | $120 - $180 | 45-60 minutes |
| Temperature Sensor | $20 - $50 | $150 - $250 | 30-45 minutes |
| Oven Door Gasket | $30 - $70 | $140 - $220 | 20-30 minutes |
| Heating Element (Bake) | $25 - $80 | $180 - $300 | 30-60 minutes |
| Control Board (EOC) | $150 - $400+ | $400 - $700+ | 1-2 hours |
Tips & Prevention
- Keep a Thermometer In-House: Leave a quality oven thermometer in your oven at all times. This gives you a constant, at-a-glance confirmation of the real temperature, not just the setpoint.
- Never Use Foil on the Bottom: Placing aluminum foil on the floor of your oven or on the bottom rack can block airflow and interfere with the heating element and temperature sensor, causing significant heating problems.
- Proper Rack Placement: Unless a recipe specifies otherwise, always cook in the center of the oven. This ensures the most even heat exposure and avoids proximity to the hotter zones near the elements.
- Clean Your Sensor: When you self-clean your oven, take a moment afterward to gently wipe down the temperature sensor probe with a damp cloth to remove any baked-on residue that might insulate it.
- Inspect the Gasket: Twice a year, visually inspect your oven door gasket for any signs of cracking, fraying, or flattening. A good seal is crucial for efficiency and temperature accuracy.
- Allow for Full Preheat: To ensure an accurate starting temperature, let your oven preheat for at least 20 minutes, even if the preheat light turns off sooner. This allows the oven walls and racks to become fully heat-soaked.
When to Call a Professional
While DIY calibration is very manageable, certain situations warrant calling a qualified appliance repair technician. A professional can diagnose complex issues faster and safer. You should call a pro if:
- Your oven is off by more than 75-100°F. An extreme temperature deviation often signals a more serious failure, like a shorted sensor or a bad control board relay.
- Calibration doesn’t fix the problem, or the oven allows for only a +/- 35°F adjustment when your issue is larger.
- You are not comfortable or experienced with using a multimeter to test electrical components like the sensor or heating element.
- You suspect the control board (EOC) is the issue. This is an expensive part, and a professional diagnosis is essential before replacing it.
- The oven exhibits other electrical problems, such as a display that is flickering, error codes appearing, or the oven tripping the circuit breaker.
- If you have a gas oven and smell gas at any time, shut off the gas supply immediately and call for emergency service. Do not attempt to diagnose or repair it yourself.
Ultimately, a professional repair is a small price to pay for safety and the peace of mind that your expensive appliance is functioning correctly. If you are ever in doubt, make the call.
Related Articles
Keep troubleshooting with these hand-picked guides from FixlyGuide:
- The #1 Mistake Homeowners Make When Their Dishwasher Stops Cleaning (And the Simple Fix) — Discover the most common reason your dishwasher isn't cleaning dishes and learn a simple, effective fix you can do yourself in minutes.
- Why Did Just One Electric Stove Burner Stop Working? — It's a common kitchen puzzle: one electric stove burner suddenly quits while the others work perfectly. We dive into the simple, independen…
- The #1 Mistake Homeowners Make When Their Dryer Isnt Drying (And How to Fix It Free) — Most homeowners assume a slow dryer means a broken dryer, but the most common culprit is a simple, often overlooked maintenance issue that'…
- Your 'Clean' Dishes Are Still Dirty? The Culprit Is Hiding — Frustrated by gritty, food-flecked dishes after a full wash cycle? The problem isn't your detergent. Your dishwasher is making dishes dirti…
- The #1 Mistake Homeowners Make When Their Ice Maker Stops (And the Easy Fix) — Before you call for service, learn the most common and easily fixable reason your refrigerator's ice maker isn't producing ice.
- The Secret Reason Your Oven Fails to Heat (It's NOT Always the Element) — Discover why your oven isn't reaching its set temperature, from common part failures to overlooked calibration issues, and how to fix it.
Frequently asked questions
How much can I realistically calibrate my oven by?+
Most digital ovens allow for a temperature offset calibration of plus or minus 35 degrees Fahrenheit. Some analog (knob-controlled) ovens may allow for a slightly larger adjustment. If your oven's temperature is off by more than 35-50 degrees, the problem is likely a faulty component like the temperature sensor, not just calibration drift.
Why is my oven hotter at the top than the bottom?+
This is normal oven behavior. Heat rises, so the top of the oven is naturally hotter. Furthermore, the top broil element may be used during the preheat phase, superheating the upper portion of the oven cavity. For the most even cooking, use the center rack position unless a recipe specifically directs otherwise.
Can a dirty oven affect temperature accuracy?+
Yes. Heavy grease or carbon buildup on the temperature sensor can insulate it, causing it to send delayed or inaccurate readings to the control board. This can lead to the oven running hotter than the set temperature. Likewise, a thick layer of grime on the heating elements can reduce their efficiency.
How do I know if my oven temperature sensor is bad?+
The two main signs of a bad sensor are a temperature inaccuracy greater than 50°F or a specific error code on the display (like F3 or F4 on many models). You can definitively test it by disconnecting it from power and using a multimeter to check its resistance in Ohms at room temperature. It should read around 1080-1100 Ohms; a reading of zero or infinity means the sensor is faulty and needs to be replaced.


Discussion
Loading comments…