
Tools & materials you'll need
Affiliate links- AmazonNon-Contact Voltage Tester1 · Essential for verifying power is off before you begin work.
- AmazonMultimeter1 · Optional but highly recommended for confirming continuity and voltage.
- Amazon4-in-1 Screwdriver1 · Will have the Phillips and flat heads needed for cover plates and devices.
- AmazonWire Strippers1 · Needed if you have to re-strip any wire ends.
- AmazonLineman's Pliers1 · Useful for twisting wires together before capping with a wire nut.
- AmazonHeadlamp1 · Frees up your hands to work when the power is off.
As an Amazon Associate FixlyGuide earns from qualifying purchases — at no extra cost to you. Prices and availability are accurate as of publication and subject to change.
Quick Answer
In a standard US electrical junction box, black wires are "hot" (carrying power), white wires are "neutral" (completing the circuit), and bare copper or green wires are "ground" (for safety). Red wires are also hot, typically used as "travelers" in 3-way switches or as a second live wire in 240-volt circuits. However, always confirm wires are dead with a non-contact voltage tester before touching them, and be aware that exceptions, like a white wire being used as a hot in a "switch loop," do exist.
The Problem
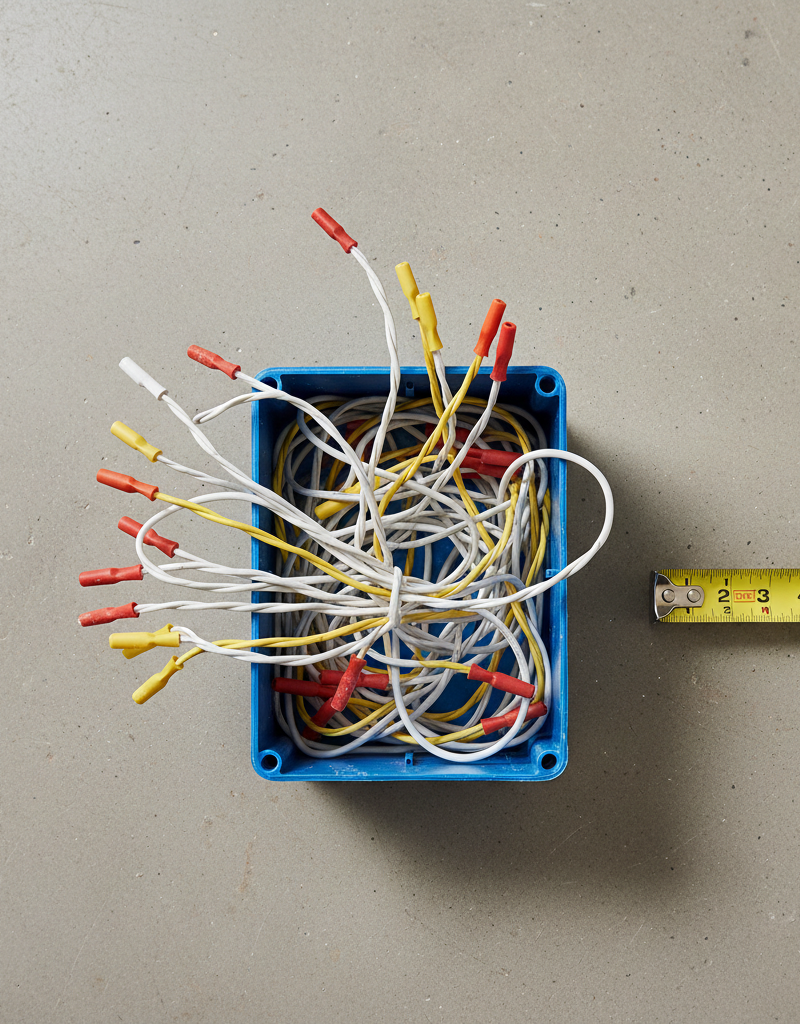
You open a junction box to replace a light fixture or an outlet and are immediately confronted with a confusing nest of wires. There are black ones, white ones, maybe a red one, and some bare copper wires, all twisted together under plastic caps. Your simple 30-minute task now feels like defusing a bomb. Which wire goes where? Guessing is not an option; a wrong connection can lead to a non-working fixture at best, or a short circuit, electrical fire, or dangerous shock at worst. The colors are a code, but without the key, you're working in the dark. This isn't just an inconvenience; it's a critical safety issue that stops many DIY projects in their tracks.
How It Works
To understand wire colors, you must first understand a basic electrical circuit. Think of your home's wiring like a closed-loop water system. The "hot" wire (usually black) is the pressurized pipe delivering power from the source (your electrical panel). The appliance (a light, outlet, etc.) is like a water wheel that does work as the current passes through it. The "neutral" wire (usually white) is the return pipe, completing the circuit by carrying the "used" electricity back to the panel. Without this return path, the circuit is broken, and electricity cannot flow.
So, what about the third wire? The "ground" wire (bare copper or green) is a safety feature. It's like an emergency overflow drain. It doesn't do anything in normal operation. Its job is to provide a safe path for electricity to flow to the earth if there's a fault, like a hot wire touching a metal part of the appliance or junction box. This intentional short circuit will trip the circuit breaker, instantly cutting off the power and preventing a dangerous electric shock. The National Electrical Code (NEC) dictates the standards for wire colors, gauges, and connections to ensure this system works safely and predictably across the country. A junction box is simply a fire-resistant container—usually plastic or metal—designed to house and protect the point where these wires connect to each other, safely containing any sparks or heat from a loose connection.
Step-by-Step Fix
This guide will walk you through the process of safely identifying the wires in a typical 120-volt junction box. This is a diagnostic process, not a repair. Never work on live wires.
1. Safety First: De-energize the Circuit
- Action: Go to your home's main electrical panel (breaker box). Locate the circuit breaker that controls the outlet, switch, or fixture you're working on. Flip it to the full "OFF" position. If your breakers aren't labeled, you may need a partner to help you identify the correct one by turning things on and off.
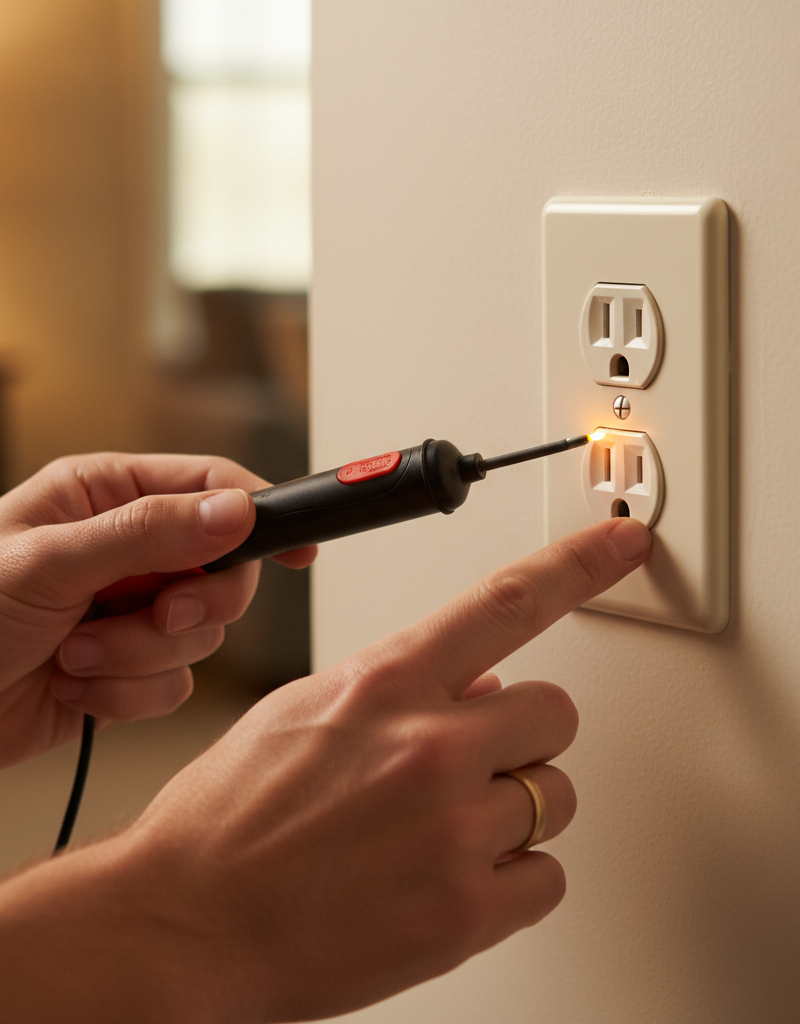
- Critical Safety Check: Return to the junction box. Use a non-contact voltage tester (a pen-style tester) and hover its tip near every wire and connection inside the box. The tester should not light up or beep. Confirm there is no power before proceeding.
2. Prepare the Junction Box
- Action: Using a screwdriver or nut driver, carefully remove the screws holding the junction box cover plate. If you are working on an outlet or switch, you will need to unscrew it from the box and gently pull it out to expose the wiring behind it. Be prepared for wires to be folded tightly inside.
3. Identify the Ground Wires
- Action: These are the easiest to spot. Look for either bare, uninsulated copper wires or wires with green insulation. All ground wires in the box should be connected together, often with a crimp or a green wire nut. They should also be connected to a green screw on the outlet or fixture and to the junction box itself if it's metal.
4. Identify the Neutral Wires
- Action: Look for all the wires with white or, in some older homes, light gray insulation. In a simple setup, all the white wires will be bundled together under a single wire nut. They connect to the silver-colored screws on an outlet or the designated neutral terminal on a light fixture.
5. Beware the "Hot" White Wire Exception
- Action: Carefully inspect the white wires. Is one of them wrapped with a piece of black or red electrical tape near its end? If so, this wire is not a neutral. It is being used as a hot wire, a practice allowed by code in specific situations like a "switch loop," where the power source is at the fixture and a two-wire cable runs down to a switch. The white wire carries power down to the switch, and the black wire carries the switched power back up. Always treat a re-identified white wire as hot.
6. Identify the "Always Hot" Wires
- Action: Look for the black wires. These are the primary current-carrying "hot" wires. You will often find a group of black wires connected, which represents the main power feed from the panel being distributed to other parts of the circuit. A single black wire connected to a brass screw on an outlet or switch is the "line" or "hot" connection that powers the device.
7. Identify Switched Hots and Travelers
- Action: Look for red wires. Red wires are also hot. They are most commonly used in two scenarios:
- Three-Way Switches: In a circuit where two separate switches control one light, red wires act as "travelers," carrying power between the two switches. You will typically see a black (common), a red (traveler), and another traveler (which could be the re-identified white wire) in this setup.
- 240-Volt Circuits: For large appliances like dryers or ovens, a red wire often serves as the second hot wire, along with a black one. (This is less common in a standard lighting/outlet junction box).
- Blue and yellow wires can also be used as hot wires, often for switched legs in commercial applications or when wiring is run through conduit.
8. Analyze the Connections
- Action: Now, step back and look at the groupings. The way wires are connected with wire nuts tells a story.
- Power-In/Power-Out: A bundle of blacks, whites, and grounds together suggests the box is passing power through to another location.
- Pigtail: You might see the main group of hot (black) wires connected with a single, short wire (a "pigtail") that then connects to the switch or outlet. This is a best-practice way to ensure a solid connection.
- Switch Leg: If you see a black wire from one cable connected to a white wire from another (which should be marked with black tape), you've found a switch leg.
9. Use a Multimeter for Absolute Confirmation
- Action: For advanced users wanting 100% certainty (with the power OFF), you can use a multimeter set to the continuity or resistance (Ω) setting. Disconnect the wires you want to test. Touch one probe to the end of a wire in your junction box and the other probe to where you think its other end is (e.g., at the switch or light fixture). A beep or a reading near zero ohms confirms they are part of the same continuous wire.
10. Document and Label Before Disconnecting
- Action: Before you take anything apart, take a clear photo with your smartphone. For more complex setups, use masking tape and a pen to create small labels for each wire (
line,load,traveler 1, etc.) before you disconnect them. This five-minute step can save hours of frustration.
Common Causes of Confusion
Why isn't reading wires always straightforward? Several factors can create a confusing junction box.
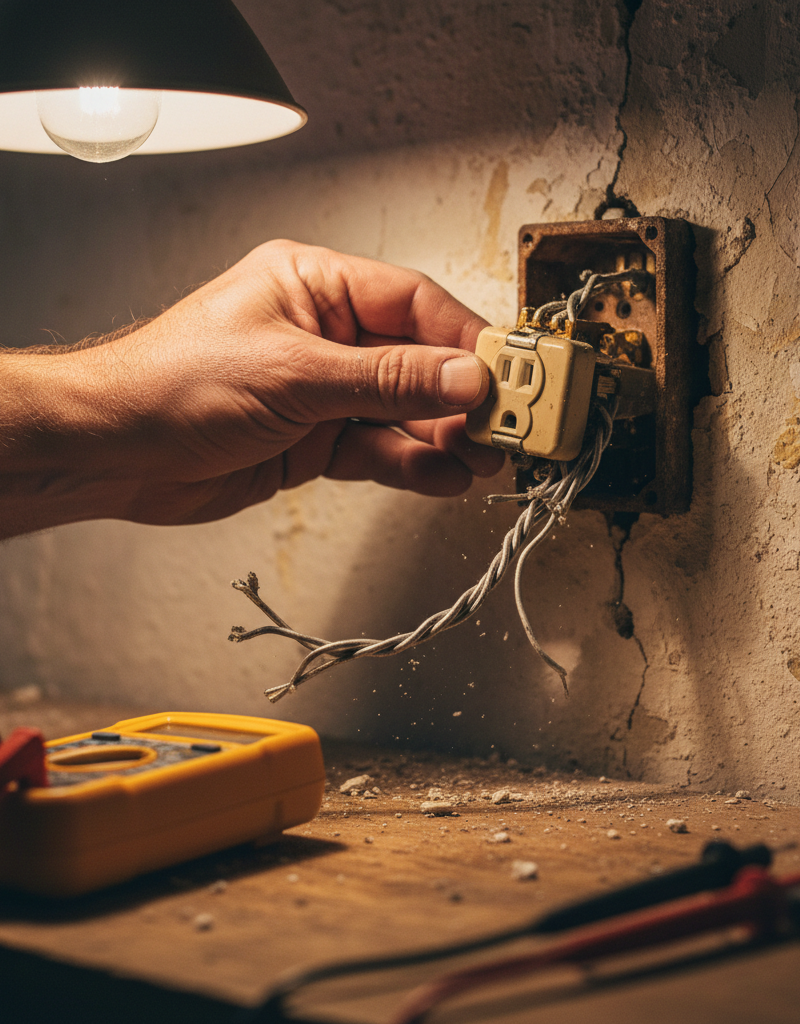
- Older Wiring: Homes built before the 1960s may have wiring that doesn't conform to modern color codes. You might find cloth-insulated wires that are all black, or insulation that has faded over the decades, making colors indistinguishable.
- Unlicensed or DIY Wiring: Previous work done by someone who didn't follow the NEC can lead to a chaotic and dangerous mix of colors. People may use whatever color wire they have on hand, creating a truly unpredictable situation.
- Complex Circuits: A junction box might serve multiple purposes. It could contain wires for a standard outlet, a switched outlet, and a 3-way switch all in the same box, leading to a high density of black, red, and re-identified white wires.
- Switch Loops: The concept of using a white wire to carry power is inherently confusing for beginners. Without the proper black-tape marking (which is often omitted in sloppy work), it's a recipe for mistakes.
- Multiple Circuits: In some cases, a large junction box may legally contain wires from two different circuits. This requires careful identification to ensure you don't accidentally connect a hot from one circuit to a neutral from another.
Common Mistakes
- Assuming White is Always Neutral: This is the #1 mistake. Failing to spot a white wire re-identified with black tape (or one that should have been) can lead to connecting a hot wire directly to a neutral terminal, causing an immediate short circuit.
- Ignoring a Ground Connection: Some people, when replacing an old ungrounded fixture, simply snip or ignore the ground wire. This eliminates a critical safety feature of the electrical system.
- "Testing" with a Spark: Never briefly tap a wire to see if it sparks. This archaic and incredibly dangerous practice can cause arc flash, damage equipment, and deliver a severe shock.
- Over-stuffing a Box: Junction boxes have a maximum "fill" capacity based on their cubic inch volume and the number/gauge of wires inside. Jamming too many wires in can damage the insulation and lead to overheating.
- Leaving Connections Exposed: All wire splices and connections must be contained within an approved and covered junction box. It is against code and extremely dangerous to leave wire nuts floating in a wall cavity.
- Mixing Line and Load: On devices like GFCIs or smart switches, there are specific terminals for the incoming power ("line") and the outgoing power to the device/downstream outlets ("load"). Reversing them will cause the device to not function correctly.
Cost & Time Breakdown
This project is about diagnosis, so the primary cost is for tools. The "Pro Cost" reflects a typical service call for an electrician to diagnose and repair a wiring issue.
| Task | DIY Cost | Pro Cost (Labor) | Time |
|---|---|---|---|
| Inspecting and Identifying Wires | $30 - $50 (for testers) | $100 - $200 | 30-60 Minutes |
| Replacing a Standard Outlet | $5 (outlet) + tools | $125 - $250 | 30 Minutes |
| Replacing a 3-Way Switch | $15 (switch) + tools | $150 - $300 | 45-75 Minutes |
| Troubleshooting Faulty Wiring | $50 (multimeter) | $200 - $400+ | 1-3 Hours |
Tips & Prevention
- Trust, But Verify: Always use a non-contact voltage tester, even if you're sure you flipped the right breaker. Circuits can be mislabeled.
- Photograph Everything: Before you disconnect a single wire, take high-resolution photos from multiple angles. This is your best blueprint for reassembly.
- Use Pigtails: When connecting multiple wires to a single device screw, it's better to connect the wires with a wire nut and a short "pigtail" wire that then connects to the device. This provides a more reliable connection.
- Mark Your Wires: Don't be shy with electrical tape. If you identify a white wire acting as a hot, wrap its last inch with black electrical tape to make it clear for yourself and the next person.
- Own a Multimeter: A basic multimeter is an invaluable diagnostic tool for any homeowner. Learning to check for voltage (power on) and continuity (power off) will elevate your DIY skills and safety.
- Righty-Tighty, Lefty-Loosey: Remember that screws on outlets and switches tighten by turning them clockwise. Ensure all connections are snug, but don't overtighten and damage the device.
When to Call a Professional
While identifying wires is a manageable DIY task, certain situations absolutely require a licensed electrician. If you open a box and see any of the following, stop immediately and make the call: aluminum wiring (dull gray instead of coppery), knob-and-tube wiring (ceramic insulators and individual wires), brittle or cloth-based insulation, any signs of black scorching, melting, or a strong acrid smell. These are indicators of older, failing, or dangerously overloaded wiring that needs a professional assessment. Furthermore, if you've followed the guide and the wiring still doesn't make sense, or if you feel any tingling sensation (a sign of a serious ground fault), do not proceed. An electrician has the diagnostic tools and experience to trace complex circuits and identify dangerous, non-standard wiring safely. Any work that involves adding a new circuit or running new cables through walls is not a beginner project and typically requires a permit and a professional.
Related Articles
Keep troubleshooting with these hand-picked guides from FixlyGuide:
- 1 warm breaker = fire risk. Here's why. — A single warm circuit breaker in your electrical panel is a red flag for a dangerous condition like an overload, loose wire, or failing com…
- The 7 Head-Scratching Reasons Your Outlet Died (Even With The Breaker On) — Discover the surprising reasons why an electrical outlet might stop working even when its circuit breaker is fully engaged, and how to safe…
- The 3 Hidden Reasons Your Circuit Breaker Keeps Tripping (And How to Stop It) — Uncover the surprising culprits behind repeatedly tripping circuit breakers and learn practical, actionable steps to diagnose and resolve t…
- Why Does Only One Outlet Have No Power (When the Breaker Is On)? — Discover the surprisingly common reasons a single electrical outlet stops working while its circuit breaker remains on, and learn how to sa…
- That One Warm Breaker Is Trying to Tell You Something — A single warm circuit breaker is not normal; it's a critical warning sign of an electrical issue, often an overload or a dangerous loose co…
- The Dryer Vent Fire Trap: 3 Hidden Signs Your Home Is at Risk — Learn the critical signs your dryer vent is clogged and how to safely clean it to prevent a dangerous house fire.
Frequently asked questions
What do I do if all the wires are the same color, like black?+
If you encounter wiring that is all one color (often black with crumbling insulation), you likely have very old knob-and-tube or cloth-insulated wiring from before modern color codes were adopted. This type of wiring is often ungrounded and can be brittle. It is highly recommended that you stop work immediately and call a licensed electrician to assess its condition.
Can I have wires from different circuits in the same junction box?+
Yes, it is sometimes permissible under the NEC, but there are strict rules. All conductors, including the neutral and ground, from each circuit must be present in the box. The voltage between conductors should not exceed 300V unless the box is partitioned. This is an advanced scenario, and if you suspect multiple circuits, it's best to have an electrician verify and work on it.
Why is there a red wire in my junction box?+
A red wire is almost always a hot wire. Its most common use is as a 'traveler' in a 3-way switch circuit (where two switches control one light). It can also be found as the second hot wire in a 240-volt circuit for an appliance, or sometimes as the switched hot leg running from a switch to a light fixture.
What happens if I mix up the hot and neutral wires?+
Reversing the hot and neutral wires on a standard outlet will still allow the appliance to receive power, but it creates a serious safety hazard. The 'off' switch on the appliance may now be disconnecting the neutral side instead of the hot side, meaning the internal components of the appliance remain energized even when it's turned off. This poses a significant shock risk.
Discussion
Loading comments…