
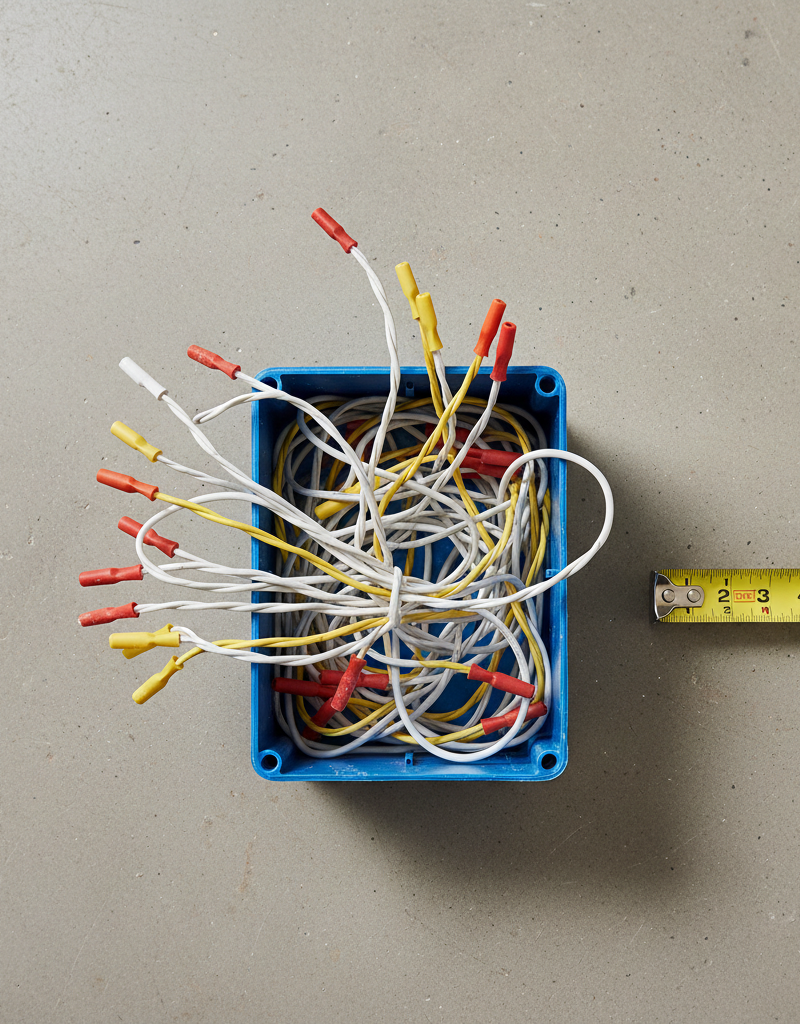
Tools & materials you'll need
Affiliate linksAs an Amazon Associate FixlyGuide earns from qualifying purchases — at no extra cost to you. Prices and availability are accurate as of publication and subject to change.
Quick Answer
Backstabbed outlets, which use a spring-loaded clip to grip the wire instead of a secure screw terminal, are a common failure point in modern homes. These connections loosen over time due to heat, vibration, and material fatigue, leading to flickering lights, dead outlets, and dangerous arcing that can create a fire hazard. The solution is to replace the outlet and connect the wires using the more reliable and permanent side-screw terminals. This is a crucial safety upgrade for any home with push-in style wiring.
The Problem
The convenience of backstabbed, or "push-in," electrical outlets comes at a steep price. Builders in the 1970s through the early 2000s loved them because they were fast to install, saving precious seconds on each outlet, which added up to significant labor savings across a whole house or subdivision. To install one, an electrician simply strips a bit of insulation and shoves the solid copper wire into a hole on the back of the receptacle. A tiny internal spring clip grabs the wire, and the connection is made.
However, that connection is incredibly flimsy. The total contact area between the spring clip and the copper wire is minuscule, creating a point of high resistance. As electricity flows through it, this tiny point heats up. Over thousands of cycles of heating and cooling, the cheap spring steel fatigues and loses its tension. Vibrations from everyday life—walking across the floor, closing a door—can further loosen the connection. Oxidation builds up on the copper, increasing resistance and heat even more.
Eventually, the connection becomes intermittent. You might notice lights on a circuit flickering when you plug in a vacuum cleaner. An entire string of outlets might suddenly stop working. This isn't just an annoyance; it's a critical warning sign. The loose connection can begin to arc—electricity jumping the microscopic gap—generating intense heat in excess of 1,000°F. This is more than enough to melt the outlet's plastic housing and ignite the surrounding paper and wood inside your wall, creating a serious fire risk.
How It Works
Understanding the difference between a backstab connection and a screw-terminal connection reveals why one is a hazard and the other is a permanent solution.
-
Backstab Connection: A backstabbed outlet relies on what is essentially a tiny, low-grade spring clamp. The solid copper wire is pushed into a small hole, and a spring-tempered metal clip presses against one side of it. The entire electrical load for that outlet—and often for all other outlets downstream on the same circuit—is forced through this single, precarious point of pressure. The grip is weak from the start and is guaranteed to degrade over time through thermal cycles (expansion and contraction from heat), oxidation, and vibration. There is no way to tighten it or improve it; its failure is a matter of when, not if.
-
Side-Screw Connection: The side-screw method is the gold standard for electricians and the only method that should be used. The wire is stripped, and the end is bent into a J-hook shape. This hook is then looped around a thick metal screw on the side of the outlet. When the screw is tightened, it clamps the entire surface of the hook powerfully against a large, conductive metal plate. This creates a huge surface area for electricity to flow, minimizing resistance and heat. Furthermore, this is a mechanically robust connection that is highly resistant to vibration and will not loosen on its own. It provides a secure, reliable, and safe flow of power that will last for decades.
Step-by-Step Fix
This guide covers replacing a single outlet. If you find one backstabbed outlet, you should assume all outlets of a similar age in your home are the same and plan to replace them all. Take your time and prioritize safety above all else.
SAFETY NOTE: This work requires turning off mains power. If you are not 100% confident in your ability to safely identify the correct circuit breaker and verify that power is off, do not proceed. Never work on live electrical wiring.
- Kill the Power: Go to your home's electrical panel. Identify the breaker that controls the outlet you're working on. Flip it to the full "OFF" position. Some breakers need to be pressed firmly to switch off completely.
- Verify Power is Off: Plug a lamp or an outlet tester into the outlet to confirm it has no power. Then, use a non-contact voltage tester by inserting its tip into the outlet's slots. The tester should not light up or beep. This double-check is non-negotiable.
- Remove the Old Outlet: Unscrew the single or double screw holding the faceplate on. Then, unscrew the top and bottom screws that mount the outlet to the electrical box in the wall.
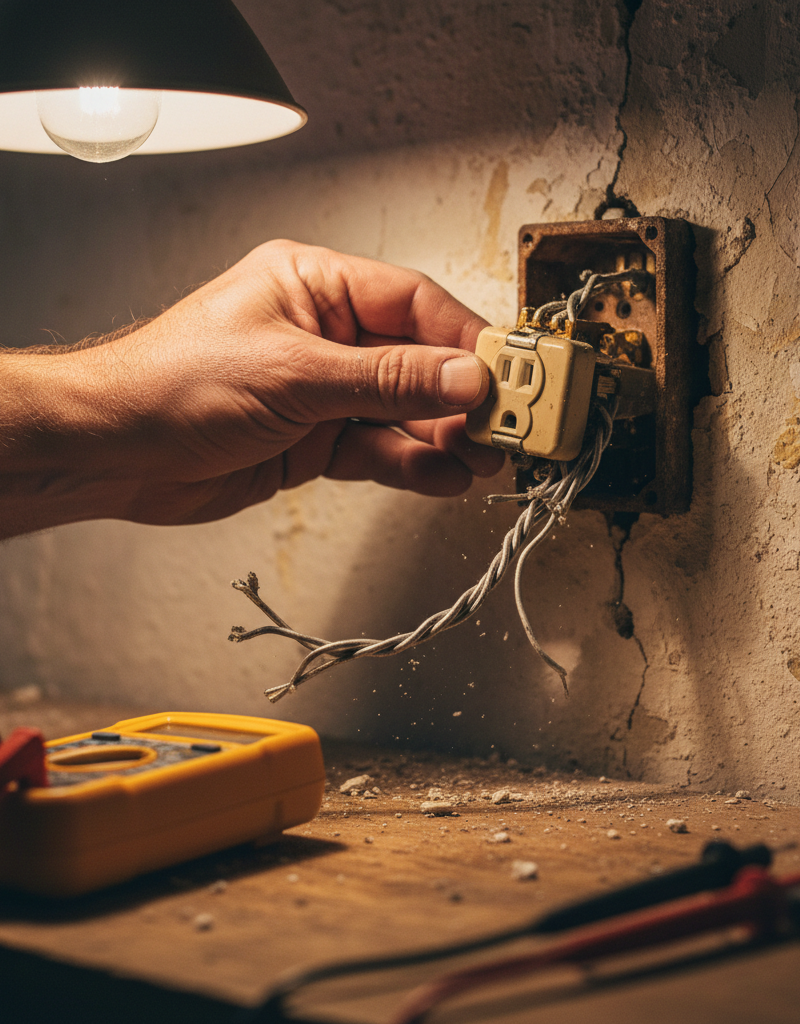
- Expose and Photograph the Wiring: Gently pull the outlet straight out from the wall. The wires will be stiff. Pull it out far enough to work on, typically 4-6 inches. Before you disconnect anything, take a clear photo with your phone. This is your map for putting everything back together correctly.
- Release the Backstabbed Wires: Look for the small release slots next to the holes where the wires are inserted. Push a very small flathead screwdriver or a stiff piece of wire into the slot to release the spring's tension, and pull the corresponding wire out. Do this for all wires. Do not simply yank or twist the wires out, as this can damage them.
- Inspect the Wires: Look closely at the copper ends of the wires you just removed. You will likely see scorch marks, discoloration, or even melted plastic on the back of the outlet. If the copper wire itself appears brittle, nicked, or heavily scorched, stop and call an electrician. The wire may need to be trimmed back, and if it becomes too short to work with, it requires a professional solution.
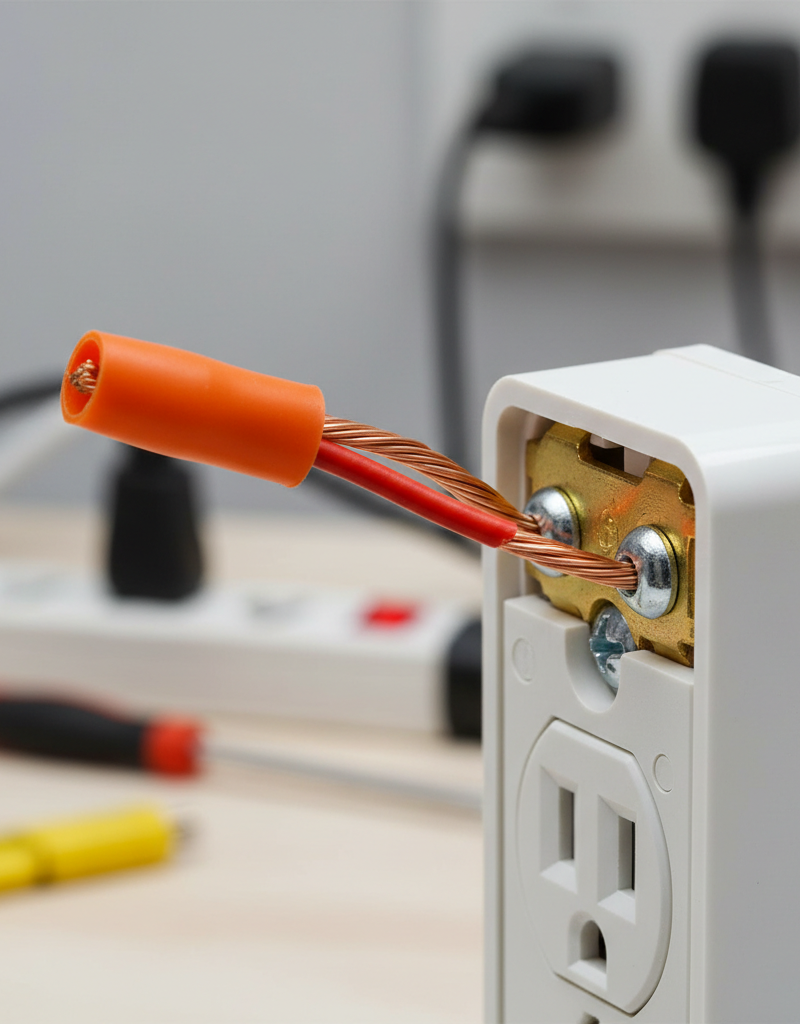
- Prepare Wires for Side Screws: Using a wire stripper, strip exactly 3/4 inch of insulation from the end of each wire. Use needle-nose pliers to bend the exposed copper end into a "J" shape, or a shepherd's hook.
- Connect Wires to the New Outlet: Connect the wires to the correct terminal screws on the new, high-quality receptacle:
- Black (Hot) Wire connects to the Brass or Gold colored screw.
- White (Neutral) Wire connects to the Silver colored screw.
- Bare Copper or Green (Ground) Wire connects to the Green screw.
- Secure the Wires Properly: Loop the J-hook around the screw so that tightening the screw (clockwise) will also pull the hook tighter. The insulation should come right up to the screw head but not be underneath it. Use a screwdriver to tighten the screws firmly. They should be snug, but do not use excessive force that could strip the screw or damage the outlet.
- Wrap and Fold: For an extra layer of safety, wrap the body of the outlet with a couple of layers of electrical tape, covering the terminal screws. This helps prevent any accidental contact with the side of the metal electrical box. Carefully fold the wires back into the box in an accordion or "S" shape. Do not just jam them in.
- Mount the New Outlet: Screw the outlet back onto the box, making sure it's straight and flush. Reinstall the faceplate.
- Test Your Work: Turn the circuit breaker back to the full "ON" position. Use an outlet tester to plug into the outlet. It should light up to indicate power and correct wiring. If it indicates an error or doesn't light up, turn the breaker off immediately and re-check your work, or call a professional.
Common Causes of Failure
The fundamental cause of failure is the poor design of the backstab spring clip itself. However, several factors accelerate this degradation:
- Thermal Cycling: The primary culprit. As you use the outlet, it heats up, causing the metal wire and spring to expand slightly. When not in use, it cools and contracts. This constant micromovement, thousands of times over, weakens the spring's tension until it no longer makes a solid connection.
- High-Load Devices: Plugging in devices that draw a lot of current, like space heaters, hair dryers, or large vacuum cleaners, generates more heat and accelerates the thermal cycling and degradation process.
- Vibration: Normal household vibrations from walking, closing doors, or nearby construction can be enough to jostle the loose connection, causing interruptions in power and arcing.
- Oxidation: Copper naturally forms a layer of oxide when exposed to air. On a loose connection, this insulating layer can build up between the wire and the spring clip, increasing resistance and generating even more dangerous heat.
- Poor Installation: If the original installer stripped too much or too little insulation, it can prevent the wire from seating properly, creating a faulty connection from day one.
Common Mistakes
Avoid these frequent errors when performing this upgrade. A simple mistake with electrical work can have serious consequences.
- "Forgetting" to Turn Off the Power: Never assume an outlet is off. Always turn off the breaker and verify with a voltage tester before touching any wires.
- Hooking the Wire Backwards: The J-hook must wrap around the screw terminal in a clockwise direction. If you hook it counter-clockwise, the act of tightening the screw will actually force the hook to open up and loosen.
- Under/Over-Tightening Screws: The terminal screws must be firm and snug. Too loose, and you've created a new hazard similar to the backstab. Too tight, and you can strip the screw, break the terminal, or damage the copper wire.
- Ignoring Damaged Wires: If you see nicks, deep scratches, or scorch marks on the copper wire, don't reuse it as-is. This damage creates a weak spot and a point of high resistance. A pro will know how to safely trim the wire and, if necessary, add a "pigtail" to extend it.
- Reusing Old Outlets: Never reinstall an old backstabbed outlet, even if you move the wires to its screw terminals. The entire device is likely builder-grade trash. For a few dollars, a new, quality outlet is a worthwhile investment in safety.
- Not Using a Torque Screwdriver: While not essential for DIY, professional electricians use special torque screwdrivers to tighten terminal screws to the exact specification (usually 12-14 inch-pounds). This guarantees a perfect connection. For a DIYer, "firmly snug" is the goal.
Cost & Time Breakdown
Replacing a single backstabbed outlet is a very affordable DIY project. The cost increases if you hire a professional, but their expertise guarantees a safe and correct installation.
| Item / Service | Cost (DIY) | Cost (Pro) | Notes |
|---|---|---|---|
| Spec-Grade Receptacle-15/20 Amp | $3 - $8 per outlet | $15 - $30 (part of labor) | Vastly superior to cheap $1 builder-grade outlets. |
| Non-Contact Voltage Tester | $15 - $30 | N/A | A required safety tool you will use for many projects. |
| Outlet Tester | $5 - $15 | Included in service | Confirms correct wiring after installation. |
| Basic Electrical Tools | $20 - $40 (if you have none) | N/A | Includes wire strippers, screwdrivers, pliers. |
| Electrician Service Call | N/A | $125 - $250 | Typically covers the first hour; can replace multiple outlets. |
Tips & Prevention
- Always Use the Screws: Even when installing a brand-new outlet that has backstab holes, ignore them. Always use the side-screw terminals. Reputable manufacturers have even begun to stop producing outlets with the push-in feature.
- Buy "Spec-Grade" Outlets: Don't cheap out. Spend a few extra dollars on "Specification Grade" or "Commercial Grade" outlets. They have heavier-duty components, stronger plastics, and superior screw terminals that provide a more secure connection.
- Pigtail When Necessary: If you have multiple wires coming into the box (common in mid-circuit outlets), the best practice is to "pigtail" them. This involves connecting all the black wires together with a new, short "pigtail" wire using a wire nut. That single pigtail then connects to the outlet. Repeat for the white and ground wires. This prevents the outlet from being part of the downstream circuit, isolating it from potential failure.
- Check for Warmth: Periodically, feel your outlets (not the plug, the faceplate itself). If an outlet faceplate ever feels warm to the touch with nothing plugged in, it's a sign of a dangerous, loose connection inside. Turn off the circuit and investigate immediately.
- Identify Aluminum Wiring: While you have an outlet out, check your wiring. If the metal wires are silver-colored (aluminum) instead of copper, STOP IMMEDIATELY. Aluminum wiring is a significant fire hazard that requires special connectors and professional expertise. Do not attempt to fix this yourself.
When to Call a Professional
While replacing an outlet is a manageable project for a careful DIYer, there are clear signs when you must stop and call a licensed electrician. Electrical work carries inherent risks, and a professional's fee is a small price to pay for your home's safety and your peace of mind.
Call an electrician if you encounter any of the following:
- Evidence of Fire or Melting: If you see significant scorch marks, melted plastic on the outlet or wires, or smell a distinct "ozone" or burning plastic odor, there has already been a dangerous arcing event.
- Brittle or Cracked Wire Insulation: Old wires can become brittle. If the insulation cracks or flakes off when you move it, you can easily create a short circuit.
- Aluminum Wiring: As mentioned above, if your home has aluminum wiring, do not touch it. It requires specialized knowledge and materials to work with safely.
- Short Wires: If, after trimming a damaged end, the wires are too short to comfortably pull out of the box and wrap around the new outlet's screws (less than 3 inches extending from the box), an electrician will need to safely extend them.
- Lack of Confidence: If at any point you feel unsure, confused, or uncomfortable, stop. There is no shame in deferring to a professional for work that can have such high stakes.
Related Articles
Keep troubleshooting with these hand-picked guides from FixlyGuide:
- 1 Flickering Light? It's Probably Not What You Think. — If the lights in a single room are flickering, the problem is usually a simple electrical issue you can often diagnose and fix yourself.
- Why Does Only One Room Have Flickering Lights? The Real Culprit — Flickering lights in a single room often point to loose connections, an overloaded circuit, or a failing light fixture, rather than a whole…
- Fix Flickering Lights Throughout Your House: A DIY Guide — Flickering lights throughout your house are usually caused by loose connections. This guide will help you diagnose and fix the most common…
- Why Does Only One Room Have Flickering Lights? The Real Culprit — Flickering lights in a single room often point to a localized electrical issue, most commonly a loose connection within the circuit.
- GFCI Outlet Won't Reset? Fix It With These Simple Steps — A GFCI outlet that won't reset usually indicates a tripped circuit, a ground fault, or a faulty outlet. Learn how to diagnose and fix the p…
- The 3 Hidden Reasons Your LED Bulbs Die Early (And the Simple Fixes) — LED bulbs promise long life, but often fail prematurely due to hidden electrical issues or incompatible fixtures. Learn the real culprits.
Get the print-ready PDF of this guide
A clean, ad-free, printable version you can keep on your phone or pin to the workshop wall. We'll also send occasional weekly tips matched to your home situation.
- Print-optimized layout
- Tools, materials & every step included
- Unsubscribe anytime
Frequently asked questions
Are backstabbed outlets against the electrical code?+
No, most backstabbed outlets are UL (Underwriters Laboratories) listed, so they are not technically against code. However, they are widely considered to be poor practice by virtually all licensed electricians due to their high failure rate over time.
How can I tell if I have backstabbed outlets without taking them out?+
Unfortunately, you can't. The only way to be certain is to turn off the power, remove the faceplate, and look at the back of the outlet. If the wires enter small, individual holes on the back plastic housing, it's backstabbed. If they are wrapped around screws on the side, you have a secure connection.
If one outlet is bad, can I just replace that one?+
You can, but it is highly recommended that you replace all of them. Electrical outlets are often wired in series, so a loose connection in one can affect all the other outlets 'downstream' on the same circuit. If you find one, assume they are all the same age and quality and should all be upgraded for safety.
What is 'pigtailing' and is it necessary?+
Pigtailing is the process of connecting the incoming and outgoing circuit wires together with a short (6-inch) wire of the same gauge, using a wire nut. This single short wire, the 'pigtail,' is then what connects to the outlet's screw terminal. This is the preferred professional method because it means the outlet itself is not carrying the electrical load for the rest of the circuit, making the entire circuit more robust and reliable.
Discussion
Loading comments…