
Tools & materials you'll need
Affiliate linksNo materials required.
As an Amazon Associate FixlyGuide earns from qualifying purchases — at no extra cost to you. Prices and availability are accurate as of publication and subject to change.
Quick Answer
Testing your sump pump is a simple yet critical task that can save you thousands in flood damage. Before heavy rain or snowmelt, manually activate your pump by pouring 5 gallons of water into its pit. This should trigger the float switch, causing the pump to run, evacuate the water, and then power down. This process confirms the pump's motor, float switch, and discharge line are all functioning correctly, giving you peace of mind for the upcoming wet weather.
The Problem
Few things are more disheartening for a homeowner than discovering a flooded basement. Whether it's from heavy rainfall, rapid snowmelt, or an unexpected plumbing leak, standing water can cause extensive damage to flooring, walls, personal belongings, and even compromise your home's structural integrity, not to mention fostering mold and mildew growth. The primary defense against this common nightmare is a properly functioning sump pump. However, these vital appliances often sit dormant for extended periods, especially in drier months. When the rainy season arrives, a forgotten or malfunctioning sump pump can lead to catastrophic consequences. Homeowners often assume their pump will work when needed, but without regular testing, a seized motor, a stuck float switch, or a blocked discharge line can go unnoticed until it's too late, turning a preventable issue into a costly disaster.
How It Works
A sump pump is essentially a specialized water pump designed to remove water that collects in a "sump pit" – a basin dug at the lowest point of your basement or crawl space. As groundwater or basement leaks accumulate in the pit, the water level rises. Inside the pit, typically attached to the pump or via an independent tether, is a float switch. This float is much like the one in your toilet tank: as the water level rises, it lifts the float. When the float reaches a predetermined height, it activates a switch, which in turn switches on the sump pump's motor. The pump then rapidly forces the accumulated water through a discharge pipe, which typically leads outside your home, directing the water away from the foundation. Once enough water has been removed and the water level in the pit drops, the float switch falls back down, deactivating the pump. This cycle ensures that water is continuously removed from your basement, preventing it from ever reaching damaging levels. Modern sump pumps can move thousands of gallons of water per hour, making them incredibly effective at protecting your home from water intrusion.
Step-by-Step Fix
1. Clear the Area — Position yourself safely with good visibility. * Ensure the area around the sump pit is well-lit and free of obstructions. You'll be working with water and electricity, so clear any tripping hazards. * Gather your tools: a 5-gallon bucket, a flashlight (optional, but helpful for inspection), and a screwdriver if you need to remove the sump pit lid.
2. Check Power Supply — Verify the pump is plugged in. * Locate the sump pump's power cord and ensure it is securely plugged into a dedicated, grounded outlet. Avoid extension cords. * If the pump is not plugged in: Plug it in. Then proceed with the testing steps. Note that some pumps may have two plugs—one for the pump and one for the float switch—ensure both are connected.
3. Inspect the Sump Pit — Look for debris and proper alignment. * Carefully remove the sump pit lid (if applicable). Use caution; wear gloves if the pit interior is dirty. * Visually inspect the pit for any large debris like dirt, gravel, or foreign objects that could impede the float switch or clog the pump intake. Remove any obstructions. * Ensure the pump itself is sitting upright and stable at the bottom of the pit, not tilted or buried in sediment.
4. Verify Discharge Pipe — Ensure the water can exit freely. * Locate the discharge pipe that leads out of your home. Check that there are no visible blockages, kinks, or damage. * Walk the path of the discharge pipe outside to ensure the end is clear of debris (leaves, mud, ice) and directs water away from your foundation (at least 10 feet). * If the pipe is frozen or clogged: You may need to thaw it with warm water (if frozen) or clear it manually. For buried pipes, this might indicate a larger issue requiring professional help.
5. Manual Float Switch Test — Gently lift the float to activate. * With the pump plugged in, reach into the pit (wear gloves!) and gently lift the float switch upwards with your hand. The pump should turn on almost immediately. * Listen for the motor running and feel for vibrations. If it doesn't turn on: Release the float and re-attempt. If it still fails, the float switch or pump motor may be bad. See troubleshooting tips below.
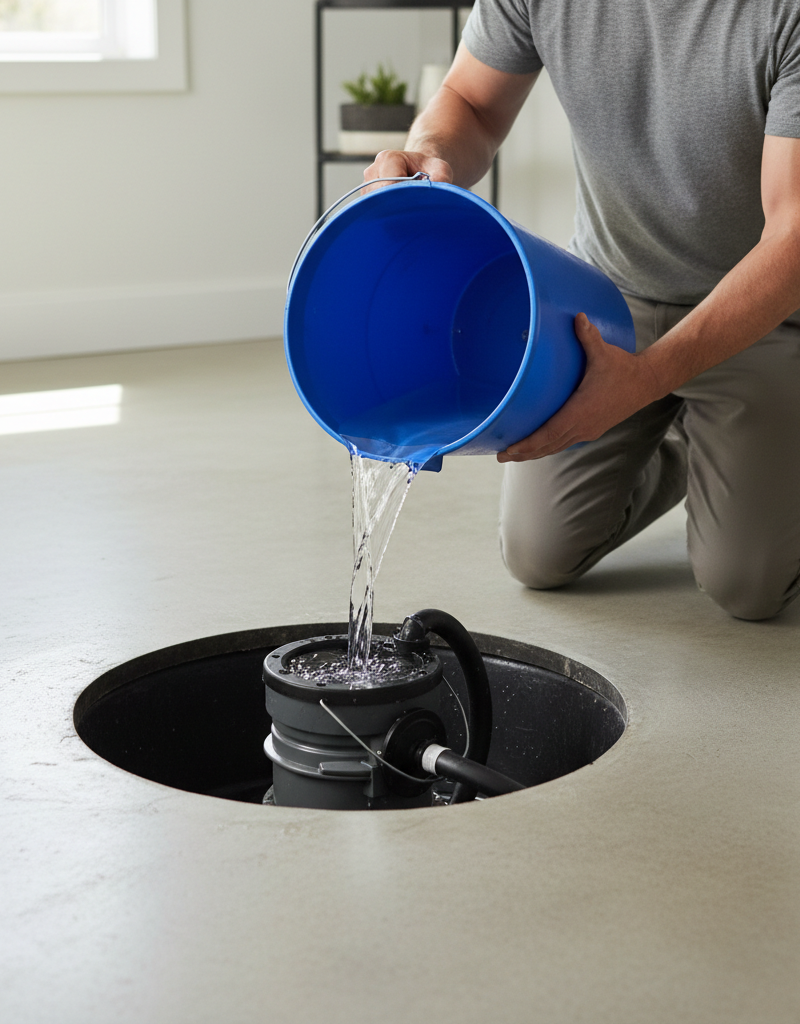
6. The Water Test (Main Event!) — Fill the pit to activate the pump. * Slowly pour 5 gallons of water into the sump pit. A standard 5-gallon bucket works perfectly. * As the water level rises, observe the float switch. It should lift and, once it reaches its activation point, the pump should kick on automatically. * If the pump doesn't activate after pouring water: Manually lift the float switch as described in step 5. If it still doesn't work, consider potential electrical issues, a bad float switch, or a dead motor.
7. Observe Pumping Action — Confirm water removal and flow. * Once the pump activates, watch as it rapidly evacuates the water from the pit. The water level should drop noticeably. * Go outside and confirm that water is flowing freely from the discharge pipe, away from your foundation. There should be a strong, consistent stream. * If water isn't flowing or flow is weak: The impeller might be clogged, the check valve could be stuck, or the discharge line is obstructed.
8. Automatic Shutdown — Ensure the pump turns off when water is gone. * After the water has been pumped out and the level in the pit drops, the float switch should fall back down, and the pump should automatically turn off. * If the pump continues running after the water is gone (running dry): The float switch might be stuck in the "on" position or is set too low. This can damage the pump. Unplug it immediately.
9. Replace Lid & Document — Finish up and make a note. * Once testing is complete and successful, replace the sump pit lid securely. * Make a note of the date you tested the pump. Regular testing (at least seasonally) is recommended.
Common Causes
- Stuck/Jammed Float Switch: Debris, sediment, or the pump itself can shift, causing the float to not rise or fall freely, preventing activation or deactivation.
- Power Failure/Tripped Breaker: Sump pumps require constant power. A tripped breaker, unplugged cord, or localized power outage will render it useless.
- Clogged Impeller/Intake: Mud, silt, gravel, or even small toys can be sucked into the pump's intake or impeller, preventing it from spinning and moving water.
- Blocked Discharge Line: Leaves, ice, roots, or collapsed sections can obstruct the pipe leading water away from your home, causing water to back up.
- Motor Burnout: Like any electrical appliance, continuous use, running dry, or old age can cause the motor to fail.
- Faulty Check Valve: The one-way check valve on the discharge line can stick closed, preventing water from exiting, or stick open, allowing water to flow back into the pit.
Common Mistakes
- Ignoring the Discharge Line: Homeowners often focus only on the pump but forget to check the exterior discharge pipe for blockages, which prevents water from leaving.
- Using an Extension Cord: Sump pumps draw significant power. Using an undersized extension cord can cause overheating, voltage drop, and motor damage. Always plug directly into a dedicated, grounded outlet.
- Not Testing Regularly: Assuming the pump works because it hasn't been needed is a recipe for disaster. Seasonal testing confirms readiness.
- Placing Pump Directly on Sediment: Over time, sediment can accumulate in the pit, causing the pump to sit unevenly or clog its intake. Periodically clear sediment.
- Improper Float Switch Adjustment: If a tethered float switch is set too low or too high, the pump might not activate soon enough or might run constantly, leading to premature wear.
- Overlooking the Check Valve: A malfunctioning check valve can lead to water continually re-entering the pit after being pumped out, causing the pump to cycle excessively.
Cost & Time Breakdown
| Task | DIY Cost | Pro Cost | Time |
|---|---|---|---|
| Sump Pump Test & Inspection | $0 | $75–$150 | 15–30 minutes |
| Minor Debris Removal | $0 | $25–$50 | 5–15 minutes |
| Replacement of Float Switch | $20–$50 | $150–$250 | 30–60 minutes |
| New Sump Pump & Installation | $150–$400 | $400–$800+ | 1–3 hours |
| Drain Line Clearing (minor) | $0 | $100–$200 | 30–60 minutes |
Tips & Prevention
- Bi-Annual Testing: Test your sump pump at least twice a year – once before the spring thaw/rainy season and again before heavy fall rains. More frequently if your area is prone to flooding.
- Keep the Pit Clean: Periodically remove the sump pit lid and clear out any leaves, dirt, or debris that could interfere with the pump or float switch. A clean pit ensures optimal operation.
- Install a Battery Backup: For peace of mind during power outages (when your main pump is useless), invest in a battery-powered backup sump pump. This is a critical safeguard.
- Check the Check Valve: Ensure the check valve on the discharge line isn't leaking or stuck. If you hear water flowing back into the pit after the pump shuts off, the check valve might be faulty.
- Extend Discharge Line: Make sure your exterior discharge line extends far enough (at least 10 feet) away from your home's foundation to prevent water from recirculating back into the soil around your basement.
- Consider a Water Alarm: Install a simple, inexpensive water alarm near your sump pit. It will alert you with a loud sound if water levels rise to a dangerous point, even during a power outage if it's battery-operated.
When to Call a Professional
While routine sump pump testing is a straightforward DIY task, there are specific situations where calling a licensed plumbing professional is essential. If, after following the testing steps, your sump pump fails to activate or continuously runs without pumping water, it could indicate a more complex electrical issue, a seized motor, or a major blockage in the discharge system that is beyond a simple fix. Never attempt to open the pump motor housing or interfere with complex electrical wiring yourself, as this can be dangerous and void warranties. Furthermore, if you suspect your discharge line is blocked deep underground, or if you're experiencing frequent pump failures, a professional can properly diagnose underlying issues, such as groundwater problems or improper installation, and recommend appropriate long-term solutions, including replacement or system upgrades. They have specialized tools to snake discharge lines and safely handle high-voltage electrical components associated with certain pump models. If you have any doubts about your ability to safely diagnose or repair the problem, or if the issue persists after basic troubleshooting, don
Related Articles
Keep troubleshooting with these hand-picked guides from FixlyGuide:
- The 10-Second Flaw Home Inspectors Spot (That Hides Water Damage) — Discover the often-overlooked sign professionals catch in seconds that points to hidden water damage, protecting your home from costly repa…
- The 30-Second Sump Pump Test That Prevents Flooding (Most Homeowners Skip It) — Discover how a simple 30-second test can prevent catastrophic basement flooding by ensuring your sump pump is ready for the rainy season.
- The 7 Sneaky Ways Spring Damages Your Home (And How to Stop Them Now) — Uncover the hidden threats spring poses to your home, from subtle water damage to pest invasions, and get actionable steps to protect your…
- The 7 Critical Home Inspection Mistakes Most Homeowners Make (and How to Spot Them) — Discover the crucial home inspection mistakes homeowners commonly overlook and learn how to identify potential problems before they become…
- The 7 Critical Home Inspection Checks Most Homeowners Miss (And How to Spot Them) — Discover the crucial annual home inspection checks often overlooked by homeowners, and learn how to identify potential issues before they b…
- The Secret Reason Your Sump Pump Runs When It’s Not Raining — If your sump pump runs constantly even on a dry day, it's not a ghost; it's a sign of a stuck switch, a failed valve, or a surprisingly hig…
Recommended for DIYers & woodworkers
Sponsored
The Top 20 Tools for Workshops of Any Budget
No stationary machines or power tools required — plus 3 fundamental tools that can't be bought at any price.
Get the free guide
Ted's Woodworking — The #1 Woodworking Resource
Detailed instructions, dimensioned drawings, materials & cutting lists, and 3D schematics for every skill level.
See the plansSponsored: links above are affiliate links. FixlyGuide may earn a commission on qualifying purchases — at no extra cost to you.
Frequently asked questions
How often should I test my sump pump?+
You should test your sump pump at least twice a year: once before the spring thaw/heavy rain season and again before the fall/winter rains. If your area experiences frequent heavy rainfall, consider testing it quarterly.
What if my sump pump runs but no water comes out?+
If your sump pump motor is running but no water is being discharged, it likely indicates a clogged impeller, a completely blocked discharge line, or a faulty check valve. Unplug the pump immediately and inspect for visible clogs. If the problem persists, it's best to call a professional.
Can I test my sump pump without a 5-gallon bucket?+
While a 5-gallon bucket is ideal for a thorough test, you can use several smaller buckets or a hose to slowly fill the sump pit. The goal is to raise the water level enough to fully activate the float switch and allow the pump to run through a complete cycle.
My sump pump won't turn off, what's wrong?+
If your sump pump won't turn off, it usually means the float switch is stuck in the 'on' position, or it's incorrectly adjusted and not falling back down. Debris in the pit can also impede the float. Unplug the pump, clear any obstructions, and ensure the float moves freely. Running dry can damage the motor.
What is a check valve on a sump pump discharge line?+
A check valve is a one-way valve installed on the discharge pipe, typically just above the pump. Its purpose is to prevent water that has been pumped out from flowing back down into the sump pit after the pump shuts off. A faulty check valve can cause the pump to cycle more frequently than necessary.


Discussion
Loading comments…