
Tools & materials you'll need
Affiliate links- AmazonEmpty coffee cans (metal or plastic)multiple
- AmazonDish soap
- AmazonClean towels
- AmazonRubbing alcohol or adhesive removerFor stubborn label residue
- AmazonSpray primerIf painting metal cans
- AmazonSpray paint or acrylic craft paintColors of choice
- AmazonDecorative paper, fabric, or labelsOptional, for customization
- AmazonCraft glue or spray adhesiveIf attaching decor
As an Amazon Associate FixlyGuide earns from qualifying purchases — at no extra cost to you. Prices and availability are accurate as of publication and subject to change.
Quick Answer
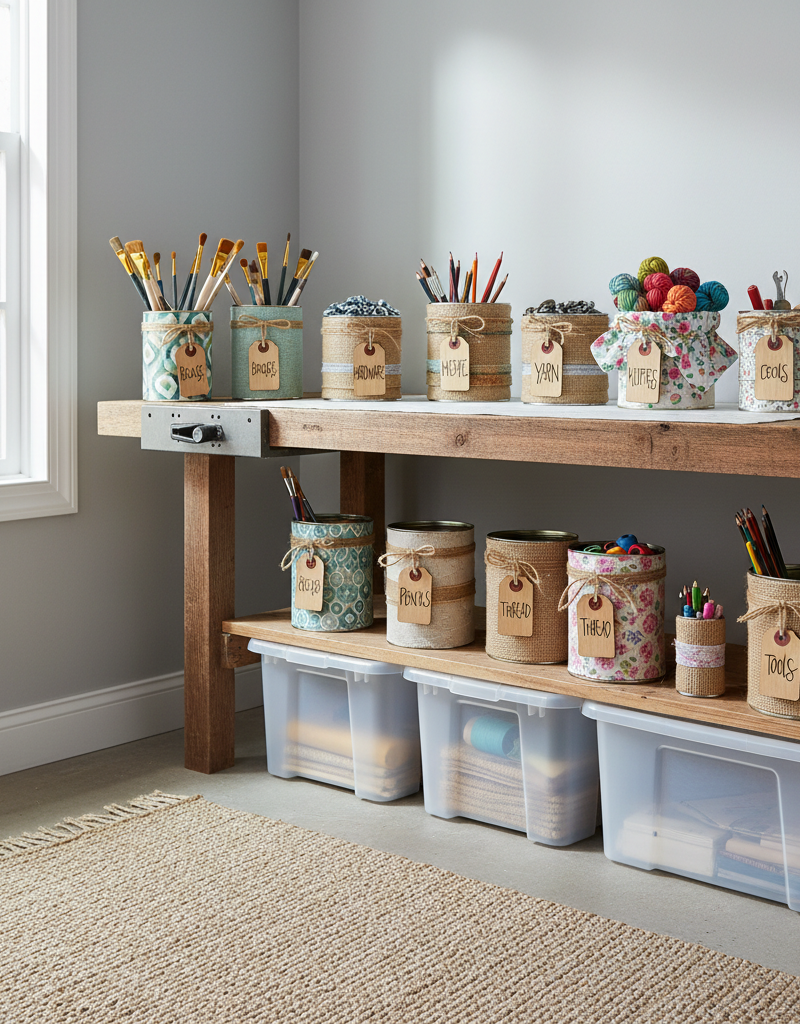
Empty coffee cans are surprisingly versatile and can be easily repurposed into effective and attractive home organizers. From tidying up craft supplies to creating custom pantry storage or even protecting delicate items in your garage, these readily available containers offer a free, sustainable, and customizable solution for common household clutter. A little cleaning and creativity are all it takes to transform them into functional organizational heroes.
The Problem
Every homeowner grapples with clutter. Small items like pens, paintbrushes, batteries, loose screws, or even spice packets tend to accumulate, creating visual mess and making it difficult to find what you need when you need it. Traditional storage solutions, while effective, often come with a cost, and plastic organizers contribute to waste. Many homeowners overlook the everyday items they already have that could solve these problems for free: the humble coffee can. After enjoying your morning brew, the empty can often ends up in recycling, missing its potential to become a practical and sustainable storage solution.
How It Works
Coffee cans are typically made from steel or rigid plastic, offering inherent durability and a consistent cylindrical shape that is ideal for storage. Their sturdy construction means they can hold a considerable amount of weight without deforming, unlike flimsier cardboard boxes. The smooth, non-porous surface of both metal and plastic cans makes them easy to clean and even decorate, allowing for customization to match any home décor. The standard sizes (often 13 oz, 19 oz, or 30 oz) are perfect for holding everything from pens and markers to kitchen utensils or small workshop hardware. Their stackable nature, especially for cans of the same diameter, maximizes vertical storage space, a critical advantage in smaller homes or crowded cabinets. The lid, if available and well-fitting, provides an enclosed environment, protecting contents from dust, moisture, and pests, which is particularly beneficial for pantry items or sensitive craft supplies. By understanding these inherent properties, homeowners can unlock the full organizing potential of what was once just a discarded commodity.
Step-by-Step Fix
Repurposing coffee cans requires minimal effort and offers maximum return in terms of organization.
-
Clean and Dry Thoroughly — Safety first, then cleanliness
- Remove all coffee grounds and rinse the can thoroughly with warm, soapy water. Use a bottle brush for hard-to-reach corners if necessary. For stubborn coffee oil residue, a paste of baking soda and a little water can help scrub it clean. Rinse again until all soap residue is gone.
- Safety Note: Be cautious of sharp edges if your can is metal and opened with a traditional can opener. If possible, use a smooth-edge can opener or wear gloves.
- Dry the can completely inside and out. Any residual moisture can lead to mold or spoilage if storing food, or rust if the can is metal. Placing it upside down on a drying rack or using a clean towel works well.
-
Remove Labels and Adhesives — A clean slate is key
- Peel off the paper label. If sticky residue remains, try warm soapy water, rubbing alcohol, or a commercial adhesive remover sparingly. Test in an inconspicuous area if using a chemical remover.
- Goo Gone or similar citrus-based cleaners are effective for most sticky residues. Apply a small amount, let it sit for a minute, then wipe with a cloth.
-
Inspect for Damage — Ensure structural integrity
- Check metal cans for rust, dents, or sharp edges that could pose a safety hazard or compromise storage. Discard heavily rusted or severely dented cans.
- Check plastic cans for cracks or deformities. A damaged can won't offer reliable storage.
-
Decorate and Customize (Optional) — Personalize your storage
- Paint: Apply primer, then spray paint or acrylic craft paint. Multiple thin coats are better than one thick coat for a smooth finish. Seal with a clear coat if desired for durability.
- Fabric/Paper: Use spray adhesive or craft glue to attach fabric scraps, decorative paper, or even wallpaper samples. Smooth out any bubbles.
- Labels: Add labels using a label maker, marker, or decorative tags. This is crucial for clear organization.
- Holes: For certain uses (e.g., pen holders), you might want to drill small drainage holes in the bottom of the can for pencils or brushes that might still be damp.
-
Add Dividers or Inserts (Optional) — Boost functionality
- For craft supplies or small hardware, consider cutting cardboard or thin plastic to create internal dividers. Hot glue holds these in place.
- Small plastic cups or even toilet paper rolls can be inserted to subdivide the can's interior for pens, markers, or small tools.
-
Choose Your Purpose — Tailor to your needs
- Kitchen: Store cooking utensils (spatulas, whisks), plastic bags, bulk dry goods (flour, sugar – use a liner for food safety), or K-cups. For food storage, ensure the can is airtight or use an internal food-grade bag/container.
- Office/Craft Room: Organize pens, pencils, markers, paintbrushes, scissors, glue sticks, knitting needles, or spools of thread. Lids are useful here to keep dust out.
- Garage/Workshop: Sort nails, screws, washers, bolts, drill bits, craft wires, or small parts. Labeling is especially important here.
- Bathroom: Hold cotton balls, cotton swabs, hair ties, or small makeup brushes.
- Kids' Rooms: Store crayons, small toys, building blocks, or art supplies.
-
Fill and Label — The final organizational step
- Fill your newly repurposed cans with their designated items. Don't overfill, as this defeats the purpose of organization.
- Ensure all cans are clearly labeled immediately after filling. This prevents confusion later and maintains your system.
Common Causes
Home clutter isn't a single
Related Articles
Keep troubleshooting with these hand-picked guides from FixlyGuide:
- The Hidden Culprit Behind Your AC Not Cooling (and How to Find It) — If your central AC isn't cooling your home, the issue often stems from a surprisingly simple problem that's easy to overlook. Learn how to…
- The 3-Ingredient Carpet Cleaner Recipe That Revitalizes Old Stains — Learn the surprisingly simple, three-ingredient recipe that tackles embedded dirt and deep-seated stains, bringing your carpet back to life…
- The Secret Weapon Against Gaming Clutter: A $25 Custom Controller Stand You Can Build — Discover how a simple, custom-built stand using common materials can transform your gaming space, eliminating clutter and protecting your e…
- The 7 Critical Household Filters You're Forgetting (And What They Cost You) — Neglected household filters are quietly costing you money, diminishing air quality, and paving the way for expensive repairs. Discover the…
- The 4 Critical Power Tools Every New Homeowner FORGETS to Buy (Don't Be One of Them) — New homeowners often overlook essential power tools that make common home repairs and maintenance tasks significantly easier. Learning whic…
- The 5-Minute Trick to Fix a Sagging Window (No New Parts Needed) — Discover the simple, often overlooked cause of a window that won't stay open and how to fix it in minutes using common household items.
Get the print-ready PDF of this guide
A clean, ad-free, printable version you can keep on your phone or pin to the workshop wall. We'll also send occasional weekly tips matched to your home situation.
- Print-optimized layout
- Tools, materials & every step included
- Unsubscribe anytime
This article was independently written by FixlyGuide based on the source topic.
Frequently asked questions
Are coffee cans safe for food storage?+
Metal coffee cans are generally safe for *dry* food storage like flour or sugar, but it's best practice to use a food-grade liner bag inside for extra protection against moisture and potential metallic taste. Ensure the can is thoroughly cleaned and dried, and use an airtight lid.
How do I get rid of the coffee smell from the cans?+
After thoroughly washing with soap and water, you can try several methods to eliminate residual coffee smell. Placing a crumpled newspaper or a small bowl of baking soda inside the dry can for a few days can help absorb odors. You can also air them out in direct sunlight for a day or two.
What's the best way to decorate a coffee can?+
For metal cans, priming before painting is recommended to ensure even adhesion and prevent rust show-through. Spray paint offers a smooth finish, or you can use acrylic craft paints. Alternatively, use spray adhesive to attach decorative paper, fabric, or even burlap for a textured look. Always ensure the surface is clean and dry before decorating.


Discussion
Loading comments…