
Tools & materials you'll need
Affiliate linksAs an Amazon Associate FixlyGuide earns from qualifying purchases — at no extra cost to you. Prices and availability are accurate as of publication and subject to change.
Quick Answer
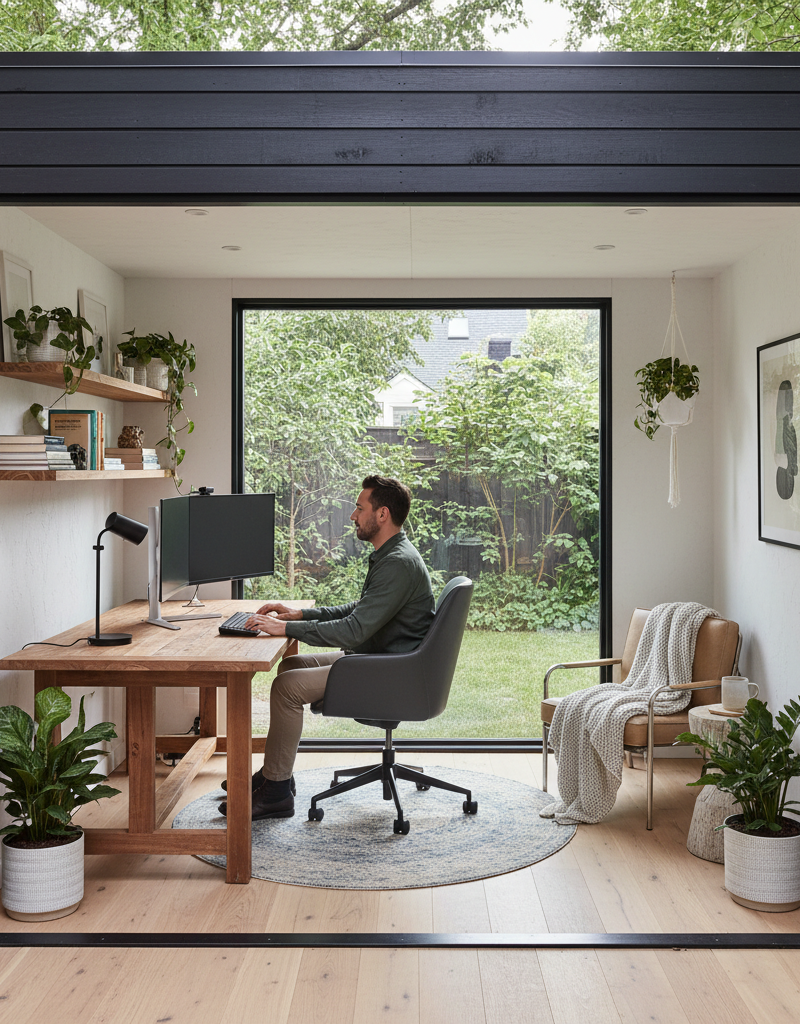
Converting an existing shed into a home office is a rewarding project that leverages underutilized backyard space. It typically involves ensuring structural integrity, weatherproofing, adding insulation for comfort, running electrical wiring for power, and finishing the interior to create a functional and aesthetically pleasing workspace. This transformation not only provides a quiet retreat for productivity but also significantly enhances the utility and value of your property without the complexities of new construction.
The Problem
Many homeowners have a shed in their backyard that has become a forgotten repository for old tools, seasonal decorations, and miscellaneous clutter. It sits there, occupying valuable real estate, often in disrepair, and serves little practical purpose beyond storage. This unused space represents a missed opportunity, especially in an era where remote work is increasingly common. The challenge lies in seeing beyond the current state of neglect and envisioning the potential for a dedicated, inspiring home office – a space that can boost productivity, provide a quiet escape, and add tangible value to your property. The perceived effort, cost, and complexity often deter homeowners from undertaking such a transformation, leaving the shed to slowly deteriorate.
How It Works
Turning a shed into a home office isn't just about moving a desk inside; it's about fundamentally repurposing a structure. The process begins with structural stability. Your shed, regardless of age, needs a solid foundation and sound framing to support its new role. This might involve shoring up a weak base, replacing rotten studs, or reinforcing the roof. Once structurally sound, weatherproofing is critical. This includes repairing leaks, replacing damaged siding, and ensuring the roof is watertight. A shed office must protect its contents – and you – from the elements.
Next comes comfort control. Standard sheds are rarely insulated, making them unbearable in extreme temperatures. Adding insulation to walls, floor, and ceiling is essential for maintaining a comfortable working environment year-round. Following insulation, utilities become the focus. The most vital is electricity, providing power for lights, computers, and heating/cooling. This typically involves running a dedicated electrical line from your main service panel, often requiring trenching. Plumbing is less common for a basic office but might be considered for a small sink or toilet, significantly increasing complexity.
Finally, interior finishing brings the vision to life. This involves drywall or paneling, flooring, painting, and installing windows and doors that offer better security, insulation, and aesthetics than standard shed components. The goal is to create an environment that feels less like a shed and more like a true extension of your home, designed for focus and inspiration. Each step builds upon the last, transforming a basic utility structure into a refined, functional space.
Step-by-Step Fix
Here’s how to systematically transform your old shed into a comfortable and productive home office:
-
Assess and Clear the Structure – Before lifting a hammer, understand what you're working with.
- Inspect thoroughly: Check the foundation for cracks or sinking, look for rotten wood in the framing, assess the roof for leaks or sagging, and examine the siding for damage. Pay close attention to areas where the shed meets the ground. Take photos and make detailed notes of all issues. This initial assessment guides your entire project plan and budget.
- Empty completely: Remove all contents from the shed. This allows for a clear view of the interior structure and prevents damage to your belongings during construction. Sort items for donation, disposal, or relocation.
-
Ensure Structural Integrity – A strong foundation and frame are non-negotiable for a lasting office.
- Repair or reinforce foundation: If your shed sits on concrete blocks, ensure they are level and stable. For concrete slabs, patch any significant cracks with concrete repair caulk. If there's rot where wood meets the ground, you might need to use a temporary jack to lift the shed slightly and replace the bottom plates with pressure-treated lumber.
- Address framing issues: Replace any studs or roof rafters showing signs of rot, severe warping, or insect damage. Use new lumber of the same dimensions. For minor damage, sistering new lumber alongside the old can provide sufficient reinforcement.
-
Weatherproof and Secure the Shell – Keep out the elements and unwanted guests.
- Roof repair/replacement: Patch small leaks with roofing cement and flashing. For extensive damage or an old roof, consider a full replacement with asphalt shingles, metal roofing, or EPDM rubber, depending on your shed's pitch and your budget. Ensure proper drip edge installation.
- Siding and trim: Replace any damaged siding sections. If the existing siding is in poor shape, consider re-siding the entire structure with T1-11, clapboard, or vinyl for improved aesthetics and weather resistance. Caulk all seams and gaps thoroughly with exterior-grade caulk.
- Install new windows and doors: Replace original shed windows with insulated, residential-grade windows for better energy efficiency and security. Opt for a secure, insulated exterior door, perhaps a pre-hung unit, to provide a proper entrance and enhance the office feel. Ensure they are properly flashed and sealed.
-
Insulate for Comfort – Crucial for year-round usability and energy efficiency.
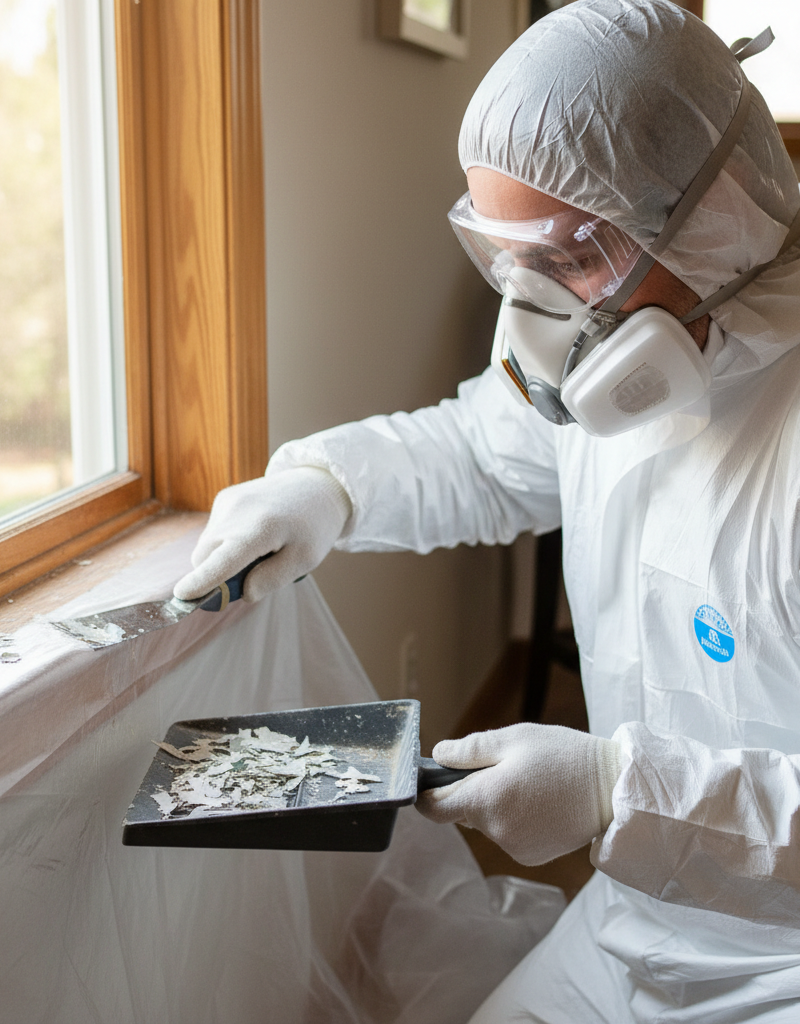
- Walls: Install unfaced fiberglass batts or rigid foam insulation between wall studs. Ensure a snug fit without compressing the insulation. Use an exact knife to cut batts to size. If using fiberglass, wear appropriate PPE (gloves, mask, long sleeves).
- Ceiling: Install insulation batts or rigid foam between roof rafters. If there's no attic space, consider insulating directly against the roof sheathing with rigid foam board, leaving an air gap for ventilation if applicable.
- Floor: Insulate the floor from underneath, between the joists, using rigid foam board or moisture-resistant fiberglass batts held in place with netting or wire. This is especially important if the shed is elevated.
-
Run Electrical Wiring – Bring power to your new workspace. Call a licensed electrician for this step.
- Trenching and conduit: Dig a trench from your main electrical panel to the shed location. Install appropriate underground electrical conduit (e.g., Schedule 40 PVC) and pull feeder wires. The size of the wire and conduit will depend on the amperage required for your office (typically 30-60 amps).
- Subpanel installation: A licensed electrician will install a subpanel in the shed, connecting it to the main panel. This subpanel will house circuit breakers for your lights, outlets, and any dedicated circuits for HVAC or specific equipment.
- Interior wiring: The electrician will then wire the interior of the shed, installing outlets, light switches, and light fixtures according to code. Discuss your power needs upfront (e.g., how many outlets, task lighting, dedicated circuits for computers or heaters).
-
Interior Finishing – Transform the utilitarian shed interior into a professional office.
- Install drywall or paneling: Cover the insulated walls and ceiling with drywall. Tape, mud, and sand the seams for a smooth finish, or opt for simpler plywood paneling for a rustic look. Apply primer before painting.
- Flooring: Choose durable and comfortable flooring. Laminate, vinyl plank, or engineered wood are popular choices for their ease of installation and resilience. Ensure the subfloor is clean, level, and dry before installation.
- Paint and trim: Apply at least two coats of interior paint in a color that promotes focus and comfort. Install baseboards, window trim, and door trim to give the space a finished, professional look.
-
Add HVAC and Furnishings – Make it comfortable and functional.
- Heating and cooling: Install a mini-split heat pump system for efficient year-round heating and cooling. Alternatively, consider a small electric space heater and a window AC unit as a more budget-friendly option, ensuring your electrical system can handle the load.
- Furnishings and décor: Bring in your desk, ergonomic chair, shelving, and office supplies. Personalize the space with artwork, plants, and appropriate lighting (task lighting, ambient lighting) to create an inspiring and productive environment.
Common Causes
Neglect is the primary cause of a shed falling into disrepair, but specific factors contribute:
- Poor original construction: Many sheds are built with minimal foundations, untreated lumber, or low-quality siding, making them prone to early deterioration.
- Lack of maintenance: Ignoring small leaks, peeling paint, or minor wood rot allows problems to escalate rapidly.
- Inadequate drainage: Water pooling around the base of the shed leads to foundation issues and accelerates wood rot.
- Vegetation encroachment: Plants growing directly against the shed walls trap moisture, invite pests, and can cause structural damage.
- No insulation or climate control: Without insulation, sheds experience extreme temperature fluctuations, leading to condensation, mold, and material degradation over time.
- Improper ventilation: Lack of airflow can trap moisture, especially in humid climates, worsening wood rot and promoting mildew growth.
Common Mistakes
Avoid these pitfalls when transforming your shed into a home office:
- Ignoring local building codes and permits: Many shed conversions, especially those involving electrical work or structural changes, require permits. Always check with your local planning department first to avoid costly rework or fines.
- Underestimating the importance of insulation: Skipping or skimping on insulation will result in an office that's too hot in summer and too cold in winter, making the space unusable for much of the year. Invest in good R-value insulation for walls, ceiling, and floor.
- DIYing complex electrical work: Unless you are a licensed electrician, wiring a subpanel and running new circuits is dangerous and illegal in most areas. Always hire a professional to ensure safety and code compliance.
- Failing to address moisture issues: Simply covering up rotten wood or a leaking roof will lead to bigger problems down the line, including mold, further structural damage, and health hazards. Fix the source of moisture first.
- Not installing proper ventilation: Even with insulation, a shed office can feel stuffy or develop moisture problems without adequate ventilation. Consider a small exhaust fan or ensuring effective cross-ventilation with windows.
- Neglecting access and security: The shed office needs to be just as secure as your main home office. Install robust locks on doors and windows. Consider adding exterior lighting or even a simple alarm system.
Cost & Time Breakdown
| Task | DIY Cost | Pro Cost | Time |
|---|---|---|---|
| Structural Assessment & Repair | $50–$300 (materials) | $300–$800 | 1–2 days |
| Weatherproofing (Roof/Siding/Windows/Door) | $500–$2,000 (materials) | $1,500–$5,000 | 2–5 days |
| Insulation (Walls, Ceiling, Floor) | $300–$800 (materials) | $800–$2,000 | 1–3 days |
| Electrical Wiring & Subpanel | NOT DIY. Call Pro. | $1,500–$4,000 | 1–3 days |
| Interior Finishing (Drywall/Flooring/Paint) | $500–$1,500 (materials) | $1,000–$3,500 | 3–7 days |
| HVAC (Mini-Split) | $800–$2,500 (unit + DIY install*) | $2,000–$5,000 (unit + pro install) | 0.5–1 day |
*Note: While some mini-split units are advertised as DIY-friendly, professional installation is often recommended for optimal performance and warranty.
Tips & Prevention
- Regular Inspections: Twice a year, walk around your shed. Check for loose siding, cracked caulk, signs of moisture around the foundation, and clear any debris from the roof and gutters. Early detection of issues prevents major repairs.
- Maintain Drainage: Ensure rainwater drains away from the shed's foundation. Install gutters and downspouts if you don't have them, and make sure the ground slopes away from the structure.
- Pest Control: Seal any small openings or cracks in the shed's exterior to prevent pests from taking up residence, which can compromise insulation and structural components.
- Smart Planning for Utilities: Even if you don't plan for plumbing initially, rough in conduits during the build for future expansion. It's much easier to run wires or pipes through empty conduits later than to tear open finished walls.
- Factor in Climate: Design your insulation and HVAC choices based on your local climate extremes. A shed in Arizona will need more robust cooling than one in Maine, and vice versa for heating.
- Consider Permeability: When insulating and finishing, think about vapor barriers and breathability. Trapping moisture can lead to mold and rot. Consult local building codes for recommendations on vapor retarders.
When to Call a Professional
While the idea of a DIY shed conversion is appealing, certain aspects are best left to licensed professionals to ensure safety, compliance, and longevity. You absolutely must call a licensed electrician for all electrical work, including trenching, installing a subpanel, and wiring outlets and lights. Attempting to DIY high-voltage electrical is extremely dangerous and can lead to property damage, injury, or even death, and will almost certainly violate local codes and insurance policies. If your shed's foundation is significantly compromised (e.g., major cracking, severe unleveling, or structural sinking), consult a structural engineer or foundation specialist. They can assess the damage and recommend appropriate, safe repairs that a DIYer might not be equipped to handle. Similarly, if your roof structure is severely compromised beyond simple shingle replacement, a licensed roofer can ensure a safe and watertight installation. Always obtain necessary permits and inspections for major structural or utility changes; a professional often handles this as part of their service.
Related Articles
Keep troubleshooting with these hand-picked guides from FixlyGuide:
- The Single Cedar Board Secret to Attracting Bluebirds This Spring — Discover how a single cedar board can be transformed into a welcoming home for bluebirds, enriching your yard with their vibrant presence a…
- The Single Board Secret to Attracting Bluebirds: A Quick DIY House — Discover how to construct an ideal bluebird house using just one cedar board, providing a safe and inviting home for these cherished backya…
- The Secret Weapon Against Gaming Clutter: A $25 Custom Controller Stand You Can Build — Discover how a simple, custom-built stand using common materials can transform your gaming space, eliminating clutter and protecting your e…
- 7 Hidden Equity Drains Costing You Thousands Annually — Your home is an asset, but silent problems like minor leaks, poor insulation, and deferred maintenance can drain its value. Discover the se…
- The 7 Critical Household Filters You're Forgetting (And What They Cost You) — Neglected household filters are quietly costing you money, diminishing air quality, and paving the way for expensive repairs. Discover the…
- The $5 Secret to Preventing Ice Dams (and Why Your Neighbors Still Get Them) — Discover the surprising truth about ice dams and how a simple, inexpensive solution can protect your home from costly winter damage.
Get the print-ready PDF of this guide
A clean, ad-free, printable version you can keep on your phone or pin to the workshop wall. We'll also send occasional weekly tips matched to your home situation.
- Print-optimized layout
- Tools, materials & every step included
- Unsubscribe anytime
This article was independently written by FixlyGuide based on the source topic.
Frequently asked questions
How much does it cost to convert a shed into an office?+
The cost can vary significantly based on the shed's current condition, the extent of desired finishes, and whether you hire professionals for certain tasks. Expect to spend anywhere from $3,000 to $15,000 or more, with electrical work being a major component if you hire a pro.
Do I need a permit to turn my shed into an office?+
In most jurisdictions, yes. Any significant structural changes, adding electrical, or changing the occupancy of a structure (from storage to habitable space) will likely require permits. Always check with your local planning or building department before starting work.
How long does it take to convert a shed into an office?+
The total time can range from a few weeks to several months, depending on the scope of work, your DIY skill level, and professional availability for specialized tasks like electrical. Plan for at least 3-6 weekends of dedicated work for a moderate project.
What's the best way to insulate a shed office?+
For year-round comfort, insulate the walls, ceiling, and floor. Fiberglass batts or rigid foam boards are common choices. Ensure a vapor barrier is incorporated on the warm side of the insulation, especially in humid climates, to prevent moisture issues.
Can I run electricity to my shed myself?+
Unless you are a licensed electrician and local codes permit homeowner electrical work, absolutely not. Running power to an outbuilding involves high voltage, trenching, subpanel installation, and specific safety protocols that require professional expertise and permits.

Discussion
Loading comments…