Tools & materials you'll need
Affiliate linksAs an Amazon Associate FixlyGuide earns from qualifying purchases — at no extra cost to you. Prices and availability are accurate as of publication and subject to change.
Quick Answer
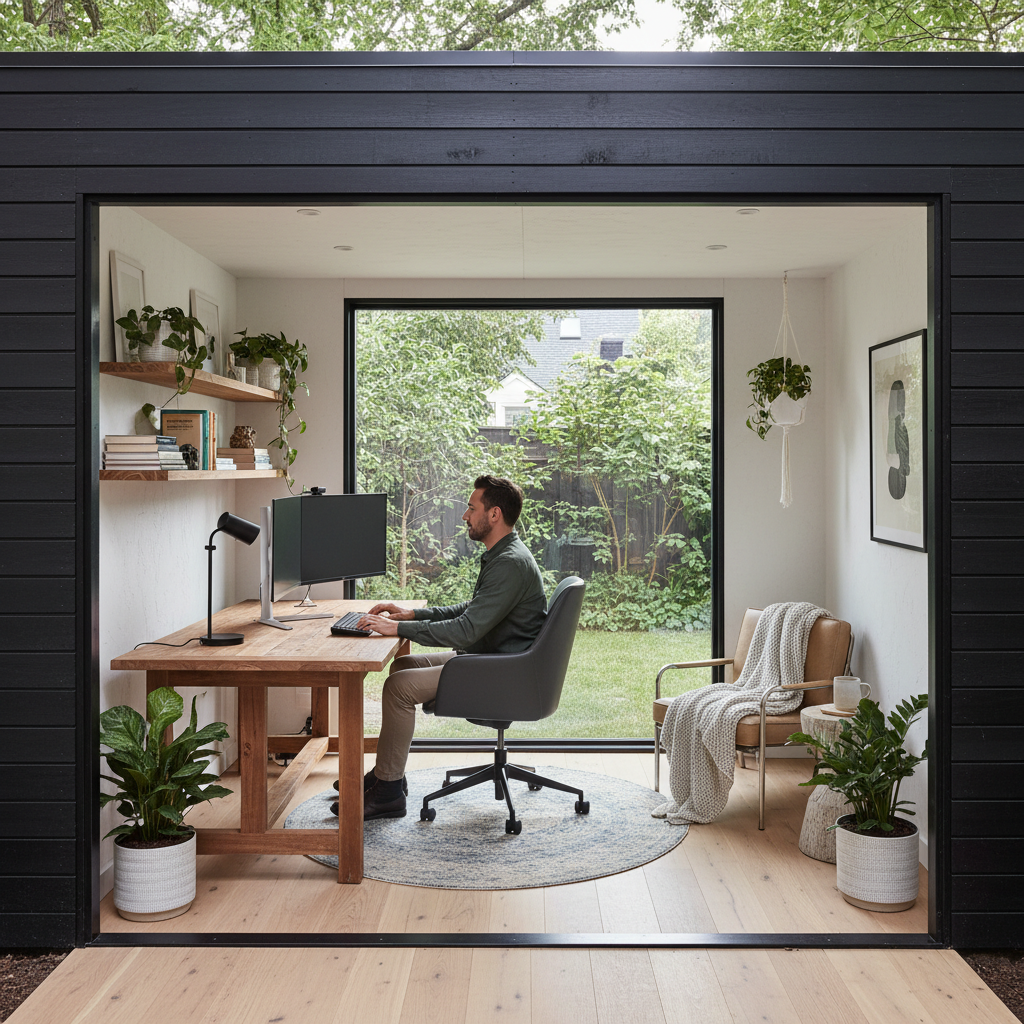
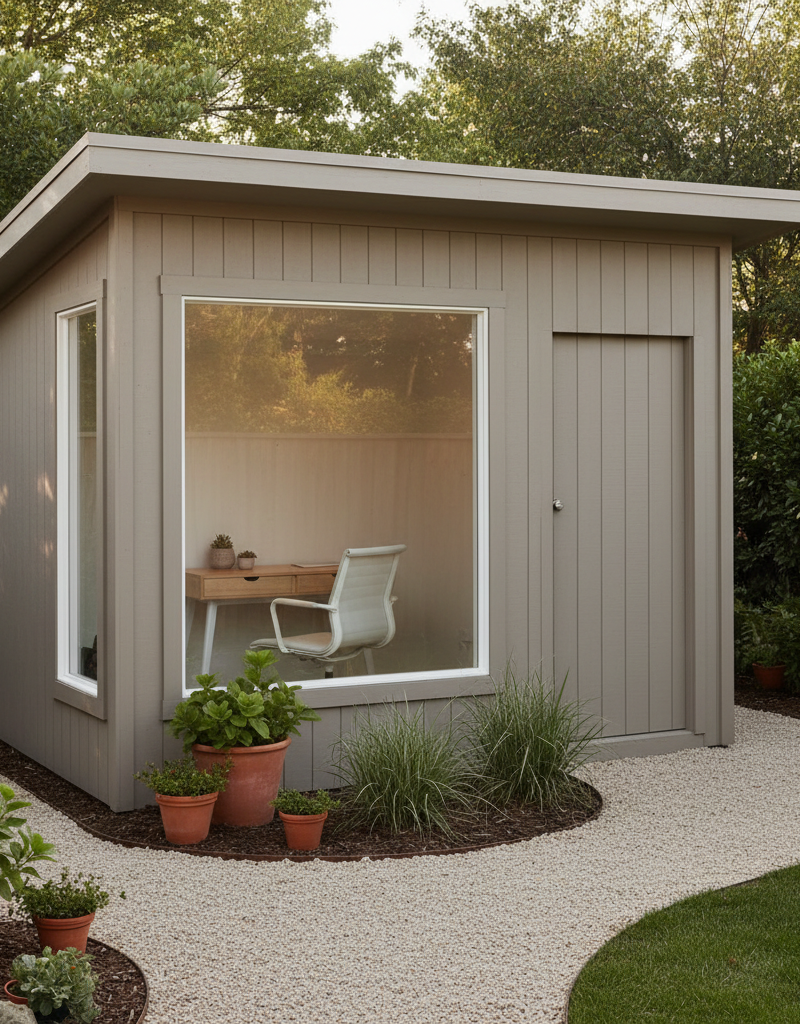
Converting an existing shed into a home office is a highly achievable DIY project that can provide a dedicated workspace, increase your property's value, and offer a quiet retreat from the main house. The core process involves reinforcing the structure, thoroughly weatherproofing, adding insulation for year-round comfort, safely installing electrical wiring, and then finishing the interior to create a functional and aesthetically pleasing environment. Proper planning for ventilation, lighting, and material selection is essential for a successful and lasting transformation.
The Problem
Many homeowners possess an underutilized or dilapidated shed in their backyard. These structures often become repositories for forgotten tools, lawn equipment, or general clutter, eventually falling into disrepair. The problem isn’t just an eyesore; it's a wasted opportunity. In an era where remote work is increasingly common, the lack of a dedicated, distraction-free home office can severely impact productivity and work-life balance. Working from a kitchen table or spare bedroom often leads to discomfort, interruptions, and a blurring of personal and professional boundaries. Transforming that neglected shed into a vibrant home office addresses this directly, providing a quiet, inspiring space just steps away.
How It Works
Turning a shed into a comfortable home office isn't just about painting walls; it's about making the space genuinely habitable and safe. The process essentially mirrors many aspects of small-scale home construction. First, a solid foundation is paramount. This could range from ensuring existing concrete slab integrity to installing new pier and beam supports. A level, stable base prevents structural issues down the line. Next, weatherproofing is critical. This involves repairing or replacing roofing, sealing gaps, and ensuring proper flashing to prevent water intrusion, which is the enemy of any long-term structure. Effective insulation, typically fiberglass batts in walls and ceiling and rigid foam in the floor, creates a thermal envelope, keeping the space cool in summer and warm in winter, drastically reducing energy costs.
Electrical wiring, while intimidating for some, is straightforward with careful planning and adherence to code. This includes running a dedicated circuit from the main house panel to a sub-panel in the shed, then installing outlets, switches, and lighting fixtures. Proper ventilation through windows, vents, or even a small exhaust fan helps manage humidity and air quality. Finally, interior finishes like drywall, flooring, and paint transform a utilitarian shed into a professional and inviting office, while exterior finishes protect the structure and enhance curb appeal.
Step-by-Step Fix
1. Assess and Plan — Before lifting a hammer, thoroughly inspect your shed's condition.
Begin by clearing out the shed to identify any structural issues, rot, or pest infestations. Check the foundation for cracks or unevenness. Measure the interior dimensions to plan your office layout, considering desk placement, shelving, and electrical outlet locations. Sketching a floor plan helps visualize the space. Research local building codes for shed conversions, especially concerning electrical work and new construction that might require permits.
2. Reinforce and Repair the Structure — A sturdy foundation and frame are non-negotiable for a lasting office.
Address any foundational issues first; this might involve pouring a new concrete footing, shimming existing piers, or repairing cracks in a slab. Replace any rotted wooden studs, floor joists, or roof rafters. If your shed has a lean or wobble, use angle braces or additional framing members to square it up and add rigidity. Ensure the subfloor is sound; replace damaged sections with new plywood or OSB.
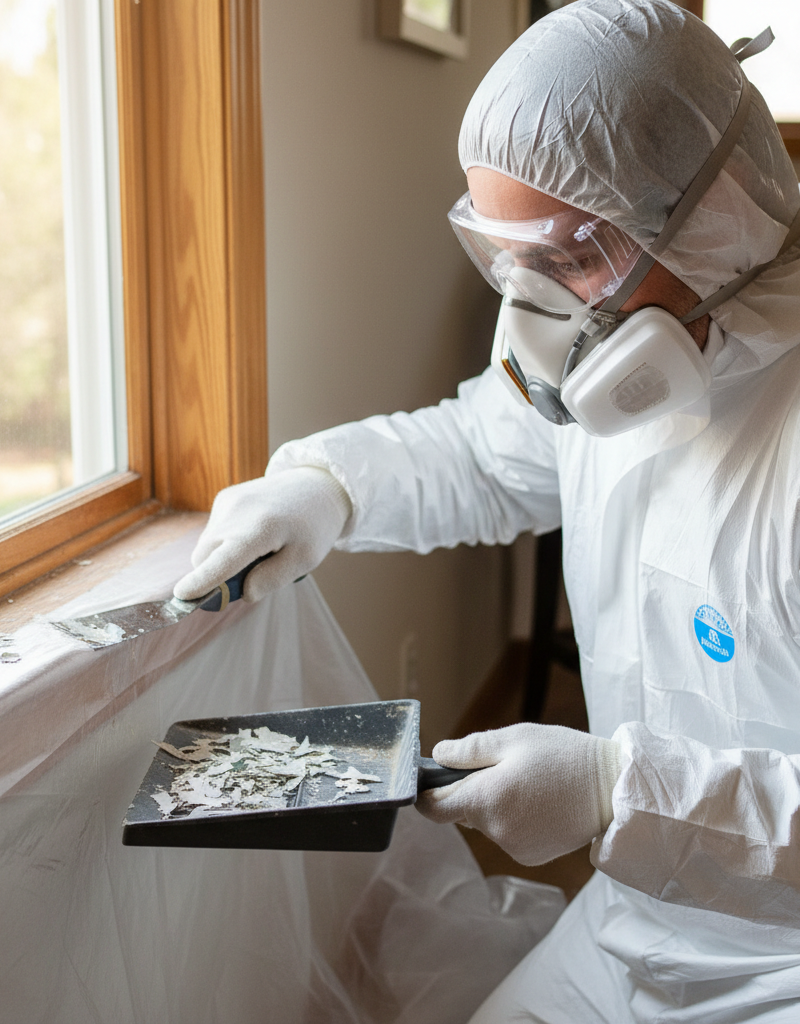
3. Weatherproof the Exterior — Keep the elements out to protect your investment.
Inspect the roof for leaks, missing shingles, or deterioration. Repair or replace the roofing material as needed, adding a drip edge if it's missing. Inspect siding for cracks, holes, or rot; repair with appropriate patching compounds or replace damaged sections. Caulk all seams, window frames, and door frames thoroughly with exterior-grade caulk to prevent water intrusion. Consider adding house wrap before new siding for an extra layer of protection.
4. Install Windows and Doors — Natural light and secure access are crucial for a comfortable office.
If the existing windows are not energy-efficient or too small, consider upgrading to new, double-pane windows for better insulation and light. Ensure windows are properly flashed and sealed to prevent leaks. Replace flimsy or unsecure shed doors with solid, insulated exterior doors installed with a good lockset for security. This also contributes significantly to the overall energy efficiency of your new office.
5. Add Insulation — Maintain a comfortable temperature year-round.
Cut unfaced fiberglass batts to fit snugly between wall studs and ceiling joists. For the floor, lay rigid foam insulation boards directly over the subfloor, taping seams with foil tape. In colder climates, consider adding a vapor barrier (thin plastic sheeting) on the warm side of the insulation before covering with drywall to prevent moisture buildup within the wall cavity.
6. Run Electrical Wiring — Provide power for lighting, heating, and your essential electronics.
SAFETY NOTE: This step involves working with electricity. If you are not entirely confident in your abilities, or if your local codes require it, ALWAYS hire a licensed electrician. Running a new dedicated electrical circuit from your home's main panel to a new sub-panel in the shed requires careful planning and strict adherence to electrical codes. Install electrical boxes, run wires through drilled holes in studs, and rough in for outlets, switches, and overhead lighting according to your planned layout. Use appropriate gauge wire for the load.
7. Install Interior Finishes — Transform the raw space into a functional office.
Once wiring and insulation are in, install drywall or other interior wall coverings (like plywood paneling for a rustic look). Tape and mud drywall seams, then sand smooth for painting. Install your chosen flooring—laminate, vinyl plank, or even carpet squares are good durable options. Ensure the subfloor is clean and level before laying flooring. Finish with trim around windows, doors, and baseboards.
8. Paint and Furnish — Personalize your workspace and make it your own.
Apply a primer and then two coats of paint to the walls and trim, choosing colors that promote focus and comfort. Install your desk, shelving, and office chair. Plan for adequate task lighting, such as a desk lamp, and ambient lighting, such as an overhead fixture. Consider adding window treatments for privacy and light control.
Common Causes
- Neglect and lack of maintenance: Many sheds simply fall into disrepair due to infrequent inspections and deferred repairs. Small leaks become big problems, minor rot spreads, and the structure weakens over time.
- Poor initial construction: Some prefabricated or older sheds weren't built with the same structural integrity as a house, making them more susceptible to foundational shifting, water damage, and pest infestations.
- Inadequate weather protection: Insufficient roofing, lack of proper flashing, or unsealed seams on siding are common culprits for water intrusion, leading to wood rot and mold.
- Lack of effective drainage: If rainwater isn't directed away from the shed's foundation, constant moisture exposure can lead to foundational damage and accelerate rot in the lower parts of the structure.
- Pest damage: Unsealed gaps and cracks provide easy entry points for rodents and insects, which can chew through wiring, insulation, and even structural wood.
- Absence of insulation: A shed without proper insulation is susceptible to extreme temperature fluctuations and condensation, making it unsuitable for a comfortable working environment and leading to potential moisture issues.
Common Mistakes
- Ignoring the foundation: Many DIYers overlook foundational issues, leading to uneven floors, wall cracks, and long-term structural instability. Always start with a level and sound base.
- Insufficient weatherproofing: Cutting corners on roof repairs, sealing gaps, or ensuring proper drainage will inevitably lead to leaks, mold, and rot, undoing all interior efforts.
- Underestimating electrical needs: SImply running an extension cord is dangerous and inefficient. Not properly wiring for dedicated circuits, adequate outlets, and proper grounding can lead to tripped breakers, damaged electronics, or even fire hazards. Always consult or hire a pro for electrical.
- Skipping insulation: Without proper insulation, the office will be unusable for large parts of the year due to extreme heat or cold, defeating the purpose of creating a comfortable workspace.
- Poor ventilation: A sealed, unventilated space can quickly become stuffy, humid, and prone to mold. Ensure proper airflow with operable windows, vents, or a small exhaust fan.
- Neglecting permits and codes: Failing to check local building codes and obtain necessary permits can result in forced demolition, fines, or issues when selling your home.
- Purchasing the wrong window and door types: Using single-pane windows or interior doors will lead to significant heat loss/gain and poor security. Always opt for exterior-grade, energy-efficient options.
Cost & Time Breakdown
| Task | DIY cost | Pro cost | Time |
|---|---|---|---|
| Foundation repair/reinforcement | $50–$300 | $300–$1,000+ | 1–2 days |
| Roofing & Siding Repair | $100–$500 | $500–$2,000 | 1–3 days |
| Windows & Doors (materials) | $300–$1,000 | $300–$1,000 | 2–4 hours |
| Insulation (materials) | $150–$500 | $150–$500 | 4–8 hours |
| Electrical Wiring (DIY parts) | $200–$800 | $1,000–$3,000+ | 1–3 days (pro) |
| Interior Finishes (drywall/floor) | $200–$700 | $500–$2,000 | 2–4 days |
| Paint & Furnishings | $100–$500+ | $100–$500+ | 1–2 days |
Tips & Prevention
- Regular Inspections: Periodically check your shed's exterior for signs of wear, especially the roof, siding, and foundation. Address small issues like missing caulk or damaged shingles immediately.
- Maintain Good Drainage: Ensure gutters (if present) are clean and downspouts direct water away from the shed's foundation. Regrade soil around the shed if it slopes towards the structure.
- Ventilate Properly: Even after conversion, maintain good ventilation by opening windows or using a small exhaust fan to prevent moisture buildup and keep the air fresh.
- Pest Control: Seal any small openings or cracks in the shed's exterior to prevent rodents and insects from entering and causing damage to insulation or wiring.
- Scheduled Maintenance: Annually re-caulk around windows and doors, inspect paint for peeling, and check for any signs of water intrusion or wood rot.
- HVAC Options: Consider a small ductless mini-split system for efficient heating and cooling, or a portable electric heater/AC unit for occasional use.
When to Call a Professional
While many aspects of shed conversion can be tackled by a confident DIYer, certain stages absolutely require professional expertise for safety, compliance, and quality. Always call a licensed electrician for any new electrical wiring that involves connecting to your home's main electrical panel or installing a sub-panel. Improper electrical work is a significant fire hazard and can lead to serious injury or death. If your shed's foundation has significant cracks, uneven settling, or signs of structural compromise, a structural engineer or foundation specialist should be consulted to ensure the building is stable before any major renovations. Similarly, if extensive wood rot or pest damage has compromised more than a few studs or joists, a qualified carpenter or general contractor can assess the full extent of the damage and ensure the repairs are structurally sound and meet local building codes. Finally, if your local building department requires specific permits for 'change of use' or 'accessory dwelling unit' conversions, directly consult with them or hire a general contractor experienced in such projects to navigate the permitting process and ensure all work adheres to regulations, avoiding costly future issues.
Related Articles
Keep troubleshooting with these hand-picked guides from FixlyGuide:
- The Secret to Lush Raised Beds? It's Not Just About How You Water — Smart irrigation for raised garden beds isn't just about automation; it's about delivering the right amount of water precisely when your pl…
- The Hidden Reason Your GFCI Trips (It's Not Always a Faulty Outlet) — A continuously tripping GFCI outlet is a critical safety warning, often indicating moisture, a faulty appliance, or a wiring problem that r…
- The Hidden Reason Your GFCI Trips (It’s Not Always a Bad Outlet) — A tripping GFCI outlet is a safety mechanism doing its job, often indicating a problem like moisture, a faulty appliance, or a wiring issue…
- The 5-Minute Trick to Vacation-Proof Your Garden (Before You Leave Town) — Prevent your garden from wilting while you're away with simple, proactive steps that ensure lush growth and minimal fuss upon your return.
- The Secret to Scoring Deep Grill Discounts (Before Everyone Else Does) — Unlock massive savings on top-brand grills and outdoor cooking essentials by understanding the overlooked retail inventory cycles before Me…
- Is Your Gutter Sagging After Every Storm? The Hidden Flaw Most Homeowners Miss — Discover the overlooked reason your gutters sag after every storm and learn the lasting fix that most homeowners miss.
This article was independently written by FixlyGuide based on the source topic.
Frequently asked questions
Can any shed be converted into a home office?+
While most sheds can be converted, the ease and cost depend on its existing condition. A shed with a solid foundation, intact roof, and sturdy walls will be much simpler and cheaper to transform than one requiring extensive structural repairs or a complete rebuild.
Do I need a permit to convert my shed into an office?+
Permit requirements vary widely by location. Factors like the size of the shed, whether you're adding electricity or plumbing, and local zoning laws for 'accessory structures' or 'change of use' can all trigger the need for permits. Always check with your local planning or building department before starting any major work.
How do I insulate a shed for year-round use?+
Effective insulation involves adding R-value to the walls, ceiling, and floor. Common methods include using fiberglass batts in wall and ceiling cavities, rigid foam board for floors, and ensuring a vapor barrier is installed on the warm side of the insulation to prevent condensation and moisture issues.
What's the best way to get electricity to my shed office?+
The safest and most reliable method is to run a dedicated electrical circuit from your home's main panel to a sub-panel installed in the shed. This typically involves trenching and burying electrical conduit. This work should always be done by a licensed electrician to ensure compliance with electrical codes and safety regulations.
How much does it typically cost to convert a shed into a home office?+
Costs can range significantly, from as little as $1,000 for a very basic conversion of an already sound shed to $5,000 or more for a complete overhaul including new windows, doors, extensive electrical work, and high-quality finishes. The biggest cost variables are the shed's initial condition and whether you hire professionals for certain tasks.

Discussion
Loading comments…