
Tools & materials you'll need
Affiliate linksAs an Amazon Associate FixlyGuide earns from qualifying purchases — at no extra cost to you. Prices and availability are accurate as of publication and subject to change.
Quick Answer
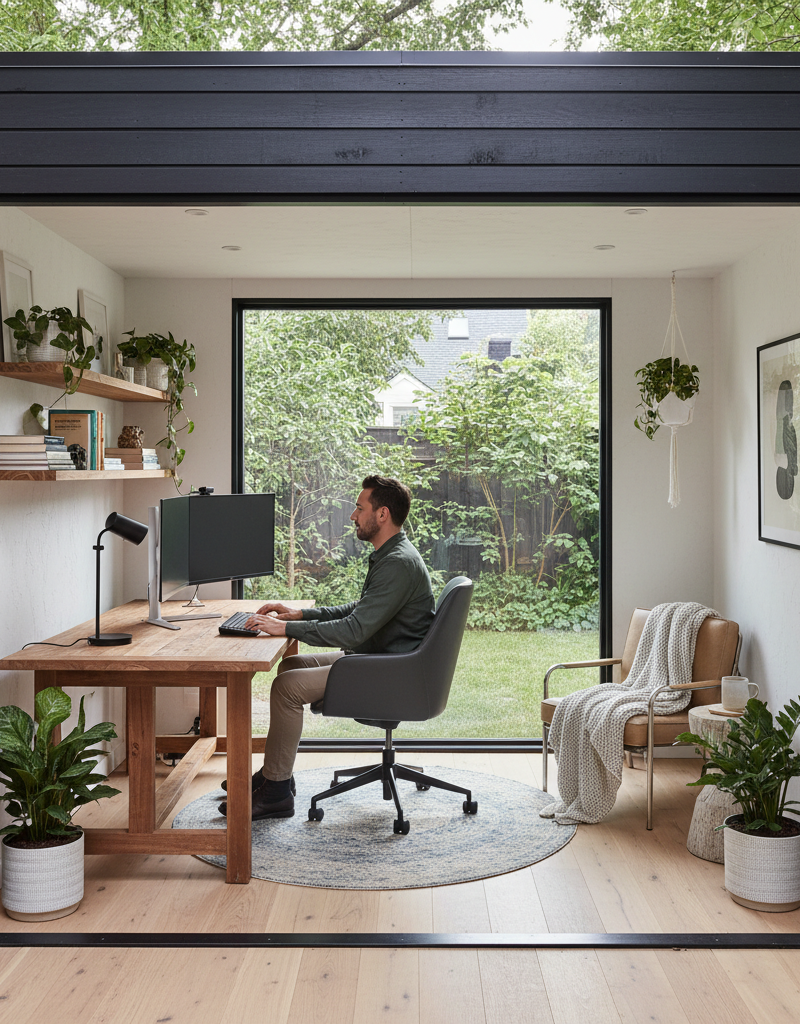
Turning a forgotten shed into a vibrant home office is more than just a renovation; it's a creative revival of underutilized space. The key is a phased approach, starting with a thorough structural assessment and moving to essential weatherproofing, insulation, and interior design. With careful planning and DIY effort, you can create a dedicated workspace that enhances your home's functionality and your daily productivity, often for less than the cost of a new prefabricated unit.
The Problem
Many homes lack a dedicated space for work, leading to cluttered dining tables, makeshift desk corners in bedrooms, or constant distractions. This can severely impact productivity, focus, and the ability to maintain a healthy work-life balance. Meanwhile, an old shed in the backyard often sits as an underutilized, sometimes decaying, structure — an eyesore that serves as little more than storage for rusty tools or forgotten garden supplies. The problem is a missed opportunity: a functional, isolated workspace is within reach, hidden in plain sight, waiting for a smart transformation rather than costly new construction.
How It Works
Converting a shed into a home office involves addressing several critical areas to transition it from a storage unit to a habitable space. First, structural integrity is paramount. This means inspecting the foundation for settling or rot, checking wall studs for damage, and ensuring the roof trusses are sound. Once the structure is stable, weatherproofing becomes the next major hurdle. This involves repairing or replacingcompromised roofing, sealing gaps and cracks in the walls, and ensuring doors and windows create a tight seal against the elements. A shed's original purpose rarely included climate control, so insulation is crucial for year-round comfort. Adding rigid foam boards or batt insulation in walls, ceiling, and floor will dramatically improve temperature regulation. Adequate ventilation, often achieved through soffit and ridge vents or a small exhaust fan, prevents moisture buildup and improves air quality. Finally, electrical service is often needed for lighting, heating/cooling, and essential electronics. This typically involves running a dedicated underground circuit from the main house panel to a sub-panel or outlet box within the shed, adhering strictly to local electrical codes. The interior finish, from drywall or plywood to flooring and paint, transforms the utilitarian space into a comfortable and inspiring work environment. Each layer builds upon the last, culminating in a functional, dedicated home office.
Step-by-Step Fix
Before starting any work, thoroughly clean out the shed. Remove all contents, sweep away debris, and assess the existing structure for any signs of damage. Take photos for reference.
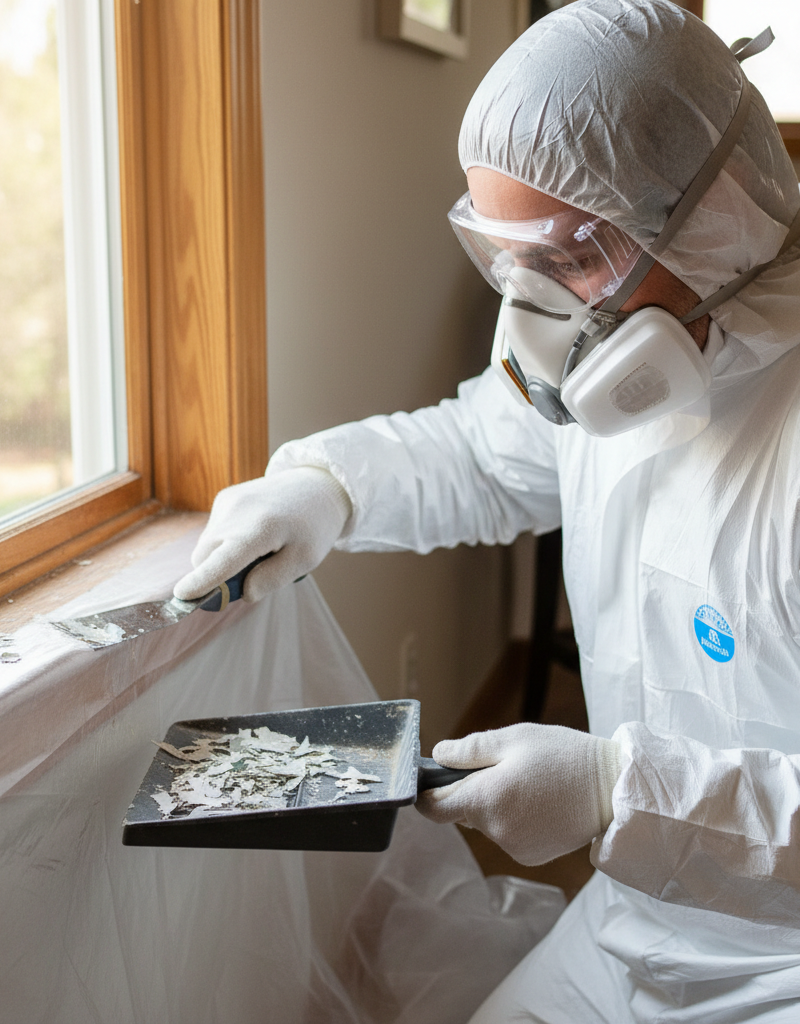
Safety Note: Always wear appropriate personal protective equipment (PPE) including gloves, eye protection, and a dust mask when working with old structures, insulation, or power tools. If your shed appears to have extensive structural damage, or if you plan to run new electrical lines, consult with a qualified professional before starting.
-
Inspect and Repair the Foundation — *Address any settling, rot, or instability in the shed's base.
- Beneath the shed, examine piers, skids, or concrete slabs for cracks, crumbling, or rot. Address any foundational issues immediately. For minor rot, you might be able to sister new lumber to damaged sections with construction screws. For significant settling or widespread rot, consider jacking up the shed slightly (using a hydraulic jack and cribbing) and replacing entire sections of rotten skids or reinforcing piers. This is a critical step; a weak foundation compromises the entire structure.
- If your shed sits directly on the ground, consider adding gravel or concrete pavers beneath it to improve drainage and prevent future moisture issues.
-
Reinforce the Structure and Walls — *Ensure the shed frame is solid and square.
- Check wall studs, top plates, and bottom plates for rot, insect damage, or bowing. Sister new lumber alongside compromised studs where possible, or replace sections that are too far gone. Pay close attention to corners and around window/door openings. Add hurricane ties or framing clips at roof-to-wall connections if they are missing, especially in high-wind areas.
- Check for square: Use a large framing square or the 3-4-5 triangle method to ensure the walls are plumb and square. Adjust bracing as needed before proceeding.
-
Repair or Replace Roofing — *Create a watertight seal above your head.
- Inspect the existing roof thoroughly for missing shingles, cracked tar paper, or soft spots in the sheathing. Patch minor issues with roof cement and new shingles. For extensive damage, consider re-roofing entirely. Remove old shingles, replace any rotten plywood sheathing, install new felt paper, and lay down new shingles or metal roofing according to manufacturer instructions. Ensure drip edges are properly installed.
- Consider adding soffit and ridge vents: These are vital for attic ventilation, preventing heat buildup in summer and moisture accumulation in winter, which can lead to mold and rot.
-
Install Windows and Doors — *Upgrade for security, light, and energy efficiency.
- If your shed lacks windows or uses single-pane, consider installing new, energy-efficient double-pane windows. Frame out new openings if necessary. For the door, a solid, insulated exterior door with a good lock will provide security and help with climate control. Weatherstrip all doors and windows thoroughly to prevent drafts.
- Ensure proper flashing: Always use flashing tape or house wrap around window and door openings to prevent water intrusion, even if using pre-flashed units.
-
Address Electrical Needs — *Plan for power, light, and climate control safely.
- Pro Callout Strongly Recommended: Running new electrical service requires specific knowledge of building codes and safety practices. It is highly advisable to consult with or hire a licensed electrician to run the main power line from your house panel to the shed. They will ensure proper wire gauge, conduit, GFCI/AFCI protection, and adherence to all local electrical codes.
- For DIYers comfortable with basic electrical work (after the main line is run by a pro): Install outlets (GFCI protected), light fixtures, and switches. Plan your layout based on your desk, equipment, and any heating/cooling units.
-
Insulate Walls, Ceiling, and Floor — *Maintain comfortable temperatures year-round.
- For walls and ceiling, consider fiberglass batts (R-13 to R-19 for walls, R-30+ for ceiling) or rigid foam insulation (R-5 per inch). Cut insulation to fit snugly between studs and joists. For the floor, rigid foam insulation cut to fit between floor joists is effective, especially if you have a crawl space. Alternatively, use batting and cover with a vapor barrier. Ensure a vapor barrier is installed on the warm-in-winter side of the insulation.
- Wear gloves and a respirator: When working with fiberglass insulation, always protect your skin and airways.
-
Install Interior Walls and Flooring — *Create a finished aesthetic.
- Options for interior walls include drywall, plywood, or tongue-and-groove planks. Drywall provides a smooth finish but requires taping and mudding. Plywood is more durable and quicker to install. For flooring, consider laminate, vinyl plank, or engineered wood. Ensure the subfloor is clean, level, and dry before installing.
- Acclimatize materials: Allow drywall, flooring, and trim to sit in the shed for 24-48 hours before installation to adjust to the shed's humidity and temperature, preventing warping or gaps.
-
Paint and Furnish — *Give your office its final look and functionality.
- Finish interior walls with paint, wallpaper, or stain. Choose light colors to maximize natural light and make the space feel larger. Arrange your desk, chair, shelving, and other office essentials. Consider ergonomic furniture and good task lighting. Add organizational systems to keep your new workspace tidy and efficient.
- Ventilate well during painting: Ensure good airflow to dissipate fumes while painting.
Common Causes
- Neglect and Exposure: Over years, sheds exposed to the elements without proper maintenance develop rot, leaks, and structural weaknesses. Sunlight, rain, snow, and fluctuating temperatures take their toll, leading to deteriorated roofing, compromised siding, and damaged foundations.
- Lack of Proper Foundation: Many older sheds were built directly on the ground or on simple wood skids without adequate drainage or critter protection. This leads to constant moisture wicking into the wood, accelerating rot and providing entry points for pests.
- Poor Ventilation: Insufficient airflow in sheds can lead to moisture buildup, which fosters mold, mildew, and wood rot. This is often exacerbated when sheds are packed tight with stored items, further restricting air circulation.
- Original Construction Quality: Basic sheds often use lower-grade materials and simpler construction techniques not intended for long-term habitation or heavy loads. This inherent lack of robustness means they degrade faster than a main dwelling.
- Pest Infestation: Rodents, insects, and other pests can cause significant structural damage by chewing through wood, insulation, and even wiring, compromising the integrity of the shed.
Common Mistakes
- Skipping Foundation Repairs: Thinking you can just build on a crumbling foundation is a recipe for disaster. Any new work will settle, crack, or fail prematurely if the base isn't solid. Instead: Always start with a thorough foundation inspection and make all necessary repairs or reinforcements.
- Ignoring Proper Insulation and Ventilation: Overlooking these critical steps leads to an uncomfortable, potentially mold-ridden office that's too hot in summer and freezing in winter. Instead: Insulate all six sides (walls, ceiling, floor) and ensure cross-ventilation or mechanical ventilation (e.g., small exhaust fan) to manage temperature and moisture.
- Underestimating Electrical Needs (or DIYing it all): Running extension cords or attempting complex wiring without experience is a serious fire hazard and likely not up to code. Instead: Consult a licensed electrician for all main power connections and significant wiring. They'll ensure safety and compliance.
- Not Planning for Water Management: Allowing rainwater to pool around the foundation or letting moisture wick up from the ground will quickly undo your hard work. Instead: Install gutters and downspouts if possible, grade the surrounding soil away from the shed, and ensure a robust vapor barrier under the floor.
- Overlooking Permits and Codes: Depending on your local jurisdiction and the extent of your renovation, you might need permits for structural changes, electrical work, or even just adding habitable space. Instead: Always check with your local planning or building department before starting major work to understand permit requirements and building codes.
Cost & Time Breakdown
| Task | DIY Cost | Pro Cost | Time |
|---|---|---|---|
| Foundation repair | $50–$200 | $300–$800 | 1–4 hours |
| Structural reinforcement | $100–$300 | $500–$1,500 | 2–8 hours |
| Roofing repair/replacement | $150–$600 | $500–$2,000 | 4–16 hours |
| Windows & door | $200–$800 | $400–$1,200 | 4–12 hours |
| Electrical work (materials) | $150–$400 | ~$1,000–$3,000+ (pro labor) | 4–8 hours (DIY) |
| Insulation | $100–$500 | $300–$1,000 | 4–12 hours |
| Interior finishes | $200–$700 | $500–$1,500 | 8–24 hours |
| Total Estimate | $1,150–$3,500 | $3,500–$10,000+ | 2–5 full days |
Tips & Prevention
- Regular Inspections: Periodically check your shed's exterior and interior for any signs of moisture intrusion, pest activity, or structural damage, especially after severe weather. Early detection can save significant repair costs.
- Maintain Drainage: Ensure the ground around your shed is sloped away from the foundation and that gutters and downspouts (if installed) are clear and directing water away. This is crucial for preventing rot.
- Keep it Clear: Avoid storing items directly against the shed walls, especially on the exterior. This allows for better airflow and makes it easier to spot issues like rot or pest entry points. Trim back any bushes or trees touching the shed.
- Proper Ventilation: If not already installed, consider adding simple passive vents (e.g., gable vents, or even just leaving a window slightly ajar when not in use) to encourage airflow and prevent moisture buildup, especially if the shed is in a humid climate.
- Gutter Installation: Adding gutters to your shed, if it doesn't have them, will significantly protect the foundation and lower walls from direct water runoff, extending its lifespan.
- Regular Sealing/Painting: Apply a fresh coat of exterior paint or sealant every few years to protect the wood from UV radiation and moisture damage.
When to Call a Professional
While transforming a shed can be a rewarding DIY project, certain aspects require specialized expertise for safety and compliance. You should call a licensed professional immediately if you discover significant structural damage to the main supports (e.g., rotten foundation skids, severely compromised wall studs that affect the shed's stability). Any new electrical wiring, especially running a dedicated circuit from your main house panel to the shed, must be handled by a licensed electrician to ensure it adheres to national and local electrical codes, preventing fire hazards and ensuring proper grounding. Additionally, if your shed's roof is severely damaged and you're uncomfortable working at heights or with complex roofing materials, a professional roofer can ensure a watertight and durable installation. Always consult a building official in your municipality regarding permits before undertaking any significant structural or electrical changes, as failure to do so can result in fines or forced removal of your new office space.
Related Articles
Keep troubleshooting with these hand-picked guides from FixlyGuide:
- 7 Hidden Equity Drains Costing You Thousands Annually — Your home is an asset, but silent problems like minor leaks, poor insulation, and deferred maintenance can drain its value. Discover the se…
- The Hidden Culprit Behind Your AC Not Cooling (and How to Find It) — If your central AC isn't cooling your home, the issue often stems from a surprisingly simple problem that's easy to overlook. Learn how to…
- The Hidden Reason Your AC Isn't Cooling (And 7 Fixes Homeowners Miss) — If your central AC isn't cooling your home, the culprit often lies in an overlooked issue that's simple to fix, preventing costly professio…
- 7 Inspection Red Flags That Secretly Signal a $20,000 Bill — Don't let your dream home become a money pit. Many buyers and even some inspectors overlook subtle home inspection red flags that lead to f…
- The Single Board Secret to Attracting Bluebirds: A Quick DIY House — Discover how to construct an ideal bluebird house using just one cedar board, providing a safe and inviting home for these cherished backya…
- That Ceiling Stain Isn't a Leak: 5 Hidden Causes — A mysterious ceiling stain can be alarming, especially when there's no active leak. The real culprits are often hidden issues like attic co…
Get the print-ready PDF of this guide
A clean, ad-free, printable version you can keep on your phone or pin to the workshop wall. We'll also send occasional weekly tips matched to your home situation.
- Print-optimized layout
- Tools, materials & every step included
- Unsubscribe anytime
This article was independently written by FixlyGuide based on the source topic.
Frequently asked questions
Can any old shed be converted into a home office?+
Most structurally sound sheds can be converted. Critical factors are the foundation, roof integrity, and the overall condition of the walls. Minor issues can often be repaired, but extensive rot or collapse may make it impractical.
Do I need a permit to convert my shed into an office?+
It depends on your local municipality and the extent of the renovation. Adding electrical, plumbing, or making significant structural changes often requires permits. Always check with your local planning department before starting.
How do I get electricity to my shed office?+
Running electricity to a detached shed almost always requires a licensed electrician. They will properly run an underground conduit and wire from your main electrical panel, typically to a sub-panel or dedicated outlets in the shed, ensuring all work meets local electrical codes for safety.
What's the best way to insulate a shed for year-round use?+
For year-round comfort, insulate all six sides: walls, ceiling, and floor. Rigid foam insulation or fiberglass batts are common. Ensure a vapor barrier is installed on the warm-in-winter side to prevent moisture buildup.
How much does it cost to convert a shed into a home office?+
DIY costs can range from $1,000 to $3,500 for materials, depending on the shed's starting condition and your desired finishes. Professional conversion costs can be significantly higher, from $3,500 to $10,000 or more, largely due to labor and permit fees.

Discussion
Loading comments…