
Tools & materials you'll need
Affiliate linksAs an Amazon Associate FixlyGuide earns from qualifying purchases — at no extra cost to you. Prices and availability are accurate as of publication and subject to change.
Quick Answer
Many homeowners rush the deck sealing process, skipping crucial preparation steps that are vital for the sealant's adhesion and longevity. The single biggest mistake is applying new sealer over a dirty, mildewed, or improperly stripped surface. This leads to the sealant failing prematurely, peeling, flaking, and leaving your deck vulnerable to moisture damage, rot, and UV degradation. The correct approach involves a thorough cleaning, repairing any existing damage, and proper surface preparation to ensure a strong, lasting bond.
The Problem
Your beautiful wood deck takes a beating from the elements year-round. Sunlight, rain, snow, and daily foot traffic conspire to break down the wood fibers, leading to graying, splintering, and ultimately, rot. A protective sealant is your deck's first line of defense, but if it's applied incorrectly, it's virtually useless. The problem isn't usually with the sealant itself, but with the homeowner's approach to application. A hasty job, without proper cleaning, old finish removal, or wood repair, creates a poor bonding surface. This means moisture can still penetrate, mildew can still grow beneath the new coating, and your effort and expense go to waste as the sealant flakes off prematurely. You'll see signs like water soaking into the wood instead of beading up, discoloration, or the sealant lifting and peeling within a year or two.
How It Works
Wood is a porous material, and its cellular structure is designed to absorb and release moisture. When exposed to the elements, this natural process can lead to expansion and contraction, making the wood vulnerable. Sealants work by penetrating the uppermost layers of the wood or forming a protective film on the surface, creating a barrier that repels water, blocks UV rays, and inhibits the growth of mold and mildew.
Before a sealant can do its job effectively, the wood surface must be clean and open, allowing the sealant to adhere and penetrate deeply. If old, failing sealant, dirt, grime, mildew, or loose wood fibers are present, they create a barrier between the new sealant and the actual wood. Imagine trying to glue two surfaces together with a layer of dust in between – it simply won't hold. Wood cleaners and brighteners are specifically formulated to strip away old finishes, kill mildew, and open up the wood's pores, creating an ideal substrate for the new sealant. Sanding further refines this surface, removing any remaining imperfections and ensuring an even application. When done correctly, the sealant forms a durable bond, protecting the wood for years and maintaining its aesthetic appeal. Skipping these critical preparation steps is akin to building a house on a shaky foundation – it's doomed to fail prematurely.
Step-by-Step Fix
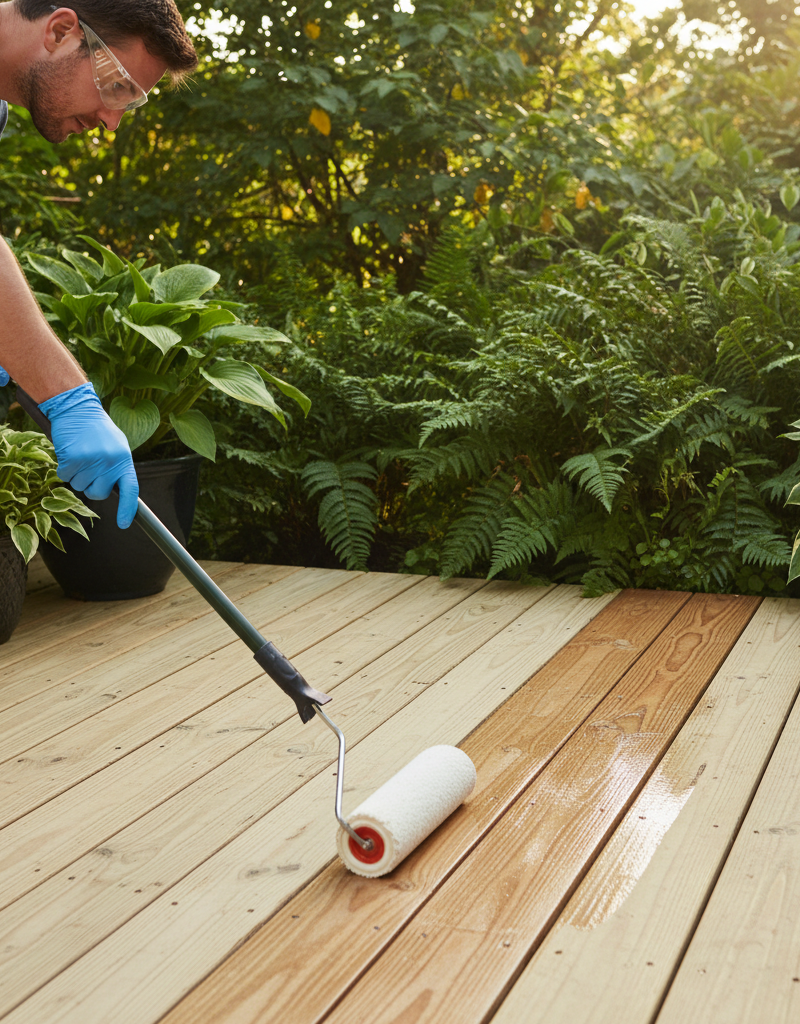
Safety First — Always wear eye protection and gloves, especially when working with cleaning chemicals. Cover any nearby plants or landscaping you wish to protect from chemical overspray.
Clean the Deck Thoroughly — A clean surface is paramount for sealant adhesion.
- Sweep the deck to remove loose debris, leaves, and dirt.
- Mix a dedicated deck cleaner (oxygenated bleach formulas are less harsh on plants than chlorine bleach) according to the manufacturer's instructions in a pump sprayer or bucket.
- Apply the cleaner evenly to a small section of the deck, allowing it to dwell for 10-15 minutes, but don't let it dry. If working on a large deck, tackle one section at a time to keep the cleaner wet.
- Scrub the surface with a stiff-bristle brush, working with the wood grain, paying extra attention to stubborn stains or mildew.
- Rinse thoroughly with a garden hose (avoid high-pressure washing unless experienced, as it can damage wood fibers). Repeat for all sections.
- If this doesn't work: For stubborn old stains or failing finishes, consider a stronger deck stripper, but always test in an inconspicuous area first.
Repair Any Damage — Address structural and aesthetic issues before sealing.
- Inspect the deck for loose boards, protruding nails, or screws. Secure loose boards with deck screws (ensure they are exterior-grade).
- Hammer down or replace any raised nails.
- Fill small cracks or minor rot spots with exterior-grade wood filler, allowing it to dry completely according to product instructions.
Sand the Surface, If Necessary — Smooth wood provides the best adhesion and appearance.
- For heavily weathered or rough decks, or if you've used a stripper that raised the grain, light sanding is beneficial.
- Use an orbital sander with 60-80 grit sandpaper. Sand with the wood grain, removing splinters and creating a smooth, even surface.
- Vacuum or sweep the deck thoroughly to remove all sanding dust. Dust can act as a bond breaker for the sealant.
Allow the Deck to Dry Completely — Moisture is the enemy of sealant adhesion.
- After cleaning and rinsing, allow the deck to dry for at least 24-48 hours. Better yet, check the forecast for a few days of dry weather.
- Test for dryness: Sprinkle a few drops of water on the deck. If they bead up, the deck is likely too wet or still has an old finish. If they soak into the wood quickly, it's ready.
Choose the Right Sealer — Not all sealers are created equal.
- Penetrating oil-based sealers: Tend to provide excellent nourishment and protection, enhancing natural wood grain. Good for severe weather.
- Water-based acrylic/urethane sealers: Offer good durability, easier cleanup, and can provide a clearer finish. Good for lighter protection and color retention.
- Clear vs. Toned: Toned sealers (with a slight stain) offer better UV protection than clear sealers.
- Read reviews and choose a high-quality product suitable for your wood type and climate.
Apply the Sealer Evenly — Thin coats are better than thick ones.
- Stir the sealant thoroughly before and during application.
- Use a high-quality natural bristle brush, a roller designed for deck applications, or a pump sprayer.
- Apply in thin, even coats, working with the wood grain. Avoid puddling, which can lead to sticky spots or uneven drying.
- Work in small sections, making sure to maintain a wet edge to prevent lap marks.
- If you get drips or puddles: Back-brush immediately to smooth them out before they dry.
Apply a Second Coat (if recommended) — Boost durability with a proper second application.
- Consult the product instructions for recoat times. Most sealers require 2-4 hours between coats, but some may need longer.
- Apply the second coat just like the first – thin and even. Two thin coats are always better than one thick one.
Allow for Proper Curing — Patience protects your investment.
- Keep foot traffic off the deck for at least 24-48 hours after the final coat.
- Avoid placing furniture or heavy objects on the deck, and protect it from moisture exposure (rain, sprinklers) for 48-72 hours or longer, as per manufacturer instructions. Full cure can take several days to a week.
Common Causes
- Inadequate Surface Preparation: The most frequent cause. Applying sealer over dirt, mildew, old failing finishes, or loose wood fibers prevents proper adhesion. This is like painting over peeling paint – it won't last.
- Applying Sealer to Wet Wood: Moisture trapped under the sealant can lead to bubbling, peeling, and mildew growth, as well as preventing the sealant from penetrating correctly.
- Using the Wrong Sealer: Choosing a sealant not suited for your deck's wood type, climate, or level of sun exposure can lead to premature failure.
- Over-application (Too Thick Coats): Applying sealant too thickly prevents it from drying properly, leading to sticky spots, uneven finish, and a tendency to peel or flake sooner.
- Skipping Repairs: Sealing over rotten wood, deep cracks, or loose boards won't fix those issues; it only temporarily masks them and allows water to find weak points.
- Ignoring Old Sealer: If an old, failing sealer is present, it must be removed. Applying new sealer over a compromised old layer will cause both to fail quickly.
Common Mistakes
- Mistake: Not cleaning the deck thoroughly.
- Instead: Always start with a power wash or a dedicated deck cleaner and stiff brush to remove all dirt, grime, mold, and mildew. Even if the deck looks clean, microscopic contaminants can prevent adhesion.
- Mistake: Sealing too soon after cleaning or rain.
- Instead: Allow at least 24-48 hours of dry weather after cleaning or rainfall. The wood must be bone dry for the sealer to penetrate and bond properly. Use the
Related Articles
Keep troubleshooting with these hand-picked guides from FixlyGuide:
- The 3 Hidden Mistakes That Make Your Deck Sealer Fail (And How to Fix Them) — Resealing your wood deck protects it from weather and extends its life. Learn how to avoid common mistakes for a long-lasting finish and vi…
- The #1 Mistake Homeowners Make When Sealing a Deck (and How to Fix It) — Prevent costly damage and extend your deck's life by avoiding common sealing errors and following a simple, effective resealing process.
- The #1 Mistake Homeowners Make After Finding Missing Shingles (And How to Fix It Right) — Discover the crucial steps to take after a storm rips shingles from your roof, ensuring a proper, lasting repair and preventing costly futu…
- Is Your Gutter Sagging After Every Storm? The Hidden Flaw Most Homeowners Miss — Discover the overlooked reason your gutters sag after every storm and learn the lasting fix that most homeowners miss.
- The 3 Hidden Reasons Your Gutters Fail in Heavy Rain (It’s Not Just Leaves) — Overflowing gutters during heavy rain often stem from a few common, yet overlooked, issues beyond simple leaf clogs, leading to potential s…
- The Nasty Truth About Your Smelly Bathroom Sink — And the 2-Ingredient Trick to Fix It — Uncover the hidden reasons behind that foul odor wafting from your bathroom sink drain and learn a simple, two-ingredient solution to banis…
Frequently asked questions
How often should I reseal my wood deck?+
The frequency depends on your deck's exposure, the type of wood, and the quality of the sealant. Generally, most decks need resealing every 1-3 years. A simple water test will tell you if it's time: if water soaks into the wood instead of beading up, it's time to reseal.
Can I seal a deck when it's humid?+
It's best to avoid sealing on high-humidity days. High humidity can prolong drying and curing times, potentially leading to a cloudy finish or poor adhesion. Aim for moderate temperatures (50-90°F / 10-32°C) and low to moderate humidity.
What's the difference between a sealer and a stain?+
A sealer is primarily for protection against moisture and UV damage, often allowing the natural wood grain to show through (though some have a light tint). A stain primarily adds color to the wood, with varying levels of protection. Many products today are 'stain and sealer in one,' offering both color and protection.
How do I know if my deck needs to be sealed?+
The easiest way is the 'water bead test.' Sprinkle a few drops of water on the deck surface. If the water beads up, your deck is likely still protected. If the water quickly soaks into the wood and darkens it, the old sealant has worn off, and it's time to reseal.
Can I use a pressure washer to clean my deck before sealing?+
Yes, but with extreme caution. A pressure washer can be very effective for cleaning, but using too high a pressure or holding the nozzle too close can damage wood fibers, leaving permanent scars. Use a fan tip nozzle and keep the pressure below 1200 PSI for most deck woods, maintaining a safe distance (usually 6-12 inches) while moving with the grain.


Discussion
Loading comments…