
Tools & materials you'll need
Affiliate links- AmazonDethatching rake1 · For small lawns or light thatch
- AmazonPower dethatcher1 · Rent from a home improvement store for larger lawns or thick thatch
- AmazonCore aerator1 · Rent from a home improvement store
- AmazonHand trowel or small spade1
- AmazonHard-tined rake1
- AmazonHand spreader or broadcast spreader1 · For even seed/fertilizer distribution
- AmazonGarden hose with gentle spray nozzle1
- AmazonWork gloves1 pair
As an Amazon Associate FixlyGuide earns from qualifying purchases — at no extra cost to you. Prices and availability are accurate as of publication and subject to change.
Quick Answer
Patchy grass in your lawn often points to an underlying issue: excessive thatch. Thatch is a dense layer of organic material—dead grass, roots, and debris—that accumulates between the green blades and the soil surface. While a thin layer is beneficial, too much thatch chokes out new growth, prevents water and nutrients from reaching the roots, and creates an environment ripe for pests and diseases. Fixing this involves reducing the thatch layer, preparing the soil, and overseeding the bare areas for a lush, uniform lawn.
The Problem
Imagine a healthy lawn as a thriving ecosystem where grass blades can breathe, roots can absorb water and nutrients, and new seeds can easily germinate. When thatch becomes too thick, it acts like a suffocating blanket. Water pools on top or runs off instead of penetrating the soil. Fertilizers struggle to reach the roots, making them ineffective. Air circulation is reduced, encouraging fungal diseases, and insect pests find a cozy home within the dense mat. This stress leads to weak grass, stunted growth, and eventually, dead patches. Many homeowners mistakenly try to 'feed' these patches more, only exacerbating the problem as the nutrients never reach the actual soil.
How It Works
Thatch naturally forms as grass sheds old blades and roots. Microorganisms in the soil typically break down this organic matter, keeping the thatch layer thin—ideally no more than half an inch. This thin layer is beneficial; it insulates the soil, helps retain moisture, and reduces compaction. However, several factors can disrupt this natural decomposition process, leading to excessive thatch build-up. Common culprits include over-fertilizing with nitrogen-rich products that stimulate rapid top growth (more dead blades), compact soil that inhibits microbial activity, infrequent watering which dries out microbes, and certain grass types like Kentucky bluegrass or Bermuda grass that produce thatch more rapidly. A thick thatch layer creates a barrier, acting like a sponge that holds moisture but doesn't release it effectively to the soil below. It also deflects new grass seeds, preventing them from making contact with the soil needed for germination. This is why simply throwing seed on bare patches often fails if a significant thatch layer is present. The goal is to restore the balance, allowing your lawn to breathe, absorb, and grow effectively from the soil up.
Step-by-Step Fix
1. Assess Your Thatch Layer — Determine the extent of the problem.
Using a trowel or small spade, cut out a small wedge of turf about 2-3 inches deep. Examine the cross-section. The layer between the green grass blades and the soil is your thatch. If it's thicker than 1/2 inch, you have a thatch problem that needs addressing before effective patchy grass repair can begin.
- If thatch is under 1/2 inch: Your patchiness may be due to other factors like compaction, disease, or nutrient deficiency. Consider aeration.
2. Dethatch Your Lawn (if needed) — Remove excess organic build-up.
If your thatch layer is significant (over 1/2 inch), dethatching is crucial. This is best done in late spring or early fall when your grass is actively growing and can recover quickly. For smaller lawns, a robust dethatching rake with sharp tines can be effective. For larger areas, consider renting a power dethatcher (also called a vertical mower or verticutter) from a home improvement store. Set the machine to lightly score the soil surface, pulling up the thatch. Rake up all the loosened thatch and dispose of it.
- Safety Note: Always wear sturdy gloves and eye protection when operating power equipment. Read the operator's manual thoroughly before use.
3. Aerate Compacted Soil (if needed) — Improve air and water flow.
Compacted soil can contribute to thatch buildup and poor growth. After dethatching (or if your thatch is thin but soil is compacted), aerate your lawn. A core aerator pulls small plugs of soil from the ground, creating channels for air, water, and nutrients to penetrate deeper. This encourages stronger root growth and improves microbial activity, which helps break down thatch naturally over time. Leave the soil plugs on the lawn; they will break down and return nutrients to the soil.
- Tip: Aeration is generally recommended once a year for high-traffic lawns or those with clay soil, and every 2-3 years for others.
4. Prepare the Patchy Areas — Create an optimal bed for new seeds.
Once thatch is removed and aeration is complete, focus on the bare patches. Rake these areas vigorously with a hard-tined rake to loosen the top inch or two of soil. Remove any remaining dead grass, weeds, or debris. This provides good seed-to-soil contact, which is essential for successful germination.
- If soil is extremely hard: Mix in a thin layer (1/4 inch) of compost or good quality topsoil into the loosened soil to improve drainage and nutrient content.
5. Select the Right Grass Seed — Match your new seed to your existing lawn and climate.
Choose a grass seed variety that matches your existing lawn type (e.g., Kentucky Bluegrass, Tall Fescue, Ryegrass) and is suitable for your local climate and sun exposure. A professional at your local garden center can help if you're unsure. Look for disease-resistant varieties. For quick repair, a blend with ryegrass can establish quickly, but ensure it's compatible long-term.
6. Overseed the Patches — Distribute new seeds evenly.
Spread the chosen grass seed over the prepared bare patches. Follow the manufacturer's recommended seeding rate carefully – too much seed can lead to overcrowding and weak seedlings, while too little will result in sparse growth. For small patches, hand-spreading works. For larger areas, a hand-held spreader can ensure even distribution. Lightly rake the seeds into the top 1/8 inch of soil to ensure good seed-to-soil contact.
7. Apply a Starter Fertilizer — Give new seedlings a nutrient boost.
After seeding, apply a 'starter' or 'new lawn' fertilizer specifically designed for new grass. These fertilizers typically have a higher phosphorus content to promote strong root development. Follow application rates precisely to avoid burning new seedlings. Avoid high-nitrogen 'weed and feed' products on newly seeded areas, as herbicides can inhibit germination.
8. Water Diligently — Keep seeds moist for germination.
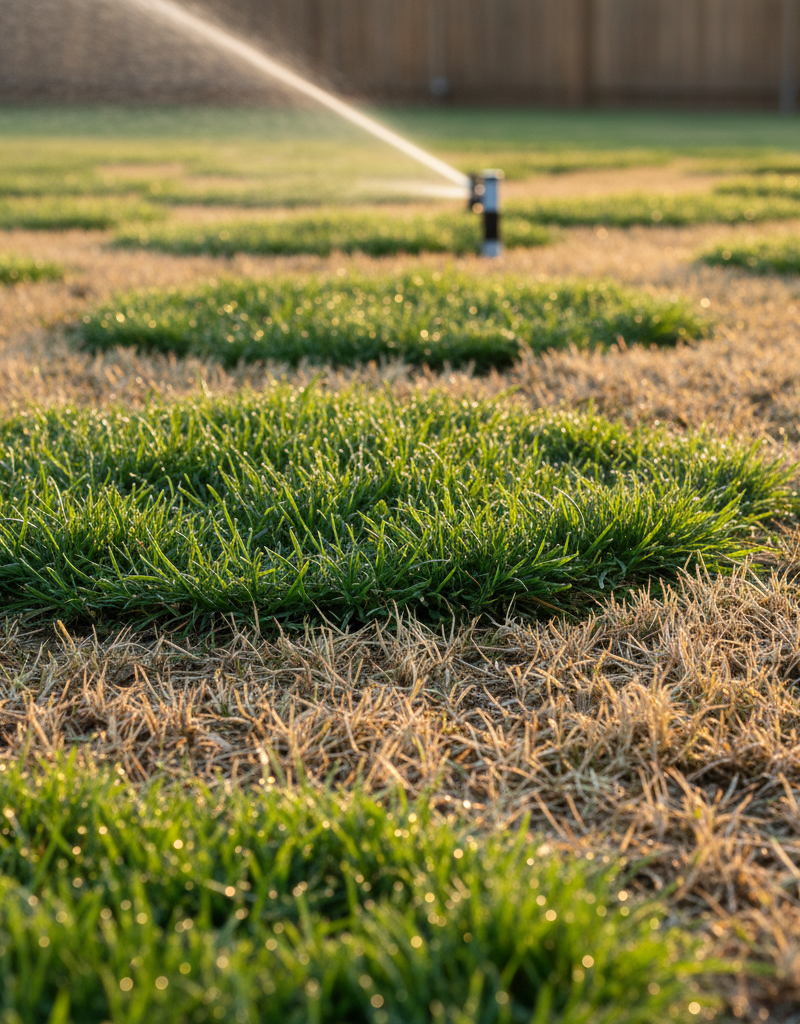
This is perhaps the most critical step. New grass seeds need consistent moisture to germinate and establish. Water the newly seeded areas lightly but frequently, multiple times a day (e.g., 2-3 times for 5-10 minutes each) for the first 2-3 weeks, or until the seedlings are about an inch tall. The goal is to keep the top inch of soil continuously moist, not saturated. Avoid heavy watering that can wash away seeds.
9. Protect New Growth — Guard against birds and foot traffic.
Consider covering newly seeded small patches with a very thin layer (1/8 inch) of straw, peat moss, or a germination blanket. This helps retain moisture and can deter birds. Avoid walking on newly seeded areas for at least 4-6 weeks to allow the grass to establish properly.
10. First Mow & Ongoing Care — Promote healthy growth.
Wait until the new grass is at least 3-4 inches tall before its first mow. Set your mower to its highest setting and ensure the blades are sharp. After the new grass is established (around 6-8 weeks), gradually transition to a less frequent but deeper watering schedule. Continue with regular, appropriate fertilization based on soil tests.
Common Causes
- Excessive Thatch: The most common culprit. A thick layer prevents water, nutrients, and air from reaching roots and new seeds.
- Soil Compaction: Hard, dense soil restricts root growth and inhibits water penetration, often contributing to thatch accumulation.
- Nutrient Deficiencies: Lack of essential nutrients, often due to poor soil or incorrect fertilization, leads to weak, dying grass.
- Pest Infestations: Grubs, chinch bugs, sod webworms, and other pests can chew through grass roots or blades, creating dead patches.
- Fungal Diseases: Brown patch, dollar spot, or rust can manifest as irregular dead or discolored areas, especially in warm, humid conditions.
- Improper Watering: Either too little water (drought stress) or too much (suffocating roots) can cause grass to die off.
- Chemical Spills/Burns: Fertilizer spills, herbicide drift, gasoline, or pet urine can
Related Articles
Keep troubleshooting with these hand-picked guides from FixlyGuide:
- The #1 Mistake Killing Your Thin Lawn (And How to Fix It in a Weekend) — Overseeding your lawn can transform it from thin and patchy to lush, but many homeowners make a crucial mistake that hinders success. Learn…
- The #1 Mistake Killing Your Thin Lawn (and How to Fix It in a Weekend) — Overseeding a thin lawn is crucial for a lush yard, but a common mistake can ruin your efforts before they even begin. Learn how to diagnos…
- The #1 Mistake Killing Your Lawn's Crabgrass Defense (And the Easy Fix) — Discover why common crabgrass removal methods fail and how to naturally eliminate this stubborn weed for a healthier lawn.
- The #1 Lawn Aeration Mistake Most Homeowners Make (And When to REALLY Do It) — Discover the crucial mistake many homeowners make with lawn aeration and learn the optimal timing for a thriving, healthy lawn.
- The #1 Mistake Killing Your Lawn's Clover—and the Easy fix That Spares Your Grass — Discover the most common mistake homeowners make when trying to eliminate clover, and learn how to remove it effectively without harming yo…
- The #1 Mistake Homeowners Make When Sealing a Deck (and How to Fix It) — Prevent costly damage and extend your deck's life by avoiding common sealing errors and following a simple, effective resealing process.
Frequently asked questions
What causes patchy grass?+
Patchy grass is most commonly caused by excessive thatch buildup, compacted soil, nutrient deficiencies, pest infestations (like grubs), fungal diseases, or improper watering practices. Identifying the root cause is the first step to effective repair.
When is the best time to fix patchy grass?+
The best time to fix patchy grass through dethatching, aeration, and overseeding is in late spring or early fall. These periods offer moderate temperatures and consistent moisture, ideal for grass seed germination and establishment, allowing the lawn to recover quickly.
Can I just put seeds on bare spots?+
Simply throwing seeds on bare spots is often ineffective if underlying issues like thick thatch or compacted soil are present. Proper soil preparation, including removing thatch and loosening the soil, is crucial for good seed-to-soil contact and successful germination.
How often should I dethatch my lawn?+
Most lawns benefit from dethatching every 1-3 years, depending on grass type, soil conditions, and maintenance practices. If your thatch layer consistently measures over 1/2 inch thick, it's time to dethatch.
What is the difference between dethatching and aeration?+
Dethatching removes the thick layer of dead organic matter (thatch) from just above the soil surface. Aeration, on the other hand, pulls small plugs of soil from the ground to relieve compaction and improve air, water, and nutrient penetration deeper into the root zone.


Discussion
Loading comments…