
Tools & materials you'll need
Affiliate linksAs an Amazon Associate FixlyGuide earns from qualifying purchases — at no extra cost to you. Prices and availability are accurate as of publication and subject to change.
Quick Answer
For cool-season grasses (like fescue, rye, Kentucky bluegrass), late summer to early fall (August to October) is the ideal time to aerate. For warm-season grasses (like Bermuda, zoysia, St. Augustine), late spring to early summer (April to June) is best. The key is to aerate when your grass is actively growing so it can quickly fill in the small holes created by the aeration process, preventing weeds from taking root.
The Problem
Many homeowners understand that lawn aeration is beneficial, but mistakenly think any time of year will do. The truth is, improper timing can turn a helpful practice into a lawn disaster. Aerating when your lawn is dormant, stressed by drought, or about to face extreme temperatures can severely damage your grass, promote weed growth, and waste your effort and money. Compacted soil, a common issue in many lawns, prevents water, nutrients, and air from reaching the roots, leading to thinning grass, bare patches, and an unthrifty appearance. Aeration is the solution, but only if performed at the correct time.
How It Works
Lawn aeration involves creating small holes in the lawn to alleviate soil compaction. This process allows essential elements—water, air, and nutrients—to penetrate deeper into the soil and reach the grass roots. When soil becomes compacted from foot traffic, heavy machinery, or even rain, the tiny spaces between soil particles collapse, effectively suffocating the grass roots. Oxygen is crucial for root respiration, water for nutrient transport, and nutrients for growth. Without these, roots struggle to develop, leading to shallow root systems and a vulnerable lawn. There are two primary types of aerators: spike aerators and core (or plug) aerators. Spike aerators simply poke holes in the ground with solid tines. While they can provide some temporary relief, they don't remove soil, and can actually increase compaction around the edges of the holes. Core aerators, on the other hand, extract small plugs of soil, leaving behind actual open channels. These channels are what truly decompact the soil and facilitate the movement of air, water, and nutrients. The extracted soil plugs, often called “cores” or “thatch bugs,” are left on the lawn to break down naturally, returning beneficial microorganisms and nutrients to the soil. As the grass grows, its roots will naturally expand into these newly created open spaces, leading to a stronger, deeper root system and a more resilient, healthier lawn.
Step-by-Step Fix
1. Identify Your Grass Type – Warm-season or cool-season
- Determine if you have cool-season grasses (fescue, rye, bluegrass) or warm-season grasses (Bermuda, zoysia, St. Augustine). This is crucial for proper timing. Cool-season grasses thrive in cooler temperatures (60-75°F / 15-24°C) and go dormant in hot summers. Warm-season grasses prefer warmer temperatures (75-90°F / 24-32°C) and go dormant in cold winters.
2. Determine the Right Season – Timing is everything
- Cool-season grasses: Aerate in late summer to early fall (August to October). This allows the grass to recover vigorously before winter dormancy. Avoid aerating in spring, as it can bring weed seeds to the surface right before their germination period.
- Warm-season grasses: Aerate in late spring to early summer (April to June). This is when these grasses are actively growing and can quickly heal and fill in the aeration holes before the peak heat of summer.
3. Prepare Your Lawn – *Water and mow
- Water thoroughly: Water your lawn deeply one to two days before aeration. The soil should be moist but not waterlogged. This makes it easier for the aerator to penetrate the ground and pull out clean plugs. Dry, hard soil will make aeration difficult and may damage your equipment.
- Mow your lawn: Mow your lawn to its regular height a day or two before aerating. This makes it easier to see the aeration holes and ensures the aerator tines can penetrate without getting tangled in excessively long grass.
4. Mark Obstacles – Prevent damage to irrigation and utility lines
- Before you start, clearly mark any sprinkler heads, shallow utility lines (dog fences, landscape lighting), or septic tank covers in your lawn with flags or spray paint. Hitting these with an aerator can cause significant damage and costly repairs.
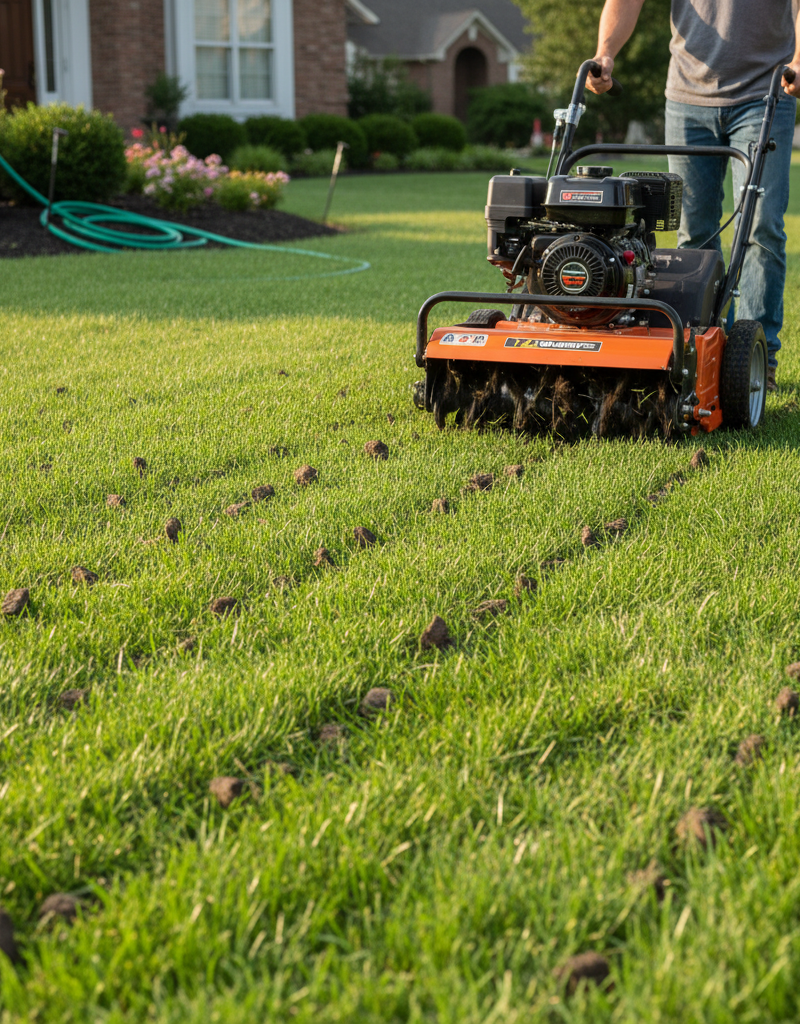
5. Choose Your Aerator – Core aerator recommended
- Rent a core aerator: For larger lawns, renting a gas-powered core aerator from a local equipment rental store is the most effective option. Ensure the tines are sharp and clean.
- Manual core aerator: For smaller areas or spot treatment, a hand-held manual core aerator can be sufficient, though more labor-intensive.
- Avoid spike aerators: These push soil down rather than removing it, which can increase compaction in the long run.
6. Aerate Your Lawn – Systematic coverage
- Make multiple passes: For best results, make one pass over your entire lawn. For heavily compacted areas or high-traffic zones, make a second pass perpendicular to the first (criss-cross pattern). Aim for a spacing of 2-4 inches between holes, with plugs at least 2-3 inches deep.
- Overlap slightly: Overlap each pass slightly to ensure even coverage across your lawn.
- Safety Note: Always wear sturdy closed-toe shoes and eye protection when operating a gas-powered aerator. Read the operator's manual thoroughly before starting the equipment.
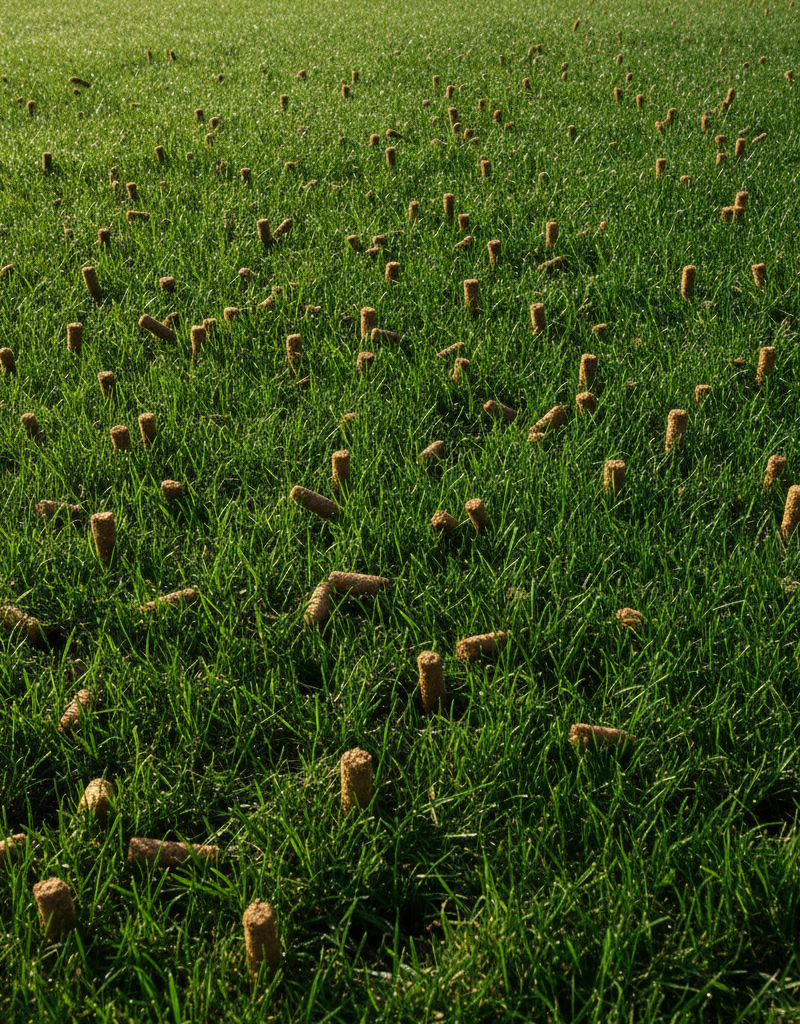
7. Leave the Plugs – Natural breakdown
- Do not remove the soil plugs. They contain beneficial microorganisms and will break down naturally within a week or two, returning nutrients to your lawn. You can speed up their disintegration by running over them with a lawnmower or raking them slightly after a few days.
8. Follow-Up Care – Water, fertilize, and overseed
- Water thoroughly: Water your lawn immediately after aeration. This helps settle the soil and promotes recovery.
- Fertilize (optional): Consider applying a slow-release fertilizer designed for your grass type after aeration to give it a nutrient boost. The aeration holes will allow the fertilizer to penetrate deeper.
- Overseed (highly recommended): Aeration provides an excellent opportunity for overseeding. The new grass seed will have direct contact with the soil in the aeration holes, significantly improving germination rates and thickening your lawn. Choose a grass seed variety appropriate for your climate and existing turf.
Common Causes
- Heavy Foot Traffic: Play areas, pathways, and entertaining spaces can lead to severe soil compaction over time.
- Heavy Machinery: Construction equipment, lawnmowers, and even rototillers can compact the soil, especially when the ground is wet.
- Clay Soil: Soils with a high clay content are naturally more prone to compaction than sandy soils due to their small particle size and tendency to bind together.
- Thatch Buildup: A thick layer of thatch (dead grass, stems, and roots) can prevent air, water, and nutrients from reaching the soil, indirectly contributing to compaction issues.
- Improper Watering/Fertilizing: Overwatering can lead to shallow roots, making the lawn more susceptible to compaction. Incorrect fertilizing can weaken the grass, making it less resilient.
Common Mistakes
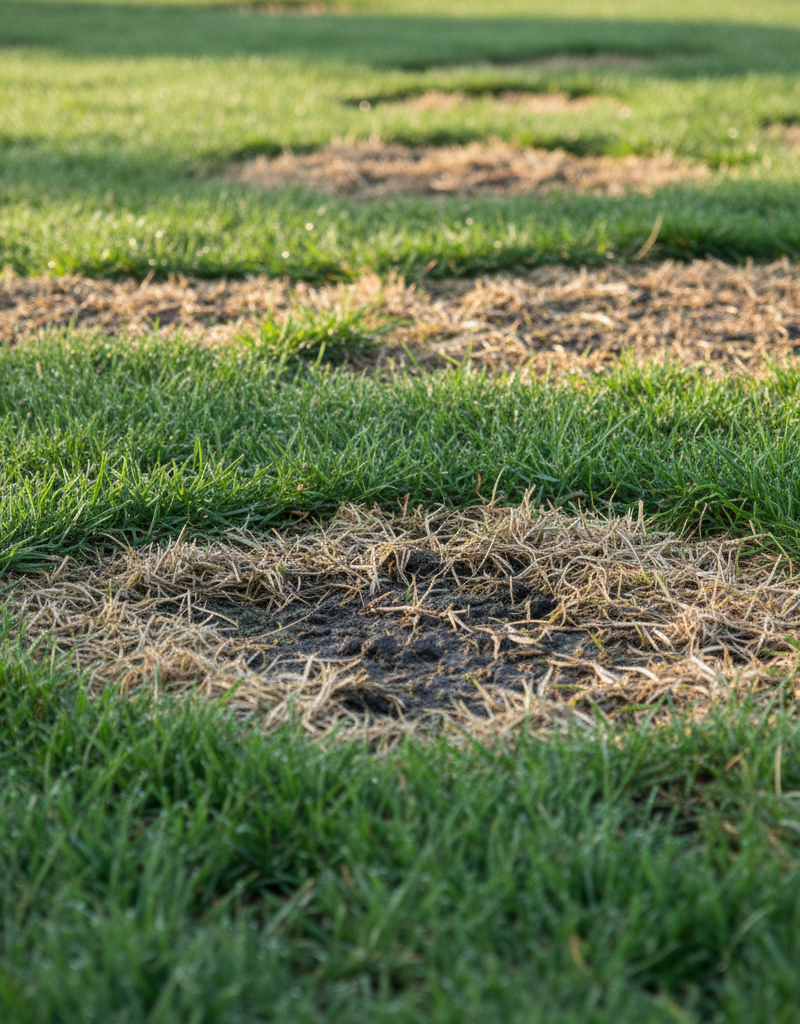
- Aerating during dormancy: Aerating when your grass is dormant (brown in winter for warm-season, brown in summer for cool-season) exposes the soil and makes it highly susceptible to weed invasion before the grass can recover.
- Aerating dry soil: Trying to aerate rock-hard, dry soil is ineffective and can damage your equipment or wear you out quickly. The aerator won't penetrate deeply enough, and plugs won't be cleanly extracted.
- Using a spike aerator instead of a core aerator: Spike aerators don't remove soil. They just push it aside, often increasing compaction around the holes. Always opt for a core aerator.
- Not marking obstacles: Forgetting to mark sprinkler heads or buried lines can lead to expensive repairs and frustration.
- Ignoring follow-up care: Failing to water, fertilize, or overseed after aeration misses a prime opportunity to maximize the benefits of the process and can leave your lawn vulnerable.
- Aerating too frequently: For most healthy residential lawns, aeration every 1-3 years is sufficient. Over-aerating can stress the lawn unnecessarily.
Cost & Time Breakdown
| Task | DIY Cost | Pro Cost | Time |
|---|---|---|---|
| Aerator Rental (4 hours) | $70–$120 | N/A | N/A |
| Manual Aerator Purchase | $30–$60 | N/A | N/A |
| Gas/Electric for aerator | $5–$15 | N/A | N/A |
| Flags/Marking Paint | $5–$10 | N/A | N/A |
| Professional Aeration Service | N/A | $150–$350 (per 5,000 sq ft) | 1–2 hours |
| Your Time | $0 | N/A | 1–3 hours |
| Overseeding (optional) | $20–$50 (seed) | $50–$100 (seed + labor) | 30 minutes |
| Fertilizer (optional) | $30–$60 | $50–$100 (material + labor) | 15 minutes |
Tips & Prevention
- Mow at the correct height: Taller grass shades the soil, keeping it cooler and promoting deeper root growth, which can naturally resist compaction. For most lawns, aim for 2.5-3.5 inches.
- Top-dress with compost: Applying a thin layer of compost (1/4 to 1/2 inch) to your lawn annually can improve soil structure over time, making it less prone to compaction and enriching it with organic matter.
- Alternate traffic patterns: If you have areas of heavy foot traffic, try to vary your routes or add stepping stones to reduce concentrated compaction.
- Minimize heavy equipment: Avoid driving vehicles or heavy mowers on wet soil, as this significantly increases compaction.
- Water deeply and infrequently: Encourage deeper root growth by watering less often but more deeply. This helps the lawn become more resilient to compaction and drought.
- Conduct a screwdriver test: If you can easily push a screwdriver into your lawn's soil (at least 6 inches), your compaction might not be severe enough to require immediate aeration. If it's difficult, aeration is likely needed.
When to Call a Professional
You should call a professional lawn care service if your lawn is severely compacted across a large area, if you lack the time or physical ability to operate an aerator, or if you have complex landscaping with many obstacles like intricate irrigation systems. Professionals have commercial-grade equipment that can penetrate deeper and cover ground more efficiently, ensuring thorough aeration without risking damage to underground utilities. They can also accurately assess your specific lawn type, soil conditions, and recommend the best treatment plan, including post-aeration fertilization and overseeding strategies tailored to your yard's needs, often saving you money and effort in the long run if DIY attempts are ineffective or damage the lawn. If you have any concerns about operating rented machinery or identifying your grass type, a pro is an excellent option.
Related Articles
Keep troubleshooting with these hand-picked guides from FixlyGuide:
- The #1 Mistake Killing Your Lawn's Clover—and the Easy fix That Spares Your Grass — Discover the most common mistake homeowners make when trying to eliminate clover, and learn how to remove it effectively without harming yo…
- The #1 Mowing Mistake That Invites Weeds (And How to Fix It in 15 Minutes) — Discover the secret to a thriving lawn and banish weeds by avoiding the most common mowing error homeowners make, improving grass health dr…
- The #1 Mistake Homeowners Make Pruning Trees (And How to Fix It) — Pruning trees at the wrong time can severely damage them, stunting growth and inviting pests. Learn the critical mistake to avoid.
- The #1 Dandelion Mistake Almost Every Homeowner Makes (and How to Fix It) — Many homeowners accidentally make dandelions worse. Learn the most common mistake and how to truly eliminate these persistent weeds for goo…
- The #1 Summer Lawn Mistake That Guarantees Yellow Grass (It's Not Drought) — Understanding the most common mistake homeowners make with summer lawn care can save your grass from turning yellow and dying.
- The #1 Mistake Homeowners Make When Their AC Drain Clogs (And The $5 Fix) — Discover the most common error homeowners make when tackling a clogged AC drain line and learn a simple, inexpensive solution to prevent co…
Frequently asked questions
How often should I aerate my lawn?+
For most healthy residential lawns, aeration every 1-3 years is sufficient. Heavily compacted lawns or those with high clay content may benefit from annual aeration, while lawns with sandy soil might need it less frequently.
Should I fertilize before or after aeration?+
It is generally best to fertilize immediately after aeration. The holes created by the aerator provide direct pathways for the fertilizer to reach the grass roots more effectively, maximizing its impact.
Can I aerate with a spike aerator?+
While spike aerators are available, core aerators are far more effective. Spike aerators simply poke holes, which can actually increase compaction around the edges of the holes. Core aerators remove small plugs of soil, truly relieving compaction.
What should I do with the soil plugs after aeration?+
Leave the soil plugs on your lawn. They contain beneficial microorganisms and will break down naturally within 1-2 weeks, returning nutrients and organic matter to your turf. You can speed up their disintegration by mowing over them or lightly raking them after a few days.
Is it okay to aerate my lawn when it's dry?+
No, it's not. Aerating dry, hard soil is ineffective, as the tines won't penetrate deeply enough or pull clean plugs. It can also damage your equipment. Water your lawn thoroughly a day or two before aeration so the soil is moist but not waterlogged.
Discussion
Loading comments…