
How it works
A healthy lawn functions as a dynamic biological system, driven by the relationship between soil, water, and the grass plant itself. The process of watering is not merely about wetting the grass; it is about replenishing moisture within the soil profile, where the root system acts as the plant's lifeline. Grass absorbs water through its roots, drawing it up through vascular tissues called xylem. This water is essential for photosynthesis, nutrient transport, and maintaining turgor pressure, which keeps the blades upright and rigid.
Most of the water a lawn absorbs is released back into the atmosphere through transpiration—a cooling process where water vapor exits tiny pores, or stomata, on the leaf blades. In the intense heat of summer, transpiration rates increase dramatically, causing the lawn to use water much faster. The goal of a proper watering strategy is to ensure the soil's "water bank" is deep enough to sustain the plant between rainfall or irrigation events. Deep, infrequent watering encourages roots to grow downward in search of this moisture reservoir. This creates a dense, resilient root system that can withstand periods of heat and drought. Conversely, shallow, frequent watering keeps roots near the surface, where they are vulnerable to drying out, leading to a stressed, weak lawn.
Step-by-Step Fix
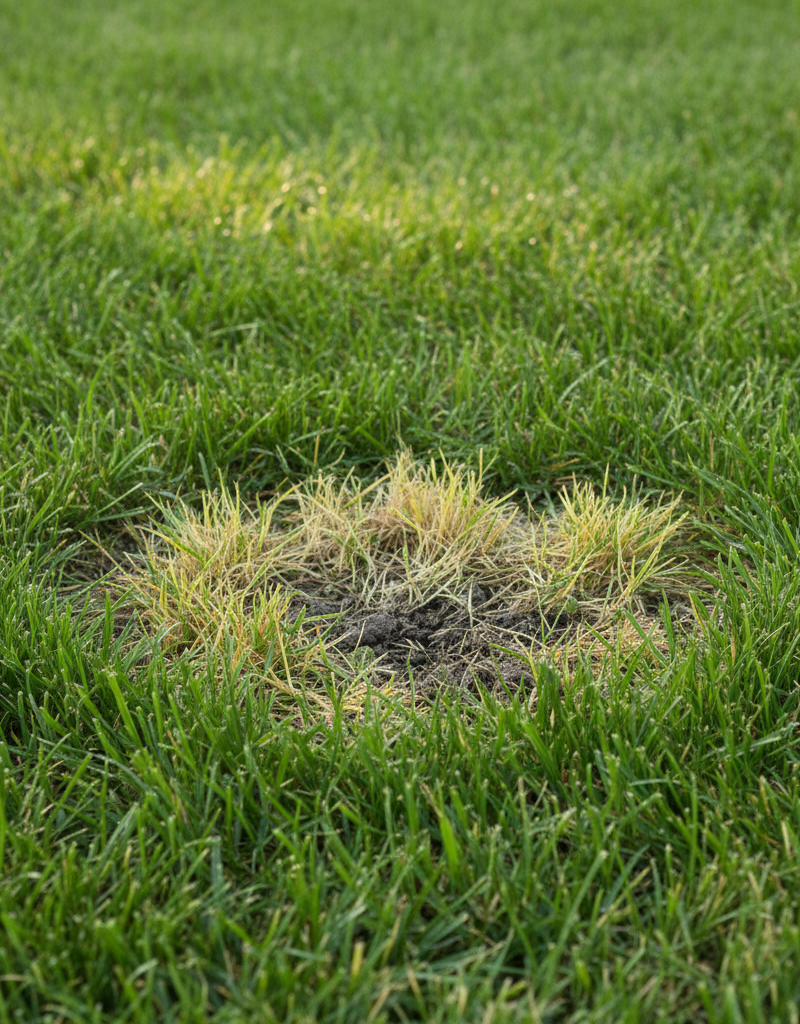
1. Identify Signs of Water Stress
Action: Observe your lawn for early indicators of dehydration before it turns brown. A properly hydrated lawn will have springy, upright blades. Walk across a section of grass and check if your footprints linger for more than a minute; this "footprint test" indicates that the grass blades lack the turgor pressure to bounce back. Other signs include a subtle color shift to a bluish-gray tint and grass blades that have begun to fold or curl inward along their length. These are the first signals that your lawn is thirsty and it is time to water.
2. Determine Your Grass Type
Action: Identify whether you have cool-season or warm-season grass, as their summer water needs differ significantly. Cool-season grasses like Kentucky Bluegrass, Fescue, and Ryegrass thrive in cooler temperatures and may go dormant or require more water to survive peak summer heat. Warm-season grasses like Bermuda, Zoysia, and St. Augustine are naturally drought-tolerant and actively grow in the heat, generally requiring less supplemental water. An online search or a local nursery can help you identify your grass from a sample.
3. Analyze Your Soil Composition
Action: Understand your soil type to determine how quickly it absorbs and retains water. Soil composition dictates your watering frequency and duration. Sandy soil has large particles and drains very quickly, often requiring more frequent watering. Clay soil consists of fine particles, absorbs water slowly, but holds it for a long time; it is prone to runoff if watered too quickly.
- DIY Soil Test: To get a rough idea, perform a "jar test." Fill a clear jar one-third full of soil from your lawn (dug from a 4- to 6-inch depth), then fill the rest with water, leaving an inch of air at the top. Shake vigorously for one minute and let it settle for 24 hours. The layers that form will show your soil's composition: sand will settle first at the bottom, followed by silt, and finally a top layer of clay.
4. Conduct an Irrigation Audit
Action: Measure the specific water output of your sprinkler system in inches per hour. Do not guess how much water your sprinklers deliver. To measure it accurately, place at least 5–7 empty, flat-bottomed containers (tuna cans or cat food cans work perfectly) randomly across a single watering zone. Run that sprinkler zone for a set amount of time, such as 20 minutes. Afterward, collect the containers and pour the water into a single can. Use a ruler to measure the total depth, then divide by the number of containers to find the average depth.
- Calculation: To find your system's output in inches per hour, use this formula:
(Average Depth in Inches / Run Time in Minutes) * 60. For example, if you collected an average of 0.25 inches in 20 minutes, your output is(0.25 / 20) * 60 = 0.75 inches per hour.
5. Calculate Required Watering Duration
Action: Use your audit results to calculate how long to run your sprinklers to deliver the target amount of water. Most lawns need 1 to 1.5 inches of water per week in summer, including rainfall. Using your calculated inches-per-hour rate, you can determine your weekly run time.
- Example: If your lawn needs 1.5 inches per week and your sprinkler output is 0.75 inches per hour, your total required run time is
1.5 inches / 0.75 inches per hour = 2 hours, or 120 minutes per week.
6. Schedule Deep, Infrequent Watering Sessions
Action: Program your watering schedule to deliver the total weekly water amount in one or two sessions. This practice encourages deep root growth. For the 120-minute example above, you could water for 60 minutes twice a week, or for 120 minutes once a week if your soil can absorb it without runoff.
- Soil Considerations: For sandy soil, splitting the total into two sessions (e.g., Tuesday and Friday) is often best to minimize water passing straight through the root zone. For heavy clay soil, a single, longer session is effective, but you may need to use the "cycle and soak" method described in the next step.
7. Water at the Optimal Time of Day
Action: Set your irrigation system to run in the early morning, between 4:00 AM and 9:00 AM. Watering during this window is most efficient. The air is cool, the sun is low, and winds are calm, minimizing water loss to evaporation. It also gives the grass blades the entire day to dry. Watering in the afternoon wastes significant water to evaporation, while evening watering leaves the foliage wet overnight, creating a prime environment for fungal diseases like brown patch and dollar spot.
8. Implement Cycle-and-Soak Watering if Needed
Action: For sloped areas or compacted clay soil, split a single watering session into multiple shorter cycles. If you notice water running off your lawn onto sidewalks before your watering session is complete, your soil cannot absorb the water as fast as the sprinkler is delivering it. Instead of running a sprinkler zone for 60 minutes straight, program your controller to "cycle and soak."
- Method: Run the zone for 15 minutes, then pause it for 30–60 minutes to allow the water to soak in. Repeat this cycle until the total run time for that zone is met. Many modern smart controllers have this feature built-in.
9. Adjust for Weather and Rainfall
Action: Monitor local rainfall and adjust your watering schedule accordingly. Never operate on a fixed "set it and forget it" schedule. Install a rain gauge in an open area of your yard to measure precipitation accurately. If your area receives 0.5 inches of rain, subtract that from your weekly watering target.
- Automated Solution: Consider installing a rain sensor or soil moisture sensor on your irrigation system. These devices automatically pause the watering schedule when sufficient moisture is detected, saving water and preventing over-saturation. Upgrading to a Wi-Fi-enabled smart controller will automate this process using local weather forecast data.
10. Monitor and Verify Water Penetration
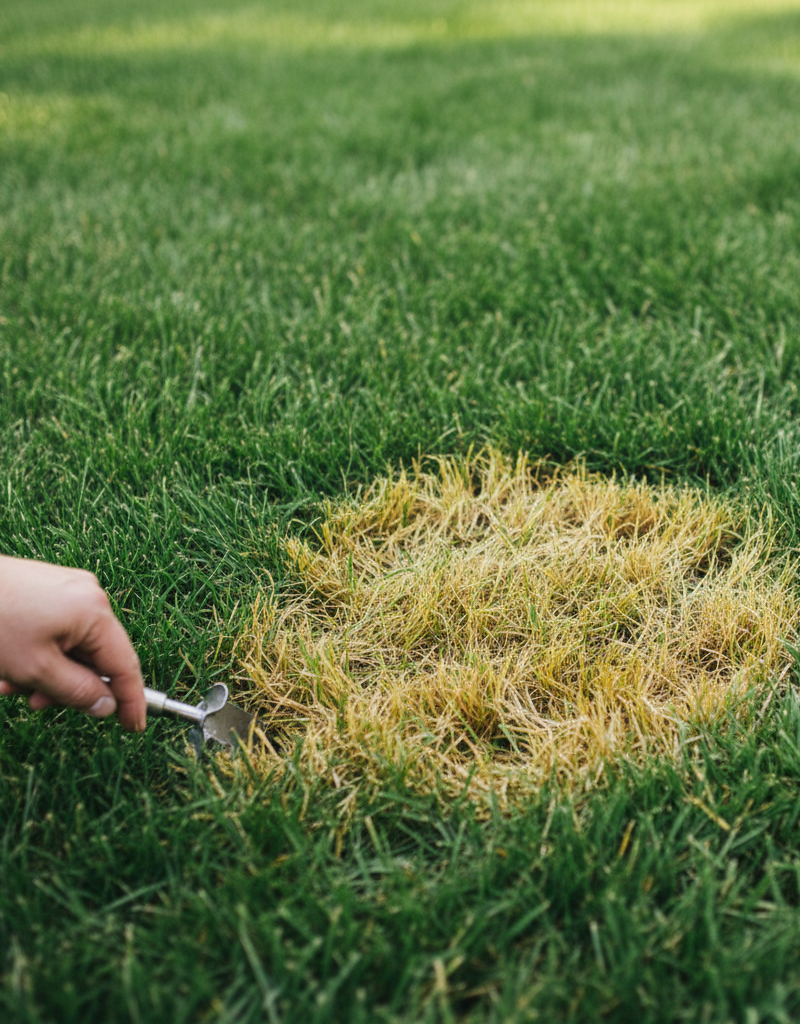
Action: After watering, check how deeply the water has penetrated the soil. The goal is to moisten the soil to a depth of at least 6 to 8 inches to encourage deep roots. About an hour after a watering cycle finishes, you can check the depth easily.
- Verification Tool: A long screwdriver or a specialized soil probe are excellent tools for this. Push the screwdriver into the ground; it will move easily through moist soil and stop or become difficult to push once it hits dry, compacted soil. If you are only moistening the top 2–3 inches, you need to increase your watering duration.
Common mistakes
-
Watering for Short Durations Daily. This is the most prevalent error. It promotes a shallow, weak root system that cannot handle heat stress. Instead, water deeply and infrequently (1-2 times per week) to train roots to grow down into the soil, creating a more resilient and drought-tolerant lawn.
-
Ignoring Sprinkler Distribution and Efficiency. Assuming all sprinkler heads deliver water evenly leads to dry, brown patches and soggy, disease-prone areas. Instead, perform an irrigation audit (the "tuna can test") to find and fix inconsistencies by adjusting heads, replacing clogged nozzles, or equalizing pressure.
-
Watering in the Evening or Midday. Watering when the sun is high leads to significant evaporation, wasting water before it reaches the roots. Evening watering leaves grass blades wet overnight, creating a perfect breeding ground for fungal diseases. Instead, always water in the early morning (4 AM to 9 AM) for maximum efficiency and lawn health.
-
Forgetting to Adjust for Rainfall. Running an automatic sprinkler system on a fixed schedule regardless of weather is wasteful and harmful. A single heavy summer rain can supply your lawn's water needs for an entire week. Instead, install a rain gauge and manually adjust your schedule, or install an automatic rain sensor that will pause cycles when it rains.
-
Treating Sunny and Shady Areas Identically. A section of lawn in full, intense sun will have much higher water needs than a shady area under a large tree. Instead, set up different irrigation zones for areas with different sun exposures and program their run times accordingly to avoid overwatering shade areas and underwatering sunny spots.
Cost & time breakdown
| Task | DIY Cost | Pro Cost | Time |
|---|---|---|---|
| Lawn Water Audit (Tuna Can Test) | $0–$10 (for containers) | $150–$300 | 1–2 hours |
| Replacing/Adjusting Sprinkler Nozzles | $2–$5 per nozzle | $95–$150 (service call) | 5–10 minutes per head |
| Installing a Smart Irrigation Controller | $150–$300 (for controller) | $350–$600 | 1–2 hours |
| Installing a Wireless Rain Sensor | $40–$70 (for sensor) | $125–$200 | 30–60 minutes |
| Annual Core Aeration | $70–$100 (half-day rental) | $150–$250 | 2–4 hours |
| Lawn Soil Composition Test | $15–$30 (for DIY kit) | $50–$100 (lab service) | 30 minutes |
When to call a pro
While proper watering is a manageable DIY task, certain situations warrant professional intervention from a certified irrigation specialist or turfgrass manager. Call a professional if you observe persistent dry spots or mushy, waterlogged areas despite having adjusted your sprinkler heads; this often points to a systemic issue like inadequate water pressure, a mainline leak, or a faulty zone valve that requires specialized diagnostic tools. An unexpectedly high water bill is a red flag for a significant, hidden underground leak that a pro can locate with electronic listening equipment.
If your lawn suffers from recurring fungal diseases even with a proper morning watering schedule, a turf management expert can diagnose the specific pathogen and apply targeted fungicides, some of which are unavailable to the public. Finally, for major irrigation upgrades, such as replacing a valve manifold, running new lines to create different zones, or troubleshooting complex electrical faults in the controller or wiring, a professional has the expertise to perform the work correctly and to code.
Prevention & maintenance
-
Mow High with Sharp Blades. Set your lawnmower to one of its highest settings, typically 3 to 4 inches for cool-season grasses. Taller grass provides shade for the soil, reducing evaporation and cooling the root zone. Ensure your mower blades are sharpened annually; dull blades tear grass, causing stress and increasing water loss.
-
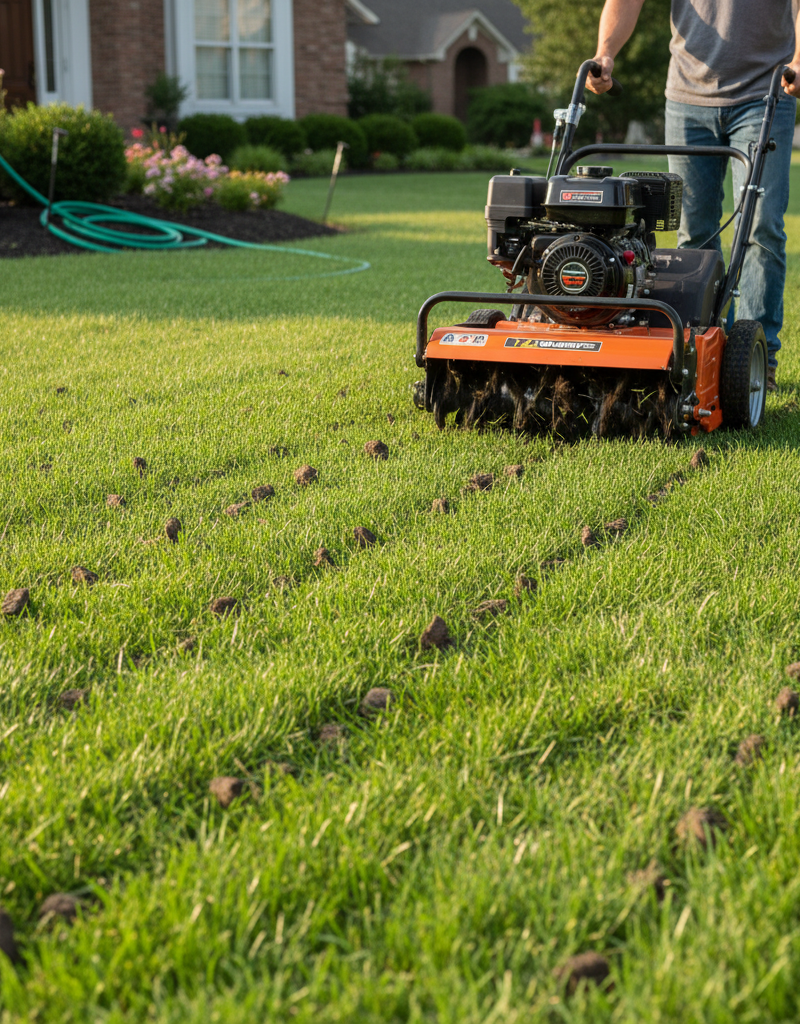
Perform Annual Core Aeration. Once a year, use a core aerator to pull plugs of soil from the lawn. This process relieves soil compaction, allowing water, air, and nutrients to penetrate deep into the root zone. For cool-season grasses, aerate in the fall. For warm-season grasses, aerate in late spring or early summer.
-
Topdress with Organic Compost. After aerating, spread a thin layer (1/4 to 1/2 inch) of high-quality compost over your lawn. Rake it in to fill the aeration holes. This improves soil structure, enhances water retention, and adds beneficial microbes that contribute to a healthier, more drought-resistant turf.
-
Regularly Inspect Your Irrigation System. At least once a month during the watering season, manually run each sprinkler zone for a few minutes. Walk the lawn to look for problems: broken or tilted heads, geysers from missing nozzles, spray patterns hitting pavement, or clogged sprinklers creating dry rings. Promptly clean or replace faulty components.
-
Dethatch When Thatch Exceeds 1/2 Inch. Thatch is a layer of dead and living organic matter between the soil surface and the green grass. A thin layer is beneficial, but if it becomes thicker than half an inch, it can act like a barrier, preventing water from reaching the soil. Check the depth and use a dethatching rake or machine if necessary.
Related Arti
Related Articles
Keep troubleshooting with these hand-picked guides from FixlyGuide:
- The #1 Mistake Turning Your Green Lawn Brown After Watering — Watering your lawn should make it greener, but brown spots appearing afterward can signal common issues like overwatering, fungal disease,…
- Why Is My Lawn Turning Yellow in Summer? A Homeowner's Guide — Your lawn turning yellow in summer is often a sign of improper watering, a common and fixable issue for homeowners.
- The #1 Reason Your Sprinkler Misses the Lawn (and How to Fix It in 5 Minutes) — Adjusting your sprinkler's spray pattern and distance is crucial for efficient watering, preventing wasted water, and ensuring a healthy la…
- Why Your Lawn Has Brown Spots AFTER Watering (And the Real Culprit) — Brown spots appearing after watering the lawn often signal improper watering techniques, soil compaction, or underlying issues like fungal…
- Fix Your Sprinkler System: Troubleshooting Common Issues — Troubleshoot and fix common sprinkler system problems like no water, low pressure, or zones not activating with these DIY steps.
- The Tiny Gap That Destroys Your Bathtub's Structure (and How to Seal It) — Recaulking your bathtub correctly is crucial to prevent water damage, mold growth, and structural issues in your bathroom.
Frequently asked questions
How do I know if my lawn needs water?+
A good indicator is the 'footprint test.' If you walk across your lawn and your footprints remain visible for several minutes, the grass blades don't have enough water to spring back up, indicating it's time to water. Also, look for grass blades that appear dull or folded.
Is it better to water daily or less frequently?+
It's better to water less frequently but more deeply. Daily, shallow watering encourages shallow roots, making your lawn weaker and more susceptible to heat stress. Deep watering promotes strong, extensive root systems that can access moisture deeper in the soil.
What's the best time of day to water my lawn?+
The best time to water is early in the morning, between 4 AM and 9 AM. This minimizes water loss due to evaporation and allows the grass blades to dry before nightfall, which helps prevent fungal diseases.
How much water does my lawn need per week in summer?+
Most established lawns need about 1 to 1.5 inches of water per week, including any rainfall. This amount should be applied in one or two deep watering sessions rather than multiple short ones.
Discussion
Loading comments…