
Tools & materials you'll need
Affiliate links- AmazonClean trowel or soil probe
As an Amazon Associate FixlyGuide earns from qualifying purchases — at no extra cost to you. Prices and availability are accurate as of publication and subject to change.
How it works
Soil pH is a chemical measurement of acidity and alkalinity, rated on a logarithmic scale from 0 to 14. A pH of 7.0 is perfectly neutral. Any value below 7.0 is acidic, while any value above 7.0 is alkaline (or basic). For most common turfgrass species, including Kentucky Bluegrass, Perennial Ryegrass, and Tall Fescue, the ideal soil environment is slightly acidic, falling within a pH range of 6.2 to 7.0.
Within this optimal window, the complex soil ecosystem functions at peak efficiency. Beneficial microbes thrive, breaking down organic matter and cycling nutrients. Most importantly, essential plant nutrients—particularly the macronutrients nitrogen (N), phosphorus (P), and potassium (K)—remain in a soluble form that grass roots can easily absorb.
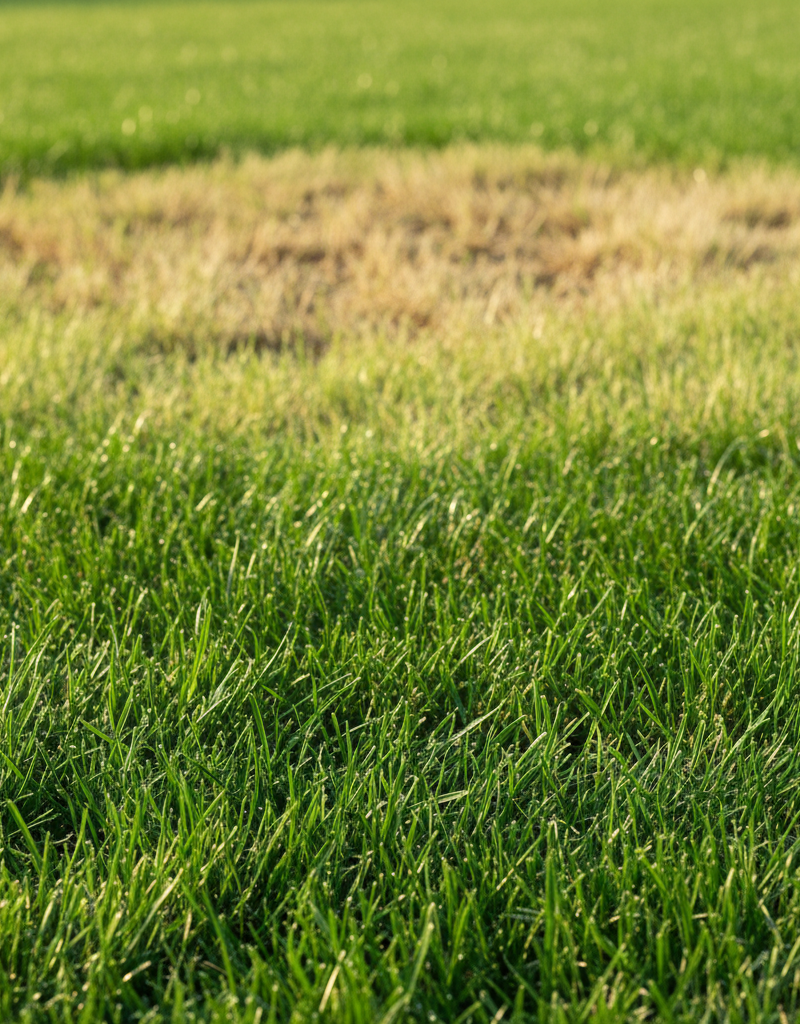
Outside this range, a phenomenon known as "nutrient lockout" occurs. In highly acidic soil (pH below 5.5), nutrients like phosphorus and molybdenum become chemically bound to soil particles, rendering them unavailable. At the same time, elements like aluminum and manganese can become excessively soluble, reaching levels toxic to grass roots. Conversely, in highly alkaline soil (pH above 7.5), vital micronutrients like iron and manganese become insoluble and inaccessible. This iron deficiency leads to chlorosis, a distinct yellowing of the grass blades, even when fertilizer is present. An at-home test kit measures pH by introducing a chemical indicator dye to a soil-and-water solution. This dye changes color in response to the hydrogen ion concentration, which is then compared against a calibrated chart to provide a pH estimate.
Step-by-Step Fix
This process guides you through accurately testing your soil's pH and applying the correct amendments to restore balance for a healthy lawn.
-
Acquire a suitable test kit and distilled water — Purchase a chemical dye-based soil pH test kit, widely available at garden centers and online. These provide more reliable readings for pH than cheap electronic probes. You will also need a gallon of distilled water; using tap or bottled spring water can contaminate the sample with its own pH and mineral content, skewing your results.
- Tools: Chemical soil test kit, distilled water, clean plastic bucket, garden trowel or soil probe, marker.
-
Map your sampling zones — Lawns are not uniform. A front yard that gets full sun may have a different soil composition and pH than a shady, damp side yard. Divide your lawn into distinct zones based on sun exposure, drainage, and performance (e.g., "Front Lawn," "Backyard," "Problem Patch by Driveway"). Plan to create one composite sample for each unique zone.
-
Collect soil cores from the root zone — For each zone, you will collect 8 to 10 sub-samples. Using a clean trowel or soil probe, dig down to a depth of 4 to 6 inches. This depth represents the primary root zone where the grass absorbs most of its nutrients. Discard the top layer of grass, thatch, and any surface debris from each core before placing it in your bucket.
-
Create a homogenous composite sample — Place all 8-10 sub-samples for a single zone into your clean plastic bucket. Use your trowel to break up the soil cores and any large clods. Thoroughly mix the soil together, removing any rocks, worms, roots, or other non-soil debris. This mixing process ensures your test reflects the average condition of the entire zone, not just one spot.
-
Let the soil sample air dry — If your soil is very wet or muddy, spread it thinly on a clean sheet of newspaper or cardboard indoors. Let it air dry for 12-24 hours until it is just slightly damp and crumbly. Testing overly saturated soil can lead to an inaccurate reading. Do not use heat to dry the sample.
-
Perform the chemical test — Follow the instructions provided with your test kit. Typically, this involves adding a specific amount of your composite soil sample to the testing vial, filling to a line with distilled water, adding the powdered chemical from the capsule, and shaking vigorously for the recommended time (usually 30-60 seconds).
- Key Step: Ensure the cap is on tightly and you shake long enough to thoroughly mix the soil, water, and reagent.
-
Allow the solution to settle and read the result — Place the vial in a stable, upright position and let the soil particles settle to the bottom. This can take anywhere from 1 minute to 30 minutes, depending on your soil type (sandy soils settle fast, clay soils settle slow). Once the water at the top has cleared and developed its final color, hold the vial against a white background in good light and compare it to the kit's color chart to determine the pH.
-
Calculate the required amendment for acidic soil (low pH) — If your pH is below 6.2, you need to raise it using lime. The amount needed depends on your soil type (clay vs. sand), the starting pH, and the target pH (6.5 is a safe target). As a general rule to raise pH by one full point (e.g., from 5.5 to 6.5) per 1,000 square feet:
- Sandy Soil: Requires approximately 20-30 lbs of pelletized lime.
- Loam Soil: Requires approximately 50-60 lbs of pelletized lime.
- Clay Soil: Requires approximately 70-80 lbs of pelletized lime.
- Always refer to the specific application rates on the product bag.
-
Calculate the required amendment for alkaline soil (high pH) — If your pH is above 7.2, you need to lower it using elemental sulfur. Lowering pH is a slower and more delicate process than raising it. To lower pH by one full point (e.g., from 8.0 to 7.0) per 1,000 square feet:
- Sandy Soil: Requires approximately 10-15 lbs of elemental sulfur.
- Loam/Clay Soil: Requires approximately 20-25 lbs of elemental sulfur.
- Never apply more than 5 lbs of elemental sulfur per 1,000 sq ft in a single application to avoid burning the lawn. If more is needed, split it into two applications 2-3 months apart.
-
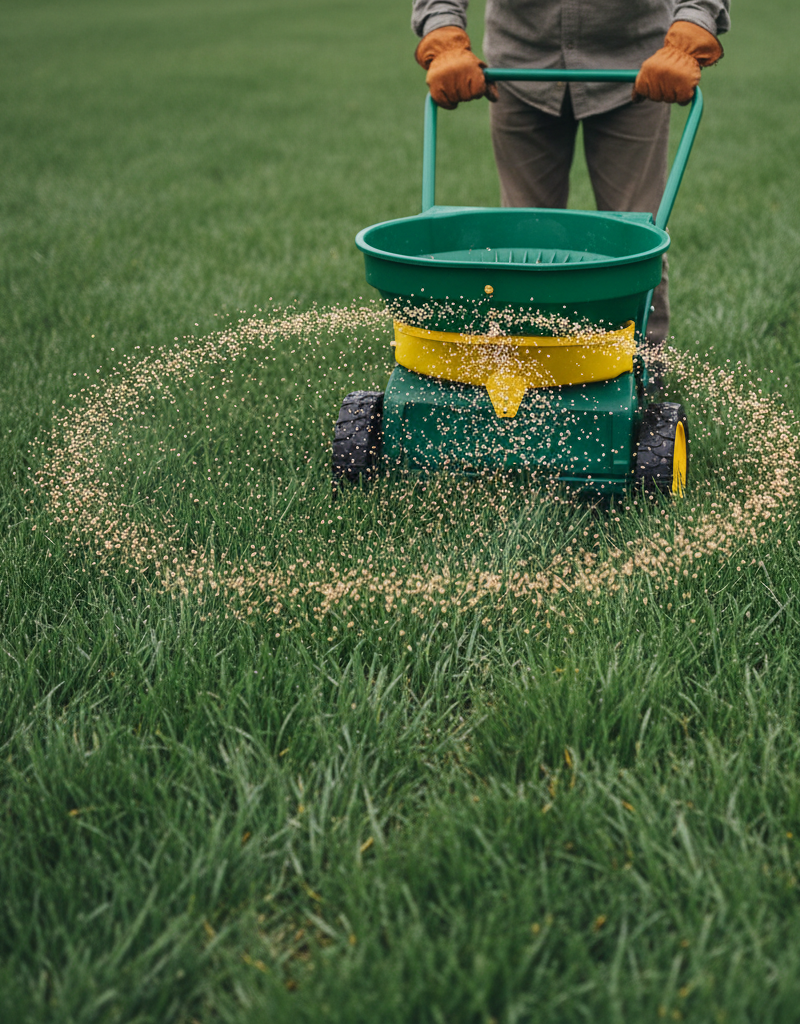
Apply the amendment evenly — Use a calibrated broadcast or drop spreader for an even application. To prevent streaks and misses, set the spreader to deliver half the calculated rate. Apply the first half by walking in a north-south pattern across the lawn, then apply the second half by walking in an east-west pattern. Wear gloves, safety glasses, and a dust mask.
-
Water in the amendment lightly — After spreading, lightly water the lawn for about 15-20 minutes. This rinses the amendment off the grass blades to prevent foliage burn and helps it begin to dissolve and work its way into the soil profile.
-
Wait and retest before reapplying — Soil pH correction is a slow chemical process that can take 6-12 months. Do not expect immediate visual changes. Resist the urge to reapply amendments. Wait until the following year, test the pH again, and then decide if further small adjustments are necessary.
Common mistakes
- Testing at the Wrong Time. Testing soil immediately after applying fertilizer (especially nitrogen-heavy types) or pesticides can give you a false, temporarily acidic reading. Instead, wait at least 4-6 weeks after any chemical application to ensure the reading reflects the soil's baseline state.
- Using Tap Water for the Test. The pH of municipal tap water can vary significantly (from 6.5 to 8.5), and it contains dissolved minerals. Using it to perform your soil test will contaminate the sample and render the result inaccurate. Instead, always use distilled water, which has a neutral pH of 7.0 and no minerals.
- Applying an Entire Year's Worth of Amendment at Once. Seeing a low pH, DIYers often apply a massive amount of lime, hoping for a quick fix. This is dangerous. Applying more than 50 pounds of lime or 5 pounds of sulfur per 1,000 sq. ft. in a single application can shock the soil chemistry, burn the lawn, and cause a severe pH overcorrection that is much harder to fix. Instead, split large corrections into multiple smaller applications in the spring and fall.
- Ignoring Soil Texture. A sandy soil and a heavy clay soil with the same pH reading require vastly different amounts of amendment. Clay soil has a higher "buffering capacity," meaning it resists pH change and requires much more lime or sulfur to adjust. Instead, get a rough feel for your soil texture (does it feel gritty like sand or sticky like clay when wet?) and adjust amendment calculations accordingly, always starting on the conservative side.
- Taking a Single, Unrepresentative Sample. Grabbing one scoop of soil from a single yellow patch is a common error. That spot could be an anomaly due to a dog urine spot, a chemical spill, or proximity to a concrete walkway. Instead, always create a composite sample by mixing 8-10 cores from across a uniform zone to get a true average reading.
Cost & time breakdown
This table outlines the typical costs and time commitment for testing and amending your lawn's soil pH. Costs are estimates and can vary by region and product choice.
| Task | DIY cost | Pro cost | Time |
|---|---|---|---|
| DIY Soil pH Test (At-Home Kit) | $10 - $25 | N/A | 1 hour |
| Professional Lab Soil Test | $20 - $50 | $75 - $150 | 30 minutes to collect, 1-3 weeks for results |
| Applying Lime for Acidic Soil (DIY) | $25 - $60 for a 5,000 sq. ft. lawn | $150 - $300 | 1 - 2 hours |
| Applying Sulfur for Alkaline Soil (DIY) | $30 - $70 for a 5,000 sq. ft. lawn | $200 - $400 | 1 - 2 hours |
| Full-Service Lawn Analysis & Treatment | N/A | $300 - $700+ | All-day service plus follow-ups |
| Spreader Rental | $15 - $25 per day | Included in Pro Cost | N/A |
When to call a pro
While managing soil pH is a very achievable DIY task, there are specific scenarios where professional help is warranted. If you have diligently followed the testing and amendment process for two consecutive years and your lawn's health still fails to improve or continues to decline, it is time to call a certified lawn care professional or agronomist. The issue is likely more complex than simple pH imbalance.
Signs like rapidly expanding dead patches, distinct circular patterns, or significant discoloration that persists despite proper fertilization and watering may indicate aggressive fungal diseases, a severe grub infestation, or deep-seated soil compaction issues that require specialized diagnosis and treatment. A professional has access to commercial-grade fungicides, insecticides, and mechanical core aerators that are more effective than consumer-grade alternatives. Furthermore, if you’ve sent a sample to a professional lab and the results show severe deficiencies in multiple micronutrients or potential elemental toxicity, a pro can formulate a precise, blended fertilizer and amendment plan that a DIY approach cannot easily replicate. For very large properties, the labor and equipment needed to apply hundreds of pounds of material correctly makes a professional service a more practical and effective choice.
Prevention & maintenance
- Test Routinely. Don't wait for your lawn to fail before you check its vitals. Test your soil pH every two to three years, preferably in the fall. This allows you to make small, proactive adjustments with lime or sulfur during the dormant season, preventing major imbalances before they start.
- Topdress with Compost. Annually spreading a thin layer (1/4 to 1/2 inch) of high-quality compost over your lawn helps buffer the soil's pH. The rich organic matter resists drastic pH swings, improves soil structure, and adds slow-release nutrients, creating a more stable and resilient environment for your grass.
- Use Fertilizers Wisely. Be aware that many synthetic nitrogen fertilizers, especially those high in ammonium sulfate, have an acidifying effect on soil over time. Alternate their use with organic options or choose slow-release formulas. If you have consistently acidic soil, avoid these acidifying fertilizers.
- Practice Grasscycling. When you mow, leave the clippings on the lawn instead of bagging them. As these clippings decompose, they return valuable nutrients and organic matter to the soil. This natural recycling process helps maintain a healthier soil ecosystem and can moderate pH fluctuations.
- Aerate to Improve Soil Health. Compacted soil restricts air, water, and nutrient movement, hindering the chemical reactions needed to adjust pH. Core aerating your lawn every one to two years allows amendments like lime and sulfur to penetrate the soil more effectively and promotes the microbial activity essential for a stable pH.
Related Articles
Keep troubleshooting with these hand-picked guides from FixlyGuide:
- The Surprising pH Secret Every Green Lawn Shares (And How to Unlock Yours) — Discover how to simply and accurately test your lawn soil pH at home to unlock a greener, healthier lawn without expensive guesswork.
- [Is Your Lawn Dying? Yo
Get the print-ready PDF of this guide
A clean, ad-free, printable version you can keep on your phone or pin to the workshop wall. Free with a FixlyGuide account.
- Print-optimized layout
- Tools, materials & every step included
- Saved to your account
Frequently asked questions
How often should I test my lawn's soil pH?+
It's recommended to test your lawn's soil pH every 2-3 years. If you've recently applied amendments to adjust the pH, retest after 6-12 months to see if further adjustments are needed.
What is the ideal pH range for most lawn grasses?+
Most common turfgrasses, such as Kentucky Bluegrass, Fescue, and Ryegrass, thrive in a slightly acidic to neutral pH range of 6.0 to 7.0. Some grasses, like Zoysia or Bermuda, tolerate slightly higher pH levels.
Can I use household items to test soil pH?+
While DIY tests using vinegar and baking soda can indicate extremely acidic or alkaline conditions (fizzing with vinegar means alkaline, fizzing with baking soda means acidic), they are not precise enough to give an accurate pH reading. An inexpensive purpose-built soil test kit is much more reliable for home use.
How long does it take for soil pH to change after applying amendments?+
Changes to soil pH are not instantaneous. It can take several months to a year for amendments like lime (to raise pH) or sulfur (to lower pH) to fully integrate and alter the soil's pH. Retesting after 6-12 months is important to monitor progress.

Discussion
Loading comments…