- Original Soil Composition: The underlying geology of your region plays a huge role. Areas with limestone bedrock often have naturally alkaline soil, while regions with high rainfall and organic matter decomposition tend towards acidity.
- Rainfall: High rainfall leaches basic minerals (like calcium and magnesium) from the soil, allowing more acidic elements to dominate. This is why areas with heavy precipitation often have more acidic soils.
- Fertilizer Use: Repeated use of certain nitrogen fertilizers, particularly those containing ammonium sulfate, can contribute to soil acidification over time. This is a common, often overlooked factor.
- Organic Matter Decomposition: The breakdown of organic materials in the soil naturally produces organic acids, contributing to acidity. While organic matter is beneficial, an excessive amount in poorly drained areas can shift pH.
- Irrigation Water: The pH of your irrigation water can subtly influence soil pH over many years. Hard water, rich in dissolved minerals, can gradually increase soil alkalinity.
Landscaping · Deck or fence project
| Project category | Landscaping |
|---|---|
| Problem type | Deck or fence project |
| Trade required | Landscaping |
| Urgency | Planned project |
| Safety risk | Moderate safety risk |
| DIY suitability | DIY for experienced homeowners |
| Cost category | High cost |
| Typical timeline | Most builds 3–10 days depending on size |
| Contractor type | Landscaping contractor |
Repair option
Replace failed boards, posts, and hardware; reseal the surface.
Replacement option
Rebuild when framing or the ledger connection is unsafe.
Common causes
- Rot at posts and ledger
- Storm damage
- Adding outdoor living space
Relevant tools:home improvement material pricesproject cost estimator
Published July 18, 2026Last updated August 17, 2026
Tools & materials you'll need
Affiliate linksAs an Amazon Associate FixlyGuide earns from qualifying purchases — at no extra cost to you. Prices and availability are accurate as of publication and subject to change.
Quick Answer
Testing your lawn's soil pH at home is a straightforward process using a basic soil test kit, essential for diagnosing nutrient deficiencies and optimizing turf health. Most lawn grasses thrive in a slightly acidic to neutral pH range of 6.0 to 7.0. By taking multiple soil samples from different areas of your lawn and following the kit's instructions carefully, you can accurately determine your soil's current pH level. This information is crucial for applying appropriate amendments like lime to raise pH, or sulfur to lower it, ensuring your grass can absorb vital nutrients efficiently and avoid common problems like yellowing or stunted growth.
The Problem
Many homeowners struggle with a patchy, discolored, or thin lawn despite consistent watering and fertilization. They pour money into expensive fertilizers, hoping for a dramatic transformation, only to be met with continued disappointment. The hidden culprit often isn't a lack of nutrients, but rather a soil pH imbalance preventing the grass from absorbing the very nutrients being applied. Imagine setting a feast for hungry guests, but chaining their hands – they can see the food, but can't eat. That's what happens in unbalanced soil. When soil pH is too high (alkaline) or too low (acidic), essential plant nutrients like nitrogen, phosphorus, and potassium become locked up chemically, inaccessible to your grass roots. This leads to nutrient deficiencies, poor growth, increased susceptibility to disease and pests, and a generally unhealthy, unattractive lawn. Without knowing your soil's pH, you're essentially fertilizing blind, throwing money away, and potentially worsening the problem.
How It Works
Soil pH is a measure of its acidity or alkalinity, represented on a scale from 0 to 14. A pH of 7.0 is neutral; values below 7.0 are acidic, and values above 7.0 are alkaline (or basic). This seemingly simple number has a profound impact on your lawn because it directly influences the availability of nutrients to plant roots. Each essential nutrient for grass – nitrogen (N), phosphorus (P), potassium (K), iron, magnesium, calcium, and many others – has an optimal pH range at which it is most soluble and accessible to the plant. For most common turfgrasses (like fescues, bluegrass, ryegrass, and zoysia), this 'sweet spot' is between 6.0 and 7.0. Within this range, soil microorganisms that help decompose organic matter and cycle nutrients are also most active.
When the pH deviates significantly from this ideal range, the chemical structure of the soil changes. In highly acidic soils (below 6.0), critical nutrients like phosphorus and calcium can become bound up with aluminum and iron, making them unavailable. Aluminum toxicity can also become an issue. Conversely, in highly alkaline soils (above 7.5), micronutrients like iron, manganese, and zinc can precipitate out of solution, leading to chlorosis (yellowing) and stunted growth, even if those nutrients are present in the soil. Understanding this mechanism is key: you could have all the nutrients in the world in your soil, but if the pH is off, your lawn simply cannot use them, leading to a host of problems that no amount of fertilizer alone can fix. Testing your pH provides the roadmap for correcting these imbalances and unlocking your lawn's full potential.
Step-by-Step Fix
Safety First – Always wear gloves when handling soil and any chemicals, even those in a testing kit. Wash hands thoroughly after completing the test.
-
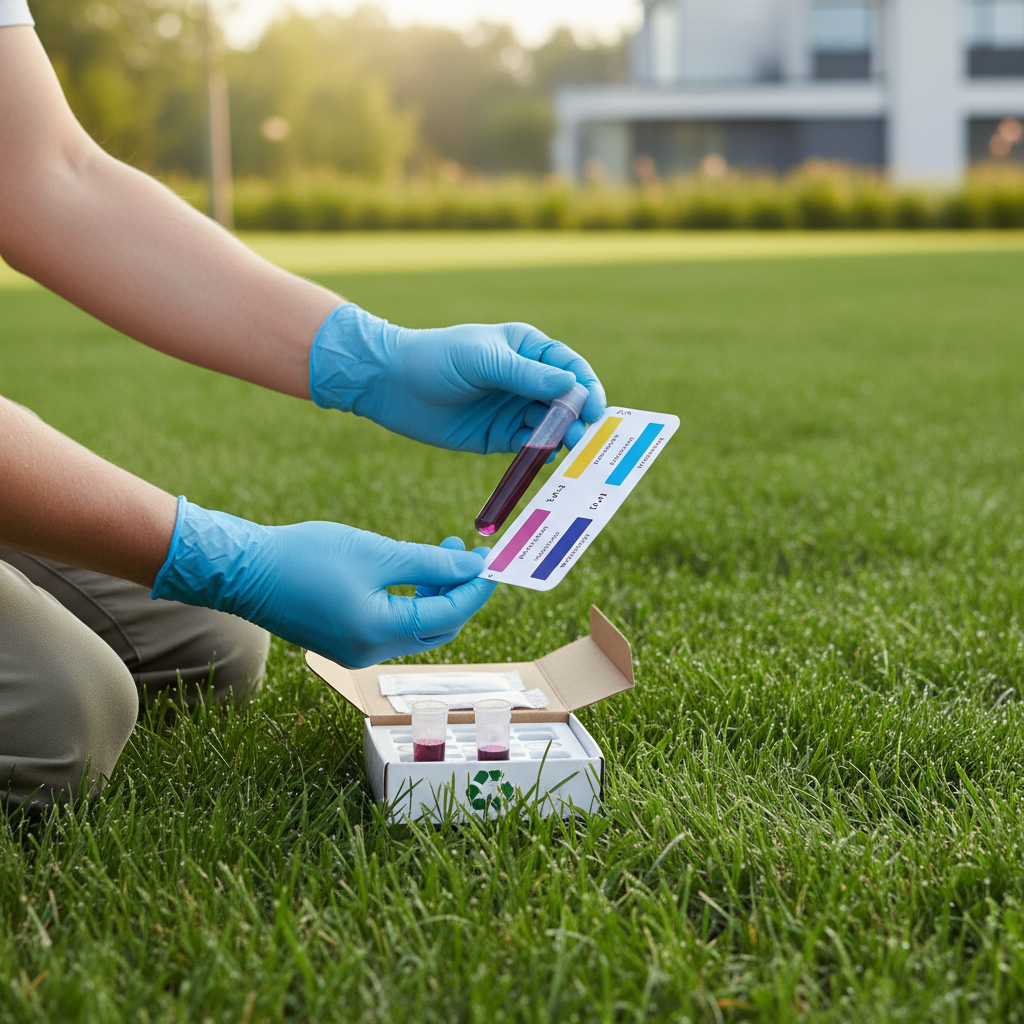
Gather Your Tools & Kit – Collect all necessary items before you begin. Ensure your chosen soil test kit is complete and has not expired. Most kits include test tubes or capsules, chemical reagents, and a color chart.
- If your kit is missing components: Purchase a new kit or contact the manufacturer. Do not attempt to substitute chemicals.
-
Select Sampling Areas – Choose representative spots across your lawn. Avoid areas near house foundations, driveways, trees, or compost piles, as these can skew results. For lawns under 10,000 sq ft, take 5-10 samples evenly distributed. If you have distinct problematic areas (e.g., one part is always yellow), sample those separately.
- Why multiple samples? Soil pH can vary significantly even within a small lawn due to past treatments, shade, or drainage patterns. Averaging samples gives a more accurate overall picture.
-
Prepare for Sampling – Clear away surface debris. Before taking a sample, remove any grass clippings, thatch, leaves, or mulch from the soil surface at each selected spot. You want to test the soil itself, not the organic layer.
- Avoid contamination: Make sure your hands, tools, and containers are clean. Residue from fertilizers or other chemicals can affect the readings.
-
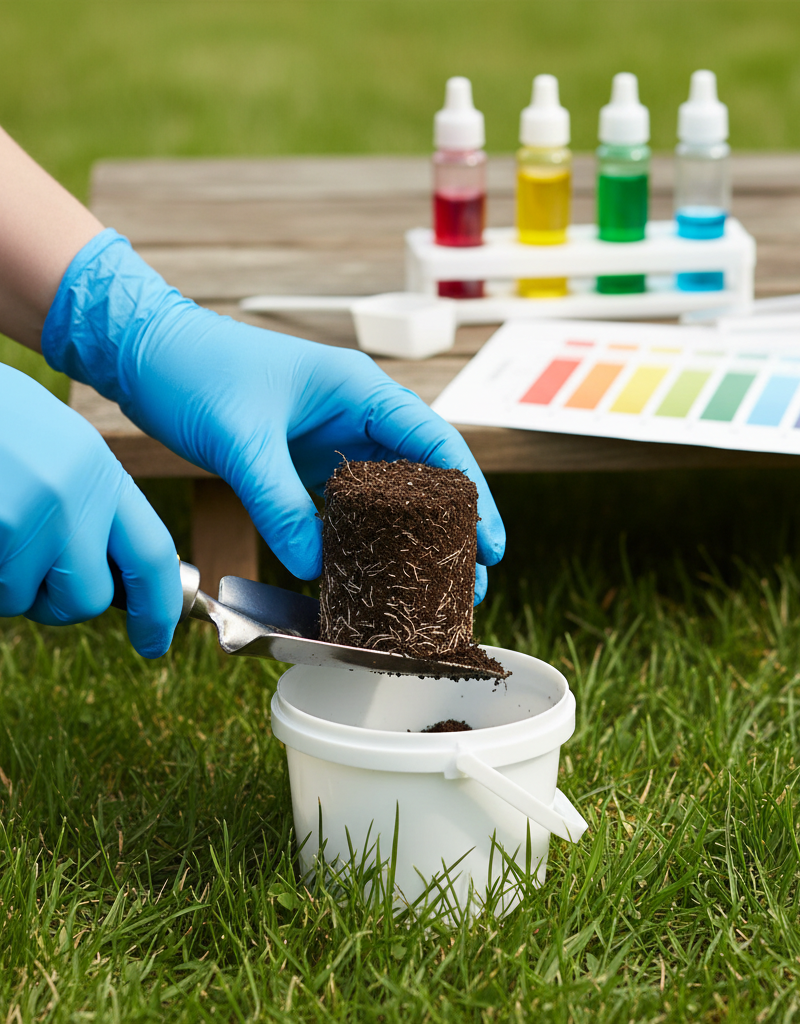
Take Soil Samples – Extract soil from the root zone. Using a trowel or soil probe, dig down 4-6 inches (for established turf) and collect a consistent amount of soil. The active roots of your grass are primarily in this zone. Place each sample into a clean bucket or container. Repeat for all chosen areas.
- Pro Tip: If using a trowel, cut a V-shape, then cut a thin slice from one side of the V, ensuring you get soil from top to bottom of the 4-6 inch depth.
-
Mix Samples (Optional, but Recommended) – Create a composite sample. If testing for an overall lawn pH, thoroughly mix all the samples you collected in the bucket. Break up any clumps and remove stones, roots, or other organic matter. This composite sample provides an average pH for your lawn.
- If you have very different areas: Keep samples from clearly distinct zones separate for individual testing. For example, a shady, possibly acidic area might be tested separately from a sunny, well-draining spot.
-
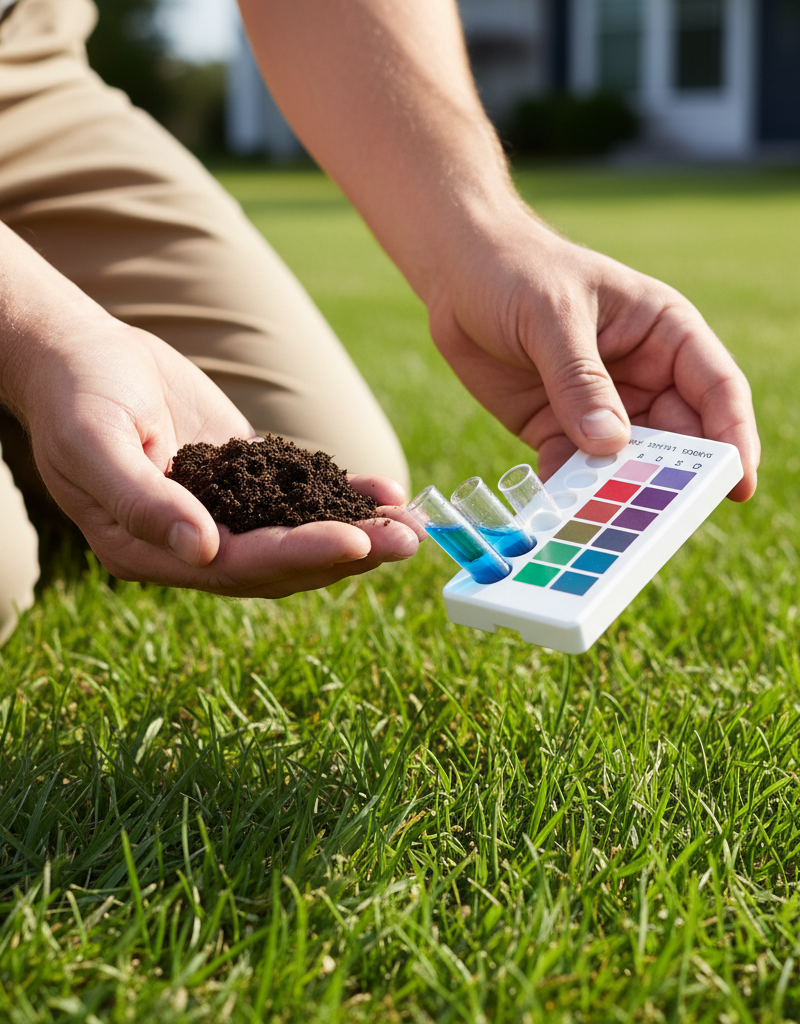
Follow Kit Instructions Precisely – Adhere to the manufacturer's guide. Every kit is slightly different. Typically, this involves placing a small, specified amount of soil into a test tube or capsule, adding the designated chemical reagent, and then adding a specific amount of distilled water. Cap and shake well.
- Critical step: Use distilled water, not tap water. Tap water has its own pH and can corrupt the test results. Incorrect amounts of soil or reagent will also lead to inaccurate readings.
-
Wait for Reaction – Allow sufficient time for color development. Most kits require a specific waiting period, usually a few minutes to an hour, for the chemical reaction to complete and the color to stabilize. Do not rush this step, as an incomplete reaction will give a false reading.
- Maintain consistent conditions: Avoid direct sunlight or extreme temperatures during the waiting period, which could affect the chemical reaction.
-
Read the Results – Compare the color to the provided chart. After the waiting period, compare the color of the liquid in your test tube or capsule to the color chart included in your kit. Match the color as closely as possible to determine the pH number.
- Interpreting nuances: If the color falls between two values on the chart, estimate the intermediate pH. For example, if it's between 6.0 and 6.5, your pH is likely around 6.2 or 6.3.
-
Record & Interpret – Document your findings and plan next steps. Write down the pH reading for each area tested. Remember the ideal range for most turfgrasses is 6.0-7.0. If your pH is outside this range, you'll need to amend your soil. Below 6.0 is acidic, above 7.0 is alkaline.
- Adjusting pH: To raise pH (make it less acidic), apply agricultural lime. To lower pH (make it less alkaline), apply elemental sulfur or products containing ferrous sulfate. Always follow product instructions for application rates and timing.
-
Re-test Periodically – Monitor your soil's progress. Soil pH doesn't change overnight. Re-test your soil every 6-12 months, especially after applying amendments, to monitor progress and confirm your treatments are working. This iterative process helps maintain optimal soil health.
- Seasonal considerations: Test in spring or fall for the most consistent results. Avoid testing immediately after heavy rain or drought, which can temporarily affect readings.
Common Causes
- Original Soil Composition: The underlying geology of your region plays a huge role. Areas with limestone bedrock often have naturally alkaline soil, while regions with high rainfall and organic matter decomposition tend towards acidity.
- Rainfall: High rainfall leaches basic minerals (like calcium and magnesium) from the soil, allowing more acidic elements to dominate. This is why areas with heavy precipitation often have more acidic soils.
- Fertilizer Use: Repeated use of certain nitrogen fertilizers, particularly those containing ammonium sulfate, can contribute to soil acidification over time. This is a common, often overlooked factor.
- Organic Matter Decomposition: The breakdown of organic materials in the soil naturally produces organic acids, contributing to acidity. While organic matter is beneficial, an excessive amount in poorly drained areas can shift pH.
- Irrigation Water: The pH of your irrigation water can subtly influence soil pH over many years. Hard water, rich in dissolved minerals, can gradually increase soil alkalinity.
- Proximity to Concrete/Foundations: Leaching from concrete (which is alkaline) can significantly raise the pH of soil immediately adjacent to foundations, sidewalks, or patios.
Common Mistakes
- Guessing Your pH: Applying lime or sulfur without a current soil test is a shot in the dark. You could worsen an existing imbalance or create a new one, wasting money and harming your lawn.
- Using Tap Water: Most municipal tap water has its own pH, often treated to be neutral or slightly alkaline. Using it for your soil test will skew results, leading to inaccurate readings.
- Taking Just One Sample: Soil pH can vary wildly across a single lawn. Relying on one sample gives an incomplete and potentially misleading picture of your lawn's overall health.
- Ignoring Kit Instructions: Over- or under-filling test tubes, using incorrect amounts of reagent, or not waiting the specified time will all lead to unreliable results. Precision is key with these kits.
- Expecting Immediate Results: Soil pH adjustments take time. Applying amendments like lime or sulfur doesn't change pH overnight. It's a gradual process, often taking several months to a year to show significant change.
- Over-Applying Amendments: Applying too much lime or sulfur can cause just as many problems as an imbalanced pH. Too much lime can lead to iron deficiency, while too much sulfur can burn grass roots. Always follow product guidelines after confirming your pH with a test.
Cost & Time Breakdown
| Task | DIY cost | Pro cost | Time |
|---|---|---|---|
| Soil pH Test Kit | $10–$30 | $0 (included) | 1 hour |
| Soil Amendments (Lime/Sulfur) | $15–$50/bag | $100–$300 | 30–60 min |
| Application Spreader | $30–$100 (one-time) | $0 (included) | 15–30 min |
| Total Initial Investment | $55–$180 | $100–$300 | ~2 hours |
| Ongoing Maintenance (yearly) | $15–$50 | $0–$300 | ~1 hour |
Note: Professional costs can vary widely based on location, lawn size, and the type/amount of amendments required.
Tips & Prevention
- Test Regularly: Make soil pH testing an annual or bi-annual ritual, ideally in the spring or fall. This allows you to catch minor imbalances before they become major problems.
- Mulch with Care: Be mindful of the type of mulch you use near your lawn. Pine needles and oak leaves can contribute to soil acidity over time, while hardwood mulches are generally more neutral or slightly alkaline.
- Balanced Fertilization: Choose fertilizers appropriate for your soil type and grass species. Opt for slow-release nitrogen fertilizers, which tend to have less of an acidifying effect than fast-acting, high-ammonium formulas.
- Compost Benefits: Incorporating well-rotted compost (which typically has a neutral pH) can help buffer soil pH, making it more resistant to drastic swings, while also improving soil structure and nutrient content.
- Overseeding with Adapted Varieties: If your soil pH is persistently difficult to adjust significantly, consider overseeding with grass varieties known to tolerate your specific pH range. For example, some fescues are more acid-tolerant.
- Water Wisely: If your irrigation water is very hard (alkaline), consider supplementing with rainwater harvesting or discussing filtration options to mitigate its long-term impact on soil pH.
When to Call a Professional
While at-home pH testing is highly effective for basic diagnostics, there are situations where calling a professional is wise. If your DIY kit consistently shows extreme pH readings (below 5.0 or above 8.0) that don't respond to appropriate amendments, a deeper issue might be at play. A professional lawn care service or local agricultural extension office can perform a comprehensive soil analysis that goes beyond pH, including macronutrient and micronutrient levels, organic matter content, and soil texture. This detailed report provides a more complete picture of your soil health. Additionally, if you have a very large lawn (over 10,000 sq ft) or are dealing with persistent lawn problems despite your best efforts, a professional can create a tailored treatment plan, ensure precise amendment application, and diagnose potential underlying issues like compaction or disease that a simple pH test won't reveal. For significant pH adjustments, professionals have access to specialized equipment and bulk amendments that are more efficient for large areas, ensuring a more effective and lasting correction without the risk of over-application.
Related Articles
Keep troubleshooting with these hand-picked guides from FixlyGuide:
- The 3 Lawn Mowing Mistakes Killing Your Grass (and How to Fix Them) — Discover the three most common lawn mowing mistakes homeowners make that damage their grass, and learn simple, actionable steps to correct…
- The #1 Summer Lawn Mistake Turning Your Grass Yellow (and How to Fix It) — Discover the most common summer lawn mistake that causes yellowing grass and learn the simple steps to revive your lawn.
- The 3 Mulching Mistakes That Are Secretly Killing Your Plants — Discover the three common mulching mistakes that unknowingly harm your garden and learn how to apply mulch correctly for thriving plants.
- The #1 Mistake Killing Your Dandelion-Fighting Efforts (and the Easy Fix) — Stop dandelions from taking over your lawn by understanding common mistakes and implementing effective, long-term solutions for a healthier…
- The #1 Mistake Homeowners Make When Battling Lawn Grubs (And a Simple Fix) — Discover the common mistake homeowners make when treating grubs and learn a simple, effective solution for a healthier lawn.
- Why Your Outlet Died (Even If the Breaker's ON): The Hidden Causes Everyone Misses — Discover the surprising reasons why an electrical outlet might stop working even when the circuit breaker appears to be on, and learn how t…
What should this project cost?
Enter your project details for a realistic cost range before you call anyone.
Cost depends heavily on which system turns out to be the source.
- Regional adjustment
- National average
- Labor share (typical)
- ~$1,620
- Quotes to collect
- 3 written estimates
Educational estimate based on national averages — not a binding quote. Always confirm with written local estimates.
Get the print-ready PDF of this guide
A clean, ad-free, printable version you can keep on your phone or pin to the workshop wall. Free with a FixlyGuide account.
- Print-optimized layout
- Tools, materials & every step included
- Saved to your account
Frequently asked questions
How often should I test my lawn's soil pH?+
You should test your lawn's soil pH at least once a year, ideally in the spring or fall. If you've applied amendments to adjust the pH, re-test every 6-12 months to monitor the changes and ensure the desired range is maintained.
What is the ideal pH range for most lawn grasses?+
Most common turfgrasses, such as Kentucky bluegrass, fescues, and ryegrass, thrive in a slightly acidic to neutral pH range of 6.0 to 7.0. Some grasses, like centipedegrass, prefer more acidic conditions, so always check the specific needs of your grass type.
What happens if my soil pH is too high or too low?+
If your soil pH is too high (alkaline) or too low (acidic), essential plant nutrients become 'locked up' in the soil and are unavailable to your grass roots. This leads to nutrient deficiencies, causing symptoms like yellowing, stunted growth, and increased susceptibility to diseases, even if adequate nutrients are present in the soil.
Can I use tap water for my soil pH test?+
No, you should always use distilled water for your soil pH test. Tap water has its own pH level, which can vary depending on your location, and can significantly skew your test results, leading to inaccurate readings and incorrect amendment applications.
How long does it take to change soil pH after applying amendments?+
Changing soil pH is a gradual process that can take several months to a year or more, especially for significant adjustments. Amendments like lime or sulfur need time to react chemically with the soil. Always re-test your soil after a few months to monitor progress and avoid over-correction.
Discussion
Loading comments…