- Cool-Season Grasses: Kentucky Bluegrass, Perennial Ryegrass, Fine Fescue, Tall Fescue. These grasses thrive in cooler temperatures (60-75°F) and are common in northern climates.
- Warm-Season Grasses: Bermuda, Zoysia, St. Augustine, Centipede, Bahia. These prefer warmer temperatures (75-90°F) and are prevalent in southern climates.
- If you're unsure: Consult your local extension office, a reputable garden center, or check a turf identification guide online. Misidentification is the quickest way to mistime your aeration.
Landscaping · Deck or fence project
| Project category | Landscaping |
|---|---|
| Problem type | Deck or fence project |
| Trade required | Landscaping |
| Urgency | Planned project |
| Safety risk | Moderate safety risk |
| DIY suitability | DIY for experienced homeowners |
| Cost category | High cost |
| Typical timeline | Most builds 3–10 days depending on size |
| Contractor type | Landscaping contractor |
Repair option
Replace failed boards, posts, and hardware; reseal the surface.
Replacement option
Rebuild when framing or the ledger connection is unsafe.
Common causes
- Rot at posts and ledger
- Storm damage
- Adding outdoor living space
Relevant tools:home improvement material pricesproject cost estimator
Published July 10, 2026Last updated August 18, 2026
Tools & materials you'll need
Affiliate linksAs an Amazon Associate FixlyGuide earns from qualifying purchases — at no extra cost to you. Prices and availability are accurate as of publication and subject to change.
Quick Answer
Aerating your lawn at the optimal time is crucial for its health and vigor. For cool-season grasses like fescue, ryegrass, and bluegrass, the sweet spot is early fall, typically September to October. You can also aerate in early spring, from March to April. For warm-season grasses such as Bermuda, Zoysia, and St. Augustine, the prime aeration window is late spring, usually April through June. The key is to aerate when your grass is in its active growth phase, allowing it to recover quickly and fill in any open spots before extreme weather sets in.
The Problem
Many homeowners treat lawn aeration as a generic chore, pulling out the core aerator whenever they happen to have a free weekend. This common mistake often leads to disappointing results or even inadvertently damages the lawn. Aerating at the wrong time – for example, when grass is dormant, stressed by heat or drought, or just before a hard frost – can expose vulnerable root systems to harsh conditions, promote weed growth by creating ideal seedbeds, and struggle to recover the disturbed turf. The core problem is a lack of understanding regarding grass biology and its seasonal growth cycles. Compacted soil, a primary reason for aeration, chokes roots, prevents water and nutrients from penetrating, and limits airflow. Aerating is the solution, but only if timed correctly.
How It Works
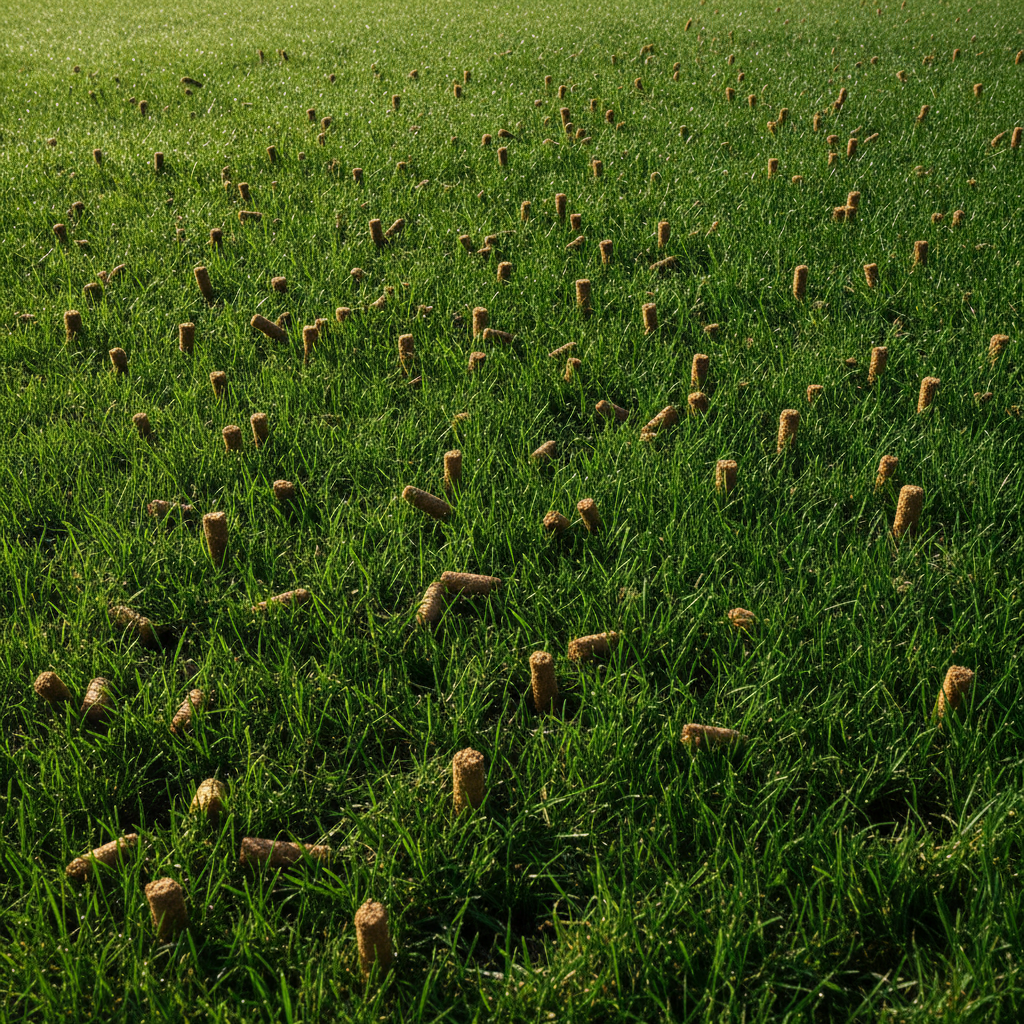
Lawn aeration is the process of creating small holes in the soil to alleviate compaction and allow air, water, and nutrients to reach the grass roots. There are two main types of aerators: spike aerators and core (or plug) aerators. Spike aerators simply poke holes in the soil, which offers some immediate relief but doesn't remove soil. Core aerators, on the other hand, pull out small cylindrical plugs of soil, typically 2-3 inches deep and 0.5-0.75 inches in diameter. This removal of soil is far more effective at reducing compaction, improving drainage, and promoting deeper root growth.
When soil becomes compacted, the tiny air pockets necessary for root respiration and microbial activity are squeezed shut. This leads to a dense, impermeable layer that water struggles to penetrate, often resulting in runoff and shallow, stressed roots. Nutrients applied to the surface can't reach the root zone efficiently, wasting fertilizer and money. By removing soil plugs, a core aerator creates channels that instantly improve the exchange of air and gases between the atmosphere and the root zone. Water can percolate deeper, encouraging roots to follow. Beneficial microorganisms, which thrive in oxygen-rich environments, can flourish and break down organic matter, further enriching the soil. The removed soil plugs, left on the surface, slowly decompose and add beneficial microbes and organic matter back into the turf. The timing is critical because the grass needs to be actively growing to quickly colonize these new channels, preventing weed seeds from taking hold and ensuring a swift recovery from the mechanical stress.
Step-by-Step Fix
1. Identify Your Grass Type — This is the foundational step for proper timing.
- Cool-Season Grasses: Kentucky Bluegrass, Perennial Ryegrass, Fine Fescue, Tall Fescue. These grasses thrive in cooler temperatures (60-75°F) and are common in northern climates.
- Warm-Season Grasses: Bermuda, Zoysia, St. Augustine, Centipede, Bahia. These prefer warmer temperatures (75-90°F) and are prevalent in southern climates.
- If you're unsure: Consult your local extension office, a reputable garden center, or check a turf identification guide online. Misidentification is the quickest way to mistime your aeration.
2. Schedule Your Aeration Window — Align with active growth cycles.
- Cool-Season Grasses: Best time is early fall (September-October) or early spring (March-April). Fall is generally preferred as it allows the grass to recover and strengthen before winter dormancy, and avoids the stress of summer heat. Spring aeration should be done early enough to allow recovery before summer stress.
- Warm-Season Grasses: Best time is late spring to early summer (April-June). This allows ample time for recovery during their peak growth period before the intense heat of mid-summer.
3. Prepare the Lawn — A well-prepared lawn ensures effective aeration.
- Mow your lawn: Cut the grass to its normal height, or slightly shorter, a day or two before aeration. This allows the aerator tines to penetrate the soil more easily without getting tangled in tall grass.
- Water thoroughly: The day before aeration, deeply water your lawn. The soil should be moist, but not saturated or muddy. Moist soil allows the core aerator to pull plugs more effectively; dry, hard soil will be very difficult to penetrate, and overly wet soil can clog the machine.
- Safety Note: Always check for buried irrigation lines, invisible fences, or utility lines before aerating. Mark them with flags to avoid damage.
4. Rent or Purchase an Aerator — Choose the right tool for the job.
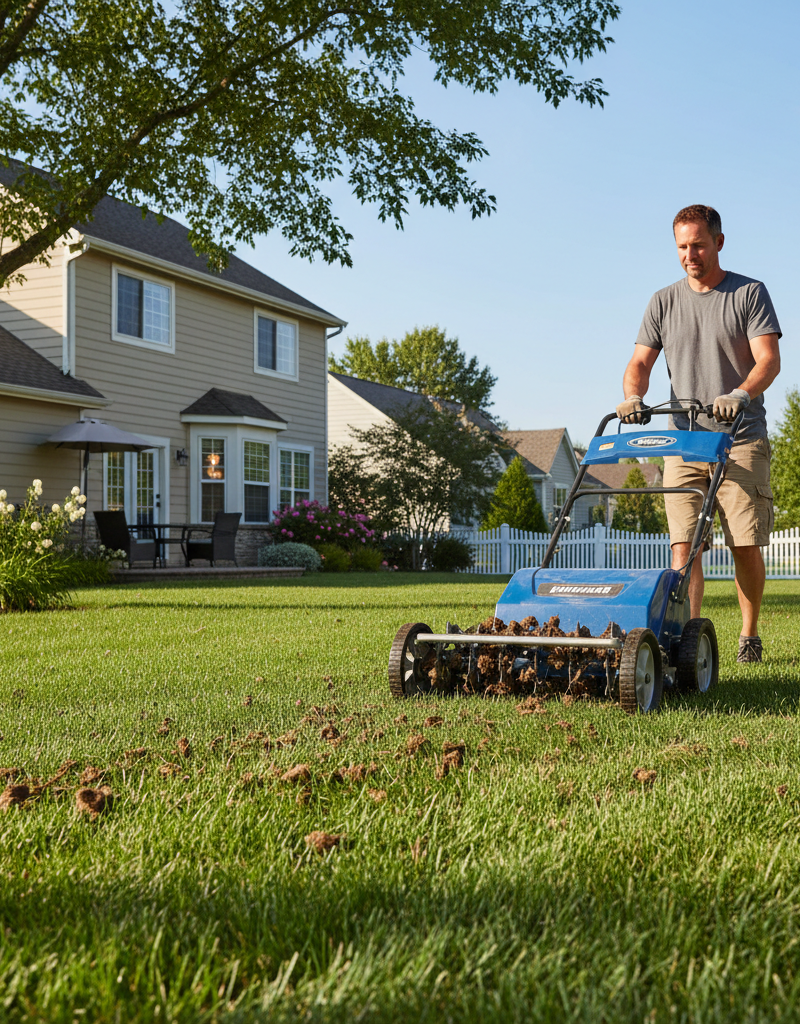
- Rental: Most homeowners rent a walk-behind core aerator from a local equipment rental store or home improvement center. Expect to pay $70-$120 for a half-day rental.
- Purchase: If you have a large lawn or plan to aerate regularly, a pull-behind aerator for a lawn tractor might be a worthwhile investment.
- Pro Tip: Ask for a demonstration on how to operate the machine, and confirm it's been recently serviced. A dull or bent tine won't pull plugs effectively.
5. Operate the Core Aerator — Systematic passes ensure even coverage.
- Make overlapping passes: For severe compaction, make two passes over the lawn – one north-south and another east-west. For lighter compaction, a single pass with slightly overlapping rows is usually sufficient.
- Watch for plugs: Ensure the machine is consistently pulling out 2-3 inch soil plugs. If it's not, the soil might be too dry, or the tines could be worn. Adjust your watering or consult the rental company.
6. Leave the Plugs Alone — They are part of the process.
- Resist the urge to rake up the soil plugs. They contain beneficial microorganisms and will break down naturally over a week or two, returning nutrients and organic matter to the soil.
- Alternative: If you find the plugs unsightly, you can lightly drag a mat or a piece of fencing linked to your lawn tractor to break them up faster.
7. Fertilize and Overseed (Optional but Recommended) — Capitalize on loosened soil.
- Fertilize: Immediately after aeration, apply a slow-release granular fertilizer. The newly created holes provide direct access for nutrients to the root zone.
- Overseed: If your lawn is thin or has bare spots, aeration is the ideal time to overseed. The seeds will fall into the holes, providing excellent seed-to-soil contact, which is crucial for germination and establishment.
- Follow up: Water frequently (but lightly) after overseeding for the next 2-3 weeks to keep the seedbed moist.
8. Maintain Post-Aeration Watering — Support recovery and growth.
- Continue with your regular watering schedule, ensuring the lawn receives adequate moisture to help it recover from the aeration process and establish any new seed.
Common Causes
- Heavy Foot Traffic: Areas where people or pets frequently walk compact the soil over time. This is especially true around pathways, play areas, and popular pet spots.
- Clay Soil: Soils with a high clay content are naturally prone to compaction because clay particles are very small and pack together tightly, leaving little room for air and water.
- Construction Activity: Even years after a new house is built, heavy machinery traffic can leave deeply compacted soil that limits root growth and drainage.
- Thatch Buildup: A thick layer of thatch (undecomposed organic matter between the grass and the soil surface) can prevent water, air, and nutrients from reaching the soil, indirectly contributing to compaction issues below.
- Frequent Shallow Watering: Encourages shallow root systems. When these shallow roots inevitably die off, they contribute to a denser, more compacted soil surface layer, especially when combined with foot traffic.
- Use of Heavy Lawn Equipment: Repeated passes with heavy riding mowers or garden tractors can gradually compact the soil, particularly if done when the soil is wet.
Common Mistakes
- Aerating When Grass is Dormant: Performed during the peak of summer heat for cool-season grass, or deep winter for warm-season grass, aeration rips up dormant roots, creating open wounds that struggle to heal and are susceptible to weeds and disease. Do it when the grass is actively growing.
- Aerating Dry, Hard Soil: The aerator tines will struggle to penetrate, often just scratching the surface or bouncing off without pulling plugs. This wastes time, effort, and can damage the machine. Always water the lawn deeply the day before.
- Using a Spike Aerator on Heavily Compacted Soil: While better than nothing, spike aerators just push soil particles together, potentially increasing compaction over time rather than alleviating it. For true compaction relief, a core aerator is essential.
- Raking Up the Soil Plugs: Those plugs are good for your lawn! They contain beneficial microorganisms and will break down naturally, returning nutrients to the soil. Raking them up removes this benefit.
- Not Marking Obstacles: Forgetting to flag sprinkler heads, buried utility lines, or invisible fences can lead to costly repairs when the aerator tines strike them. Always pre-flag your lawn.
- Ignoring Soil Type: Different soil compositions (e.g., sandy vs. clay) will compact differently and may require more or less frequent aeration. Understand your soil composition for optimal results.
Cost & Time Breakdown
| Task | DIY Cost | Pro Cost | Time |
|---|---|---|---|
| Aerator Rental (half-day) | $70–$120 | Included in service | 2–4 hours (incl. pickup/return) |
| Fertilizer (bag) | $30–$60 | Included in service | 15–30 minutes |
| Grass Seed (bag, optional) | $25–$75 | Included in service | 15–30 minutes |
| Professional Aeration Service | N/A | $150–$350 | 1–2 hours |
| Total DIY Estimate | $125–$255 | $150–$350 | 3–5 hours |
Tips & Prevention
- Annual or Biennial Aeration: For most lawns with moderate compaction, aerating once a year is sufficient. For heavy clay soils or high-traffic areas, consider aerating twice a year or every other year. Less compactable, sandy soils might only need aeration every few years.
- Mowing Height: Maintain an appropriate mowing height for your grass type. Taller grass blades encourage deeper root growth and help shade the soil, reducing compaction and water evaporation.
- Topdressing: Applying a thin layer of compost or sand (depending on your soil type) after aeration can further improve soil structure, increase organic matter, and enhance drainage over time.
- Reduce Traffic: Redirect foot traffic around sensitive areas or install permeable pathways to minimize compaction in high-use zones.
- Proper Watering: Water deeply and infrequently rather than lightly and frequently. This encourages roots to grow deeper, making the lawn more resilient to compaction and drought.
- Soil Test: Conduct a soil test every 3-5 years. This will provide valuable information on your soil's composition, pH, and nutrient levels, guiding your fertilization and amendment strategies to build a healthier, less compactable soil.
When to Call a Professional
While aerating a lawn is a manageable DIY task for many homeowners, there are specific situations where calling a professional is highly recommended. If you have significant slopes that make operating a heavy walk-behind aerator unsafe, or if your lawn is exceptionally large (over half an acre), a pro can save you considerable time and effort. Furthermore, if your lawn has extremely dense, heavy clay soil that your rental machine struggles to penetrate, or if you suspect underlying soil issues beyond simple compaction, a professional lawn care company will have industrial-grade equipment and the expertise to diagnose and address more complex problems. They can also ensure proper timing, fertilization, and overseeding for optimal results, especially if you're unsure about your grass type or local conditions.
Related Articles
Keep troubleshooting with these hand-picked guides from FixlyGuide:
- The #1 Lawn Aeration Mistake Most Homeowners Make (And When to REALLY Do It) — Discover the crucial mistake many homeowners make with lawn aeration and learn the optimal timing for a thriving, healthy lawn.
- The #1 Lawn Aeration Mistake Most Homeowners Make (And When to Fix It) — Learn the critical timing mistake most homeowners make with lawn aeration and discover the perfect window for a thriving, healthy lawn.
- The #1 Lawn Aeration Mistake Most Homeowners Make (And When to REALLY Do It) — Discover the crucial mistake many homeowners make with lawn aeration and learn the optimal timing for a healthier, more vibrant lawn.
- The #1 Lawn Aeration Mistake Most Homeowners Make (And When to REALLY Do It) — Discover the crucial mistake homeowners make with lawn aeration and learn the optimal timing to ensure a healthy, thriving lawn.
- The #1 Lawn Aeration Mistake Most Homeowners Make (And How to Time It Right) — Timing your lawn aeration correctly is crucial for maximizing its benefits and ensuring a healthy, thriving lawn. Learn the secrets.
- The #1 Mistake Homeowners Make When Caulking a Bathroom Sink (And How to Fix It) — Discover the most common caulk mistake homeowners make around bathroom sinks and follow simple steps to achieve a lasting, watertight seal.
Should you do this yourself?
Answer five quick questions before you start. Safety outranks savings every time.
Your experience with work like this
How high do you have to work?
Does the job involve any of these?
Will it need a permit?
Specialty tools
Free and instant. Educational guidance only — not a quote, inspection, or professional diagnosis.
What should this project cost?
Enter your project details for a realistic cost range before you call anyone.
Cost depends heavily on which system turns out to be the source.
- Regional adjustment
- National average
- Labor share (typical)
- ~$1,620
- Quotes to collect
- 3 written estimates
Educational estimate based on national averages — not a binding quote. Always confirm with written local estimates.
Before you start
Check the difficulty, permits, and safety risk — then decide whether to call a pro.
- Estimate this projectGet a cost range for your scope and ZIP before you call anyone.Open
- Get local estimatesSend one request and compare written estimates from vetted pros.Open
Free, no signup required. Estimates are educational guidance, not a quote or an inspection.
Frequently asked questions
How do I know if my lawn needs aeration?+
A simple test is the 'screwdriver test.' Push a screwdriver into your lawn. If it's difficult to push in, your soil is likely compacted and could benefit from aeration. Other signs include standing water, thin grass despite regular feeding, and a spongy feel underfoot due to excessive thatch.
Should I fertilize before or after aeration?+
Always fertilize *after* aeration. The newly created holes provide direct pathways for nutrients to reach the grass roots, making your fertilizer application much more effective. If you plan to overseed, apply fertilizer and seed immediately after aerating.
How often should I aerate my lawn?+
For most lawns, annual aeration is beneficial. Lawns with heavy clay soil, high foot traffic, or significant thatch buildup may benefit from aerating twice a year. Lawns with sandy soil or minimal compaction might only need aeration every 2-3 years.

Discussion
Loading comments…