- Over-Fertilization with Acidic Products: Plenty of synthetic fertilizers, especially ones high in ammonium forms of nitrogen, can slowly drag your soil’s pH down over time, especially if you’ve been using them year after year.
- Organic Matter Decomposition: As leaves, grass clippings, and compost break down, they release organic acids and push the pH lower. Usually slow. But over decades, it adds up.
- Nearby Plantings: Pine trees, oak trees, and other acid-loving plants can help lower pH around them as needles and leaves decompose.
Landscaping · Deck or fence project
| Project category | Landscaping |
|---|---|
| Problem type | Deck or fence project |
| Trade required | Landscaping |
| Urgency | Planned project |
| Safety risk | Moderate safety risk |
| DIY suitability | DIY for experienced homeowners |
| Cost category | High cost |
| Typical timeline | Most builds 3–10 days depending on size |
| Contractor type | Landscaping contractor |
Repair option
Replace failed boards, posts, and hardware; reseal the surface.
Replacement option
Rebuild when framing or the ledger connection is unsafe.
Common causes
- Rot at posts and ledger
- Storm damage
- Adding outdoor living space
Relevant tools:home improvement material pricesproject cost estimator
Published July 27, 2026Last updated August 17, 2026
Tools & materials you'll need
Affiliate links- AmazonDistilled water1 gallon · If your test kit recommends it, to avoid tap water pH interference
- AmazonGlovesOptional, for handling soil
- AmazonSmall plastic bags or containersOptional, for separate samples
- AmazonWhite vinegar1 cup · For an optional rough alkalinity test
- AmazonBaking soda1/2 cup · For an optional rough acidity test
As an Amazon Associate FixlyGuide earns from qualifying purchases — at no extra cost to you. Prices and availability are accurate as of publication and subject to change.
Quick Answer
Is your grass looking a bit yellow? Struggling to take fertilizer? Just plain not thriving the way it should? You might be dumping bags of expensive nutrients on it, but if your soil's pH is off, a lot of that effort goes right down the drain. Testing your lawn's soil pH at home is a quick, inexpensive way to find a big problem that's quietly wrecking your results. You can do it in about 10 minutes with a simple kit or even some stuff from your pantry, and it'll tell you if your soil is too acidic or too alkaline for your grass to absorb the food it needs. Get it right, and your lawn’ll start pulling its weight.
The Problem
I've seen this more times than I can count: a homeowner’s out there doing everything “right” — fertilizing, watering, aerating, the whole bit — and the lawn still looks like it’s hanging on by a thread. Thin grass. Patchy spots. Weird color. Weeds popping up where healthy turf ought to be. They'll look at me and say, “I don't get it, I'm doing everything right!” Nine times out of ten, once we run a quick soil test, the real trouble isn’t a shortage of nutrients. It’s the pH being off. It’s like setting a steak in front of somebody with their hands tied — the food’s there, but the grass can’t do much with it.
Most lawn grasses, especially cool-season types like fescue and bluegrass, like a slightly acidic to neutral range, usually between 6.0 and 7.0 on the pH scale. Push too far either way — too acidic (below 6.0) or too alkaline (above 7.0) — and the roots can’t absorb key nutrients like nitrogen, phosphorus, and potassium, even if those nutrients are sitting right there in the soil. They get locked up. That’s when you start seeing weak growth, yellowing, disease, and weeds moving in like they own the place. I pulled a water heater in Frisco last month that had exactly this kind of “everything looks fine until you look closer” problem — same story, different mess. One homeowner in Brookhaven swore his lawn was cursed; turns out his soil was a wild 4.5 pH from years of pine needle decomposition. We put down some lime, and six months later, it was a whole different yard.
How It Works
So, what exactly is pH? Think of it as a measuring stick for how acidic or alkaline something is. The scale runs from 0 to 14. A pH of 7 is dead neutral — water usually sits there. Numbers below 7 mean acidic; the closer to 0, the stronger the acid. Numbers above 7 mean alkaline; the closer to 14, the stronger the base.
For most lawn grasses, that sweet spot between 6.0 and 7.0 matters a lot. In that range, the soil chemistry lets essential nutrients stay soluble and available for your grass roots to grab. Once the pH swings too far, the chemistry changes on you. In very acidic soil, stuff like aluminum can get more soluble and toxic, while phosphorus and calcium become less available. In very alkaline soil, micronutrients like iron and manganese get tied up, and that’s where you get chlorosis — that yellowing between the veins of the grass blade.
A soil test works by measuring ion concentrations in a soil sample. Simple kits use chemical reactions and a color chart; you mix a bit of soil with water and a reagent, and the color tells you where your pH lands. Digital meters use an electrode to measure electrical potential, which gives you a more exact number. Either way, you’re getting the info you need to decide whether to add lime to raise the pH or sulfur to lower it. Really, it’s about setting the table so your grass can eat.
Step-by-Step Fix
Getting a good pH reading is all about sampling the right way. You can blow the whole thing if you just scoop dirt from one random spot. Here’s how I tell homeowners to do it.
-
Gather Your Tools — Get everything laid out first.
- You’ll need your soil test kit (liquid reagent, paper strips, or digital meter), a clean trowel or spade, a clean bucket, and some distilled water if your kit calls for it. A small plastic bag or container for each sample spot helps too. Keep it clean; even a little fertilizer residue or other chemical junk can throw your numbers off.
-
Choose Your Sample Areas — Don’t just grab one spot and call it a day.
- Lawns aren’t uniform. Shade, runoff, old amendments, and drainage can all change the pH from one area to the next. I usually tell folks to take 5-10 samples from different parts of the yard. Think front yard, backyard, shady spots, sunny spots, and any area that looks off. If you’ve got one trouble patch, take a separate sample there too. That pine tree example? A spot under a big pine will almost always run lower pH than an open sunny area.
-
Collect the Samples — Go 4 to 6 inches deep, every time.
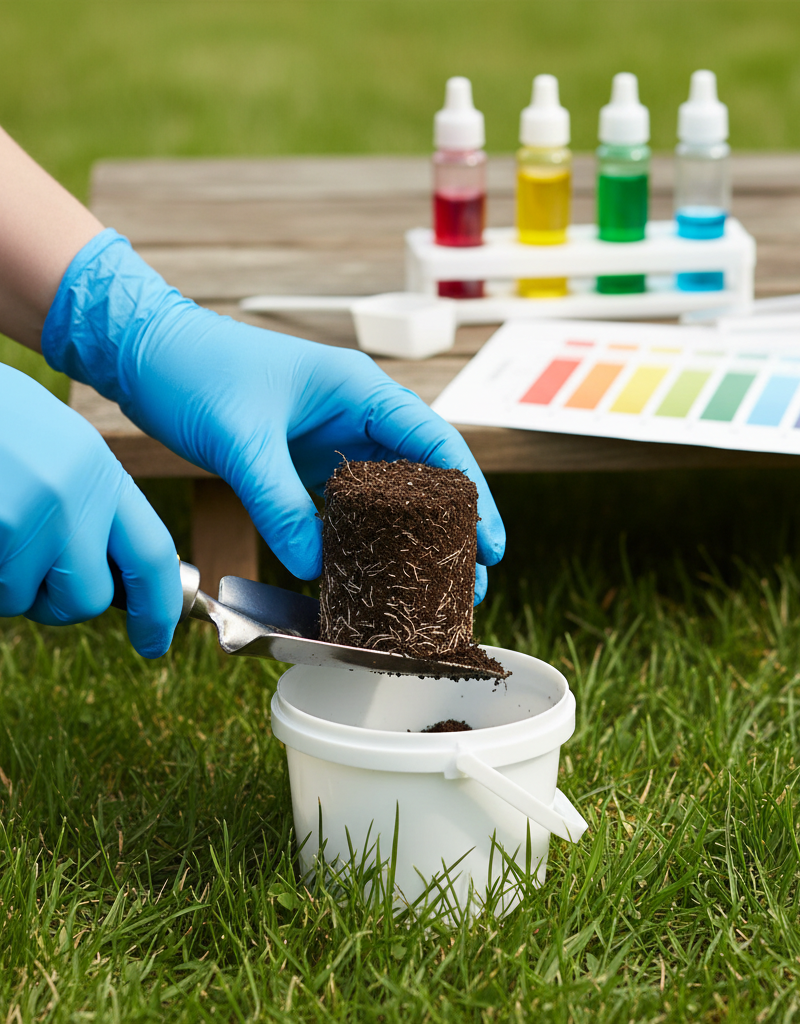
- For each area you picked, dig down about 4 to 6 inches. That’s where most of the root action happens. Skip spots right next to foundations, driveways, or anywhere you know chemicals might’ve spilled. Scoop out a consistent plug of soil. Leave out grass, thatch, and debris — just the soil itself. Clean dirt, plain and simple.
-
Mix Your Composite Sample — Blend it for an average reading.
- Dump all the individual soil plugs into your clean bucket. Break up the clumps by hand (gloves if you want to be civilized about it). Mix it thoroughly. That composite sample gives you an average pH reading for the whole lawn, which is usually what you want for general recommendations. If you’re checking problem areas one by one, keep those separate.
-
Perform the Test (Kit Method) — Read the directions like you mean it.
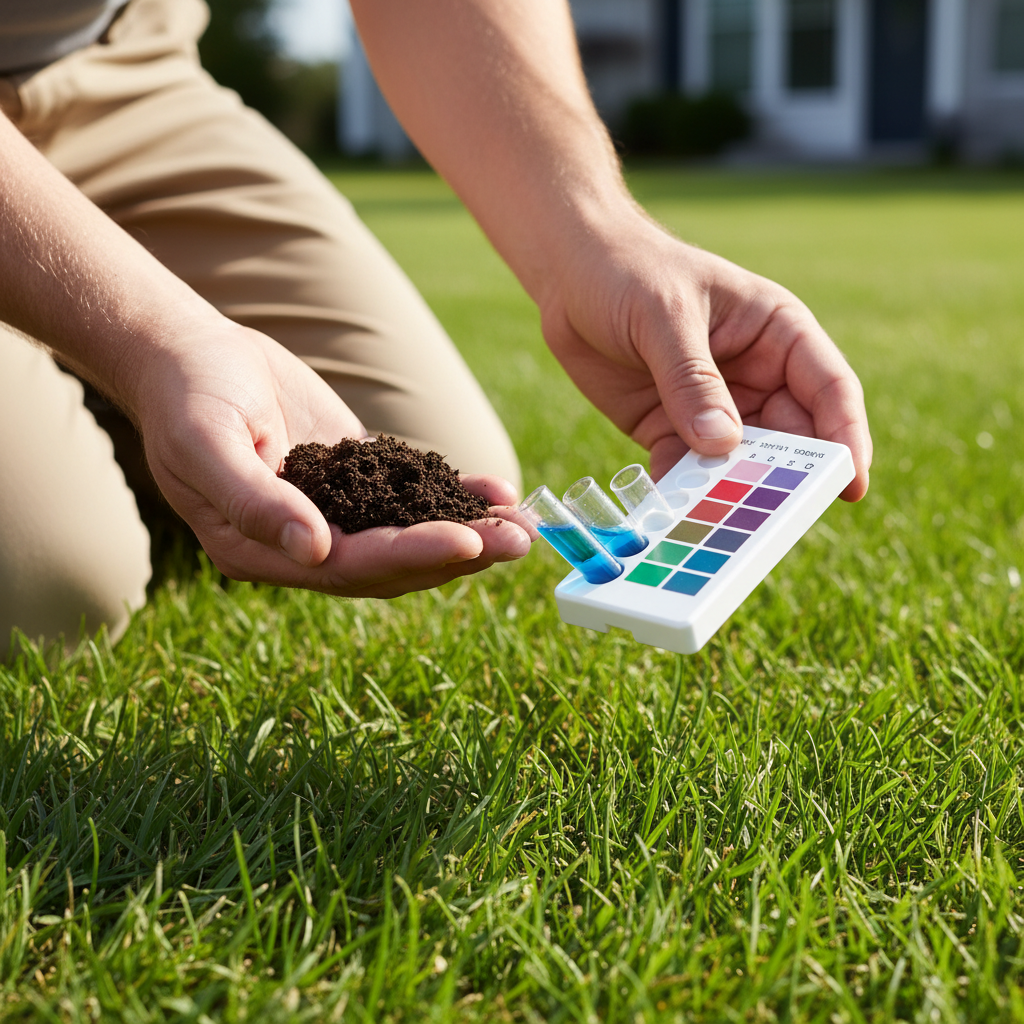
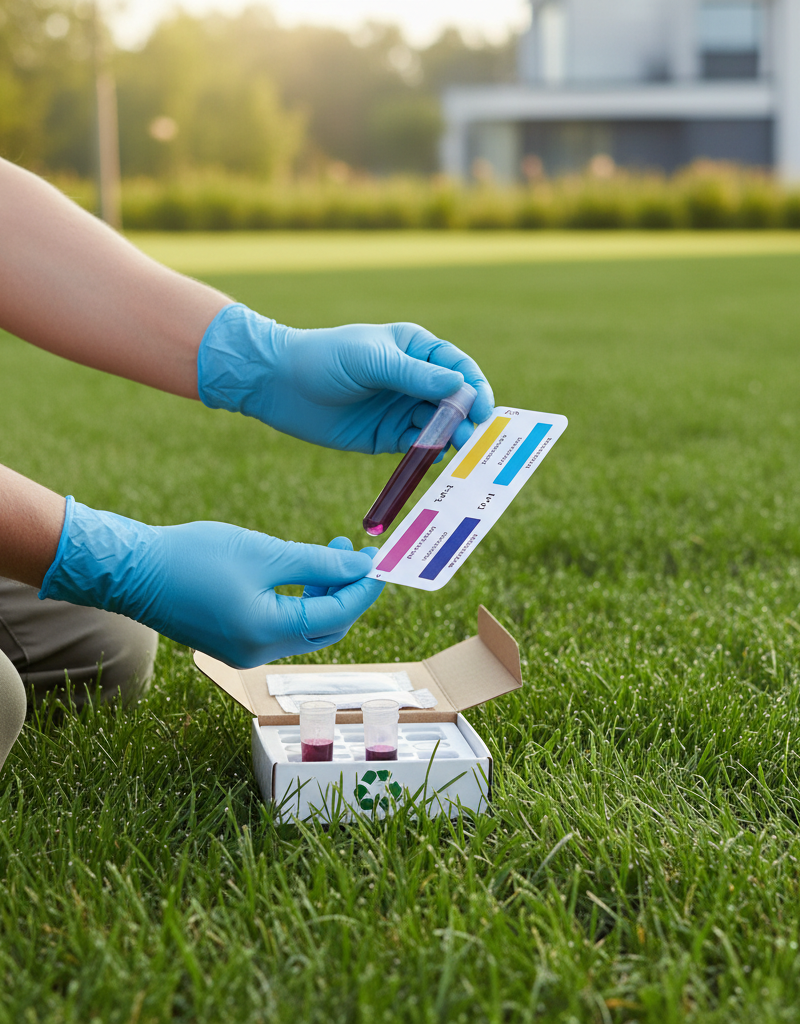
- Most home kits have you mix a small amount of your composite soil with distilled water (tap water often has its own pH and can mess with the result) and a reagent solution in a test tube. Shake it, then let it sit for the recommended time — usually 1-5 minutes. The liquid changes color. Match that color to the chart that came with the kit to get your pH reading. It’s a visual match, so lighting matters more than folks think.
-
Perform the Test (Digital Meter Method) — This one gives you a number.
- With a digital meter, you’ll usually dampen the soil sample with distilled water until it’s like a paste. Then stick the probe into the soil. Make sure the probe’s clean before and after each use. Wait for the reading to settle, usually 30-60 seconds. These usually spit out a number like 6.3 or 7.1, which makes it easier to track changes over time.
-
Optional: Vinegar and Baking Soda Test — Quick and dirty, but it’ll give you a clue.
- If you don’t have a kit, you can get a rough read. For acidity, put a small soil sample in a cup and pour about 1/2 cup of baking soda solution (1 tbsp baking soda to 1/2 cup water) on it. If it fizzes, your soil is acidic (pH below 7). For alkalinity, take another sample and add 1/2 cup of white vinegar. If it fizzes, your soil is alkaline (pH above 7). No fizz in either one usually means the soil’s closer to neutral. Not exact, but handy in a pinch.
-
Record Your Results — Don’t trust your memory.
- Write down your pH reading. If you took multiple samples from different areas, note which reading goes with which spot. That information matters when you decide what to amend and where. Retest in about 3-6 months after applying amendments to see if you’re moving the needle.
| Issue/Goal | DIY Fix Cost | Pro Service Cost | Time (DIY) |
|---|---|---|---|
| Basic pH Test | $10–$30 (kit) | $0 (if part of analysis) | 10–15 minutes |
| Raise pH (Lime) | $0.15–$0.25/sq ft | $0.50–$1.00/sq ft | 1–2 hours |
| Lower pH (Sulfur) | $0.10–$0.20/sq ft | $0.40–$0.80/sq ft | 1–2 hours |
| Full Soil Analysis | $20–$50 (lab kit) | $150–$300 (full service) | 1 week (lab turn) |
Common Causes
- Original Soil Composition: What was in that ground before your house went up? Some areas naturally run acidic — think lots of pine trees or heavy rainfall that leaches out alkaline minerals — while others lean alkaline, like places with limestone bedrock or dry climates. Sometimes you’re just fighting the soil you inherited.
- Over-Fertilization with Acidic Products: Plenty of synthetic fertilizers, especially ones high in ammonium forms of nitrogen, can slowly drag your soil’s pH down over time, especially if you’ve been using them year after year.
- Organic Matter Decomposition: As leaves, grass clippings, and compost break down, they release organic acids and push the pH lower. Usually slow. But over decades, it adds up.
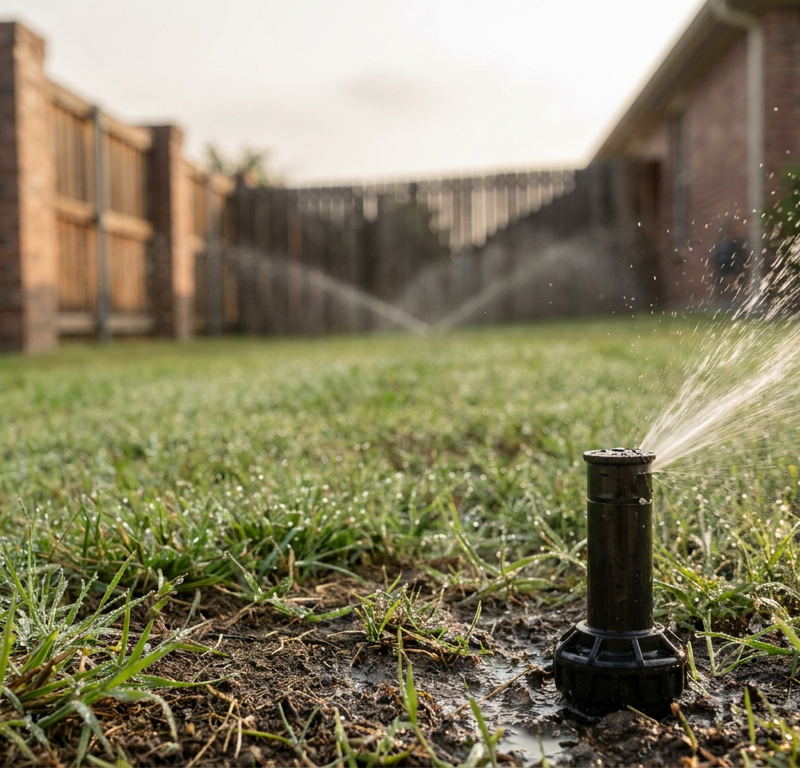
- Rainfall and Irrigation: Heavy rainfall areas tend to have more acidic soils because the rain leaches away base cations like calcium and magnesium that help hold the pH up. On the flip side, hard, alkaline irrigation water can nudge pH upward over time if you’re in an arid region.
- Nearby Plantings: Pine trees, oak trees, and other acid-loving plants can help lower pH around them as needles and leaves decompose.
Common Mistakes
- Testing at the Wrong Depth: If you just skim the surface at 1-2 inches, you’ll get a reading that doesn’t mean much, because that’s not where the roots are feeding. Stick to 4-6 inches.
- Contaminated Samples: Dirty tools, buckets that had fertilizer in them, or anything with chemical residue can mess with the test. It happens all the time. Clean everything well.
- Taking Only One Sample: Your lawn isn’t one single slab of dirt. pH can swing a lot across the yard. Take several samples and mix them into a composite, or test bad spots on their own.
- Ignoring Kit Instructions: Every kit has its own little quirks. If you don’t follow the exact directions for water amounts, mixing time, or color reading, you can wind up with junk data.
- Testing Too Soon After Amendments: If you just spread lime or sulfur, wait at least 3-6 months before testing again. The soil needs time to react. Otherwise you’re mostly measuring the fresh amendment, not the soil’s real new pH.
- Over-Applying Amendments: Don’t dump a pile of lime on the yard without knowing where you’re starting from and where you need to land. You can swing the pH too far the other way and make a fresh mess. Test first, then apply the right amount.
Cost & Time Breakdown
| Task | DIY Cost Estimate | Pro Cost Estimate | Time Estimate (DIY) |
|---|---|---|---|
| pH Test Kit (chemical/strip) | $10 – $25 | Included in service | 10 – 15 minutes |
| Digital pH Meter | $20 – $40 | Included in service | 10 – 20 minutes |
| Professional Lab Soil Test | $20 – $50 | $75 – $150 | 20 minutes (sampling) |
| Apply Granular Lime (5,000 sq ft) | $40 – $70 | $150 – $300 | 1 – 2 hours |
| Apply Granular Sulfur (5,000 sq ft) | $30 – $60 | $120 – $250 | 1 – 2 hours |
Tips & Prevention
- Routine Testing: Make pH testing part of your regular lawn care. I tell my clients to check it every 2-3 years, or once a year if they’re actively trying to shift it. Think of it like a checkup for the soil.
- Know Your Target: Find out what pH range your grass actually wants. Most cool-season grasses like fescue and bluegrass prefer 6.0-7.0, while some warm-season grasses can handle a bit higher.
- Use Proper Amendments: If your soil’s too acidic, use agricultural lime (calcium carbonate or dolomitic lime, which also adds magnesium) to raise the pH. If it’s too alkaline, use elemental sulfur to lower it. Follow the package directions for application rates — overdoing it is a classic mistake.
- Slow and Steady: Soil pH doesn’t change overnight. Don’t expect magic by tomorrow morning. It can take several months for amendments to fully react. You may need a few smaller applications over a year or two.
- Organic Matter Benefits: Sure, organic matter can slowly lower pH, but the bigger benefits to soil health, structure, and nutrient retention usually make that tradeoff worth it. A healthy soil ecosystem buffers pH swings. Just keep an eye on your readings.
- Check Irrigation Water: If your pH keeps running high and you live in an arid area, test your irrigation water. Sometimes hard, alkaline water is part of the problem.
When to Call a Professional
Testing your soil pH is one of the easier DIY jobs out there, but figuring out what to do with the results can get messy fast, especially on larger lawns or if the problem keeps coming back. If you’ve run the tests, applied amendments like lime or sulfur by the book, and your pH still won’t budge, it’s probably time to bring in a pro. They can do a more complete soil analysis through a lab, which tells you not just pH but also specific nutrient deficiencies or excesses. That kind of report gives you a real roadmap for what your lawn needs.
And if you’ve got a big property — say, over 10,000 square feet — or rough terrain, getting amendments spread evenly can be a bear. A professional lawn care service has the right equipment to apply materials accurately and efficiently, so you get uniform coverage without spending all afternoon wrestling a heavy bag of lime around the yard.
Related Articles
Keep troubleshooting with these hand-picked guides from FixlyGuide:
- The #1 Mistake Killing Your Lawn? It's Hiding in Your Soil pH — Discover how to quickly and accurately test your lawn's soil pH at home, identify nutrient absorption issues, and unlock a healthier, green…
- The #1 Summer Lawn Mistake Turning Your Grass Yellow (and How to Fix It) — Discover the most common summer lawn mistake that causes yellowing grass and learn the simple steps to revive your lawn.
- The #1 Mistake Killing Your Lawn (and the Simple Grub Fix) — Grub worms can covertly destroy a beautiful lawn, but specific biological and chemical treatments applied at the right time can eliminate t…
- The #1 Mowing Mistake That Invites Weeds (And How to Fix It in 15 Minutes) — Many homeowners unknowingly make a common mowing mistake that leaves their lawn vulnerable to weeds and disease. Learn the secret to a thic…
- The #1 Mistake Killing Your Summer Lawn (And How to Fix It in a Weekend) — Overwatering is the silent killer behind many yellow summer lawns, often mistaken for drought. Learn how to diagnose and correct drainage i…
- The Hidden Culprit Behind Your AC Not Cooling (and How to Find It) — If your central AC isn't cooling your home, the issue often stems from a surprisingly simple problem that's easy to overlook. Learn how to…
Should you do this yourself?
Answer five quick questions before you start. Safety outranks savings every time.
Your experience with work like this
How high do you have to work?
Does the job involve any of these?
Will it need a permit?
Specialty tools
Free and instant. Educational guidance only — not a quote, inspection, or professional diagnosis.
What should this project cost?
Enter your project details for a realistic cost range before you call anyone.
Cost depends heavily on which system turns out to be the source.
- Regional adjustment
- National average
- Labor share (typical)
- ~$1,620
- Quotes to collect
- 3 written estimates
Educational estimate based on national averages — not a binding quote. Always confirm with written local estimates.
Before you start
Check the difficulty, permits, and safety risk — then decide whether to call a pro.
- Estimate this projectGet a cost range for your scope and ZIP before you call anyone.Open
- Get local estimatesSend one request and compare written estimates from vetted pros.Open
Free, no signup required. Estimates are educational guidance, not a quote or an inspection.
Get the print-ready PDF of this guide
A clean, ad-free, printable version you can keep on your phone or pin to the workshop wall. Free with a FixlyGuide account.
- Print-optimized layout
- Tools, materials & every step included
- Saved to your account
Frequently asked questions
Why is soil pH important for my lawn?+
Soil pH determines how available nutrients are to your grass roots. If the pH is too high or too low, essential nutrients like nitrogen, phosphorus, and potassium get
What is the ideal pH range for most lawn grasses?+
Most common lawn grasses, like fescue, bluegrass, and perennial ryegrass, prefer a slightly acidic to neutral pH range of 6.0 to 7.0. Some warm-season grasses can tolerate slightly higher, but always check for your specific grass type.
How often should I test my lawn's soil pH?+
I recommend testing your soil pH every 2-3 years as part of your regular lawn care routine. If you're actively trying to amend your soil to change the pH, you'll want to retest every 3-6 months to monitor your progress.
Can I use a store-bought pH test kit, or do I need a lab test?+
For most homeowners, an inexpensive store-bought pH test kit (liquid reagent or digital meter) is perfectly sufficient to get a good reading. Lab tests offer more comprehensive analysis of other nutrients, but aren't strictly necessary just for pH.
What if my soil is too acidic?+
If your soil is too acidic (below 6.0), you'll typically need to add agricultural lime (calcium carbonate or dolomitic lime) to raise the pH. Always follow the product's application rates, as too much can swing the pH too high.
What if my soil is too alkaline?+
If your soil is too alkaline (above 7.0), you'll generally need to add elemental sulfur to lower the pH. Again, apply it according to the package directions; changing alkaline soil can sometimes take a bit longer and require more consistent effort.
How long does it take to change soil pH?+
Changing soil pH isn't an overnight fix. It can take several weeks to many months for amendments like lime or sulfur to fully react with the soil and alter the pH. Patience and consistent monitoring are key.
Will my irrigation water affect my soil pH?+
Yes, it can. If you live in an area with very hard, alkaline irrigation water, consistent watering can slowly contribute to a rise in your soil's pH over time, especially in arid climates.
Discussion
Loading comments…