
Tools & materials you'll need
Affiliate linksAs an Amazon Associate FixlyGuide earns from qualifying purchases — at no extra cost to you. Prices and availability are accurate as of publication and subject to change.
How it works
Soil pH is a measurement of the acidity or alkalinity of your soil, rated on a scale from 0 to 14. A pH of 7.0 is neutral. Any value below 7.0 is acidic, while any value above 7.0 is alkaline (or basic). This single number is one of the most critical factors governing your lawn's health because it directly controls nutrient availability.
Essential plant nutrients like nitrogen (N), phosphorus (P), and potassium (K), along with crucial micronutrients like iron and manganese, can only be absorbed by grass roots when they are dissolved in soil water. Soil pH dictates this chemical process. For most turfgrasses, the ideal pH range is slightly acidic, between 6.0 and 7.0. Within this window, the availability of the most vital nutrients is maximized.
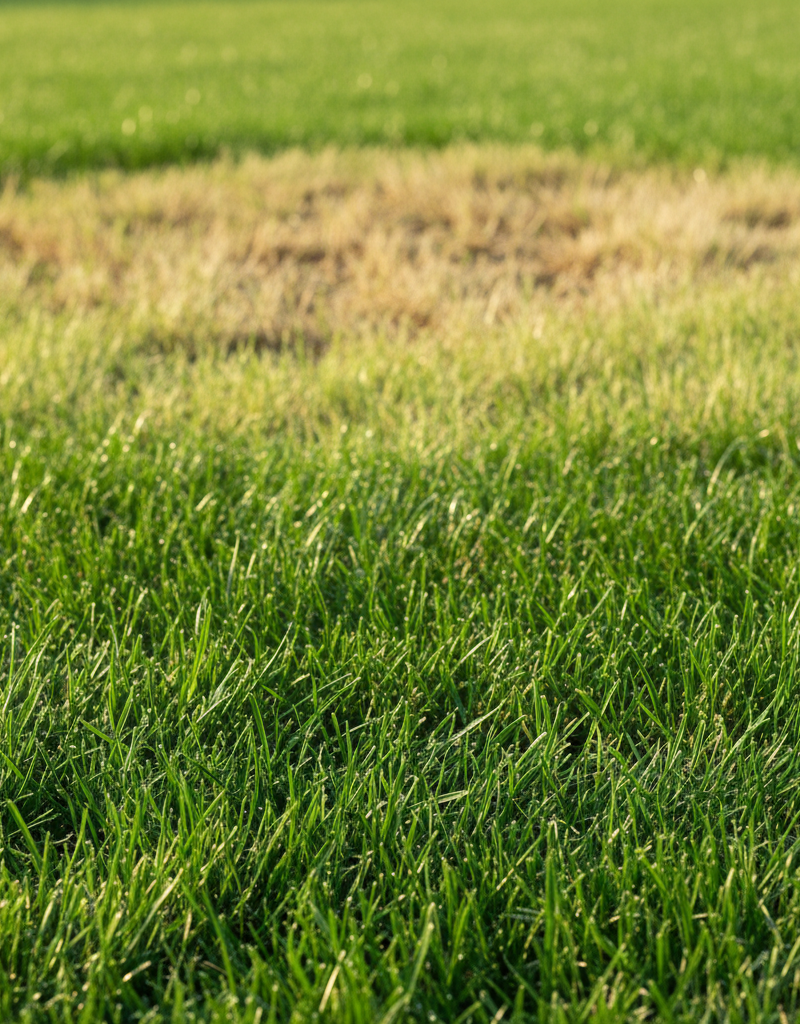
If your soil becomes too acidic (pH below 6.0), beneficial nutrients like nitrogen, phosphorus, potassium, calcium, and magnesium become chemically "locked up" and less available. Simultaneously, toxic elements like aluminum and manganese become more soluble and can be absorbed in quantities that damage grass roots. Conversely, if your soil is too alkaline (pH above 7.2), nutrients such as iron, manganese, and phosphorus become less available, leading to deficiencies. A common symptom is iron chlorosis, where grass blades turn yellow despite adequate nitrogen, because the grass cannot access the iron it needs to produce chlorophyll. Therefore, testing and adjusting your soil pH is not about treating the soil itself, but about creating the ideal chemical environment for your grass to absorb the food it needs to thrive.
Step-by-Step Fix
This process details how to accurately test your soil pH, interpret the results, and select the appropriate amendment. For reliable results, use a chemical colorimetric test kit or a university extension mail-in test, not a simple metal probe meter or the vinegar/baking soda method, which are often inaccurate.
-
Define Testing Zones — Divide your lawn into logical areas based on their function and appearance. Do not combine samples from a struggling, yellow patch with a healthy, green area. Create separate zones for the front lawn, back lawn, shady spots, full-sun areas, and any distinct problem spots. This ensures your results are specific and actionable.
- Tools: Garden layout plan or notebook, marker flags.
-
Gather Sampling Tools — Use clean tools to prevent contamination. Metal from a rusty trowel or residue in a bucket can alter the pH reading. It is critical to use distilled water for the test, as tap water has its own pH that will skew your results.
- Tools: Clean stainless steel trowel or soil probe, clean plastic bucket, soil test kit (chemical reagent type), distilled water. For mail-in lab tests, you will need the lab’s sample bag and submission form.
-
Collect Composite Samples — For each zone you identified, collect 8-10 sub-samples. Walk in a zigzag pattern across the zone. Plunge your trowel or probe 4 to 6 inches into the ground—this is the root zone where nutrient uptake occurs. Place each of these core samples into your clean plastic bucket.
- Pro Tip: Discard the top layer of grass, thatch, and surface debris before adding the soil core to your bucket.
-
Prepare a Homogenized Sample — After collecting all sub-samples for one zone, thoroughly mix the soil in the bucket with your hands or a clean trowel. Break up any large clumps and remove all rocks, roots, grass, and other debris. This creates a single, uniform sample that represents the average condition of that entire zone.
- If soil is wet: Spread the soil on newspaper in a sheltered area and allow it to air-dry until it is just slightly damp and crumbles easily. Do not use an oven or heat source to dry it.
-
Perform the Chemical Test — Carefully follow the instructions on your soil test kit. Typically, this involves adding a small amount of your prepared soil to a test vial, adding distilled water to a specified line, adding the contents of a reagent capsule, and capping the vial securely.
- Safety: The reagent capsule contains a chemical powder. Avoid inhaling it or touching it with bare hands.
-
Shake and Let Settle — Shake the vial vigorously for the time recommended by the manufacturer, usually 30 to 60 seconds. This allows the reagent to react with the soil particles. Then, place the vial in an undisturbed spot and let the soil settle to the bottom. This can take anywhere from 10 minutes to an hour. The water above the soil will change color.
-
Read and Record the pH Value — Once the solution is clear enough to see through, hold the vial against the white background of the provided color chart. In good, natural daylight (not direct sun), match the color of the solution to the colors on the chart to determine your soil's pH value. Write this number down, noting the specific zone it came from.
-
Interpret Your pH Results — Compare your recorded pH to the optimal range for lawn health. This gives you a clear diagnosis.
- pH Below 6.0 (Acidic): Soil requires an amendment to raise the pH. The most common amendment is lime.
- pH 6.0 to 7.0 (Ideal): No corrective action is needed. Maintain good practices.
- pH Above 7.2 (Alkaline): Soil requires an amendment to lower the pH. The most common amendments are elemental sulfur or acidifying fertilizers.
-
Select the Correct Amendment — The choice of product is as important as the diagnosis. An improper choice can create new nutrient imbalances.
- To Raise pH (for acidic soil): Use dolomitic limestone if your soil is also deficient in magnesium (a comprehensive lab test will tell you this). Use calcitic limestone (calcium carbonate) if magnesium levels are already sufficient. Pelletized lime is easier to spread than powdered lime.
- To Lower pH (for alkaline soil): Use elemental sulfur for a safe, gradual reduction. Aluminum sulfate works much faster but carries a higher risk of damaging plant roots if over-applied and is not recommended for large adjustments.
-
Calculate the Application Rate — Do not guess. The amount of amendment needed depends on three factors: your current pH, your target pH (usually 6.5), and your soil type. Clay and loam soils require more product to change pH than sandy soils. Your test kit or local university extension service website will have application rate charts. For example, to raise pH from 5.5 to 6.5, a loam soil may need 50 lbs of lime per 1,000 sq ft, while a sandy soil may only need 25 lbs.
-
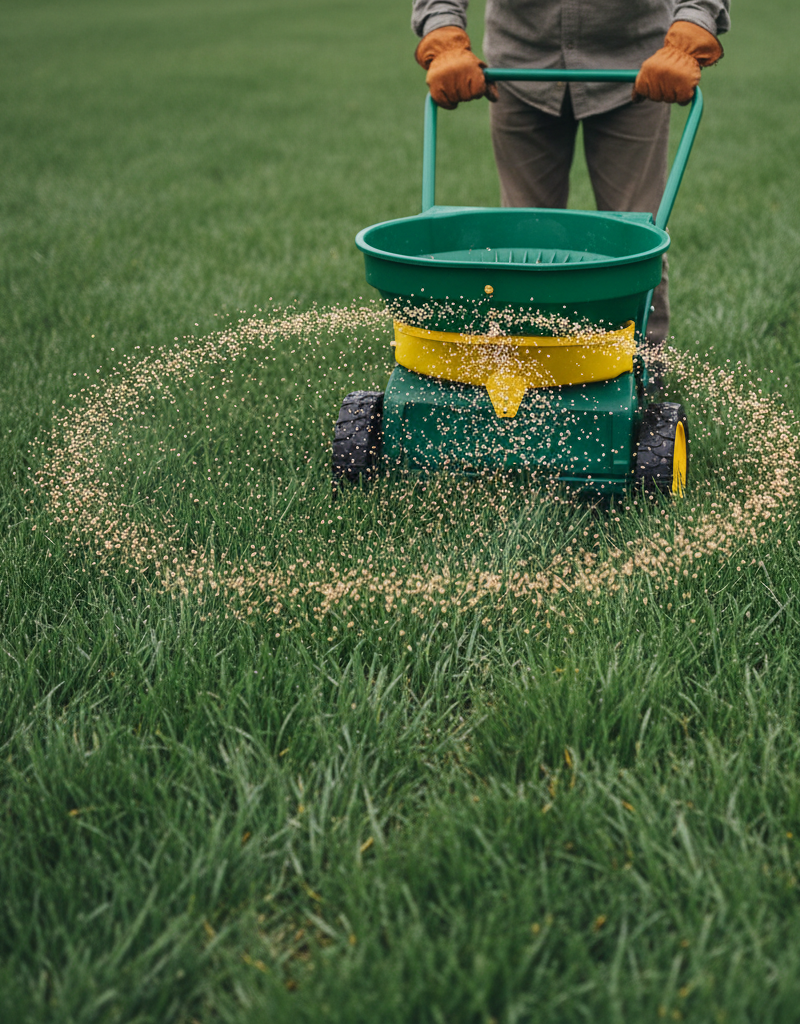
Apply the Amendment Uniformly — Use a calibrated broadcast or drop spreader for an even application. To avoid streaks and misses, divide the total amount of amendment in half. Apply the first half while walking in one direction (e.g., north-south) and the second half while walking in a perpendicular direction (e.g., east-west).
-
Water In and Wait — After spreading, lightly water the lawn for about 15-20 minutes. This rinses the product off the grass blades and helps it begin to work into the soil. Be patient; soil pH adjusts very slowly. It can take 6-12 months for lime and elemental sulfur to fully react with the soil. Do not re-test for at least six months.
Common mistakes
-
Taking a single, shallow sample. A scoop of soil from one spot only tells you about that specific spot and ignores variations across the lawn. A shallow sample misses the root zone. Instead: Collect 8-10 cores from 4-6 inches deep in a zigzag pattern across each distinct lawn area to create a representative composite sample.
-
Using contaminated equipment or tap water. A rusty shovel, a bucket used for mixing concrete, or tap water (which can be hard/alkaline or soft/acidic) will contaminate your sample and invalidate the test results. Instead: Use only clean plastic or stainless steel tools and purchase a jug of distilled water from the grocery store for testing.
-
Testing immediately after applying fertilizer or treatments. Fertilizers, especially synthetic ones, can cause a temporary and dramatic shift in the surface soil pH, giving you a false reading that doesn't reflect the soil's true baseline. Instead: Wait at least 6-8 weeks after any fertilizer, herbicide, or pesticide application before taking soil samples for a pH test.
-
Applying too much amendment at once. Believing that "more is better" is a dangerous mistake. Drastically over-shooting your target pH is a more difficult and expensive problem to fix than the original imbalance. Instead: Carefully calculate the required application rate based on your test results and soil type. For large adjustments, it's safer to apply the amendment in two smaller applications 6 months apart.
-
Expecting immediate changes. Soil chemistry is a slow, biological, and chemical process. Lime and elemental sulfur take many months to fully react and change the soil's pH. Instead: Understand that this is a long-term correction. After applying amendments, wait 6-12 months before re-testing to accurately gauge the change and determine if further adjustments are needed.
-
Ignoring soil type in calculations. A heavy clay soil has more surface area and a higher buffering capacity than a light sandy soil, meaning it resists changes in pH more strongly. Applying the same amount of lime to both will have a much greater effect on the sandy soil. Instead: Identify your soil type (sandy, loamy, or clay) and use an application chart that specifies rates for different textures.
Cost & time breakdown
The cost and time involved depend on whether you perform only the test or proceed with amending the soil. All costs are estimates and can vary by region and product quality.
| Task | DIY cost | Pro cost | Time |
|---|---|---|---|
| DIY Chemical Soil Test | $15 - $30 (for a kit with multiple tests) | N/A | 1 hour |
| Professional Lab Soil Test | $30 - $60 (includes shipping) | $75 - $150 (as part of a full analysis) | 1 hour (collection) + 1-2 weeks (results) |
| Lime Application (Acidic Soil) | $20 - $50 (for a 5,000 sq ft lawn) | $150 - $300 | 1 - 2 hours |
| Sulfur Application (Alkaline Soil) | $40 - $80 (for a 5,000 sq ft lawn) | $175 - $350 | 1 - 2 hours |
| Spreader Rental | $20 - $30 (per day) | Included in service cost | N/A |
| Comprehensive Soil Health Program | N/A | $500 - $1,200+ (per year) | Ongoing |
When to call a pro
While testing and minor pH adjustments are manageable DIY tasks, certain situations benefit from professional expertise. Call a reputable lawn care service or agronomist if you encounter these scenarios.
First, if your lawn problems persist after you have correctly tested and amended the soil pH, it's time for a professional. There may be compounding issues such as severe nutrient deficiencies, soil-borne diseases, insect infestations, or extreme compaction that a simple pH test cannot reveal. A pro has access to comprehensive laboratory testing that analyzes N-P-K levels, micronutrients, organic matter percentage, and soil texture, providing a complete diagnostic picture.
Second, for very large properties (typically over a quarter-acre), achieving an accurate, representative soil sample and then applying hundreds of pounds of amendments evenly becomes a significant logistical challenge. Professionals have efficient core sampling tools and commercial-grade, calibrated spreaders to do the job quickly and correctly.
Finally, if your test reveals an extreme pH imbalance (e.g., below 5.0 or above 8.5), a professional should manage the correction. This requires a carefully staged, multi-year plan to avoid shocking the soil ecosystem with massive doses of amendments. A professional can safely guide the soil back to a healthy range without causing further harm.
Prevention & maintenance
Maintaining a stable, healthy soil pH is more efficient than correcting a severe imbalance. Integrate these practices into your annual lawn care routine.
-
Test on a Regular Schedule: Test your soil pH every two to three years, even if the lawn looks healthy. This allows you to identify and correct pH drift before it negatively impacts grass health. The best time to test is in the fall, which gives you time to apply amendments that will work into the soil over the winter.
-
Choose Fertilizers Wisely: Be aware of your fertilizer's effect on pH. Fertilizers high in ammonium, such as ammonium sulfate, are acidifying. If your soil tends to be acidic, opt for nitrate-based fertilizers (like calcium nitrate) or slow-release organic options, which have a less dramatic impact on pH.
-
Topdress with Compost: Annually applying a thin layer (1/4 inch) of high-quality, finished compost acts as a natural buffer, helping to stabilize soil pH against drastic swings. Compost also improves soil structure, water retention, and microbial life.
-
Practice Grasscycling: When you mow, leave the clippings on the lawn. This practice, known as grasscycling, returns valuable nutrients and organic matter to the soil. As the clippings decompose, they contribute to a stable soil environment and reduce your need for synthetic fertilizers.
-
Manage Water Sources: In arid regions, irrigation water from municipal sources or wells can be alkaline. Over time, this can raise your soil's pH. In areas with high rainfall (acid rain), essential minerals like calcium can be leached from the soil, causing it to become more acidic. Deep, infrequent watering is the best practice for lawn health and helps mitigate these effects.
-
Aerate Annually: Core aeration, the process of pulling small plugs of soil from the lawn, helps lime and sulfur penetrate the soil profile more effectively. It also reduces compaction, improving water infiltration and root growth, which contribute to a more resilient soil ecosystem.
Related Articles
Keep troubleshooting with these hand-picked guides from FixlyGuide:
- The Surprising pH Secret Killing Your Lawn (and How to Uncover It at Home) — Discover how easily you can test your lawn's soil pH at home to diagnose underlying issues affecting grass health without expensive lab tes…
- The #1 Mowing Mistake That Invites Weeds (And How to Fix It in 15 Minutes) — Discover the secret to a thriving lawn and banish weeds by avoiding the most common mowing error homeowners make, improving grass health dr…
- The Surprising pH Secret Every Green Lawn Shares (And How to Unlock Yours) — Discover how to simply and accurately test your lawn soil p
Get the print-ready PDF of this guide
A clean, ad-free, printable version you can keep on your phone or pin to the workshop wall. Free with a FixlyGuide account.
- Print-optimized layout
- Tools, materials & every step included
- Saved to your account
Frequently asked questions
How often should I test my lawn soil pH?+
It's recommended to test your lawn soil pH annually, preferably in the spring or fall, to monitor changes and make timely adjustments.
What is the ideal pH for most lawns?+
Most lawn grasses thrive in a slightly acidic to neutral pH range of 6.0 to 7.0. This range allows for optimal nutrient availability.
Can I use household items to test soil pH?+
Yes, the vinegar and baking soda test can give you a basic indication of whether your soil is acidic or alkaline, but it won't provide an exact pH reading.
What if my soil pH is too high or too low?+
If your soil is too acidic, you can add garden lime to raise the pH. If it's too alkaline, you can add elemental sulfur or a specifically formulated acidifying fertilizer to lower the pH. Always follow product instructions carefully.
Is a professional soil test better than a home test?+
Professional soil tests from agricultural extension offices or private labs are generally more accurate and provide detailed nutrient analysis beyond just pH, offering comprehensive recommendations for your lawn.

Discussion
Loading comments…