Tools & materials you'll need
Affiliate linksAs an Amazon Associate FixlyGuide earns from qualifying purchases — at no extra cost to you. Prices and availability are accurate as of publication and subject to change.
Quick Answer
When undertaking any home repair or renovation in a house built before 1978, the unseen danger of lead-based paint dust can be a serious health hazard, especially for children and pregnant women. The critical steps involve isolating the work area, using personal protective equipment (PPE), wetting surfaces to minimize dust, and employing specialized cleaning techniques to contain and remove lead particles safely.
The Problem
Imagine you're tackling a long-overdue renovation project in your charming, older home. Perhaps you're scraping peeling paint from a window sill, sanding down an old door frame, or even drilling into a wall to hang new shelving. What you might not realize is that with every scrape, sand, or drill, you could be releasing microscopic lead particles into the air and onto surfaces throughout your home. These particles are invisible, odorless, and incredibly dangerous.
Lead-based paint was commonly used in homes built before 1978 due to its durability and vibrant color. While intact lead paint generally isn't a significant hazard, any activity that disturbs it—like sanding, scraping, cutting, drilling, or demolition—creates fine dust and chips. When inhaled or ingested, this lead dust can cause severe health problems, particularly developmental issues in young children, neurological damage, and reproductive problems in adults. The problem isn't just direct exposure; lead dust can settle on carpets, furniture, and toys, becoming an ongoing source of contamination long after the DIY project is finished. Ignoring these precautions can turn a simple home improvement into a serious health risk for everyone in your household.
How It Works
Lead-based paint typically consists of lead carbonate or other lead compounds mixed into a pigment and binder. When this paint dries, the lead is encapsulated within the film. As long as the paint remains undisturbed and in good condition, the lead poses a minimal threat. However, the moment that paint film is broken—whether by friction from sanding, impact from drilling, or pressure from scraping—tiny fragments and dust particles containing lead are released. These particles are often too small to see with the naked eye, ranging from micrometers to sub-micrometer sizes. Gravity eventually pulls some of these particles down, where they settle on horizontal surfaces, floors, and personal belongings. Airborne particles can remain suspended for extended periods, traveling through unsealed doorways and HVAC systems, effectively contaminating areas far from the work zone.
The human body absorbs lead primarily through inhalation and ingestion. Inhaled lead dust gets into the lungs and is quickly absorbed into the bloodstream. Ingested lead, often from contaminated hands touching the mouth or from food/drink exposed to dust, passes through the digestive system. Once in the bloodstream, lead is distributed throughout the body, accumulating in bones, teeth, and soft tissues. It interferes with various biological processes, particularly the nervous system, kidneys, and blood-forming organs. Children are especially vulnerable because their developing bodies absorb lead more readily, and their frequent hand-to-mouth activity increases ingestion risk. Even low levels of lead exposure can cause irreversible damage, affecting cognitive development, behavior, and physical growth. Understanding this pathway of exposure and accumulation is crucial for appreciating why stringent containment and cleanup are non-negotiable.
Step-by-Step Fix
1. Test Your Home for Lead — Before beginning any project in a pre-1978 home, assume lead paint is present or get it tested. Various DIY lead test kits are available at hardware stores, which can give an indication, but for definitive results, consider professional lead testing. A certified lead inspector can thoroughly assess your home and provide a detailed report, identifying lead hazards accurately.
- If you get a positive test: Proceed with extreme caution and follow all subsequent steps meticulously.
- If you are unsure: Always err on the side of caution and treat surfaces as if they contain lead.
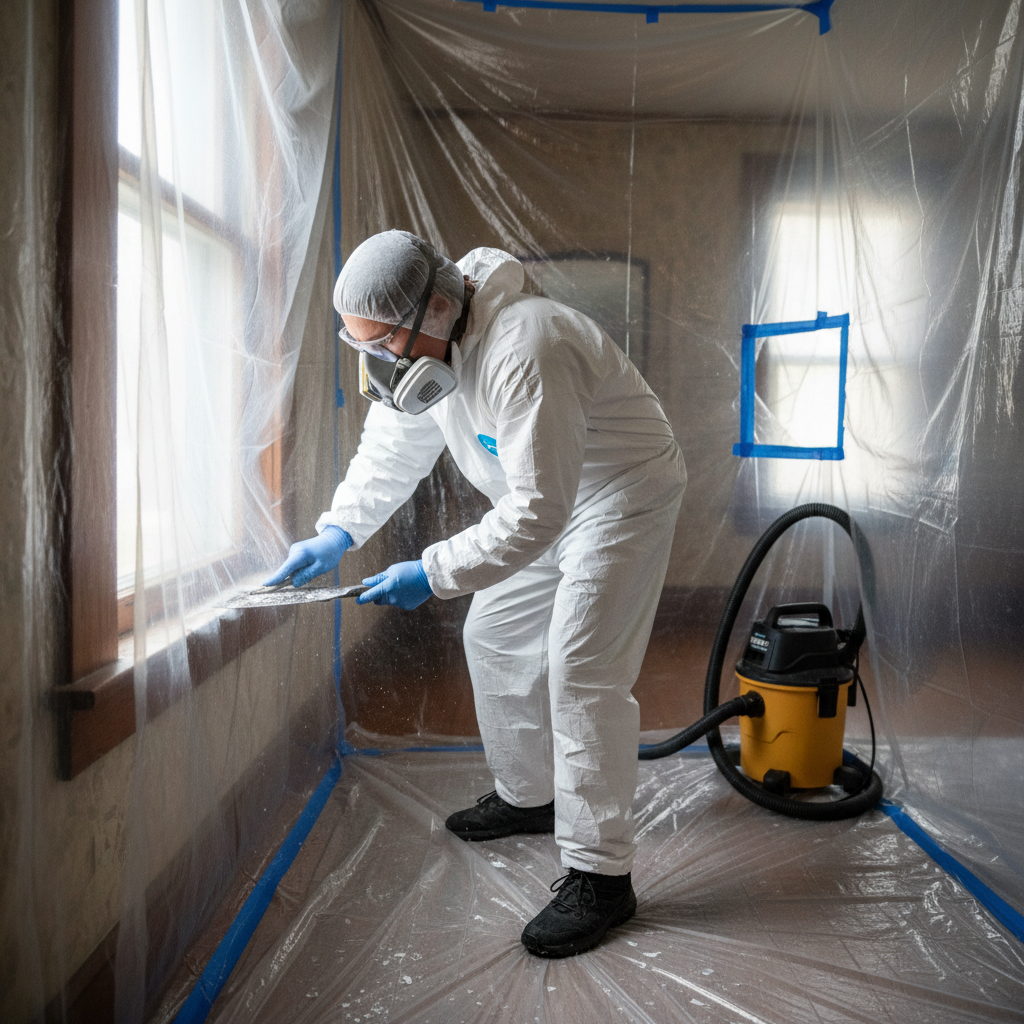
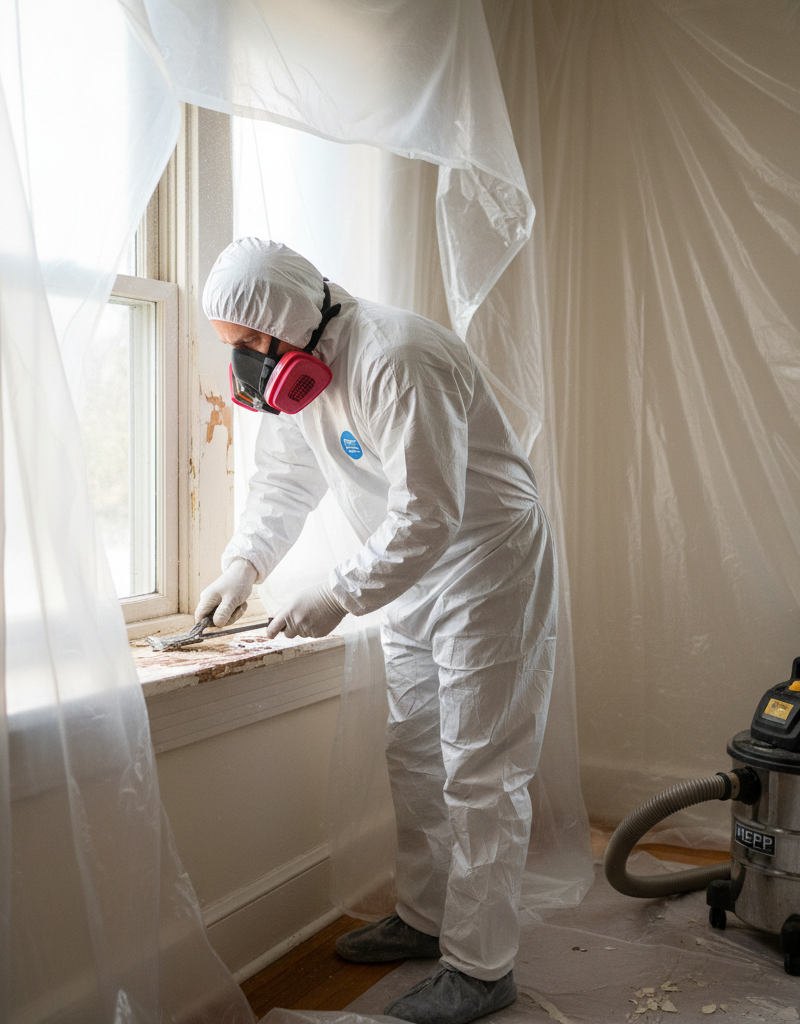
2. Prepare the Work Area — Establish a strict containment zone to prevent lead dust from spreading. Remove all furniture, curtains, rugs, and personal belongings from the room. If items cannot be moved, cover them completely with two layers of 6-mil plastic sheeting, taped securely to create an airtight seal. Close and seal all windows and doors leading to other parts of the house with plastic sheeting and painter's tape. Turn off forced-air heating and air conditioning systems to prevent dust circulation.
- Use warning signs: Post clear "HAZARD - LEAD WORK AREA" signs.
- Create a decontamination zone: Set up a small area just outside your work zone for doffing (removing) PPE.
3. Don Your Personal Protective Equipment (PPE) — Essential for protecting yourself from inhaling or ingesting lead particles. Wear a disposable dust mask or respirator rated N100 or P100 (N95 is not sufficient for lead dust). Combine this with disposable coveralls (or old clothes you'll throw away or intensely wash separately), disposable gloves, and safety glasses or goggles. Ensure the respirator fits snugly to prevent air leaks.
- Check respirator seal: Perform a fit check according to manufacturer instructions.
- No re-wearing: Do not reuse disposable PPE; dispose of it properly after each work session.
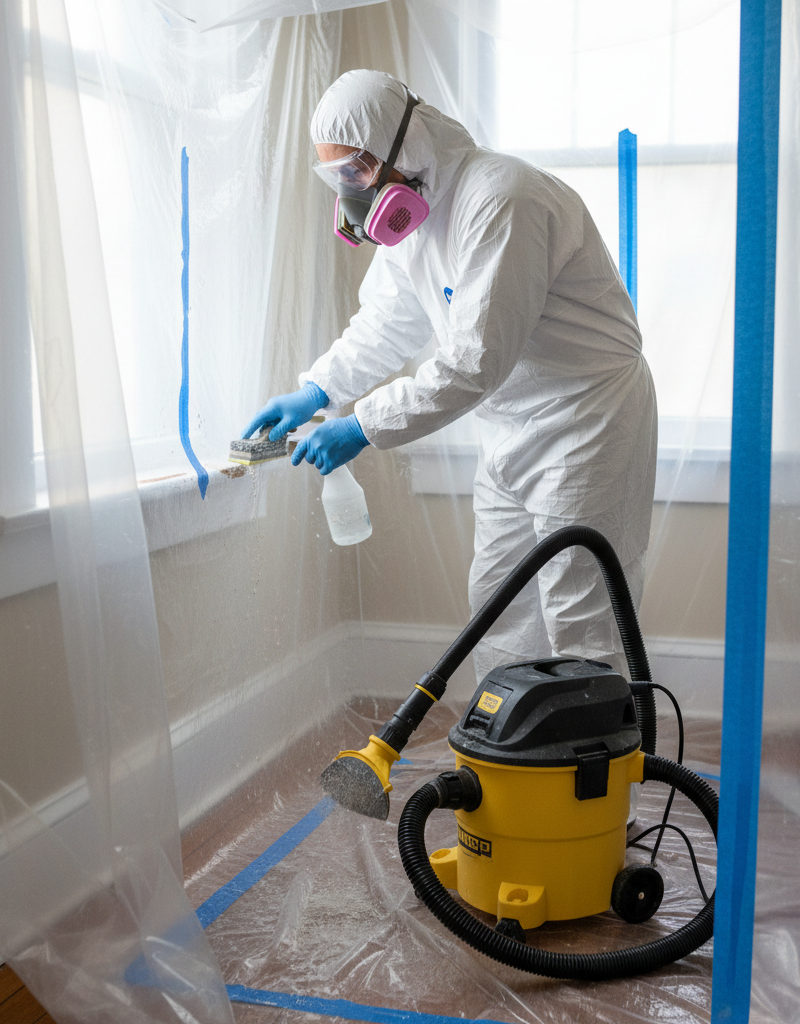
4. Wet Methods & Dust Control — Lead dust is your enemy, and moisture is your ally. Lightly mist surfaces you plan to disturb with water from a spray bottle before scraping or sanding. This significantly reduces airborne dust. For drilling, consider using a drilling shroud with a HEPA vacuum attachment. Avoid aggressive power sanding or dry scraping, which generate large amounts of dust.
- Keep surfaces damp: Re-wet as needed during the work.
- Never use a regular vacuum: Household vacuums will spread lead dust, not contain it.
5. Collect and Contain Debris — As you generate paint chips or dust, immediately collect them. Place a large piece of 6-mil plastic sheeting directly below your work area to catch all falling debris. Carefully fold the plastic inward, never shaking it, and place all waste into heavy-duty 6-mil contractor bags. Seal these bags tightly with duct tape.
- Double-bag: For added security, double-bag all lead-contaminated waste.
- Label waste: Mark bags as "HAZARDOUS WASTE - LEAD."
6. Clean the Work Area Meticulously — After finishing work, clean the area from top to bottom. First, use a HEPA-filtered vacuum cleaner (not a regular household vacuum) to thoroughly vacuum all surfaces, including walls, floors, and items left in the containment area. Next, wet-wipe all surfaces repeatedly with a lead-specific cleaner or a solution of trisodium phosphate (TSP). Use disposable cloths and change them often, rinsing them in a separate bucket of water that will also be treated as lead waste.
- Wipe-rinse-wipe: Follow a pattern of wiping with cleaner, rinsing, and then a final clean wipe.
- Dispose of all cloths/sponges: Do not reuse wiping materials.
7. Clean Yourself & Dispose of Waste — Crucial for avoiding cross-contamination. Before leaving the work area, remove disposable coveralls and gloves, turning them inside out as you take them off, and place them in a sealed waste bag. Remove your respirator last. Shower immediately, washing your hair thoroughly. All tools used should be wet-wiped clean with lead cleaner and stored separately from general household tools until decontaminated. Dispose of all sealed waste bags according to local hazardous waste regulations.
- Wash work clothes separately: If not using disposable coveralls, wash your work clothes by themselves.
- Check local regulations: Contact your municipal waste authority for specific lead paint disposal guidelines.
Common Causes
Lead paint concerns primarily arise from homes built before 1978. The primary "cause" of exposure is disturbance. This involves activities like:
- Friction and abrasion: Windows and doors that rub against their frames, creating dust as they open and close.
- Impact: Walls or surfaces that are repeatedly bumped or scraped, leading to chips or dust generation.
- Water damage: Peeling or blistering paint, often exacerbated by moisture, that creates flakes and chips.
- DIY renovations: Homeowners unknowingly sanding, scraping, drilling, or demolishing painted surfaces without proper precautions.
- Lead-contaminated soil: Exterior lead paint that has weathered and flaked into the surrounding soil, becoming a hazard, especially for children playing outdoors.
Common Mistakes
- Using a regular household vacuum: Standard vacuums (even those with "HEPA-type" filters) are not designed to trap microscopic lead particles. They can actually disperse lead dust into the air, making the problem worse.
- Dry scraping or sanding: This is the quickest way to create a massive amount of airborne lead dust. Always use wet methods to suppress dust.
- Not sealing off the work area: Failing to properly contain lead dust means it will spread throughout your home, contaminating other rooms and HVAC systems.
- Neglecting personal protective equipment (PPE): Working without an N100/P100 respirator, gloves, and coveralls leaves you directly exposed to harmful lead particles.
- Improper disposal: Throwing lead-contaminated waste into regular household trash can expose waste handlers and further contaminate the environment.
- Reusing contaminated cleaning supplies: Wiping cloths, sponges, and rinse water become lead hazards and must be disposed of properly after a single use.
Cost & Time Breakdown
| Task | DIY cost | Pro cost | Time |
|---|---|---|---|
| DIY Lead Test Kit | $20–$50 | N/A | 15–30 mins |
| Professional Lead Inspection | N/A | $300–$600 | 1–3 hours |
| Materials for Containment & PPE | $50–$150 | Included in service | 2–4 hours |
| Lead-Safe Renovation (Small Area) | $100–$300 (materials) | $1,500–$5,000+ | 1–3 days |
| Professional Lead Abatement | N/A | $5,000–$30,000+ | Days to weeks |
Tips & Prevention
- Assume before 1978 homes have lead: Always operate under the assumption that painted surfaces in pre-1978 homes contain lead, especially if you haven't tested.
- Regular cleaning: Wipe down window sills and floors regularly with damp cloths to pick up any settling dust, even if not actively renovating. Focus on areas where paint may chip or wear.
- Maintain paint in good condition: Keep painted surfaces in good repair. If paint is peeling, chipping, or chalking, address it promptly using lead-safe work practices or consider professional encapsulation or removal.
- Wash children's hands frequently: Children are most vulnerable. Ensure they wash their hands often, especially before eating and after playing outside, to minimize lead ingestion.
- Test soil around your home: If your home's exterior paint is old, it's wise to test the soil around the foundation for lead, as flaking paint can create a significant hazard.
- Encapsulate where possible: Instead of removing lead paint, consider encapsulating it with a new layer of non-lead paint or paneling if the surface is stable and intact. This creates a barrier over the lead paint.
When to Call a Professional
Calling a certified lead abatement professional is absolutely essential for large-scale renovations, demolition, or if lead test results indicate high levels of lead contamination, particularly in areas accessible to children. If you find significant amounts of peeling or chipping paint over a large area, or if you're dealing with lead paint on intricate architectural features that are difficult to safely abate yourself, a professional can ensure the job is done safely and legally. Attempting extensive lead paint removal without proper training, equipment, and certification can inadvertently create a more widespread and dangerous contamination problem for your home and family. Professionals have the specialized tools, training, and disposal methods to manage lead hazards effectively, adhering to EPA and local regulations, providing peace of mind and protecting your household's long-term health. Never hesitate to call a professional if you feel overwhelmed, or if the scope of work seems beyond simple spot repairs. They can perform full encapsulation or removal safely.
Related Articles
Keep troubleshooting with these hand-picked guides from FixlyGuide:
- The 12 Checks That Prevent 80% of Costly Home Repairs — Don't wait for a disaster. Our comprehensive monthly home maintenance checklist reveals the surprising, simple tasks that catch small issue…
- 7 Inspection Red Flags That Secretly Signal a $20,000 Bill — Don't let your dream home become a money pit. Many buyers and even some inspectors overlook subtle home inspection red flags that lead to f…
- The 7 Critical Household Filters You're Forgetting (And What They Cost You) — Neglected household filters are quietly costing you money, diminishing air quality, and paving the way for expensive repairs. Discover the…
- 7 Hidden Equity Drains Costing You Thousands Annually — Your home is an asset, but silent problems like minor leaks, poor insulation, and deferred maintenance can drain its value. Discover the se…
- The 3 Hidden Ways Your — Uncover the surprising habits and hidden household issues that are silently increasing your homeownership costs and learn how to fix them.
- The 7 Sneaky Ways Spring Damages Your Home (And How to Stop Them Now) — Uncover the hidden threats spring poses to your home, from subtle water damage to pest invasions, and get actionable steps to protect your…
This article was independently written by FixlyGuide based on the source topic.
Frequently asked questions
How do I know if my home has lead paint?+
If your home was built before 1978, assume painted surfaces may contain lead paint. For definitive proof, use a DIY lead test kit for a quick indicator, but for precise identification and levels, hire a certified lead inspector.
Is it safe to repaint over lead paint?+
Yes, if the lead paint is intact and in good condition, repainting (encapsulating) is often safer than removal, as it creates a barrier over the lead layer. However, if the old paint is peeling or chipping, it needs to be addressed with lead-safe practices first.
What kind of mask do I need for lead paint dust?+
You need a respirator rated N100 or P100. Standard dust masks or N95 masks are not sufficient to protect against microscopic lead particles.
Can I use a regular vacuum cleaner to clean up lead dust?+
Absolutely not. Regular household vacuums will churn and spread lead dust into the air, contaminating your home further. You must use a HEPA-filtered vacuum designed for lead abatement.
How do I dispose of lead-contaminated waste?+
Lead-contaminated waste (paint chips, dust, disposable PPE, cleaning cloths) must be double-bagged in heavy-duty 6-mil contractor bags, sealed, and disposed of according to your local municipality's hazardous waste regulations. Do not put it in regular trash.

Discussion
Loading comments…