
Tools & materials you'll need
Affiliate linksAs an Amazon Associate FixlyGuide earns from qualifying purchases — at no extra cost to you. Prices and availability are accurate as of publication and subject to change.
Quick Answer
Many homeowners believe simply insulating exposed pipes is enough to prevent a winter disaster. However, the most common and critical oversight is failing to address air leaks and inadequate heat distribution, particularly in concealed or less-used areas of the home. A truly effective strategy involves a multi-pronged approach: sealing drafts, ensuring proper insulation even in unheated spaces like crawl spaces and attics, opening cabinet doors to allow warm air circulation, letting faucets drip slightly, and maintaining a consistent indoor temperature of at least 55°F, even when away. These combined efforts create a protective envelope around your plumbing, drastically reducing the risk of costly frozen and burst pipes.
The Problem
Winter's chill brings with it the harrowing threat of frozen pipes, a homeowner's nightmare that can quickly escalate into a catastrophic burst pipe, leading to extensive water damage, mold growth, and expensive repairs. This isn't just an issue for homes in the frigid North; even areas that experience infrequent cold snaps are vulnerable, as structures may not be built to withstand sudden temperature drops. The root of the problem lies in water's unique property: it expands as it freezes. When water inside a pipe turns to ice, it creates immense pressure, not just at the point of freezing, but also between the ice blockage and the nearest closed faucet. This pressure can reach thousands of pounds per square inch, far exceeding what even robust plumbing can withstand, leading to ruptures in pipes, joints, or even fixtures. The economic impact is staggering, with average repair costs ranging from hundreds to tens of thousands of dollars, depending on the severity of the burst and the resulting damage. Moreover, a burst pipe often isn't discovered until warmer temperatures cause the ice to thaw, unleashing a torrent of water into your home while you're away or asleep. The stress, inconvenience, and disruption to daily life make proactive prevention an absolute necessity.
How It Works
Understanding how pipes freeze is key to preventing it. Water inside your home's pipes remains liquid until its temperature drops to 32°F (0°C). However, the air temperature doesn't need to be that low for pipes to freeze. Factors like pipe material, insulation, and exposure to cold air all play a role. Metal pipes (copper, galvanized steel) transfer heat more readily than plastic pipes (PEX, PVC), making them more susceptible to freezing if uninsulated. The primary mechanism for heat loss from pipes is conduction and convection. Heat from the water in the pipe transfers through the pipe wall to the colder surrounding air. If this heat loss is sustained and rapid, the water temperature will drop.
Pipes most at risk are those located in unheated areas such as basements, crawl spaces, attics, garages, and exterior walls. Even pipes running through interior walls can freeze if there's a significant draft or if the ambient room temperature is allowed to drop too low, especially on walls exposed directly to the outside. Air leaks around utility penetrations (like dryer vents, electrical conduits, or hose bibs) or inadequate sealing around windows and doors can funnel frigid air directly onto pipes that would otherwise be protected. When a section of water in a pipe freezes, it expands. This expansion creates an ice plug. If this plug forms in a section of pipe between a water source (like your main water line or a hot water tank) and a closed faucet, the expanding ice forces water backwards, increasing immense hydraulic pressure within the trapped segment of pipe. This pressure surge is the true cause of a burst, often occurring at points of weakness like joints, elbows, or even micro-fissures in the pipe material, not necessarily at the exact spot where the ice formed. This is why even a small section of a frozen pipe can cause extensive damage far from the initial freeze point. The faster the temperature drops and the colder it gets, the higher the risk of multiple freeze points and more catastrophic damage.
Step-by-Step Fix
1. Seal Air Leaks — Thoroughly inspect and seal any drafts or openings near pipes, especially in basements, crawl spaces, and exterior walls. Even a small crack can allow enough cold air to lower pipe temperatures significantly.
- Tools: Expanding foam sealant, caulk, caulk gun, weatherstripping.
- Method: Look for gaps around pipes where they enter the house, near windows, and electrical outlets on exterior walls. Apply caulk to smaller cracks and expanding foam for larger gaps (use low-expansion foam to prevent damage to surrounding materials).
- If this doesn't work: Consider getting a home energy audit to pinpoint hidden air leaks with specialized equipment.
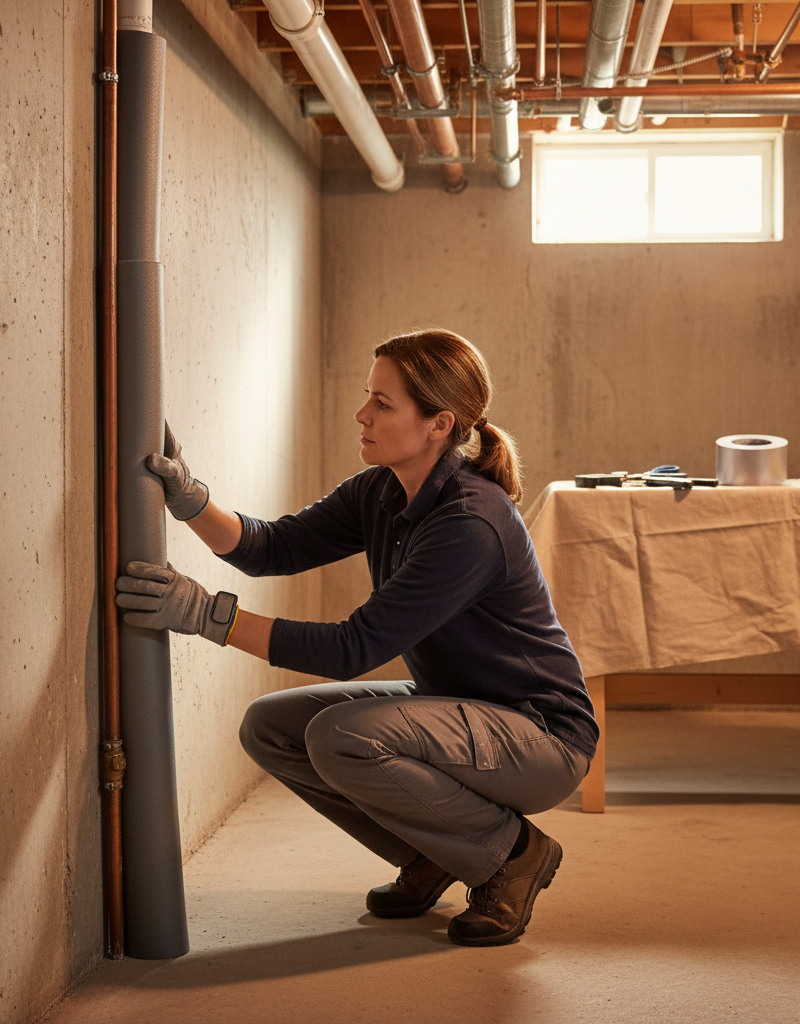
2. Insulate Exposed Pipes — Wrap pipes in unheated areas with foam pipe insulation sleeves. This is a critical step for pipes in basements, crawl spaces, attics, and garages.
- Tools: Foam pipe insulation (pre-slit), duct tape or zip ties, utility knife.
- Method: Measure and cut the insulation to fit tightly around the pipes. Ensure all sections, including elbows and valves, are covered. Secure the seams with duct tape or zip ties to prevent gaps.
- Safety Note: Wear gloves and eye protection when cutting insulation. Do not insulate hot water pipes that run through living spaces you wish to heat, as this would reduce their ability to contribute to room warmth.
3. Open Cabinet Doors — For pipes under kitchen and bathroom sinks on exterior walls, open the cabinet doors during severe cold snaps. This allows warmer room air to circulate around the pipes.
- Tools: None (just your hands!).
- Method: Simply leave cabinet doors ajar, especially overnight or when temperatures are expected to plummet. Make sure children and pets cannot access hazardous cleaning supplies during this time.
4. Let Faucets Drip — During extreme cold, allow a tiny trickle of water to flow from faucets served by pipes running through vulnerable areas. This keeps water moving, making it harder to freeze.
- Tip: A drip the size of a pencil lead is sufficient. Focus on faucets on exterior walls.
- Consideration: While effective, this does increase your water bill slightly. Weigh this against the cost of a burst pipe.
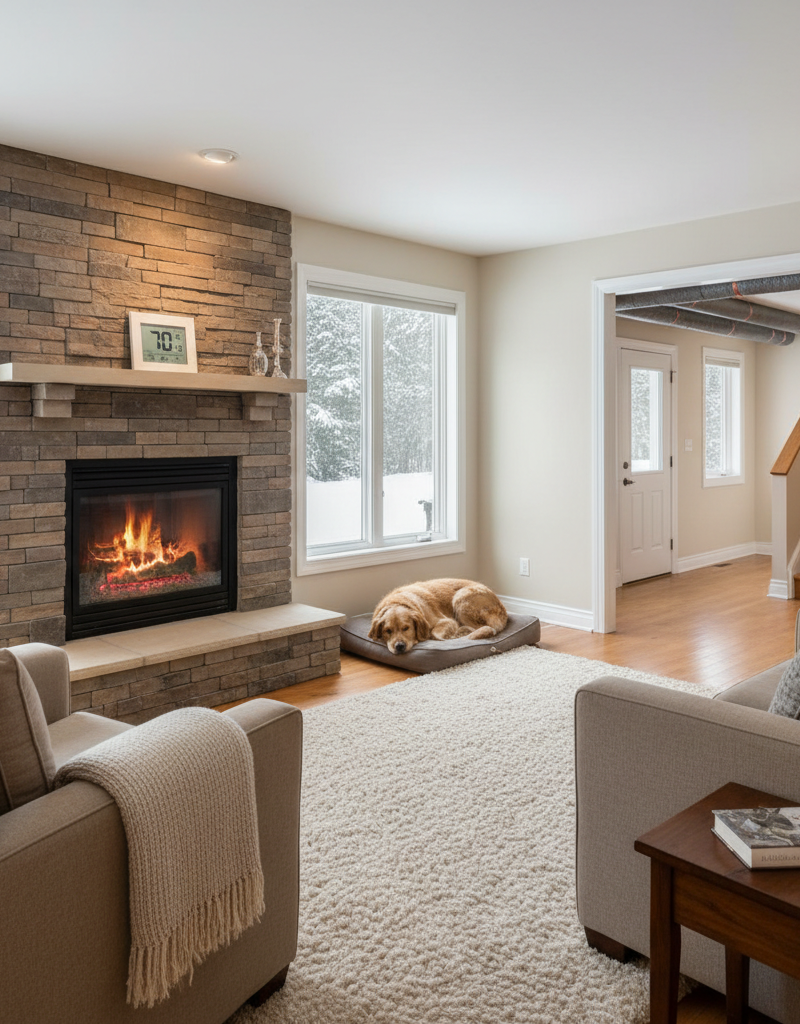
5. Maintain Indoor Temperature — Never let your home's thermostat drop below 55°F (13°C), even if you're away. Consistent ambient heat is the best defense for interior plumbing.
- Method: Use a programmable thermostat to maintain a steady temperature. If going on vacation, set it no lower than 55-60°F.
- Note: If you have an unheated garage with plumbing, consider a small space heater (ensure it's rated for continuous use and placed safely away from combustibles) or better insulation for that space.
6. Disconnect Hoses & Drain Exterior Faucets — Remove all garden hoses from outdoor spigots and ensure the spigots and their supply lines are properly drained and shut off from the inside.
- Tools: None (just your hands for disconnecting hoses), potentially a wrench for some shut-off valves.
- Method: If your home has interior shut-off valves for outdoor spigots, close them and then open the exterior spigot to drain any residual water. Leave the exterior spigot open during winter to allow expansion if any water remains.
7. Add Supplemental Heat to Cold Spots — For persistently cold areas like crawl spaces, consider installing an electric heat cable (heat tape) directly on pipes or using a safe, thermostatically controlled space heater.
- Tools: Electric heat cable (with thermostat), electrical tape, outlet (must be GFCI protected), or a safe space heater.
- Method: Follow manufacturer instructions carefully for heat cables. Ensure they are UL listed and properly installed. For space heaters, choose one with tip-over protection and automatic shut-off.
- Safety Note: Never use extension cords with space heaters. Plug directly into a wall outlet. Ensure no flammable materials are near heat sources.
8. Insulate Water Heater Supply Lines — Insulate the first 6 feet of hot and cold water pipes connected to your water heater. This not only prevents freezing but also improves energy efficiency.
- Tools: Foam pipe insulation, utility knife, duct tape.
- Method: Similar to insulating other pipes, ensure a snug fit and secure all seams. This reduces heat loss from your water heater and provides an extra layer of protection.
Common Causes
- Lack of Insulation: Pipes in unheated areas (crawl spaces, attics, basements, garages) or exterior walls without adequate insulation are highly vulnerable.
- Cold Air Leaks: Gaps and cracks in exterior walls, foundation, or around utility penetrations allow frigid outdoor air to directly expose pipes to freezing temperatures.
- Inadequate Heating: Setting thermostats too low or turning off heat entirely when away from home allows ambient temperatures to drop below freezing, putting all pipes at risk.
- Disconnected Hoses: Leaving garden hoses attached to outdoor spigots prevents the spigot from fully draining, trapping water that can freeze and burst the pipe leading to the spigot.
- Poorly Ventilated Crawl Spaces: Vents in crawl spaces and foundations, while necessary for moisture control, can allow too much cold air in during winter if not adequately closed or insulated.
- Power Outages: In prolonged power outages during cold weather, heating systems cease to function, rapidly dropping indoor temperatures and leaving pipes unprotected.
Common Mistakes
- Ignoring Inner Walls: Assuming pipes inside walls are safe. If an exterior wall has poor insulation or an air leak, even internal pipes can freeze.
- Over-Insulating Hot Water Pipes in Heated Spaces: While insulation is good, in areas you want to warm (e.g., a finished basement), hot water pipes can contribute some radiant heat. Insulating them here prevents that benefit.
- Using Unsafe Heat Sources: Relying on open flames, unsafe space heaters, or poorly installed heat tape can be fire hazards. Always use UL-listed products and follow instructions.
- Turning Off Heat When Away: Many homeowners try to save money by turning off the heat when they leave for vacation. This is a false economy; the risk of burst pipes far outweighs the minor savings.
- Forgetting Outdoor Faucets: Neglecting to disconnect hoses and properly drain outdoor spigots is a very common cause of supply line bursts.
- Not Addressing Crawl Space Vents: While not always recommended to seal completely, some crawl space vents should be seasonally covered or baffled to limit extreme cold penetration into the crawl space.
Cost & Time Breakdown
| Task | DIY Cost | Pro Cost | Time |
|---|---|---|---|
| Sealing Air Leaks | $10–$50 | $150–$400 | 1–3 hours |
| Insulating Exposed Pipes | $30–$100 | N/A (DIY usually) | 1–4 hours |
| Draining Exterior Faucets | $0 | N/A (DIY usually) | 10–20 minutes |
| Maintaining Indoor Temp. | $50–$200/mo | N/A | Ongoing |
| Installing Heat Cable (DIY) | $50–$150 | $200–$500+ (pro) | 1–2 hours |
| Emergency Burst Pipe Repair | N/A | $500–$10,000+ | Days to weeks |
Tips & Prevention
- Know Your Vulnerable Spots: Identify pipes that run along exterior walls, in unheated basements, crawl spaces, or attics. Focus your prevention efforts there.
- Seasonal Checklist: Create a yearly checklist for winterizing your plumbing, including hose disconnection, outdoor spigot drainage, and inspecting insulation.
- Smart Thermostat: Install a smart thermostat to monitor and adjust your home's temperature remotely, giving you peace of mind when you're away.
- Emergency Contact: Keep the number for a trusted plumber handy in case a pipe does freeze or burst despite your best efforts.
- Water Shut-Off: Learn where your main water shut-off valve is and how to turn it off. This knowledge is crucial if a pipe bursts to minimize water damage.
- Regular Inspections: Periodically check your pipe insulation for damage or gaps, especially before the coldest months.
When to Call a Professional
While many preventative measures are within a homeowner's DIY capabilities, certain situations warrant professional intervention. If you discover a frozen pipe that you cannot safely thaw yourself, or if you suspect a pipe has already burst but hasn't thawed yet, immediately contact a licensed plumber. Never use open flames or high-heat devices to thaw pipes, as this can cause further damage or pose a fire risk. If you have persistent issues with certain areas of your home always freezing, or if you lack confidence in properly installing insulation or heat cables, a professional can assess your home's specific vulnerabilities and recommend appropriate, safe solutions. They can also perform air sealing audits that pinpoint hidden drafts and ensure your plumbing is set up to withstand extreme cold without compromising safety or efficiency.
Related Articles
Keep troubleshooting with these hand-picked guides from FixlyGuide:
- The 7 Critical Mistakes That Lead to Burst Pipes (And How to Stop Them Now) — Learn the seven critical mistakes homeowners make that lead to burst pipes and discover actionable steps to prevent this costly winter disa…
- The #1 Mistake Homeowners Make to Burst Pipes (and 5 Ways to Prevent It) — Learn the critical mistake most homeowners make when trying to prevent frozen pipes and discover five actionable strategies to protect your…
- The #1 Mistake Homeowners Make When Protecting Pipes From Freezing — Preventing frozen pipes is crucial for winter home maintenance. Learn the key mistake homeowners make and how to properly prepare your plum…
- The 5-Minute Trick to Restore Your Kitchen Sink Sprayer's Lost Pressure — Restore your kitchen sink sprayer's low pressure with a quick, simple trick that often takes less than five minutes and requires no special…
- The 5-Minute Trick to Stop a Dripping Single-Handle Faucet (No Plumber Needed) — A persistent drip from your single-handle faucet is usually caused by a worn-out cartridge, a repair you can typically complete yourself in…
- The #1 Mistake Homeowners Make After Finding Missing Shingles (And How to Fix It Right) — Discover the crucial steps to take after a storm rips shingles from your roof, ensuring a proper, lasting repair and preventing costly futu…
Frequently asked questions
How cold does it have to be for pipes to freeze?+
Pipes can begin to freeze when outdoor temperatures drop below 32°F (0°C). However, sustained exposure to cold, poor insulation, and wind chill factors can cause pipes to freeze even when ambient air temperatures are slightly above freezing, especially if they are in unheated areas like crawl spaces or exterior walls.
Should I let my faucet drip hot or cold water to prevent freezing?+
It is generally recommended to let both hot and cold water drip from faucets that are most at risk, as both supply lines can freeze. A slow, steady drip of cold water is usually sufficient and costs less than dripping hot water, but if severe cold is prolonged, a small drip from both can offer added protection.
Can PEX pipes freeze and burst like copper pipes?+
While PEX (cross-linked polyethylene) pipes are more flexible and somewhat more resistant to bursting from freezing than rigid copper or galvanized steel pipes, they are not immune. PEX can still freeze, leading to blockages, and under extreme pressure from ice expansion, even PEX can burst. The primary advantage of PEX is its ability to expand and contract more without necessarily rupturing, but it's still crucial to prevent freezing.

Discussion
Loading comments…