
Tools & materials you'll need
Affiliate linksAs an Amazon Associate FixlyGuide earns from qualifying purchases — at no extra cost to you. Prices and availability are accurate as of publication and subject to change.
Quick Answer
Installing a smart thermostat can significantly upgrade your home's climate control, offering features like remote access, scheduling, and energy usage reports. The core of a successful DIY installation hinges on understanding your current thermostat's wiring, particularly identifying if you have a C-wire (common wire). This wire provides continuous 24V power, essential for most smart thermostats. If you lack a C-wire, solutions exist, but they add complexity. The process involves safely powering down your HVAC system, meticulously labeling wires, mounting the new thermostat's base plate, connecting wires, and finally, setting up the device via an accompanying smartphone app.
The Problem
Many homeowners want the convenience and energy savings of a smart thermostat but are intimidated by the installation process. The primary challenge often lies in deciphering existing HVAC wiring and ensuring compatibility with a new smart device. Common issues include not having a C-wire for consistent power, mislabeling wires during removal, or incorrectly connecting wires to the new thermostat's terminals. This can lead to the smart thermostat not powering on, incorrect heating or cooling operation, or even damage to the HVAC system if not handled carefully. This guide will walk you through the essential steps to overcome these hurdles and successfully install your smart thermostat.
How It Works
Traditional thermostats act as simple switches, completing a 24-volt low-voltage circuit to tell your HVAC system when to turn on the heating, cooling, or fan. Here’s a breakdown of common thermostat wires and their functions:
- R (Red): This is the 24-volt power wire. It's the 'hot' side of the transformer. You might have an
Rc(Red Cooling) andRh(Red Heating) if you have two separate transformers for heating and cooling, or a singleRwire if they share one. - W (White): This wire controls the heating. When the thermostat calls for heat, it completes the circuit with the R wire to activate the furnace.
- Y (Yellow): This wire controls the cooling. When the thermostat calls for cool, it completes the circuit with the R wire to activate the air conditioner's compressor.
- G (Green): This wire controls the fan. Completing this circuit with the R wire turns on the system's fan, even without heating or cooling.
- C (Common, Blue or Black): This is the often-missing crucial wire for smart thermostats. It provides a continuous common return path to the 24-volt transformer, delivering constant power to the thermostat. Without it, many smart thermostats cannot maintain their Wi-Fi connection or power advanced features, often relying on internal batteries that drain quickly.
- O/B (Orange/Blue): These wires are used in heat pump systems to control the reversing valve, switching between heating and cooling modes.
- Aux/E (Auxiliary/Emergency Heat): Used in heat pump systems for auxiliary or emergency heating coils.
Smart thermostats, unlike their traditional counterparts, require a constant power source to operate their internal electronics, Wi-Fi radios, and displays. This is where the C-wire becomes critical. Without a continuous power feed from the C-wire, some smart thermostats attempt to 'power steal' from the heating/cooling wires, which can lead to issues like 'ghost cycling' (your HVAC system turning on briefly when it shouldn't) or rapid battery depletion. Knowing which wires you have at your existing thermostat is the first and most critical step in determining smart thermostat compatibility.
Step-by-Step Fix
Before you begin, gather all necessary tools and ensure you have a clear workspace. Always prioritize safety.
-
Safety First: Turn Off Power — Crucial Safety Step: Go to your electrical service panel (breaker box) and locate the breaker that controls your HVAC system (furnace, air handler, or AC unit). Flip it to the OFF position. This prevents electrical shock and protects your HVAC system. Double-check that all power is off by trying to adjust your old thermostat – it shouldn't light up or activate the HVAC system.
- If you're unsure which breaker controls your HVAC, turn off the main breaker to your home, but be prepared for disruption.
-
Document Existing Wiring — Take a clear photo of your existing thermostat's wiring BEFORE you disconnect anything. This photo is your blueprint if you get confused. Note the terminal labels (
R, W, Y, G, C, etc.) and the color of the wire connected to each. This step is invaluable for troubleshooting.- Use your phone's camera for a high-resolution image.
-
Label and Disconnect Wires — Carefully remove your old thermostat's cover. Depending on the model, you might need to pry it off or unscrew it. Use the provided labels in your new smart thermostat kit (or masking tape and a pen) to label each wire according to the terminal it's connected to. For example, the wire in the 'R' terminal gets an 'R' label. After labeling, use a small screwdriver to loosen the terminal screws and gently pull each wire out.
- If your wires are stiff, be careful not to bend or damage them. If a wire retracts into the wall, you may need needle-nose pliers to retrieve it.
-
Remove the Old Thermostat Base — Unscrew the old thermostat's mounting plate from the wall. Pull the plate away, carefully feeding the labeled wires through the opening in the wall.
- Inspect the wall for any large holes or damage that might affect the new thermostat's mounting.
-
Check for C-Wire (Crucial Step) — Look closely at the bundle of wires coming out of your wall. Even if your old thermostat didn't use a C-wire, one might be tucked back in the wall, unused. It's often blue or black. If you find an unused wire, gently pull it out and verify it's connected to the 'C' terminal at your furnace or air handler control board. This is your best-case scenario for smart thermostat power.
- If no C-wire is present, consult your smart thermostat's instructions for alternative power options, such as a power extender kit (PEK) or a dedicated 24V transformer. Some thermostats, like Ecobee, include a PEK. Nest thermostats sometimes operate without a C-wire by 'power stealing,' but this can lead to HVAC issues over time.
-
Mount the New Thermostat Base — Feed your labeled wires through the center opening of the new smart thermostat's mounting plate. Position the plate on the wall, ensuring it's level (use a small level if your plate doesn't have one built-in), and screw it into the wall using the provided hardware. Avoid overtightening.
- If the new mounting holes don't align with the old ones, use a drill to create new pilot holes before screwing.
-
Connect the Wires — Referring to your photo and the labels, connect each wire to the corresponding terminal on the new smart thermostat's base plate. Most smart thermostats have clear terminal labels. Push the wire into the terminal and tighten the screw or push down the lever to secure it. Give each wire a gentle tug to ensure it's firmly seated.
- If you have
RcandRhwires but only oneRterminal on the new thermostat, follow the smart thermostat's instructions for combining them (often involves removing a jumper wire).
- If you have
-
Attach the Thermostat Head — Once all wires are securely connected, carefully snap the smart thermostat's display unit onto its mounting plate. Ensure it clicks into place firmly.
-
Restore Power and Test — Return to your electrical service panel and flip the HVAC breaker back to the ON position. The smart thermostat should power up. Follow the on-screen prompts or the smart thermostat's app to complete the initial setup, including connecting to your home Wi-Fi network and configuring your heating/cooling preferences. Test both heating and cooling functions to ensure they activate your HVAC system correctly.
- If the thermostat doesn't power on, immediately turn off the HVAC breaker and re-check all connections, especially the C-wire. Consult your thermostat's manual for troubleshooting specific error codes.
Common Causes
The drive for smart thermostat installation is typically motivated by several factors:
- Energy Savings: Smart thermostats learn your habits and adjust temperatures automatically, leading to significant reductions in heating and cooling costs. Features like geo-fencing (adjusting temperature based on your proximity) and detailed energy reports highlight inefficient usage.
- Convenience & Comfort: Remote control via smartphone, voice assistant integration, and intelligent scheduling offer unparalleled convenience. You can adjust the temperature before you arrive home or while you're away, ensuring comfort upon entry and preventing frozen pipes in winter.
- Advanced Features: Beyond basic temperature control, smart thermostats often include features like humidity sensing, air filter reminders, furnace diagnostics, and integrations with other smart home devices like sensors and lighting systems.
- Outdated Existing Thermostat: Many older thermostats lack programmability or accurate temperature sensing, leading to discomfort and wasted energy. Upgrading provides a modern interface and precise control.
- Home Automation Integration: For homeowners building a comprehensive smart home ecosystem, a smart thermostat is a cornerstone, seamlessly interacting with other devices for a more cohesive and automated living experience.
Common Mistakes
Avoiding these common pitfalls will make your smart thermostat installation smoother:
- Forgetting to Kill the Power: Failing to shut off power at the breaker can result in electrical shock or blowing the low-voltage fuse on your furnace control board, requiring a professional repair.
- Not Documenting Old Wiring: Skipping the photo and labeling step often leads to confusion when connecting wires, causing wrong connections or even short circuits.
- Ignoring C-Wire Issues: Attempting to install a C-wire-dependent smart thermostat without one, or without a proper power extender kit, can lead to erratic behavior,
short cyclingof your HVAC, or premature thermostat failure. - Incorrectly Seating Wires: Wires that are not firmly pushed into terminals or screws not tightened enough can result in intermittent power to the thermostat or unreliable control signals to the HVAC system.
- Overtightening Screws: This can strip the screw heads or damage the delicate terminal blocks on the thermostat's base plate.
- Relying Solely on Wire Color: Wire colors aren't universally standardized. Always go by the terminal labels (
R, W, Y, G, C,etc.) rather than just the color, as colors can vary between HVAC systems.
Cost & Time Breakdown
| Task | DIY Cost | Pro Cost | Time |
|---|---|---|---|
| Smart Thermostat Purchase | $100–$250 | Included in service | N/A |
| Install New Thermostat | $0 | $150–$300 | 30–60 minutes |
| C-Wire Power Extender Kit (if needed) | $20–$50 | Included in service | Add 15–30 minutes |
| New 24V Transformer (if needed) | $25–$40 | $50–$75 (part only) | Add 30–60 minutes |
| Troubleshooting & Setup | $0 | $75–$150/hour | 15–30 minutes |
Tips & Prevention
- Verify Compatibility Before Purchase: Use the compatibility checker tools often found on smart thermostat manufacturer websites (e.g., Nest, Ecobee, Honeywell Home). Input your existing wiring configuration to ensure the model you choose will work with your system.
- Understand Your HVAC System: Take a moment to understand if you have a conventional system, heat pump, or multi-stage system (e.g.,
'W1'and'W2'for two stages of heating). This knowledge is crucial for proper wiring and setup. - Download the App First: Many smart thermostat apps offer guided installation steps even before you start physical wiring. Familiarize yourself with the app's interface and requirements.
- Keep Your Old Thermostat: Don't discard your old thermostat immediately. It can serve as a backup if you encounter issues with the smart thermostat or need to return it.
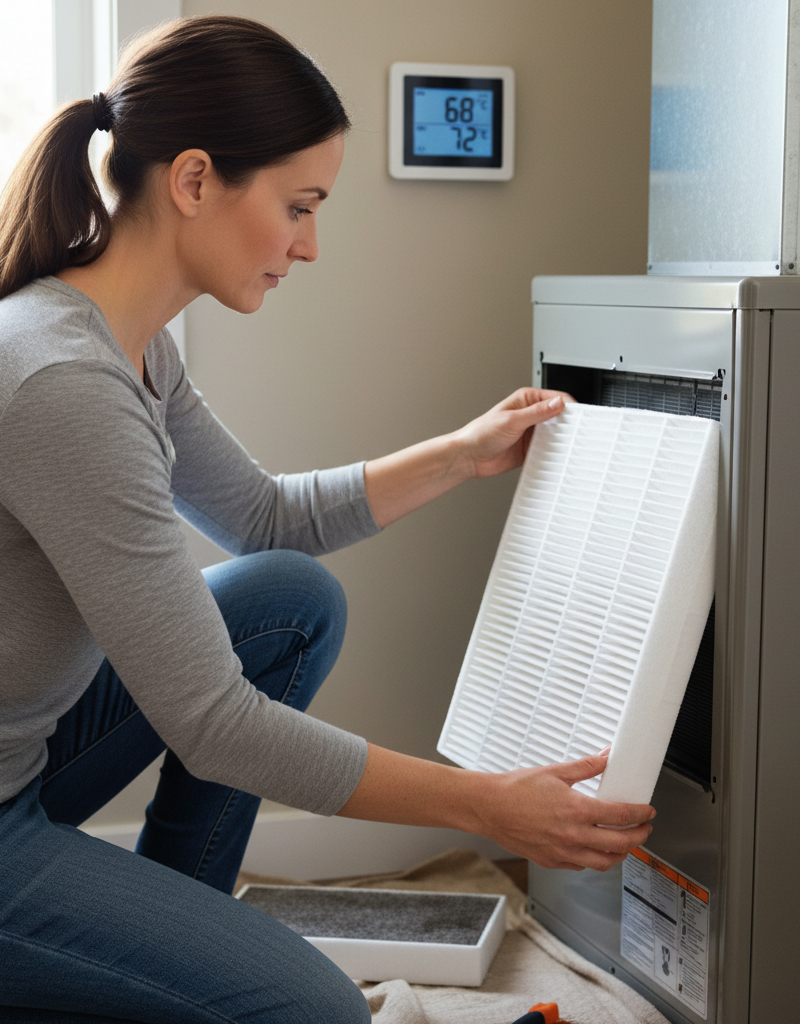
- Regularly Clean Filters: While not directly related to thermostat installation, a clean air filter ensures your HVAC system runs efficiently, complementing the energy-saving benefits of your new smart thermostat. Aim to check it monthly and replace it every 1-3 months.
- Monitor Energy Reports: Take advantage of your smart thermostat's energy usage reports. They can help you identify patterns, optimize schedules, and further reduce your energy consumption.
When to Call a Professional
While installing a smart thermostat is a common DIY project, there are clear instances when calling a licensed HVAC professional is the safest and most effective course of action. If, after removing your old thermostat, you discover no C-wire and are unwilling or uncomfortable with installing a power extender kit or a separate 24V transformer, a pro can run the necessary wiring for a reliable power connection. If you have a complex HVAC system, such as a multi-stage heat pump with several auxiliary heat wires (e.g., O/B, Aux, E), or if you have a zone control system, incorrect wiring can lead to system damage or improper operation. Moreover, if you turn the power back on and your smart thermostat doesn't light up, your HVAC system doesn't respond, or you hear unusual noises from your furnace or AC, immediately shut off the power and contact a professional. An HVAC technician can diagnose wiring issues, ensure proper system configuration, and prevent costly damage that might result from DIY missteps. They can also optimize your new smart thermostat's settings for peak performance and energy efficiency.
Related Articles
Keep troubleshooting with these hand-picked guides from FixlyGuide:
- The #1 Mistake Homeowners Make Installing a Smart Thermostat (and How to Avoid It) — Avoid a common wiring mistake that can fry your smart thermostat or HVAC system, by ensuring proper power and compatibility.
- The #1 Mistake Homeowners Make Installing a Smart Thermostat (And How to Avoid It) — Avoid the most common smart thermostat installation pitfall and ensure your new device powers on correctly with this essential guide.
- The #1 Mistake Homeowners Make Installing a Smart Thermostat (and How to Fix It) — Avoid the most common pitfall when installing a smart thermostat yourself and ensure a smooth, energy-efficient setup.
- The Secret Reason Your Thermostat Lies (and 5 Fixes That Actually Work) — If your thermostat isn't reaching its set temperature, understanding the underlying cause is key to a comfortable home and lower energy bil…
- The $0 Trick to Revive Your Frozen AC Fan (Before You Call a Pro) — Before you spend money on an AC repair, try this simple, no-cost trick to get your condenser fan spinning again and cool your home.
- The #1 Mistake Killing Your Lawn's Fight Against Dandelions (It's Not What You Think) — Stop dandelions from taking over your lawn by understanding the crucial timing and methods that most homeowners overlook, leading to endles…
Get the print-ready PDF of this guide
A clean, ad-free, printable version you can keep on your phone or pin to the workshop wall. Free with a FixlyGuide account.
- Print-optimized layout
- Tools, materials & every step included
- Saved to your account
Frequently asked questions
Do I need a C-wire for a smart thermostat?+
Most smart thermostats require a C-wire (common wire) to provide continuous power for their advanced features and Wi-Fi connectivity. Some models can operate without one using power stealing or battery power, but this can lead to performance issues or frequent battery changes. A power extender kit (PEK) can simulate a C-wire if one isn't present.
What if I don't have a C-wire?+
If you don't have a C-wire, check if one is tucked into the wall behind your old thermostat. If not, solutions include using a power extender kit (PEK) often included with smart thermostats like Ecobee, or installing a dedicated 24V transformer. Nest thermostats are known for sometimes working without a C-wire, but a proper power connection is always recommended for optimal performance.
How long does it take to install a smart thermostat?+
A typical smart thermostat installation for a homeowner with basic DIY skills usually takes about 30-60 minutes, assuming a C-wire is present. If you need to install a power extender kit or troubleshoot wiring, it might take an additional 15-30 minutes.

Discussion
Loading comments…