
Tools & materials you'll need
Affiliate links- AmazonScrewdriver setPhillips and flathead for thermostat removal and wiring terminal screws
- AmazonNeedle-nose pliersFor gently bending or stripping wires
- AmazonWire stripperIf a C-wire adapter is used or if wires need re-stripping
- AmazonVoltage multimeter (optional but recommended)To confirm 24V AC power at terminals
- AmazonPencilFor marking wires
- AmazonSmartphone or cameraTo photograph existing wiring
As an Amazon Associate FixlyGuide earns from qualifying purchases — at no extra cost to you. Prices and availability are accurate as of publication and subject to change.
How it works
Your home's heating, ventilation, and air conditioning (HVAC) system operates on low-voltage 24-volt alternating current (24V AC), supplied by a transformer located inside your furnace or air handler. The thermostat acts as the system's command center, using a series of switches to send power to different components. This is managed through a bundle of color-coded wires.
The core of this circuit involves the R wire (Red), which provides the 24V "hot" power from the transformer, and the C wire (Common), which serves as the return path to complete the electrical circuit. Think of the R wire as the source of power and the C wire as the neutral or ground, allowing for a continuous, uninterrupted flow of electricity.
When a traditional, non-smart thermostat calls for heat, it closes a switch connecting the R wire to the W wire (White), sending a signal to activate the furnace. Smart thermostats, however, require constant power to run their own internal electronics, including Wi-Fi radios, backlit touchscreens, and processors. They cannot rely on the intermittent power drawn only when heating or cooling is active. They need a steady 24V AC supply, which is only possible with a dedicated R and C wire connection. This provides a permanent, closed loop that powers the thermostat itself, independent of the switching operations for heating (W), cooling (Y), or the fan (G). The "C-wire mistake" stems from installing a device that needs this constant power onto a system wired only for intermittent power.
Step-by-Step Fix
Follow these steps methodically to diagnose your C-wire situation and execute a safe, correct installation. Taking a picture of your original wiring is the single most important action you can take.
-
Safety First: De-energize the HVAC System — Before touching any wires, you must completely cut power to your entire HVAC system. Go to your main electrical panel and turn off the breaker labeled "Furnace," "Air Handler," or "HVAC." Many systems also have a dedicated service switch, which looks like a light switch, located on or near the furnace/air handler unit; turn this off as well.
- Safety Check: To confirm power is off, try to raise the temperature on your old thermostat to call for heat. If the system remains silent and does not start, the power is successfully cut.
-
Document Your Existing Wiring — Gently pull the faceplate off your old thermostat. The baseplate with the wire connections will be revealed. Do not disconnect any wires yet. Take a clear, well-lit photograph of the baseplate, ensuring the wire colors and the lettered terminals they connect to are clearly visible. This photo is your most critical reference point.
-
Assess the "C" Wire Situation — Examine the terminals on your old thermostat's baseplate. Look for a terminal labeled "C."
- If a wire is connected to the "C" terminal: You have a C-wire. Your installation will be straightforward.
- If the "C" terminal is empty, but an unused wire is tucked into the wall behind the thermostat: This is an excellent scenario. You likely have a spare wire you can use as a C-wire.
- If there is no "C" terminal and/or no spare wires visible: You do not have a dedicated C-wire and will need to use a C-wire adapter, also known as a Power Extender Kit (PEK). Most major smart thermostat brands include one in the box.
-
Disconnect the Old Thermostat — With your photo as a guide, use a small screwdriver to loosen the terminal screws and carefully unhook each wire. As you disconnect each wire, label it with the corresponding letter from the terminal it was connected to using the small stickers often provided with your new thermostat. Once all wires are labeled and disconnected, unscrew the old baseplate from the wall.
-
Option A: Install with a Dedicated C-Wire — If you had a wire connected to the "C" terminal in step 3, your job is simple. Gently feed the labeled wires through the new smart thermostat's baseplate, mount the baseplate to the wall, and connect each wire to the terminal with the matching letter (R to R, W to W, C to C, etc.). Then, skip to Step 8.
-
Option B: Repurpose a Spare Wire — If you found an unused wire tucked in the wall, you now need to connect its other end. Go to your furnace/air handler (power is still off). Remove the service panel to access the main control board. You will see a bundle of wires from the thermostat connecting to a terminal strip. Locate the same unused wire from your thermostat (e.g., the blue one). Find the terminal labeled "C" or "COM" on the control board. Loosen the screw, insert the bare end of the spare wire, and tighten the screw securely.
- Verification (Recommended): After making the connection at the furnace but before connecting the new thermostat, go back to the thermostat location. Use a multimeter set to AC voltage (V~) to measure the voltage between the
Rwire and your newly designatedCwire. You should get a reading between 22V and 28V AC. This confirms your circuit is correct.
- Verification (Recommended): After making the connection at the furnace but before connecting the new thermostat, go back to the thermostat location. Use a multimeter set to AC voltage (V~) to measure the voltage between the
-
Option C: Install a C-Wire Adapter (PEK) — If you have no spare wire, use the adapter kit. The process involves rewiring at both the thermostat and the furnace.
- At the thermostat: Your adapter will have instructions to re-label your wires. For example, an Ecobee PEK requires you to take your
Ywire and insert it into the adapter'sYport, then take the adapter's newYwire and connect it to your thermostat'sYterminal. Follow the manufacturer's specific diagram meticulously. You will effectively be sending signals for multiple components through a single wire. - At the furnace control board: Disconnect the R, Y, W, and G wires from the control board terminals. Connect those four wires to the matching wires on the furnace-side of the adapter. Then, take the five wires coming out of the adapter and connect them to the corresponding R, Y, W, G, and C terminals on the control board. This adapter essentially "creates" the C-wire connection while cleverly multiplexing the other signals.
- At the thermostat: Your adapter will have instructions to re-label your wires. For example, an Ecobee PEK requires you to take your
-
Mount and Connect the New Thermostat — Securely mount the new baseplate to the wall, ensuring it is level. Connect each labeled wire to its corresponding terminal on the new baseplate, ensuring about 3/8-inch of bare copper is seated firmly in each connector. Push any excess wire back into the wall cavity for a clean fit.
-
Attach the Faceplate and Restore Power — Click the new smart thermostat faceplate onto its baseplate. Go back to your furnace/air handler and turn on the service switch, then turn on the breaker at the main electrical panel.
-
Complete On-Screen Setup — The smart thermostat should power on within a minute. Follow the on-screen prompts to connect to your Wi-Fi network, configure your HVAC system type (e.g., Gas/Forced Air, Heat Pump), and test each function (Heat, Cool, Fan). Run a test cycle for each to confirm the system responds correctly.
Common mistakes
Avoiding these common errors is just as important as following the steps correctly. Rushing the job often leads to blown fuses or a non-functional system.
- Forgetting to Kill the Power. This is the most dangerous mistake. Even low-voltage 24V AC can create a short. If the
R(hot) andC(common) wires touch, you will almost certainly blow the 3A or 5A automotive-style fuse on your furnace's control board. Replacing this fuse is an extra, frustrating step that is easily avoided. - Relying on Wire Color Alone. While industry standards exist (Yellow for cooling, White for heat, etc.), they are not always followed. The only thing that matters is which terminal a wire was connected to on the old thermostat. Your photo is the source of truth, not a color chart found online. Miswiring can cause your heat to run when you call for AC, or vice versa.
- "Stealing" the Fan Wire (G) as a C-Wire. Some online guides suggest a "shortcut" where you move the G-wire to the C-terminal at both the thermostat and furnace. While this will power the thermostat, it eliminates your ability to run the fan independently ("Fan On" mode). This compromises a key function of your HVAC system and is not a proper solution. Always use a spare wire or an adapter kit.
- Ignoring the Furnace Door Safety Switch. After working on the control board, you must put the service panel/door back on securely. Most furnaces have a plunger-style safety switch that cuts all power to the unit when the door is removed. If you restore breaker power but the thermostat doesn't turn on, a loose furnace door is a likely culprit.
- Incorrectly Identifying Your System Type. During setup, the thermostat will ask if you have a conventional furnace, a heat pump, a dual-fuel system, etc. If you have a heat pump and configure it as a conventional furnace, your heating and cooling commands will be reversed or will not work at all. Refer to documentation for your outdoor unit or furnace if you are unsure.
- Creating a Loose Connection. Ensure at least 3/8-inch of bare copper wire is inserted into each terminal and that the terminal screw or lever is tight. A loose wire can cause intermittent power loss, leading to the thermostat rebooting, dropping Wi-Fi, or the HVAC system short-cycling.
Cost & time breakdown
The cost and time commitment vary significantly depending on your home's existing wiring. The thermostat cost itself (typically $100-$250) is not included below.
| Task | DIY Cost | Pro Cost (Labor Only) | Time |
|---|---|---|---|
| Install with Existing C-Wire | $0 | $100 - $175 | 30 - 60 minutes |
| Install by Repurposing a Spare Wire | $0 - $15 (for wire strippers) | $125 - $200 | 1 - 2 hours |
| Install with a C-Wire Adapter Kit | $0 - $30 (if not included) | $150 - $225 | 1.5 - 3 hours |
| Professional Runs a New Wire Bundle | Not a DIY task | $175 - $400+ | 2 - 4 hours |
| Pro Diagnosis & Fuse Replacement | $10 (for a fuse) | $75 - $150 | 1 hour |
When to call a pro
While many installations are DIY-friendly, certain scenarios warrant professional expertise to avoid damage to your expensive HVAC equipment.
Call a licensed HVAC technician if you encounter any of the following:
- Complex System Wiring: If your old thermostat uses terminals labeled L, K, S, U, O/B, E, AUX, W2, or Y2, you likely have a multi-stage, heat pump, dual-fuel, or proprietary communicating system. These require specific configuration that is easy to get wrong, potentially damaging compressors or heat strips.
- No Clearly Labeled Control Board: You open the furnace panel and find a "rat's nest" of unlabeled wires connected with wire nuts, or a control board with no clear "R, W, G, Y, C" terminal strip. An expert can trace the wiring from the transformer and components to identify the correct connections.
- Extreme Discomfort with Wiring: If you are not 100% confident in turning off breakers and handling low-voltage wiring, it is safer to hire a professional. The risk of blowing a fuse or damaging a $1,000+ control board is not worth the savings on a service call.
- Post-Installation Issues: If after your best efforts the thermostat won't power on, or it causes the HVAC system to behave erratically (e.g., clicking, short-cycling, buzzing), a pro is needed to diagnose the underlying issue, which could be a faulty transformer, a wiring short, or an incompatible component.
Prevention & maintenance
A properly installed smart thermostat requires minimal maintenance, but ensuring the health of the surrounding system is key to its longevity and performance.
- Perform Regular System Maintenance: Have a qualified HVAC technician perform a full system check-up annually. They will clean components, check refrigerant levels, and verify that the transformer's voltage output is stable and within the ~24V AC range required by your thermostat.
- Keep Firmware Updated: Ensure your thermostat remains connected to Wi-Fi. Manufacturers regularly push out firmware updates that patch security flaws, improve energy-saving algorithms, and fix compatibility bugs.
- Know Your Fuse: Locate the low-voltage fuse on your HVAC control board (usually a purple 3A or orange 5A automotive-style spade fuse). Keep a spare on hand. If your thermostat ever goes dead unexpectedly, a blown fuse from a momentary short is the most common cause.
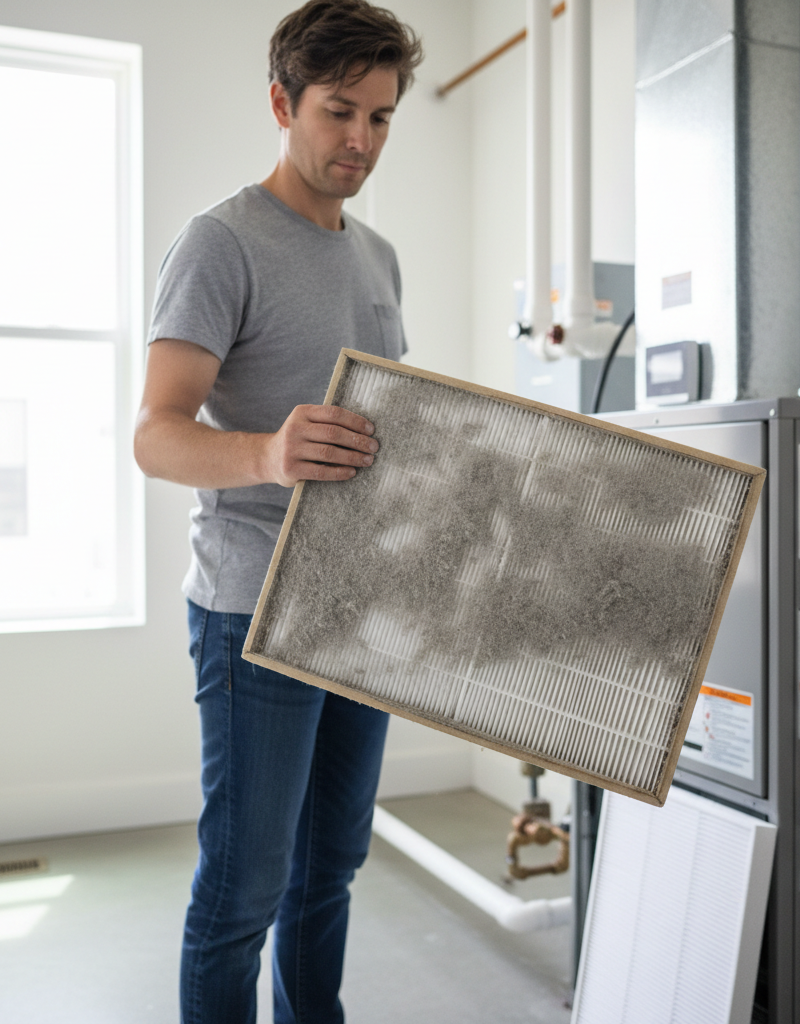
- Monitor System Performance: Use your thermostat's app to monitor energy usage and runtimes. A sudden, unexplained spike in runtime could indicate an issue with your HVAC equipment (like low refrigerant or a clogged filter) that the thermostat is trying to overcome.
- Clean Vents and Sensors: Gently wipe the thermostat's exterior with a dry microfiber cloth every few months. If it has visible vents for its internal temperature sensor, ensure they are free of dust buildup, which can cause inaccurate temperature readings.
Related Articles
Keep troubleshooting with these hand-picked guides from FixlyGuide:
- The #1 Mistake Homeowners Make Installing a Smart Thermostat (and How to Fix It) — Avoid the most common pitfall when installing a smart thermostat yourself and ensure a smooth, energy-efficient setup.
- The #1 Mistake Homeowners Make When Their AC Won't Turn On (And the Easy Fix) — Learn the most common reason your air conditioner won't turn on and how to diagnose and fix it with simple steps.
- AC Blowing Warm Air? Easy Fixes for Common AC Problems — Discover the most common reasons your AC is blowing warm air and learn simple, actionable steps to troubleshoot and fix the issue you
Get the print-ready PDF of this guide
A clean, ad-free, printable version you can keep on your phone or pin to the workshop wall. Free with a FixlyGuide account.
- Print-optimized layout
- Tools, materials & every step included
- Saved to your account
Frequently asked questions
What is a C-wire and why is it important for a smart thermostat?+
A C-wire (common wire) provides continuous 24V AC power to your thermostat, which is crucial for smart thermostats that require consistent power for features like Wi-Fi and backlit displays. Without it, the thermostat may experience power issues or battery drain.
My old thermostat didn't use a C-wire. Can I still install a smart thermostat?+
Yes, but you will likely need to find an unused wire in your thermostat cable to re-purpose as a C-wire, or install a C-wire adapter/power extender kit. Your smart thermostat will not function reliably without a continuous power source.
How can I tell if my HVAC system has a C-wire?+
First, check your existing thermostat wiring for a wire connected to a terminal labeled 'C'. If not present there, check your HVAC control panel connections. Look for an unused wire tucked into the wall behind your thermostat, or a free terminal labeled 'C' on the furnace control board.
Can I use a smart thermostat with only two wires?+
Typically, no. Smart thermostats require continuous power, usually supplied by at least three wires (R, W/Y, and C). Some models might work with a power stealing method for a short period, but this is not recommended for long-term reliability and can damage your HVAC system. A C-wire adapter is usually necessary.

Discussion
Loading comments…