
Tools & materials you'll need
Affiliate linksAs an Amazon Associate FixlyGuide earns from qualifying purchases — at no extra cost to you. Prices and availability are accurate as of publication and subject to change.
Quick Answer
If your stand mixer is leaking a yellowish, greasy oil, it's typically because the food-grade grease lubricating its gears has separated due to age, heat, or long periods of inactivity. This is a common and fixable problem, not a fatal flaw. For most stand mixers, especially KitchenAid models, the solution is to open the housing, thoroughly clean out the old separated grease, and apply a fresh batch of food-grade gear grease, a repair that can add years to its life.
The Problem
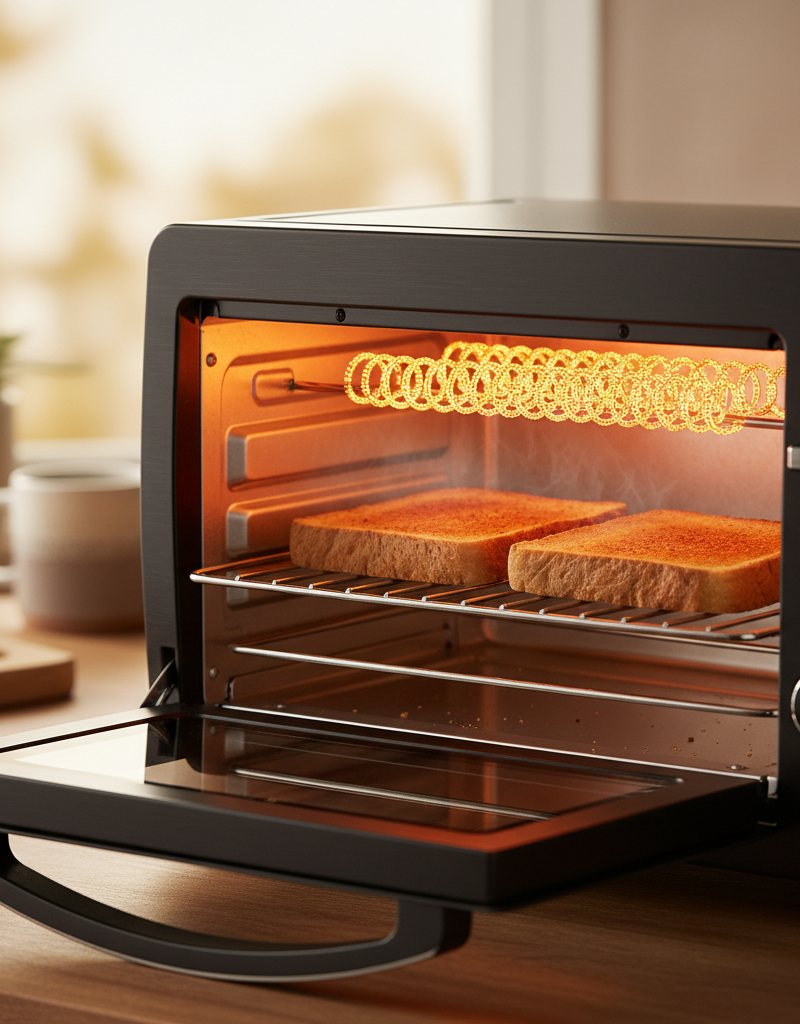
You see it one day, a small, amber-colored puddle on the counter beneath your trusty stand mixer. Or maybe it’s a greasy drip trailing down from the silver band around the planetary head where the beater attaches. The immediate reaction is often panic: Is it broken? Is that oil toxic? Did I just ruin a $400 appliance?
That greasy substance is, indeed, oil. It’s a sign that the essential lubricant inside your mixer’s gearbox is beginning to break down. This can happen to any brand, but it’s a widely documented phenomenon in the ever-popular KitchenAid line of mixers. The good news is that in a vast majority of cases, this is not a death sentence for your mixer. It is, however, a clear signal that your machine is due for some critical, but entirely manageable, internal maintenance. Ignoring it can lead to bigger problems, but tackling it head-on can give your mixer a new lease on life.
How It Works
Inside the top housing of your stand mixer is a surprisingly tough, all-metal gearbox. A powerful electric motor turns a worm gear, which in turn drives a series of planetary gears that spin the beater, whisk, or dough hook. This gear-on-gear action generates significant friction and heat, and to function smoothly for years, it needs constant lubrication. This is where the grease comes in.
Manufacturers pack this gearbox with a thick, heavy-duty, food-grade grease. It’s typically an "NLGI #2" grade grease, which has a consistency similar to peanut butter. The "food-grade" part (specifically an NSF H1 rating) is crucial—it means that if a tiny amount were to accidentally come into contact with your food, it wouldn’t be harmful. This grease consists of two parts: a thickener (often a soap-like substance) and a base oil (like mineral oil). The thickener acts like a sponge, holding the lubricating oil in suspension and releasing it onto the gears as needed.
Over time, three things cause this system to fail. First, heat from the motor and gear friction can slowly cook the grease, accelerating oil separation. Second, long periods of inactivity are actually bad for the grease; it sits still, and gravity causes the thinner oil to separate and settle. Third, age itself breaks down the thickener. When the oil separates, it’s thin enough to find its way through minuscule seams in the gearbox and gaskets, dripping out of the mixer. What’s left behind is a thick, waxy, soap-like substance that is a poor lubricant, leading to increased gear wear and heat.
Step-by-Step Fix: A Complete Re-Greasing
This guide focuses on the popular KitchenAid tilt-head and bowl-lift models, but the principles apply to many other brands. The goal is not just to add new grease, but to completely remove the old, failed product first.
1. Gather Your Supplies & Safety Gear
- The Right Grease: You need about 4-6 oz of NLGI #2 food-grade, NSF H1 certified grease. Brands like Benalene or Impresa are readily available online. Do NOT use automotive grease, lithium grease, or petroleum jelly.
- Tools: Phillips and flathead screwdrivers, a putty knife or plastic scraper, a small punch or nail set (for some models).
- Cleaning: A roll of paper towels, a small bowl for the old grease, and a food-safe degreaser or isopropyl alcohol.
- Safety: Lay down a towel to protect your work surface. And most importantly:
SAFETY: UNPLUG YOUR MIXER. Double-check that it is unplugged from the wall outlet before you begin.
2. Prepare for Surgery Lay the mixer on its side on a soft towel. Have your tools, new grease, and disposal bowl ready. This is a messy job; you might consider wearing nitrile or latex gloves.
3. Remove Trim and External Parts
- Planetary Ring: On most models, the shiny silver ring around the beater shaft (the "beauty ring" or drip ring) needs to come off. It's usually held by friction or a small set screw. Gently pry it off with a flathead screwdriver.
- Rear Cover: On tilt-head models, there is often a single screw holding a small cover on the back of the mixer. Remove this.
4. Un-Do the Housing Screws
- Tilt-Head Models: You'll find five main screws holding the top housing on. Two are long screws deep inside the neck (one on each side), and three are at the back where you removed the rear cover.
- Bowl-Lift Models: The locations vary, but typically involve several screws at the top and back of the mixer head. Consult a diagram for your specific model if you're unsure. Keep all screws in a small dish so you don't lose them.
5. Lift Off the Top Housing Gently work the top housing up and off the mixer base. You may need to wiggle it a bit to free it from gaskets. This will expose the gearbox and the old grease. Prepare for a sight that can range from slightly oily to a full-on mess of black, waxy gunk and separated oil.
6. Excavate the Old Grease This is the most critical and messiest step. Using your putty knife, popsicle sticks, or even an old spoon, scoop out every bit of the old grease from the housing and around the gears. Scrape it into your disposal bowl. You want to be meticulous. Get into the corners and crevices. The more old gunk you remove, the better your repair will be.
7. Detail Clean the Gearbox Once the bulk of the grease is gone, switch to paper towels. Wipe down the gears, the gear shafts, and the inside of the housing. Now, use your degreaser or isopropyl alcohol on a clean paper towel to wipe everything down again. The goal is to remove the thin film of separated oil that coats everything. The gears and housing should be clean and dry before you proceed.
8. Inspect the Gears With the gears clean, you have a perfect opportunity to inspect them. Slowly rotate them by hand and look closely at the teeth. You're looking for any chips, cracks, or excessively worn teeth. Pay special attention to the large "worm follower" gear. On many KitchenAid models, this gear is made of a slightly softer material and is designed to be a "sacrificial gear." It will fail first to protect the more expensive motor if the mixer is jammed or overloaded. If you see broken teeth, the re-greasing job must wait; you need to order and replace that gear first.
9. Apply the New Grease Now for the fun part. Open your new tub of food-grade grease. Using a clean scraper or your gloved hands, start packing the new grease into the gearbox. Don't be shy. Apply a liberal amount directly onto all the gears. Push it down into the teeth and into the main gearbox housing. You should use at least 4 ounces—about the size of a large scoop of ice cream. The goal is to create a solid mass that encases the gears. There is very little risk of "over-greasing" here; you want it well-packed.
10. Clean Mating Surfaces and Reassemble Before putting the housing back on, take a clean paper towel and wipe any grease off the flat edges of the lower and upper housings where they meet. This ensures a clean, tight seal. Carefully lower the top housing back into place, making sure it sits flush. Re-install the five main housing screws, but do not overtighten them—just snug is perfect. Overtightening can crack the plastic or metal housing. Finally, re-attach the rear cover and the planetary drip ring.
11. Test Your Work Clean the exterior of your mixer. Plug it in. Turn the mixer on to its lowest speed for 30 seconds. Then cycle through a few higher speeds for about 10-15 seconds each. This helps distribute the new grease throughout the gearbox. Listen for any loud or unusual noises. It might sound slightly different or quieter, which is a good sign. Your mixer is now serviced and ready for years of use.
Common Causes
- Age & Separation: The number one cause. Grease has a finite life and after 5-10 years, the oil will begin to separate from the thickener.
- Lack of Use: Counter-intuitively, mixers that sit unused for months on end are more prone to leaking as gravity does its work on the inert grease.
- Excessive Heat: Storing your mixer in a hot garage, on a sunlit counter, or right next to your oven can accelerate the separation process. Running the mixer for extremely long periods without a break can also cause enough heat to trigger a leak.
- Vibration: Years of normal operation and vibration can contribute to the oil slowly breaking free from its soap-like binder.
Common Mistakes
- Using the Wrong Grease: Never use automotive or general-purpose grease. It is not food-safe and may not have the correct viscosity, leading to rapid failure and potential contamination.
- Just Adding New Grease: Simply adding new grease on top of the old, separated mess does nothing. The separated oil is still there and will find its way out, and the old waxy soap base will not lubricate properly.
- Incomplete Cleaning: Failing to thoroughly degrease the gearbox and gears means the new grease will be immediately contaminated with old, separated oil, leading to another leak much sooner.
- Forgetting to Unplug It: An absolute and critical safety failure. Always unplug any appliance before servicing.
- Ignoring Broken Gears: If you spot chipped gear teeth during your inspection, closing it back up is a recipe for disaster. The mixer will make horrible noises and eventually fail completely, potentially damaging the motor.
- Under-packing the Grease: Being too stingy with the new grease won't provide enough lubrication or heat dissipation, leading to premature wear.
Cost & Time Breakdown
This is a fantastic DIY repair that costs very little compared to replacing the mixer or even paying for a professional service.
| Task | DIY Cost | Pro Cost | Time (DIY) |
|---|---|---|---|
| Food-Grade Grease (4-6 oz) | $10 - $20 | Included in Labor | 15 min (to order/buy) |
| Disassembly & Old Grease Removal | $5 (for towels) | $75 - $125 | 45 - 60 minutes |
| Gearbox Cleaning & Inspection | (Included above) | (Included above) | 20 - 30 minutes |
| Re-greasing & Reassembly | (Included above) | (Included above) | 20 - 30 minutes |
| Total | $15 - $25 | $100 - $175 | 1.5 - 2 Hours |
Tips & Prevention
- Run It Monthly: Turn the mixer on and run it empty for one minute every month. This churns the grease and keeps the oil and thickener from separating.
- Store It Smart: Keep your mixer in a climate-controlled area of your home. Avoid the hot garage, attic, or the cabinet right above your stove.
- Don't Overload: While these mixers are workhorses, be mindful of their limits. If you're kneading multiple batches of very dense, low-hydration dough, the motor head will get hot. Feel it occasionally; if it's very warm to the touch, give it a 15-minute break to cool down.
- Proactive Maintenance: If your mixer is over 10 years old and has seen heavy use, consider performing a re-greasing before it starts to leak. You'll extend its life and prevent a mess.
When to Call a Professional
While this is a very doable DIY job, there are definitely times when it’s best to call a small appliance repair pro.
- You Find Broken Gears: Replacing a gear is a more complex job that often requires removing retaining clips and ensuring proper alignment. A pro can source the right gear and install it correctly.
- Loud Grinding or Clicking Noises: If the problem is more than just a leak, such as a loud, mechanical grinding that persists after re-greasing, it points to a deeper issue like a bad bearing or a misaligned gear that needs an expert eye.
- Electrical Issues: If you ever see sparks, smell a distinct electrical burning odor, or the motor behaves erratically, unplug the mixer immediately. This is not a grease issue and should be diagnosed by a qualified technician.
- You Lack the Time or Confidence: There is no shame in knowing your limits. It is a messy, somewhat involved process. If you'd rather not deal with it, paying a pro $120 to refurbish a $400 mixer is still a great value.
Related Articles
Keep troubleshooting with these hand-picked guides from FixlyGuide:
- The #1 Mistake Homeowners Make When Their Dryer Isnt Drying (And How to Fix It Free) — Most homeowners assume a slow dryer means a broken dryer, but the most common culprit is a simple, often overlooked maintenance issue that'…
- The #1 Mistake Homeowners Make When Their Ice Maker Stops (And the Easy Fix) — Before you call for service, learn the most common and easily fixable reason your refrigerator's ice maker isn't producing ice.
- The #1 Mistake Wrecking Your Dishwasher's Cleaning Power (It's Not Soap!) — Your dishwasher isn't cleaning dishes because of a common, overlooked issue with its spray arms, leading to poor water distribution.
- That 15-Minute Brew? Your Coffee Maker's Secret Clog — A slow-dripping coffee maker is almost always a sign of internal mineral buildup, not a faulty machine, and a simple vinegar descaling can…
- Why Did Just One Electric Stove Burner Stop Working? — It's a common kitchen puzzle: one electric stove burner suddenly quits while the others work perfectly. We dive into the simple, independen…
- Why Is My Lawn Turning Yellow in Summer? A Homeowner's Guide — Your lawn turning yellow in summer is often a sign of improper watering, a common and fixable issue for homeowners.
Frequently asked questions
Is the oil leaking from my stand mixer toxic?+
No. Stand mixers use special food-grade grease with an NSF H1 rating, meaning it's safe for incidental food contact. While you shouldn't eat it, there's no need to panic if a drop gets near your ingredients. Simply clean the mixer's exterior and discard any food that came into direct contact with the oil.
Can I just add more grease instead of cleaning out the old stuff?+
This is a common but ineffective shortcut. The problem is that the old grease has separated into a thin oil (which leaks) and a thick, waxy soap base that no longer lubricates effectively. You must remove all of it to allow the new, properly mixed grease to do its job.
My mixer is brand new and it's leaking a little oil. Is that normal?+
A very small amount of oil seepage can be normal during the first few uses, sometimes called "breaking in," as the grease settles. However, if the leak is significant, continuous, or appears after the first few uses, you should contact the manufacturer. This could indicate an issue covered by your warranty.
Why is inactivity bad for my mixer's grease?+
It's counter-intuitive, but letting a mixer sit for many months allows gravity to slowly pull the lubricating oil out of the soap-like thickener that holds it. Running the mixer for a minute or two each month churns the grease, keeping it properly mixed and preventing separation and leaks.


Discussion
Loading comments…