Tools & materials you'll need
Affiliate linksAs an Amazon Associate FixlyGuide earns from qualifying purchases — at no extra cost to you. Prices and availability are accurate as of publication and subject to change.
Quick Answer
Most AC drain line clogs are caused by a buildup of algae, mold, and sludge, restricting proper drainage and leading to water leaks. For minor clogs, you can often clear the line yourself using a wet/dry vacuum to suction out the blockage or by flushing it with a simple vinegar solution. This can typically be done in under an hour with common household items, preventing potential water damage and restoring your AC's efficiency.
The Problem
That puddle of water around your indoor AC unit isn't just an annoyance; it's a warning sign. When your air conditioner runs, it not only cools the air but also removes humidity. This moisture condenses on the cold evaporator coils and drips into a drain pan. From there, it's supposed to flow through a PVC condensate drain line and out of your home. However, given the dark, damp environment, this line is a prime breeding ground for algae, mold, and other biological growth. Over time, this growth accumulates, creating a slimy clog that eventually blocks the flow of water. When the drain line is completely obstructed, the condensate pan overflows, leading to leaks, potential water damage to ceilings, walls, or flooring, and even system shutdowns.
The initial symptoms often include visible water pooling near the indoor unit, dripping sounds, or a musty odor. If left unaddressed, serious issues like mold growth, damaged drywall, or electrical shorts can occur. Addressing a clogged AC drain line promptly is crucial to prevent these more costly and hazardous problems.
How It Works
Your air conditioning system cools your home through a thermodynamic process. Refrigerant circulating within the system absorbs heat from your indoor air as it passes over the evaporator coil. A critical byproduct of this cooling is dehumidification. As warm, humid air comes into contact with the very cold evaporator coil, the moisture in the air condenses, much like water droplets forming on a cold glass on a hot day. This condensed water, known as condensate, then drips from the coil into a sloped drain pan located directly beneath it.
From the drain pan, gravity takes over. The pan is designed with an outlet connected to a PVC (polyvinyl chloride) drain line, typically a 3/4-inch diameter pipe. This pipe slopes downwards, guiding the condensate safely out of your home, usually into a utility sink, a floor drain, or directly outside. Some systems are equipped with a condensate pump, particularly if the drain line needs to move water uphill or over a long distance, but most residential setups rely on gravity.
The problem arises when biological contaminants – primarily airborne dust, dirt, and microscopic mold and algae spores – mix with this standing water in the drain pan and line. This creates a nutrient-rich environment for these organisms to flourish. As they grow, they form a thick, slimy biofilm on the interior surfaces of the drain line. Over several weeks or months, this biofilm can accumulate to the point where it restricts or completely blocks the flow of condensate. Once the drain line is blocked, water continues to drip into the pan, but it has nowhere to go. The pan fills up, overflows, and begins to leak, causing the very noticeable and unsettling puddles you're trying to fix.
Many AC units also include a float switch in the drain pan. This safety device is designed to detect rising water levels in the pan. If the water reaches a certain height, indicating a clog and potential overflow, the float switch will interrupt power to the outdoor compressor unit, effectively shutting down your AC system to prevent further water damage. While this is a helpful safety feature, it also means your AC stops cooling until the clog is cleared.
Step-by-Step Fix
Before you start, gather your tools and materials. Always prioritize safety first. Turn off your AC unit at the thermostat and, for added safety, at the breaker box. This prevents accidental startup and reduces the risk of electrical shock while you're working near the unit.
1. Locate the Drain Line & Clear Excess Water — Identify the PVC pipe running from your indoor AC unit's drain pan.
*   Find the drain pan, typically directly under the evaporator coil section of your indoor air handler. You might need to remove an access panel. Be careful not to damage any wires or delicate components.
*   If the drain pan is overflowing, carefully use a wet/dry vacuum or towels to remove any standing water. This prevents spillage during the clearing process.
2. Check for External Clots — Sometimes the clog is visible at the end of the drain line.
*   Follow the drain line from your indoor unit to its discharge point outside. This could be near your foundation, in a flower bed, or into a utility sink.
*   Look for a visible slug of algae, dirt, or debris blocking the very end of the pipe. Use gloves and clear it by hand if accessible.
3. Suction the Clog with a Wet/Dry Vacuum — This is often the most effective first step for stubborn clogs.
*   Attach the hose of your wet/dry vacuum to the open end of the condensate drain line, usually located outside or at a utility sink.
*   Use a rag or duct tape to create a tight seal around the hose to maximize suction. This is crucial for creating enough negative pressure to dislodge the clog.
*   Turn on the wet/dry vacuum to its highest setting for 2-3 minutes. You should hear sputtering and then potentially a rush of water and debris as the clog is pulled free. Be prepared for dirty water to come through the vacuum.
*   *If this doesn't work:* The clog might be too dense or too far down the line. Proceed to the next step, using a different entry point.
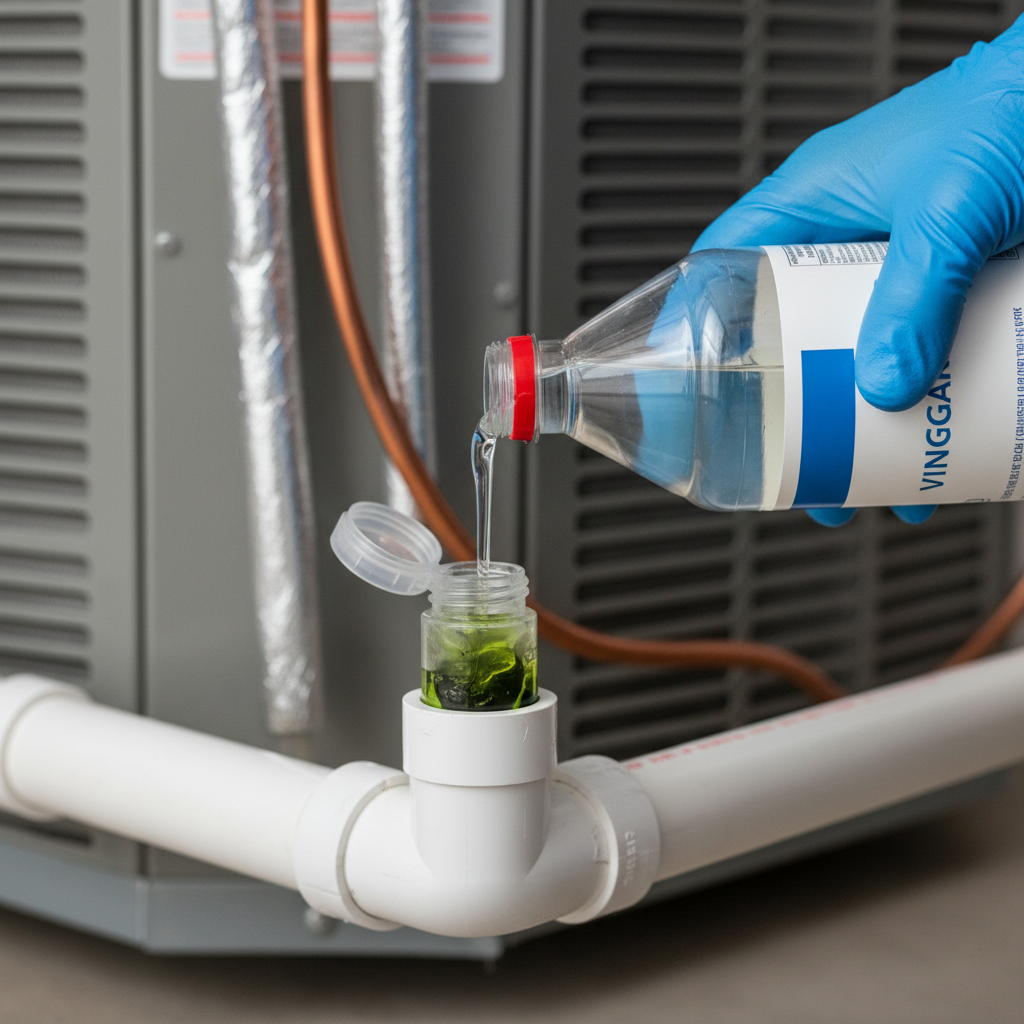
4. Clear the Vent Tee & Pour Vinegar — Access the drain line closer to the indoor unit for a flush.
*   Locate the T-shaped vent or access port on the drain line near your indoor unit. This is usually closer to the drain pan.
*   Remove the cap or plug from this T-shaped vent. You might see standing water or gunk here.
*   Slowly pour 1–2 cups of undiluted distilled white vinegar into the access port. Vinegar is mildly acidic and effective at dissolving algae and mold without damaging the PVC.
    *   *Safety Note:* Avoid using bleach, as it can be corrosive to some components and its fumes are strong indoors. Never mix vinegar and bleach – this creates a dangerous toxic gas.
*   Allow the vinegar to sit for 30–60 minutes to break down the clog. You might hear gurgling as it works.
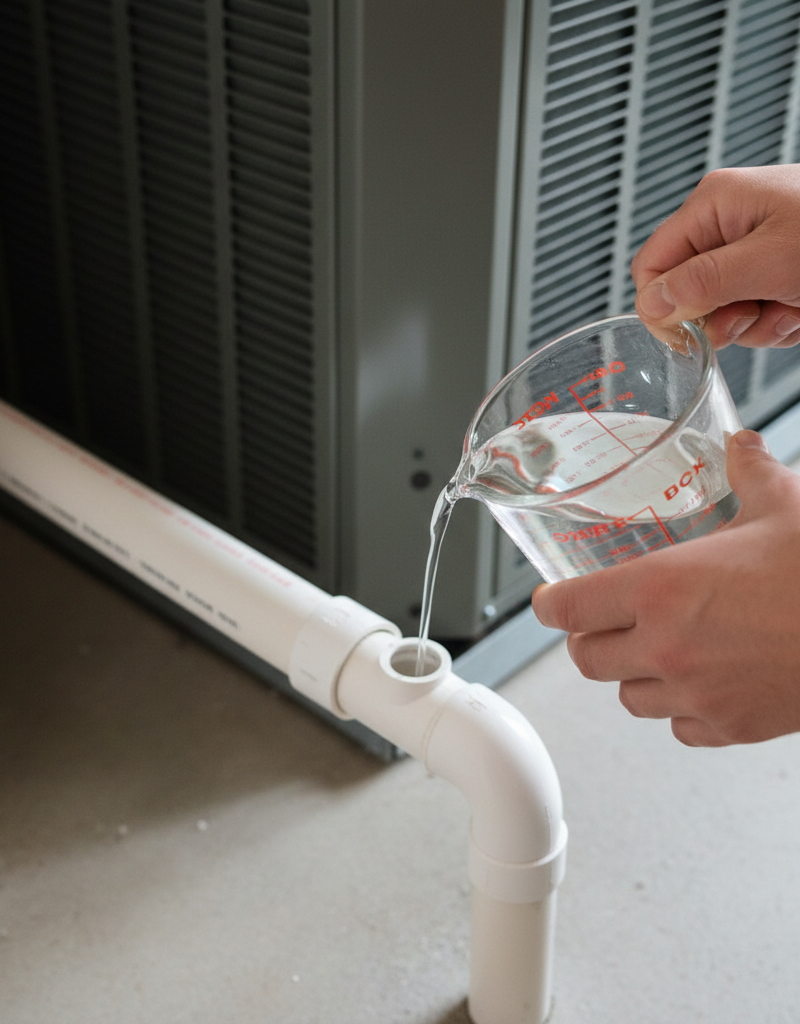
5. Flush with Water — Push the dissolved clog through the line.
*   After the vinegar has had time to work, follow it with 1–2 quarts of clean water poured into the same access port.
*   Observe if the water flows freely out of the discharge end of the drain line. If it does, the clog is likely cleared.
*   *If water still backs up:* Repeat steps 3 and 4, or consider using a plumbing snake specific for small diameter pipes, if you have one and are comfortable using it. For persistent clogs, a professional might be needed.
6. Replace Cap & Test System — Reassemble and verify proper operation.
*   Replace the cap or plug firmly on the T-shaped vent.
*   Turn the AC unit back on at the thermostat and then at the breaker. Set it to a cooling mode.
*   Monitor the drain pan and the discharge end of the drain line for the next couple of hours. You should see steady water flow from the line, and no water should be accumulating in the drain pan or leaking from the unit.
    *   *If water still leaks or AC doesn't turn on:* Double-check all connections. If the AC unit still won't run, the float switch might be stuck, or there could be a more serious issue requiring professional attention.
Common Causes
- Algae and Mold Buildup: This is by far the most common cause. The dark, damp environment of the condensate line is an ideal breeding ground for these organisms. They form a slimy biomass that gradually restricts flow.
- Dust and Debris: Airborne dust, dirt, pet dander, and other particles that bypass your air filter can get caught in the condensate and settle in the drain pan and line, contributing to the biological slime.
- Infrequent Maintenance: Neglecting regular AC maintenance, especially not flushing the drain line periodically, allows these biological clogs to accumulate unchecked.
- Poor Drain Line Slope: If the drain line isn't installed with a sufficient downward slope, water can sit in the line rather than draining freely, accelerating the growth of algae and mold.
- Insect or Rodent Nests: While less common indoors, sometimes insects or small rodents can access and build nests in the outdoor portion of the drain line, causing obstructions.
- Damaged Drain Pan or Line: A cracked drain pan or a compromised drain line can lead to leaks, but usually, this presents as a constant drip rather than an overflowing pan from a clog.
Common Mistakes
- Using Bleach: While bleach kills mold and algae, it can corrode some AC components over time and its fumes can be harmful in an enclosed space. Never mix bleach and vinegar, as this creates highly toxic chlorine gas.
- Ignoring the Float Switch: If your AC unit isn't turning on, don't assume it's a major compressor issue. Always check if the drain pan is full; the float switch might have shut off the system to prevent water damage.
- Not Creating a Tight Seal with the Wet/Dry Vac: A loose connection will prevent sufficient suction power from being generated, making the vacuum method ineffective. Use tape or a rag for a secure fit.
- Not Flushing Regularly: Waiting until you see water pooling is reactive, not proactive. A quick vinegar flush once or twice a year can prevent most clogs.
- Using a Chemical Drain Cleaner: Harsh chemical drain cleaners designed for household plumbing can be too aggressive for the PVC and other components in your AC drain line and can cause damage.
- Forgetting to Turn Off Power: Always, always turn off the power to your AC unit at the thermostat and the breaker before performing any work. This is a crucial safety step to prevent electrical shock.
Cost & Time Breakdown
| Task | DIY cost | Pro cost | Time |
|---|---|---|---|
| Diagnosing clog | $0 | $75–$150 | 5–10 minutes |
| Suctioning with wet/dry vac | $0–$15 (if owned) | $75–$150 | 15–30 minutes |
| Vinegar flush | $2–$5 | Included in service | 30–60 minutes |
| Post-fix testing | $0 | Included in service | 10–15 minutes |
| Total (DIY) | $2–$20 | $75–$250+ | 60–120 minutes |
Tips & Prevention
- Regular Vinegar Flushes: To prevent future clogs, pour 1 cup of distilled white vinegar down the condensate drain line via the access port every 1-2 months during the cooling season. This helps inhibit mold and algae growth.
- Keep Filters Clean: A clean air filter not only improves air quality and AC efficiency but also reduces the amount of dust and debris that can enter the condensate pan and contribute to clogs.
- Inspect Annually: As part of your annual AC check-up, visually inspect the drain pan for standing water and the drain line for any visible blockages or signs of dripping.
- Ensure Proper Slope: If you're having recurring issues, check that the drain line has a continuous downward slope to ensure water doesn't sit and stagnate. An improperly sloped line might need adjustment by an HVAC professional.
- Install a Drain Pan Tablet: You can buy special slow-release tablets designed to prevent algae and slime growth in AC condensate pans. These are usually added to the pan directly.
- Clear Nearby Debris: If your drain line exits outdoors, make sure the end isn't buried in dirt, leaves, or mulch, which can block its opening.
When to Call a Professional
While clearing a simple AC drain line clog is a common DIY task, there are specific situations where calling an HVAC professional is the safest and most effective course of action. You should contact a qualified technician if you've attempted the DIY steps and the clog persists, meaning water is still backing up, or the AC unit continues to shut off due to the float switch activating. Another crucial sign is if you suspect the clog is located deep within the coil area or if the drain line itself appears damaged, cracked, or disconnected, which can be difficult and risky to repair yourself. Furthermore, if you're uncomfortable working with plumbing near electrical components, or if your AC unit is an older model with complex access panels, a professional can diagnose and fix the issue without causing further damage. They have specialized tools like CO2 cartridges or powerful vacuums for stubborn blockages and can ensure your system is operating efficiently and safely.
Related Articles
Keep troubleshooting with these hand-picked guides from FixlyGuide:
- The #1 Mistake Homeowners Make When Their AC Drain Clogs (And The $5 Fix) — Discover the most common error homeowners make when tackling a clogged AC drain line and learn a simple, inexpensive solution to prevent co…
- The Secret Culprit Behind Your AC Leaks: Why Most Homeowners Miss This Easy Fix — Discover the often-overlooked reason your AC is leaking water and learn how a simple, inexpensive fix can prevent costly damage and restore…
- The $5 Secret to Silencing That Annoying Dripping Faucet (Single-Handle Fix) — Stop a dripping single-handle faucet with a simple and inexpensive DIY fix by replacing a worn-out o-ring or washer.
- The #1 Mistake Homeowners Make with a Slow Kitchen Drain (and the Real Fix) — Before you reach for harsh chemicals, learn the right way to fix a slow kitchen sink drain and prevent future clogs.
- The 5-Minute Trick to Restore Your Kitchen Sink Sprayer's Lost Pressure — Restore your kitchen sink sprayer's low pressure with a quick, simple trick that often takes less than five minutes and requires no special…
- The Secret to Lush Raised Beds? It's Not Just About How You Water — Smart irrigation for raised garden beds isn't just about automation; it's about delivering the right amount of water precisely when your pl…
Frequently asked questions
Why is my AC drain line clogged?+
The most common reason for an AC drain line to clog is the accumulation of algae, mold, and airborne dust. This creates a slimy buildup inside the pipe which restricts or completely blocks the flow of condensate water.
Can I use bleach to clear my AC drain line?+
No, it is generally not recommended to use bleach. While it can kill mold, bleach can be corrosive to certain AC components over time. Additionally, mixing bleach with other cleaners (like vinegar) creates dangerous toxic gases. Stick to distilled white vinegar.


Discussion
Loading comments…