
Tools & materials you'll need
Affiliate linksAs an Amazon Associate FixlyGuide earns from qualifying purchases — at no extra cost to you. Prices and availability are accurate as of publication and subject to change.
Quick Answer
A wobbling ceiling fan is most often caused by imbalanced blades or a loose mounting bracket. The quickest fix involves checking and tightening the mounting bracket, ensuring all blade screws are secure, and then then carefully balancing the blades with a balancing kit, which usually includes small weights and a clip to identify the problematic blade. Addressing these common issues can restore your fan to smooth operation and prevent potential safety hazards.
The Problem
You know the discomfort: you're relaxing in your living room, and your ceiling fan, instead of providing a gentle breeze, is gyrating like a helicopter taking off, creating a distracting wobble and often a rhythmic thumping noise. This isn't just an aesthetic inconvenience; a heavily wobbling ceiling fan can actually be dangerous. Excessive vibration can loosen electrical connections over time, potentially leading to arcing or a fire hazard. More immediately, a fan that is severely off-balance puts undue stress on its motor and mounting hardware, which can lead to premature failure of the fan or, in extreme cases, cause the entire unit to fall from the ceiling. Even minor wobbles, if left unaddressed, can exacerbate these problems, shortening the fan's lifespan and requiring more costly repairs down the line.
How It Works
Ceiling fans operate on a simple principle: an electric motor spins a set of blades, creating air movement. The stability of this operation relies heavily on a perfectly balanced rotating mass. Each component – from the motor housing itself to the individual blades and their attachment points – contributes to the overall balance. The fan is securely mounted to an electrical box in the ceiling, which in turn must be rated for the weight and dynamic forces of a ceiling fan. This box is typically reinforced and bolted directly to a joist or a brace between joists to prevent movement. From the mounting bracket, a downrod suspends the fan motor and blades.
When a ceiling fan wobbles, it indicates an imbalance in this rotating system. Even a small difference in weight or angle among the blades, or a slight loosening of a mounting screw, can create a centrifugal force that pulls the fan off its axis as it spins. Imagine spinning a bicycle wheel with a weight attached to only one spoke – it would wobble dramatically. The same principle applies here. The motor's rotational energy, instead of being smoothly distributed to move air, is converted into a shaking motion. The faster the fan spins, the more pronounced and potentially dangerous this wobble becomes. Diagnosing a wobble often involves systematically checking each part of this mechanical chain, from the ceiling mount to the individual blades, to identify where the delicate balance has been disrupted.
Step-by-Step Fix
Safety First – Always begin by turning off the power to the ceiling fan at your home's circuit breaker. Use a non-contact voltage tester to confirm the power is off before touching any part of the fan. Working with electricity or at heights carries inherent risks.
-
Tighten the Mounting Bracket – The most common culprit is a loose connection where the fan meets the ceiling.
- Carefully remove the decorative canopy cover that conceals the mounting bracket. You'll usually find two or three screws holding it in place near the ceiling.
- Once exposed, check the screws that secure the fan's mounting bracket to the electrical box in the ceiling. Tighten any screws that appear loose. Ensure the electrical box itself is securely fastened to the ceiling joist or bracing. Don't overtighten, but make sure they are snug.
- If this doesn't work: The electrical box might not be fan-rated or properly secured. This requires professional assessment.
-
Inspect and Secure the Downrod – If your fan uses a downrod, ensure it's tightly connected.
- Check where the downrod connects to both the ceiling mount and the fan motor housing. There are usually pins or screws that hold it in place.
- Tighten any set screws on the downrod that secure it to the fan's motor housing. Ensure any clevis pins or cotter pins are correctly inserted and secured.
-
Check Blade Arm Screws – Loose blade arms are a frequent cause of imbalance.
- Examine where each blade arm attaches to the fan's motor housing. There are typically two or three screws per blade arm.
- Using a screwdriver, tighten every screw on every blade arm. Sometimes, even one loose screw can cause a significant wobble. Be firm but avoid stripping the screw heads.
-
Verify Blade Attachment – Ensure the blades themselves are securely fastened to the blade arms.
- Each blade is usually attached to its arm with two or three screws.
- Tighten all screws connecting the blades to the blade arms. Again, ensure they are snug to prevent any shifting during operation.
-
Inspect for Bent Blade Arms – Visually check each blade arm for any signs of bending or warping.
- Stand on a sturdy ladder and, at eye level, compare the height and angle of each blade arm relative to the others. You can use a ruler or tape measure to verify that the distance from the ceiling to the tip of each blade is approximately the same (or at least consistent across all blades when rotated).
- If a blade arm is bent: Gently attempt to bend it back into alignment. Be very careful, as excessive force can break the arm. If severely bent, replacement might be necessary.
-
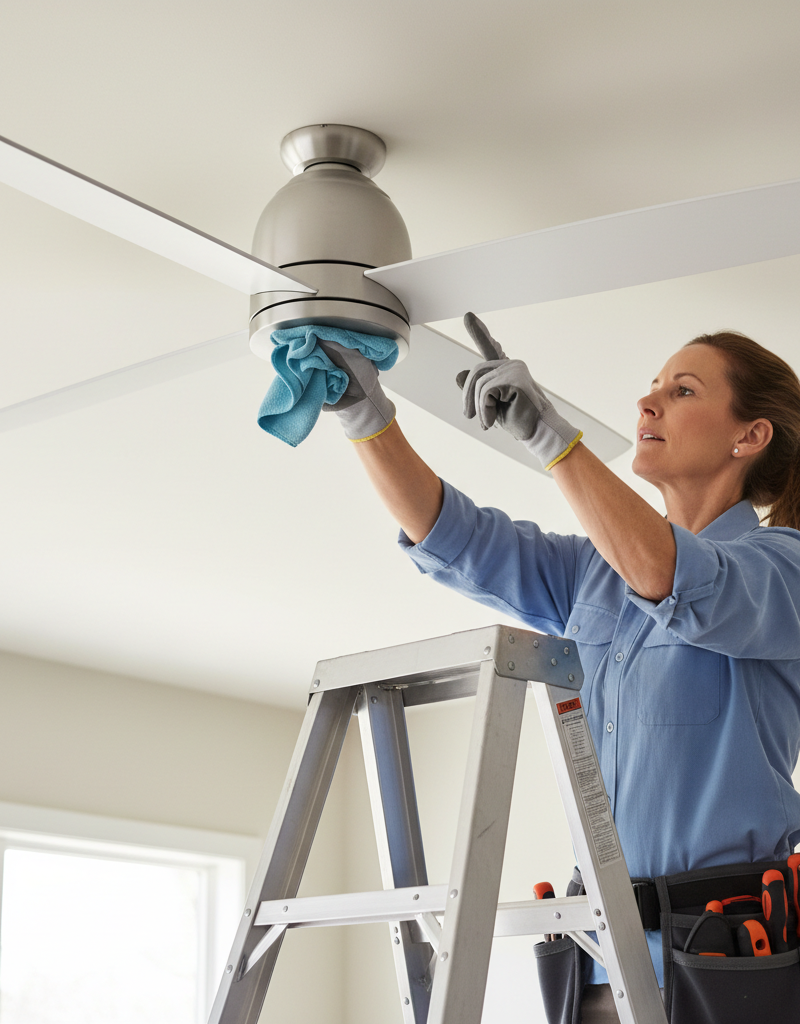
Clean and Inspect Blades – Dirt buildup or damage can alter blade weight.
- Dust and debris can accumulate unevenly on blades, adding subtle weight differences. Wipe down all blades thoroughly with a damp cloth.
- Inspect each blade for any cracks, warps, or chips. Damaged blades can be imbalanced and might need replacement.
-
Balance the Blades (Using a Kit) – If the wobble persists after tightening everything, blade imbalance is the likely culprit.
- Attach the balancing clip: With the power on (but standing clear of the fan), turn the fan on to a medium speed. Attach the provided plastic balancing clip from your fan balancing kit to the trailing edge of one fan blade, midway between the motor and the blade tip. Observe if the wobble improves or worsens.
- Test other blades: If no improvement, remove the clip and repeat on each subsequent blade until you find the blade where the wobble is most reduced or most pronounced when the clip is attached. This identifies the problematic blade.
- Find the optimal spot: Once you've identified the problematic blade, move the clip along its trailing edge, closer to and further from the motor, until you find the exact spot where the wobble is minimized.
- Apply weights: Once the optimal position is found, peel the adhesive backing off one of the small weights provided in the kit and firmly press it onto the top surface of the blade at the location where the clip was most effective. Remove the clip.
- Test and adjust: Turn the fan on and observe. If it still wobbles, you may need to add another weight, or try adjusting the position slightly. Some trial and error may be necessary. For severe wobbles, you might need to try the clip on a different blade (opposite the first) and add a weight there too.
-
Verify Junction Box Fastening – This is an often overlooked but critical step for long-term stability.
- With the canopy still removed (and power off!), ensure the electrical junction box itself is securely fastened to the ceiling joist or a fan-rated brace. Many older homes might have inadequate boxes.
- Pro Tip: If the box feels loose or isn't secured directly to a structural member, it's a significant safety concern. You may need to install a fan-rated brace or box, which often involves cutting into the ceiling. This might be a job for a professional electrician or experienced DIYer.
Common Causes
- Loose Mounting Bracket: The screws securing the fan to the ceiling electrical box or the box to the ceiling joist have vibrated loose over time. This is often the primary reason.
- Unsecured Downrod: If your fan has a downrod, the set screws or pins securing it to the fan motor or ceiling mount can become loose, creating play.
- Loose Blade Arm or Blade Screws: The screws that attach the blade arms to the motor or the blades to the blade arms can loosen, allowing the blades to shift or sag slightly.
- Bent or Warped Blades/Arms: Over time, humidity changes, accidental bumps, or manufacturing defects can cause a blade or blade arm to bend or warp, leading to an uneven weight distribution.
- Uneven Blade Weight: Even if perfectly straight, slight differences in blade weight (e.g., from an overlooked manufacturing flaw, or uneven dust accumulation) can cause imbalance.
- Inadequate Electrical Box: The electrical box in the ceiling might not be properly rated for a ceiling fan's weight and dynamic movement, or it may not be securely attached to structural framing.
Common Mistakes
- Ignoring a Minor Wobble: Many homeowners tolerate a slight wobble, but even small imbalances can worsen over time, stress the motor, and potentially lead to bigger problems or safety hazards. Address it early!
- Not Shutting Off Power: Forgetting to turn off the circuit breaker before working on a ceiling fan is a serious safety risk, potentially leading to electrical shock or accidental activation of the fan while working.
- Overtightening Screws: While tightening is good, overtightening can strip screw threads, crack plastic or metal components, or deform parts, making the problem worse or creating new issues.
- Guessing Blade Imbalance: Randomly adding weights without methodically using a balancing clip can make the wobble worse and waste materials. Follow the balancing kit instructions carefully.
- Not Checking Mounting Bracket First: Many DIYers jump straight to blade balancing when a loose mounting bracket is a far easier and more common fix. Always start at the source – the connection to the ceiling.
- Using a Non-Fan-Rated Electrical Box: Installing a heavy ceiling fan on a standard, light-duty electrical box that isn't securely braced for dynamic loads is a significant safety mistake and can lead to the fan falling.
Cost & Time Breakdown
| Task | DIY Cost | Pro Cost | Time |
|---|---|---|---|
| Tighten Screws / Minor Adjust | $0–$5 | N/A | 15–30 minutes |
| Blade Balancing Kit | $5–$15 | N/A | 30–60 minutes |
| Replace Damaged Blade/Arm | $20–$50 per part | $100–$250 (incl. part) | 1–2 hours |
| Secure Fan-Rated Electrical Box | $20–$50 (part) | $150–$400 | 2–4 hours (DIY) |
| Full Fan Replacement | $75–$300 (fan) | $250–$500+ (fan + install) | 2–4 hours (DIY) |
Tips & Prevention
- Regular Inspections: Periodically check your ceiling fan's mounting and blade screws, especially if it gets heavy use, or after moving the fan's speed settings frequently. A quick check twice a year can catch issues early.
- Proper Installation: If installing a new fan, always ensure the electrical box in the ceiling is fan-rated (designed to support the dynamic weight of a fan) and securely mounted to a joist or a fan-rated brace. Never hang a fan from a standard electrical box only secured by drywall.
- Keep Blades Clean: Regularly dust and clean your fan blades. Uneven dust buildup can subtly alter blade weight and contribute to imbalance over time. Pay attention to both the top and bottom surfaces.
- Avoid Bumping Blades: Be mindful of activities that could accidentally bend fan blades, such as moving furniture or playing sports indoors. Even a slight bend can cause significant wobble.
- Use the Right Fasteners: When performing maintenance, ensure you're using the correct size and type of screws (and not overtightening them) to avoid stripping or damaging components.
- Balanced Replacement: If replacing a single blade or blade arm, try to find an exact match from the manufacturer. If not possible, replacing all blades as a set can help maintain balance.
When to Call a Professional
While many ceiling fan wobble issues are DIY-friendly, certain situations warrant calling a licensed professional electrician. If, after following all the troubleshooting steps, the wobble persists, or if you encounter any issues with the electrical wiring, a pro can safely diagnose and resolve the problem. Specifically, if the ceiling electrical box itself feels loose, is not rated for a ceiling fan, or requires modification to the ceiling or attic space for proper bracing, an electrician is necessary to ensure the fan is securely and safely mounted according to electrical codes. Furthermore, if you suspect any internal motor problems, hear grinding noises, smell burning plastic, or if any electrical connections appear frayed or corroded, immediately call an electrician to prevent fire hazards. Attempting advanced electrical work or structural modifications without proper experience and tools can be dangerous and is not recommended.
Related Articles
Keep troubleshooting with these hand-picked guides from FixlyGuide:
- The 30-Minute Trick to Stop Your Ceiling Fan From Wobbling (No Disassembly Needed!) — A wobbling ceiling fan is more than annoying; it can shorten the life of your fan. Learn how to quickly diagnose and fix the imbalance.
- The 3 Hidden Reasons Your Ceiling Fan Wobbles (And the Easy Fixes) — A wobbling ceiling fan isn't just annoying; it can be a sign of underlying issues that are simple to fix with the right approach.
- The Secret Cause of Ceiling Fan Wobble (It's Not Always What You Think) — A wobbling ceiling fan isn't just annoying; it can be a sign of a deeper issue. Learn the common culprits and how to restore balance safely.
- The Surprising Culprit Behind Your Wobbling Ceiling Fan (It's Not Always Loose Screws) — A wobbling ceiling fan is annoying and potentially dangerous. Learn how to diagnose and fix the most common causes, from imbalanced blades…
- The #1 Mistake Homeowners Make When a Gas Burner Won't Light (And the Easy Fix) — Before you call a technician, discover the most common, overlooked reason your gas stove burner isn't lighting and how to fix it yourself i…
- The 3 Hidden Reasons Your Sprinkler Head Won't Pop Up (And How to Fix It FAST) — Discover the most common reasons your sprinkler head isn't popping up and follow our step-by-step guide to quickly diagnose and fix the iss…
Get the print-ready PDF of this guide
A clean, ad-free, printable version you can keep on your phone or pin to the workshop wall. We'll also send occasional weekly tips matched to your home situation.
- Print-optimized layout
- Tools, materials & every step included
- Unsubscribe anytime
Frequently asked questions
How do you stop a ceiling fan from wobbling?+
The most common ways to stop a ceiling fan from wobbling are to tighten all mounting screws, secure the downrod, ensure blade arms and blades are tightly fastened, and if necessary, use a fan balancing kit to correct uneven blade weight.
Why is my ceiling fan wobbling so bad?+
Severe ceiling fan wobbling is often caused by a very loose mounting bracket, a severely bent blade or blade arm, or a significant imbalance in blade weight. It's crucial to address severe wobbles promptly due to potential safety risks.
Can a wobbly ceiling fan fall?+
In extreme cases, yes, a severely wobbly ceiling fan can fall, especially if it's mounted to an inadequate electrical box or if its mounting hardware has become significantly loose or damaged over time. This is why addressing wobbles and ensuring proper, fan-rated mounting is essential for safety.
Do all ceiling fans wobble a little?+
While perfectly still operation is ideal, some very minor, almost imperceptible movement might occur with any rotating machinery, especially at high speeds. However, any visible or distracting wobble indicates an issue that should be investigated and corrected. Modern, well-installed fans should generally operate smoothly.
What tools do I need to fix a wobbly ceiling fan?+
You'll typically need a Phillips head screwdriver, a flathead screwdriver, a step ladder, a non-contact voltage tester for safety, and potentially a ceiling fan balancing kit that includes weights and a clip.


Discussion
Loading comments…