
Tools & materials you'll need
Affiliate linksAs an Amazon Associate FixlyGuide earns from qualifying purchases — at no extra cost to you. Prices and availability are accurate as of publication and subject to change.
Quick Answer
A leaky chimney during rain is a frustrating problem for many homeowners, often leading to water stains, damaged ceilings, and potential mold growth. While many immediately suspect the roof, the true culprits are frequently issues specific to the chimney structure itself. The most common causes include damaged or improperly installed flashing, a cracked chimney crown, porous or deteriorated masonry, and issues with the chimney cap or chase cover. Identifying the exact source is key to a lasting repair, and many of these fixes are well within the capabilities of a diligent DIYer.
The Problem
Water intrusion from a chimney during rainfall can manifest in several ways: dark stains on the ceiling around the fireplace, dripping water into the firebox, or even visible moisture on interior walls. Beyond the immediate aesthetic damage, prolonged leaks can lead to significant structural problems, including weakened rafters, damaged drywall, rotted wood, and dangerous mold proliferation which can impact indoor air quality. Ignoring these leaks will only exacerbate the damage, leading to more costly and complex repairs down the line. It's crucial to address chimney leaks promptly and effectively to protect your home's integrity and your family's health.
How It Works
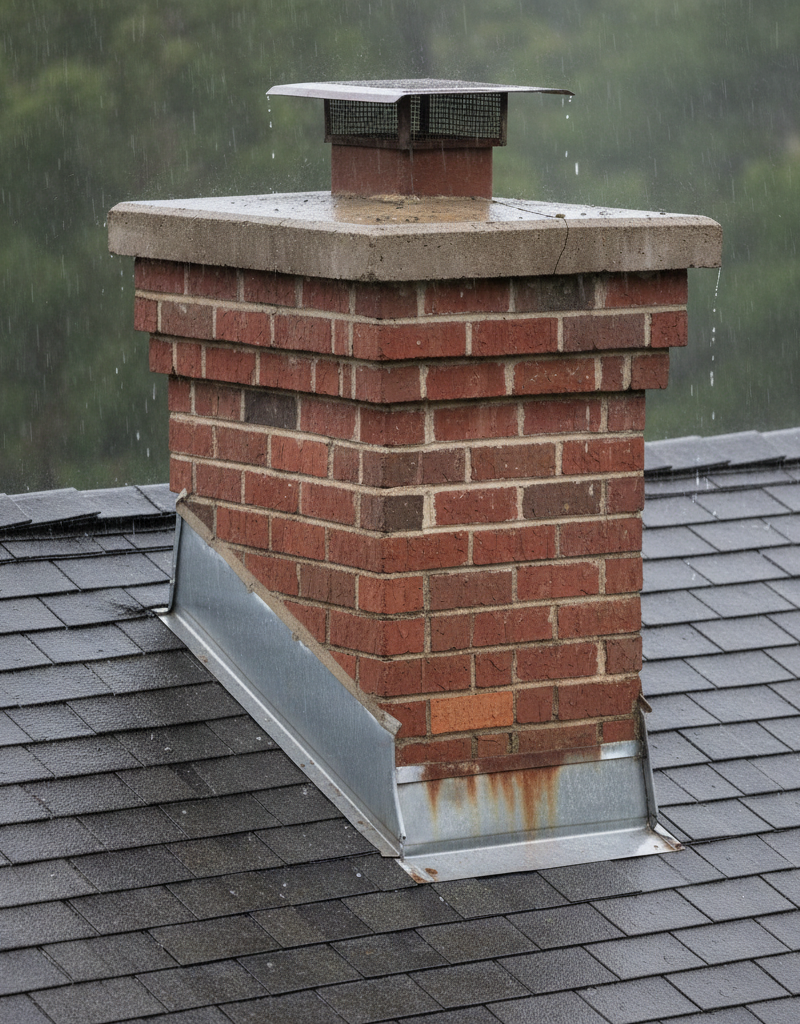
To understand why your chimney leaks, it helps to understand its components and how they're designed to shed water. At the very top, the chimney cap (or flue cover) prevents rain and animals from entering the flue. Below that, the chimney crown is a sloped concrete or stone slab that sits atop the masonry, extending slightly beyond the chimney walls to direct water away. The flashing is perhaps the most critical component for preventing leaks where the chimney meets the roof. It consists of multiple pieces of metal (often aluminum, copper, or steel) that are integrated with both the roofing material and the chimney masonry. The step flashing is bent at 90-degree angles and interwoven with the shingles on the sides. The apron flashing covers the front, and the back pan (or saddle) diverts water around the back, especially on the uphill side. All these flashing pieces depend on a proper seal, often with counter-flashing which is embedded into the mortar joints of the chimney and then bent down over the step or apron flashing. Below the crown, the masonry itself (bricks and mortar) acts as a barrier. Healthy mortar joints are tight and solid, and bricks are non-porous. However, over time, mortar can crack and erode, and bricks can become porous due to freeze-thaw cycles, allowing water to saturate the chimney structure. When any of these protective layers fail—be it a crack in the crown, a separation in the flashing, or deteriorating mortar—water finds an easy path into your home.
Step-by-Step Fix
Safety First: Before attempting any work on your roof or chimney, ensure you have a stable, tall ladder. Work only on dry days when the roof is not slippery. Wear appropriate safety gear, including non-slip shoes, gloves, and safety glasses. If you are uncomfortable with heights or roof work, call a professional. Never attempt to work on a gas appliance flue without a licensed professional.
-
Inspect the Chimney Cap and Crown — Check for damage and tight seals
- Carefully climb onto your roof and examine the chimney cap. Is it rusted, bent, or missing entirely? Gaps or missing sections allow rain to pour directly into your flue. Replace a damaged cap if necessary. Caps usually cost between $50-$200. Secure new caps according to manufacturer instructions. If your flue is open to the elements, this is often the easiest fix.
- Next, inspect the chimney crown. Look for any cracks, large or hairline, especially where it meets the flue liner or the edge of the masonry. A properly built crown should have an overhang, or 'drip edge,' to direct water away from the brickwork. If you find small cracks, clean the area thoroughly with a wire brush and apply a high-quality elastomeric chimney crown sealant. For larger cracks or crumbling sections, a full crown repair or replacement by a professional might be necessary. A good quality sealant will cost $30-$50 per tube.
-
Examine the Flashing — Look for bent metal, separated seals, or rusted areas
- Water often enters where the chimney meets the roofline due to flashing issues. Carefully inspect the step flashing (the L-shaped metal pieces woven with shingles) and the counter-flashing (the metal tucked into the chimney's mortar joints). Look for bent, rusted, or missing sections. Pay close attention to any sealant or caulking that might have dried out, cracked, or pulled away from the chimney or roof.
- Sometimes, simply re-sealing compromised areas with a high-quality, exterior-grade silicone sealant designed for roofing can temporarily stop a leak. For more significant issues like bent or separated flashing, gently try to press the flashing back into place. If the flashing is severely damaged or rusted through, it will need to be replaced. This is often a job best left to roofing professionals, as it involves removing shingles and precisely installing new metalwork. Expect to pay $3-$5 per linear foot for new flashing materials, plus labor.
-
Check Mortar Joints and Bricks — Identify crumbling mortar or spalling bricks
- Thoroughly inspect all visible mortar joints for cracks, voids, or signs of deterioration. Mortar should be firm and solid. If you can easily scrape out mortar with a screwdriver, it's failing. Similarly, look at the bricks themselves for signs of 'spalling,' where the face of the brick is flaking off due to water absorption and freeze-thaw cycles. This indicates porous bricks.
- For minor mortar joint deterioration, you can 'repoint' or 'tuckpoint' the chimney. This involves carefully scraping out old, loose mortar to a depth of about 1 inch and then filling the joints with fresh mortar using a tuckpointing trowel. Ensure the new mortar matches the old in color and texture as closely as possible for aesthetic reasons. For severely spalled bricks or widespread mortar degradation, consulting a mason is recommended. Mortar mix is inexpensive, around $10-$20 per bag.
-
Seal Porous Bricks — Prevent water absorption in the masonry
- If your bricks are generally sound but appear to be absorbing water (darkening significantly when wet), they may have become porous over time. After ensuring the chimney is completely dry, you can apply a breathable, silane/siloxane-based masonry water repellent. This creates a hydrophobic barrier without trapping moisture inside the brickwork. Do not use non-breathable sealants, as they can cause more damage by trapping water. Always follow the manufacturer's application instructions carefully, typically applying with a sprayer or roller. A good quality masonry sealer costs about $40-$100 per gallon.
-
Inspect the Chase Cover (for pre-fab chimneys) — Check for rust, holes, or improper fit
- If you have a pre-fabricated metal chimney, it will have a metal chase cover instead of a concrete crown. Inspect this cover for rust, especially at the edges or where the flue pipes exit. Look for standing water on the cover, which indicates a poor slope, or holes. A rusted-through chase cover is a direct pathway for water. Replace a damaged chase cover with a new, preferably stainless steel, version. Stainless steel chase covers are more durable than galvanized steel. The cost of a new chase cover varies significantly, from $150-$500 for materials alone, depending on size and material.
-
Verify Proper Drainage Around the Base — Ensure water isn't pooling
- Sometimes, what appears to be a chimney leak is actually water pooling at the base of the chimney on the roof, seeping in through compromised shingles adjacent to the flashing. Confirm that leaves, debris, or old caulk aren't creating dams that prevent water from flowing freely down the roof and away from the chimney. Clean out any debris and repair or replace any damaged shingles near the chimney base. A bundle of shingles runs about $30-$50.
Common Causes
- Damaged or improperly installed flashing: This is the number one cause of chimney leaks. Flashing can rust, bend, tear, or pull away from the chimney or roof surface due to expansion and contraction, high winds, or improper installation.
- Cracked chimney crown: The concrete slab at the top of the chimney is constantly exposed to weather. Cracks allow water to seep into the masonry below, leading to saturation and leaks.
- Porous masonry (bricks and mortar): Over time, bricks can become saturated with water, and mortar joints can erode. This allows water to be absorbed into the chimney structure and eventually leak into the house.
- Missing or damaged chimney cap: A missing or damaged cap allows rain to directly enter the flue, potentially leading to water accumulation in the firebox or flue liner.
- Rusted or poorly fitted chase cover: For pre-fabricated chimneys, the metal chase cover can rust through or be poorly installed, acting as a funnel for water.
- Debris accumulation: Leaves, pine needles, or other debris can accumulate around the chimney's base, especially on the uphill side, creating a dam that holds water and forces it under the flashing or shingles.
Common Mistakes
- Using the Wrong Sealant: Applying standard caulk or non-breathable sealants to masonry or flashing. Silicone or elastomeric, exterior-grade sealants are necessary for flexibility and weather resistance. Masonry should only be sealed with breathable products.
- Ignoring Minor Cracks: Dismissing small hairline cracks in the crown or mortar joints. These tiny openings are often the beginning of significant water intrusion problems.
- Blaming the Roof (Exclusively): Assuming all attic/ceiling leaks near the chimney are solely due to roof shingles. While the roof can contribute, the chimney-specific components (flashing, crown, masonry) are very often the primary culprits.
- Working on a Wet or Slippery Roof: Attempting repairs when the roof is wet, icy, or otherwise hazardous. This significantly increases the risk of falls and injury.
- Improper Flashing Repairs: Attempting to patch severely damaged flashing with sealant alone. If the metal is bent, rusted, or separated beyond minor gaps, it requires proper replacement or re-securing, not just a bead of caulk.
- Not Cleaning the Chimney: Failing to remove debris around the chimney base or inside gutters, which can create water dams that lead to leaks.
Cost & Time Breakdown
| Task | DIY cost | Pro cost | Time (DIY) |
|---|---|---|---|
| Chimney Cap Replacement | $50–$200 | $200–$500 | 1 hour |
| Crown Repair (sealant) | $30–$50 | $150–$300 | 1–2 hours |
| Mortar Repointing (minor) | $10–$50 | $300–$800 | 2–4 hours |
| Masonry Sealer Application | $40–$100 | $150–$300 | 2–3 hours |
| Flashing Re-sealing | $15–$30 | $100–$250 | 1–2 hours |
| Complete Flashing Replacement | N/A | $500–$1,500+ | N/A |
Tips & Prevention
- Annual Visual Inspections: Twice a year, ideally in spring and fall, visually inspect your chimney from the ground with binoculars and from the roof (if safe) for any signs of damage to the cap, crown, flashing, or masonry. Look for cracks, missing mortar, rust, or loose components.
- Keep Gutters Clean: Ensure gutters around the chimney are clean and free of debris. Clogged gutters can cause water to back up and overflow directly onto the chimney or behind the flashing.
- Trim Overhanging Branches: Trim any tree branches that hang directly over your chimney. This reduces debris accumulation and prevents physical damage during storms.
- Consider a Stainless Steel Cap/Chase Cover: If replacing a chimney cap or chase cover, opt for stainless steel over galvanized steel for superior durability and corrosion resistance.
- Proper Crown Maintenance: If you have a concrete crown, check its condition periodically. Applying a high-quality crown sealant every 5-10 years can significantly extend its life and prevent cracking.
- Breathable Masonry Sealer: If your chimney masonry is frequently damp or shows signs of water absorption, consider applying a breathable masonry water repellent every 5-10 years to protect it from the elements.
When to Call a Professional
You should call a licensed roofing contractor or a certified chimney sweep if you identify extensive damage that you're not comfortable repairing yourself, such as severely deteriorated or missing flashing, major cracks in the chimney crown beyond simple sealing, widespread crumbling mortar (spalling), or structural issues with the chimney masonry. Any work involving removing shingles, integrating new flashing, or repairing significant masonry damage requires specialized skills and tools. Additionally, if the leak persists after your DIY attempts, or if you suspect the leak is related to a gas or oil flue, which could pose a carbon monoxide risk, immediately contact a professional. Professionals also have the expertise to safely access and work on steep roofs or tall chimneys that present a fall hazard.
Related Articles
Keep troubleshooting with these hand-picked guides from FixlyGuide:
- The Secret Culprit Behind Your Leaky Chimney (It's Not Always the Obvious Fix) — Discover the often-overlooked causes of a leaky chimney during rain, beyond just a faulty cap, and learn practical steps to fix it.
- The Secret Culprit Behind Your Leaky Chimney (It’s Not Always the Obvious Flashing) — Discover the often-overlooked causes of chimney leaks during rain and how to tackle them with effective DIY solutions and prevention tips.
- The 4 Hidden Reasons Your Chimney Leaks During Rain (And the $50 Fix) — A leaky chimney during rain can signify several underlying issues, from a damaged chimney cap to degraded flashing, leading to significant…
- The Secret Culprit Behind Your Leaky Refrigerator (It’s Not Always the Water Line) — Discover the most common, often overlooked, reasons your refrigerator is leaking water and how to fix them with simple DIY steps.
- The #1 Overlooked Reason Your Chimney Leaks (It Rots Your Roof!) — Discover the surprising, often-missed culprit behind your leaky chimney and how this common issue can silently damage your home.
- The Hidden Reason Your Circuit Breaker Keeps Tripping (It's Not Always an Overload) — Discover the often-overlooked causes behind a frequently tripping circuit breaker and learn how to diagnose and fix them safely.
Get the print-ready PDF of this guide
A clean, ad-free, printable version you can keep on your phone or pin to the workshop wall. Free with a FixlyGuide account.
- Print-optimized layout
- Tools, materials & every step included
- Saved to your account
Frequently asked questions
Why does my chimney only leak when it rains heavily?+
Heavy rain exacerbates existing vulnerabilities. Minor cracks in the crown, small gaps in flashing, or slightly porous bricks might only allow water to seep through during prolonged or intense rainfall when water has more time and pressure to penetrate.
Can a chimney leak without seeing water stains on the ceiling?+
Yes, water can sometimes travel down the flue liner or inside the chimney cavity without immediately manifesting as visible stains on your interior ceiling. It might soak into insulation, structural wood, or collect in the firebox. Early signs could be a musty smell or crumbling plaster/drywall nearby.
How long does chimney flashing typically last?+
The lifespan of chimney flashing depends on the material. Aluminum flashing typically lasts 15-20 years, while copper can last 50 years or more. However, poor installation, severe weather, or damage can significantly shorten its lifespan.
Is it safe to use my fireplace if my chimney is leaking?+
It is generally not recommended to use your fireplace if your chimney is actively leaking. Water can damage the flue liner, weaken the chimney structure, and potentially lead to rust in metal components. More importantly, if water enters the flue, it can create creosote buildup or even damage gas appliance venting, posing fire or carbon monoxide hazards. Have the leak addressed before using your fireplace again.
Can I seal a leaky chimney crown with regular concrete patch?+
No, regular concrete patch is not suitable for chimney crown repairs. Chimney crowns experience extreme temperature fluctuations and movement, requiring an elastomeric, flexible crown repair product specifically designed to expand and contract without cracking. Standard concrete will likely crack again quickly.


Discussion
Loading comments…