
Tools & materials you'll need
Affiliate linksAs an Amazon Associate FixlyGuide earns from qualifying purchases — at no extra cost to you. Prices and availability are accurate as of publication and subject to change.
Quick Answer
Low pressure from your kitchen sink sprayer can be incredibly frustrating, turning a simple rinsing task into a chore. Fortunately, most low-pressure issues are caused by easily fixable culprits: mineral buildup in the sprayer head, a kink or blockage in the hose, or a malfunctioning diverter valve. You can often diagnose and resolve the problem yourself in under an hour with basic tools and a little know-how. This guide will walk you through the most common solutions, from simple cleaning to replacing key components, helping you restore full spray power without calling a professional.
The Problem
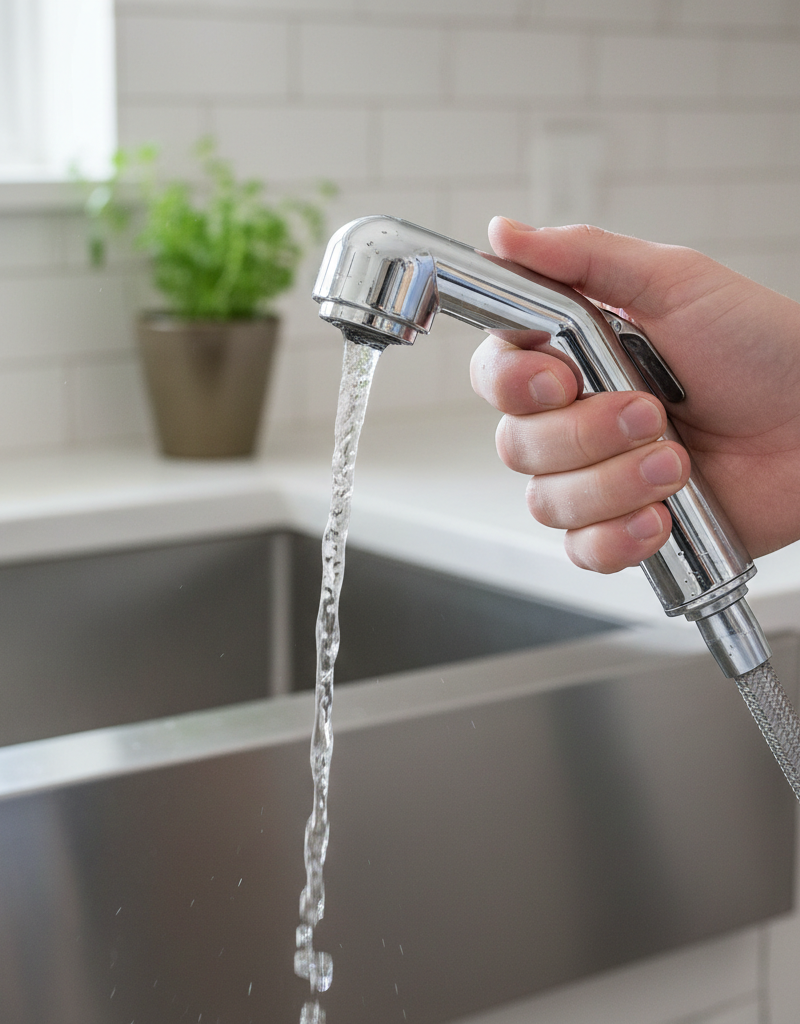
You're trying to rinse dishes, wash vegetables, or clean the sink basin, but your kitchen sprayer just dribbles water or offers a weak, unsatisfactory dòng. This low pressure makes the sprayer largely ineffective, forcing you to use the main faucet more often, and ultimately slows down your kitchen tasks. The issue usually develops gradually, starting as a slight decrease in force and worsening over time as blockages or component failures progress. Identifying the exact cause is crucial for an effective fix, and thankfully, most originate from just a few common points within the sprayer's system.
How It Works
To understand how to fix a low-pressure sprayer, it helps to know how it's supposed to work. When you activate your kitchen sink sprayer, you're engaging a diverter valve located either within the main faucet body or, less commonly, in the hot or cold water supply lines. This diverter valve, a small but critical component, shifts the water flow from the main faucet spout to the sprayer hose.
The water then travels through a flexible hose, usually made of braided nylon or rubber, to the sprayer head itself. At the sprayer head, a nozzle with small orifices directs the water into a powerful, concentrated stream. The pressure felt at the sprayer head is a direct result of the water pressure entering your home, the efficiency of the diverter valve, the unimpeded flow through the hose, and the cleanliness of the sprayer's nozzle openings. Any obstruction or malfunction in this chain – from the diverter not fully engaging, to a kinked hose, to mineral deposits constricting the nozzle – will reduce the water flow and, consequently, the pressure at the sprayer head. Understanding these individual components helps pinpoint where the problem truly lies.
Step-by-Step Fix
1. Check for Simple Kinks or Obstructions – Locate and clear any immediate blockages.
Before diving into disassembly, always check the simplest potential issues. Reach under your sink and visually inspect the sprayer hose. Is it kinked, twisted, or pressed against other items? Sometimes, moving items under the sink or a slight shift of the hose can restrict water flow significantly. Straighten any kinks and ensure the hose has a clear path.
- If this doesn't work: Proceed to inspecting the sprayer head.
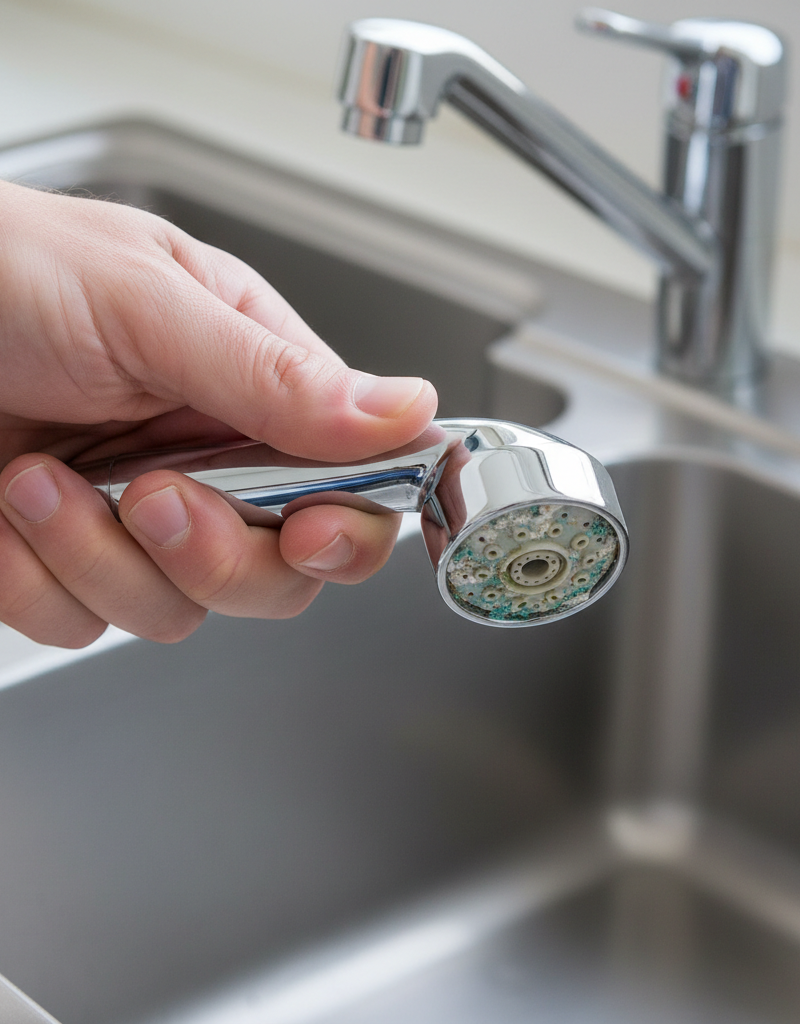
2. Clean the Sprayer Head for Mineral Buildup – Remove the head and soak it in vinegar to dissolve deposits.
Mineral deposits, especially in hard water areas, are the most common cause of low pressure. Over time, calcium, lime, and rust can accumulate in the small orifices of the sprayer nozzle.
- How to: Unscrew the sprayer head from the hose (it's usually hand-tight or requires a gentle turn with pliers). Inspect the small holes for visible buildup. Place the sprayer head in a bowl of white vinegar for at least 30 minutes, or preferably several hours, to dissolve the minerals. Use an old toothbrush or a small, pointed object (like a toothpick) to gently scrub away any remaining debris. Rinse thoroughly with water.
- Safety Note: Always turn off the water supply to the faucet before attempting any major disassembly, especially if you're not confident in your ability to reassemble quickly. While cleaning the head doesn't typically require turning off the water, it's a good practice if you expect to leave the hose detached for a while.
3. Inspect and Flush the Sprayer Hose – Check for internal blockages or sediment.
sediment, or even small debris can become lodged inside the sprayer hose, restricting water flow.
- How to: With the sprayer head detached (from Step 2) and the water supply still OFF at the shut-off valves under the sink, place the end of the sprayer hose into a bucket. Slowly turn the water supply back on (both hot and cold, one at a time, then both). Observe the water flow and pressure coming directly from the hose. Is it strong and consistent? If not, there might be a blockage within the hose itself.
- If flow is still weak: Consider replacing the hose, or attempt to flush it more aggressively by briefly increasing water pressure, though this risks dislodging sediment into other parts of the faucet.
4. Examine the Diverter Valve – Access and clean or replace the diverter valve if it's faulty.
The diverter valve is responsible for directing water to either the main spout or the sprayer. If it's sticky, clogged with minerals, or worn out, it won't fully divert water to the sprayer, leading to low pressure. The location varies significantly by faucet model.
- Identifying the Diverter: For older faucets with a separate sprayer, the diverter is often a small cylindrical cartridge or piston located within the main faucet body, sometimes accessible by removing the main spout or the handle. For pull-down or pull-out sprayers, the diverter is often integrated into the cartridge itself, or the connection point where the hose meets the main faucet.
- How to Access (General): Turn off the water supply. Consult your faucet's manual for precise instructions on accessing the diverter. You'll likely need to remove the faucet handle, then access the main cartridge or a specific port where the sprayer hose connects.
- Cleaning/Replacing: Once accessed, inspect the diverter for mineral buildup or wear. You can try cleaning it with vinegar and a small brush. If it appears damaged, worn, or cleaning doesn't resolve the issue, it likely needs to be replaced. Take the old diverter to a plumbing supply store or hardware store to find a matching replacement. Reinstall everything in reverse order.
- If you're unsure: This step can be complex. If you can't locate the diverter or are uncomfortable disassembling your faucet, it's time to consider a professional or replacing the faucet.
5. Test Water Pressure at the Supply – Rule out broader household pressure issues.
Occasionally, the low pressure isn't isolated to the sprayer but indicates a general issue with your home's water pressure.
- How to: Temporarily disconnect the sprayer hose from its connection point under the sink (after turning off the water supply, of course). Place the end of the supply hose into a bucket and briefly turn on the hot and cold water supply valves, one at a time, then both. If the flow into the bucket is strong, your household pressure is likely fine, and the issue is localized to the sprayer or faucet. If the flow is weak into the bucket, you might have a bigger house-wide pressure problem (e.g., pressure regulator, main shut-off valve partial closure, municipal issues) that requires a different approach or a professional plumber.
6. Install a New Sprayer Hose – Replace a worn or internally damaged hose.
If the hose itself is visibly damaged, leaking, or you suspect an internal blockage that couldn't be flushed, a replacement is in order.
- How to: Disconnect the old hose from both the sprayer head and the faucet's diverter connection under the sink. Take the old hose to a hardware store to ensure you purchase a new one with the correct length and connection types. Installation is the reverse of removal.
Common Causes
- Mineral Buildup (Limescale): Hard water is the number one enemy of sprayer nozzles and diverter valves, causing calcium and lime deposits to restrict flow over time.
- Kinked or Pinched Hose: The flexible hose under the sink can easily become kinked, trapped by other items, or twisted, blocking water flow.
- Faulty Diverter Valve: This small valve directs water to the sprayer. If it's clogged, worn, or sticky, it won't fully open, leading to low pressure.
- Sediment in Hose: Small particles or rust can accumulate inside the hose, creating internal blockages.
- Low Household Water Pressure: While less common for an isolated sprayer issue, overall low water pressure in your home will, of course, affect the sprayer.
- Damaged Sprayer Head: Physical damage to the sprayer head itself, such as a crack or a loosened internal component, can sometimes cause pressure loss, though this is rare.
Common Mistakes
- Ignoring the Supply Valves: Forgetting to turn off the hot and cold water supply valves under the sink before disconnecting hoses or disassembling faucet components can lead to leaks and flooding.
- Over-tightening Connections: When reassembling, overtightening plastic connections, especially the sprayer hose to the diverter, can strip threads or crack plastic components, leading to leaks.
- Skipping the Simplest Checks: Jumping directly to replacing parts without first checking for a kinked hose or cleaning the sprayer head means you might spend money and effort on unnecessary repairs.
- Using Harsh Chemicals: While vinegar is safe, using strong chemical cleaners to clear mineral buildup can damage plastic or rubber components within the sprayer or faucet.
- Not Using Thread Sealant: When screwing metal connections back together, especially the sprayer hose to the faucet, failing to use plumber's tape (PTFE tape) can result in slow leaks over time.
- Forceful Disassembly: Trying to force stuck faucet components can strip screws, break plastic clips, or damage the faucet body, turning a simple fix into a much larger (and more expensive) problem.
Cost & Time Breakdown
| Task | DIY Cost | Pro Cost | Time |
|---|---|---|---|
| Clean Sprayer Head | $0–$5 | N/A | 15–30 minutes |
| Clear Kinked Hose | $0 | N/A | 5 minutes |
| Replace Sprayer Hose | $20–$50 | $100–$250 | 30–60 minutes |
| Clean/Replace Diverter | $10–$40 | $150–$350 | 1–2 hours |
| Professional Diagnosis | N/A | $150–$300 | 1–2 hours |
Tips & Prevention
- Regular Cleaning: If you have hard water, periodically (every 3-6 months) unscrew and soak your sprayer head in white vinegar to prevent mineral buildup.
- Water Softener: Consider installing a whole-house water softener if hard water is a persistent issue, as it will benefit all your plumbing fixtures.
- Gentle Handling: Avoid yanking or twisting the sprayer hose excessively, as this can lead to kinks or internal damage over time.
- Check Under the Sink: Every few months, quickly check under your sink to ensure nothing is pressing against or kinking the sprayer hose.
- Observe Changes: Pay attention to subtle changes in spray pressure. Addressing minor reductions early can prevent a complete loss of pressure.
- Know Your Faucet: Keep your faucet's make and model number handy, or even the installation manual. This makes finding replacement parts like diverter valves much easier.
When to Call a Professional
While many low-pressure sprayer issues are DIY-friendly, there are specific situations where calling a licensed plumber is the smart and safer choice. If you've cleaned the sprayer head and hose, checked the diverter valve, and still experience persistent low pressure, especially if it affects other faucets in your home, it could indicate a more complex problem like a faulty pressure regulator, issues with your main water supply, or hidden pipe damage. Furthermore, if you encounter significant difficulty disassembling your faucet, are uncomfortable working with plumbing, or discover leaks after attempting a repair, it's best to stop and call a professional. Plumbers have specialized tools and expertise to diagnose underlying issues quickly and ensure the repair is done correctly, preventing potential water damage or further plumbing headaches. Never attempt to forcefully remove stuck components or work on gas lines near plumbing – always defer to a professional for such risks.
Related Articles
Keep troubleshooting with these hand-picked guides from FixlyGuide:
- The 5-Minute Trick to Fix a Kitchen Sink Sprayer's Weak Stream — A weak kitchen sink sprayer can be frustrating, but often a simple cleaning or adjustment can restore full pressure in minutes.
- The 90-Second Trick to Fix a Weak Kitchen Sprayer (No Plumber Needed) — Restore full power to your kitchen sink sprayer with simple DIY steps, addressing common causes like clogs and diverter issues.
- The 5-Minute Trick to Fix a Weak Kitchen Sink Sprayer (No Plumber Needed) — Restore full power to your kitchen sink sprayer with simple, DIY steps that tackle common culprits like clogs and diverter issues.
- The 5-Minute Trick to Fix Your Kitchen Sprayer's Weak Stream — Restore your kitchen sink sprayer's full power with a simple, quick fix tackling common pressure culprits.
- The 5-Minute Trick to Restore Your Kitchen Sink Sprayer's Lost Pressure — Restore your kitchen sink sprayer's low pressure with a quick, simple trick that often takes less than five minutes and requires no special…
- The 5-Minute Trick to Fixing a Door That Won't Latch (No New Hardware Needed) — A door that won't latch properly is a common household nuisance, but often requires a simple, quick fix without replacing any hardware.
Frequently asked questions
Why is my kitchen sink sprayer suddenly weak?+
The most common reasons for a sudden drop in kitchen sink sprayer pressure are mineral buildup in the sprayer head, a kinked hose under the sink, or a partially blocked or faulty diverter valve within the faucet assembly.
Can I replace just the sprayer head, or do I need a whole new faucet?+
Often, you can replace just the sprayer head if it's the source of the problem. Many sprayer heads unscrew easily from the hose. However, ensure the new head is compatible with your existing hose connection and that the underlying pressure issue isn't elsewhere in the system before replacing just the head.
How do I clean a clogged kitchen sink sprayer?+
To clean a clogged kitchen sink sprayer, first unscrew the sprayer head from the hose. Soak the detached sprayer head in white vinegar for several hours or overnight to dissolve mineral deposits. Use a small brush or toothpick to dislodge any remaining debris from the nozzle holes, then rinse thoroughly.
What is a diverter valve and where is it?+
A diverter valve is a component inside your faucet (or sometimes in the supply lines) that directs water flow either to the main faucet spout or to the sprayer. Its exact location varies by faucet model; it's often a small cartridge or piston accessed by removing the faucet handle or the main spout.
When should I call a plumber for a low-pressure sprayer problem?+
You should call a plumber if you've tried cleaning the sprayer head, checking the hose, and inspecting the diverter valve, but the problem persists. Also, call a plumber if you notice low pressure from other faucets in your home, suspect a more complex issue with your main water supply, or are uncomfortable disassembling your faucet or dealing with potential leaks.

Discussion
Loading comments…