
Tools & materials you'll need
Affiliate linksAs an Amazon Associate FixlyGuide earns from qualifying purchases — at no extra cost to you. Prices and availability are accurate as of publication and subject to change.
Quick Answer
Annoying floor squeaks can often be remedied without the daunting task of removing floorboards. The key is usually to address the movement between subfloor, floorboards, and joists from the space below, typically a basement or crawl space. Common methods involve using shims to fill gaps, driving screws from below to secure loose components, applying construction adhesive, or even introducing specialized anti-squeak brackets. For surface-level squeaks, strategically applied lubricants or powders can also reduce friction.
The Problem
That familiar, grating 'squeak' underfoot is more than just an annoyance; it's a symptom of movement and friction. When you step on a floor, the weight causes slight deflections. If the subfloor or floorboards are no longer tightly secured to the supporting joists, or if individual floorboards have loosened from each other, this movement creates friction. The rubbing of wood against wood, or the movement of fasteners within wood, generates the squeaking sound. Over time, changes in humidity cause wood to expand and contract, exacerbating these gaps and looseness. The underlying issue is almost always inadequate fastening or movement where two wooden components meet.
How It Works
Most residential floors consist of several layers. The primary structural components are the joists, which are large lumber beams spanning between foundation walls or support beams. On top of these joists, a subfloor, typically made of plywood or OSB (Oriented Strand Board), is fastened. The subfloor provides a continuous, stable base. Finally, the finished flooring (hardwood, laminate, carpet, etc.) is installed over the subfloor.
Squeaks occur when these layers become loose. Think of it like this: when lumber dries out over many years, it can shrink. When floor installers use nails, those nails can lose their grip as the wood shrinks and expands. The nail shaft might become slightly loose in its hole, or the nail head might no longer be holding the subfloor tightly against the joist. Each time weight is applied, the subfloor lifts slightly off the joist, or a finished floorboard rubs against its neighbor or the subfloor. This friction creates the noise.
From below, in a basement or crawl space, you can access the underside of the subfloor and the joists. This allows you to address the points of movement directly. By introducing shims, driving screws upwards into the subfloor, or applying adhesive, you can re-secure the loose components, eliminating the friction and the resulting squeak. The goal is to bring the moving parts back into firm, non-moving contact with each other.
Step-by-Step Fix
1. Identify the Exact Squeak Location – Pinpointing the source is critical for success.
- Have a helper walk slowly over the squeaky area upstairs while you listen carefully from below (basement/crawl space). Use a marker to circle the specific joist bay and subfloor section where the squeak is loudest.
- If finding it is hard: Sometimes the squeak seems to travel. Try pressing up firmly on the subfloor from below while your helper steps on the spot. If the squeak reduces or stops, you've found the general area.
2. Safety First: Gear Up – Protect yourself in the crawl space.
- Wear: Gloves, eye protection, a dust mask, and old clothes. A headlamp is invaluable.
- Clear: Remove any debris or hazards in your path in the crawl space. Ensure adequate ventilation.
- Safety Note: Never attempt this beneath areas with active water leaks or exposed electrical wiring. Address these issues with a professional first.
3. Shim Gaps Between Joist and Subfloor – A classic, effective method for larger gaps.
- Locate: Find any visible gaps between the top edge of the floor joist and the bottom of the subfloor where movement might be occurring.
- Insert: Gently tap thin wooden shims (wood siding shims work well) into these gaps. Use construction adhesive on the shim for extra grip.
- Don't Overtighten: Tap the shim just until it's snug, filling the gap without lifting the subfloor further. Over-driving can create new squeaks or buckles.
- If this doesn't work: The gap might be too small for a shim, or the movement is elsewhere.
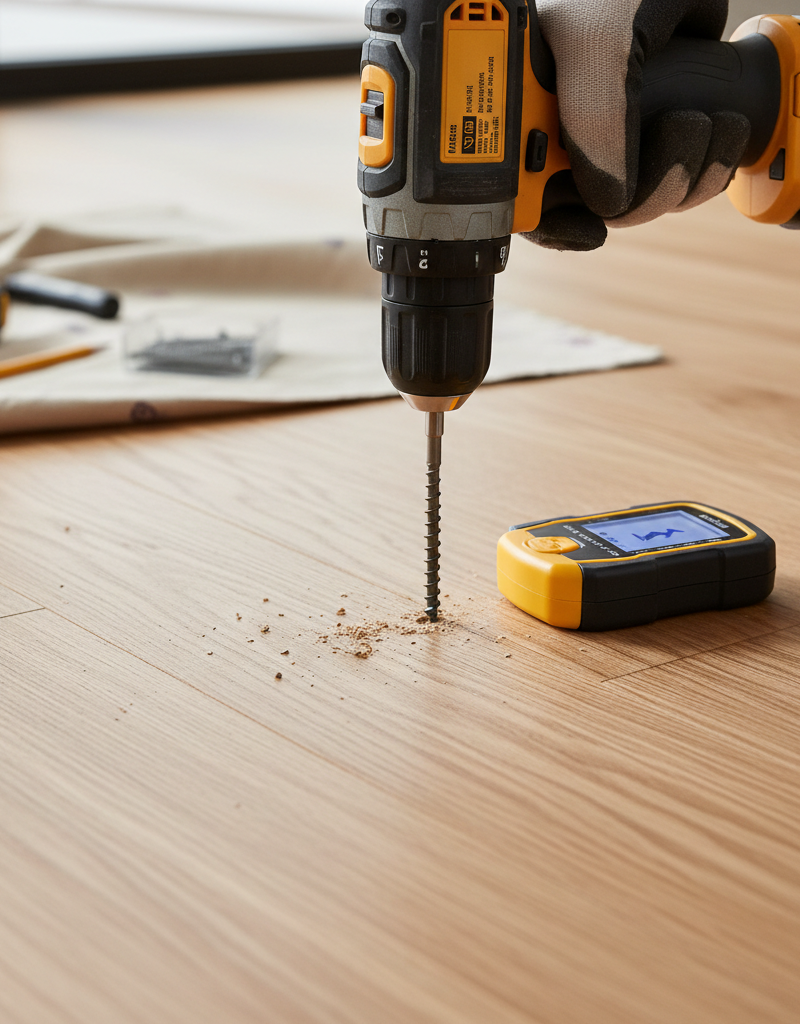
4. Screw Subfloor to Joist from Below – A durable solution for persistent squeaks.
- Mark: Ensure you're screwing directly into the joist. Use a stud finder upstairs to pinpoint joist locations, or look for existing nails/screws from below.
- Drill: Use 2.5-inch or 3-inch coarse-thread construction screws. For thicker subfloors (3/4 inch or more), 2.5-inch screws are usually sufficient. Pre-drill a pilot hole a bit smaller than the screw's diameter to prevent splitting, especially in older, dry wood.
- Fasten: Drive the screws straight up through the subfloor into the joist. Start with one screw, then have your helper test the floor above. Add more screws along the joist as needed, typically every 6-8 inches where movement is present.
- Important: Ensure the screws are long enough to penetrate the subfloor by at least 1.5 inches but short enough not to protrude through your finished floor above (consider total floor thickness).
5. Apply Construction Adhesive in Gaps – For very small gaps or widespread, subtle movement.
- Clean: Ensure the area between the joist and subfloor is clean and dust-free for good adhesion.
- Apply: Using a caulk gun, apply a generous bead of high-quality construction adhesive (e.g., PL Premium) into any fine gaps you can see between the subfloor and joist. You can also apply it along the side of the joist where it meets the subfloor.
- Press: If possible, use a temporary jack or piece of lumber to apply upward pressure on the subfloor against the joist until the adhesive cures (check product instructions, usually 24 hours).
6. Use Anti-Squeak Brackets (Squeak-Ender) – Specialized hardware for stubborn spots.
- Position: These metal brackets are designed to pull the subfloor tightly to the joist without screws from above. Place the bracket against the joist, with the foot touching the bottom of the subfloor.
- Secure: Drive the specialized screw through the bracket and into the subfloor until the bracket arm pulls the subfloor firmly against the joist. Some types require drilling into the joist as well.
- Benefits: Excellent for specific, localized squeaks where other methods are difficult.
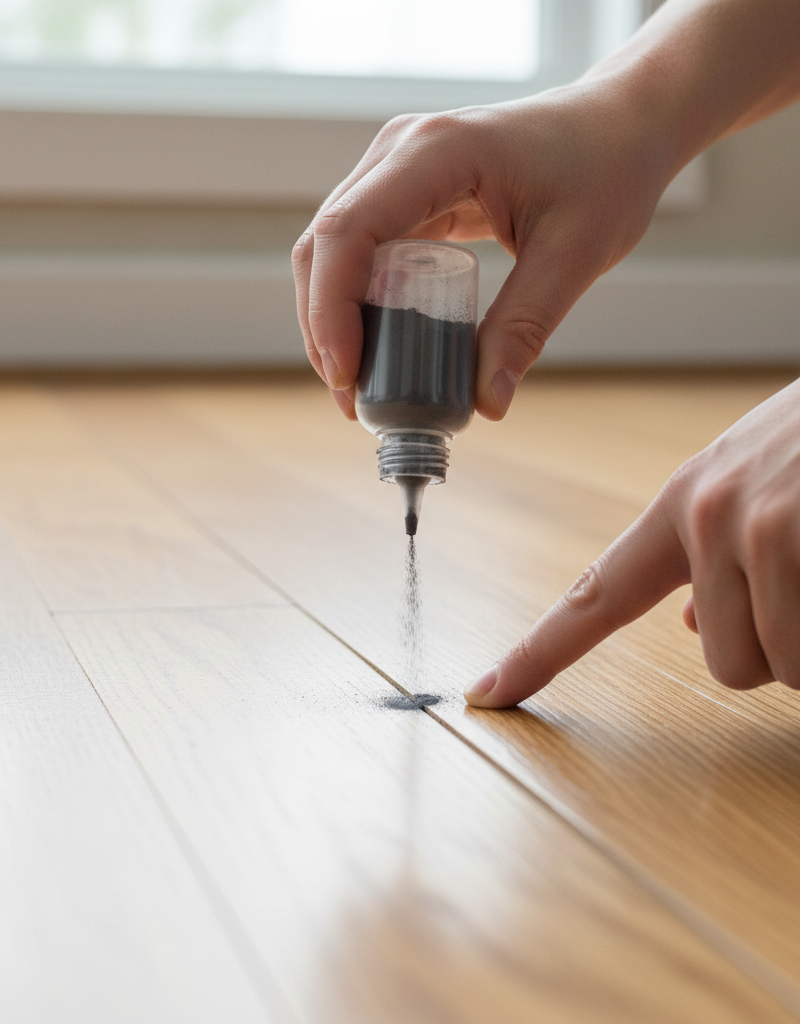
7. Address Loose Board-on-Board Squeaks (from above) – When the noise isn't subfloor or joist related.
- Locate: If the squeak arises directly from two finished floorboards rubbing, or a finished board rubbing the subfloor, you might need to address it from above.
- Lubricate: For small, tight gaps, sprinkle talcum powder, graphite powder, or a specific floor squeak lubricant into the seam and work it in by walking on the boards. Wipe away excess.
- Pro Tip: This is a temporary fix for friction between finished boards, not structural issues.
Common Causes
- Wood Shrinkage: As lumber dries over time, it shrinks, causing gaps between joists and subfloor, or between individual floorboards. This is the most prevalent cause.
- Loose Fasteners: Nails can
Related Articles
Keep troubleshooting with these hand-picked guides from FixlyGuide:
- The Creaky Floor Secret: How to Silence Squeaks Without Tearing Up Boards — Learn how to eliminate annoying floor squeaks using simple, non-invasive methods without the hassle of removing floorboards.
- The Secret to Silencing Squeaky Floors (Without Tearing Up Your Room) — Discover the surprisingly simple methods to eliminate annoying floor squeaks from above or below, preserving your flooring and your peace.
- The Secret to Silencing Squeaky Floors (Without Ripping Up Boards) — Discover how to eliminate annoying floor squeaks using targeted, non-invasive methods that won't require you to remove a single floorboard.
- The Secret $7 Fix for Squeaky Floors (No Demolition Needed!) — Silence annoying floor squeaks using simple, non-invasive methods that don't require ripping up your flooring.
- The 3 Hidden Reasons Your Floor Squeaks (And 3 Ways to Silence It) — Silence a squeaky floor without tearing up your home using targeted lubrication, shims, or specialized screws.
- The #1 Mistake When Fixing Baseboards That Pull Away From Walls — Discover the crucial mistake homeowners make when reattaching baseboards and how to properly secure them for a lasting fix.
Recommended for DIYers & woodworkers
Sponsored
The Top 20 Tools for Workshops of Any Budget
No stationary machines or power tools required — plus 3 fundamental tools that can't be bought at any price.
Get the free guide
Ted's Woodworking — The #1 Woodworking Resource
Detailed instructions, dimensioned drawings, materials & cutting lists, and 3D schematics for every skill level.
See the plansSponsored: links above are affiliate links. FixlyGuide may earn a commission on qualifying purchases — at no extra cost to you.
Frequently asked questions
Can you fix a squeaky floor without removing the subfloor?+
Yes, many squeaky floors can be fixed without removing the subfloor by working from the space below (basement or crawl space). Methods include adding shims, driving screws upwards into the subfloor and joists, or using specialized anti-squeak brackets.
What causes floors to squeak?+
Floor squeaks are primarily caused by friction and movement between wooden components, typically the subfloor and joists, or between individual floorboards. This movement often results from wood shrinkage over time, loose nails or fasteners, or inadequate initial fastening during construction.
How do professionals fix squeaky floors?+
Professionals often use methods similar to advanced DIYers, including securing loose subfloor to joists with specialized screws or brackets from below, shimming gaps, and using construction adhesives. For severe issues or inaccessible areas, they might consider partial board removal or targeted blocking.
Is a squeaky floor a sign of structural damage?+
Not usually. While annoying, squeaky floors are very rarely a sign of serious structural damage. They almost always point to minor movement and friction in the floor's layers rather than a compromised foundation or failing joists. However, sudden, severe sagging or bouncing accompanied by squeaks could indicate a more serious underlying issue.
Can I screw down my squeaky subfloor from above?+
Yes, you can screw down a squeaky subfloor from above, but this means piercing your finished flooring. Specialized 'squeak repair kits' exist that use break-off screws, but this method is generally more visible and less desirable if you wish to preserve your finished floor. Fixing from below is often preferred to avoid damaging the visible floor surface.

Discussion
Loading comments…