
Tools & materials you'll need
Affiliate links- AmazonExtension ladderSturdy and rated for your weight plus debris
- AmazonGutter scoop or small trowel
- AmazonGarden hose with strong nozzle
- AmazonBucket or tarpFor debris collection
- AmazonPlumber's snake or auger (optional)For stubborn downspout clogs
- AmazonSpirit level (optional)To check gutter slope
As an Amazon Associate FixlyGuide earns from qualifying purchases — at no extra cost to you. Prices and availability are accurate as of publication and subject to change.
Quick Answer
Overflowing gutters during heavy rain are almost always a sign of a blockage, most commonly from accumulated leaves, shingle grit, and debris. This prevents rainwater from reaching the downspouts and instead forces it over the gutter's edge, often soaking your home's foundation, damaging landscaping, or even rotting fascia boards. The good news is that this is usually a straightforward problem to diagnose and fix, often requiring nothing more than a ladder and a pair of gloves. Less common causes include improper gutter slope, damage, or an undersized system that can't handle the volume of water from heavier storms.
The Problem
Imagine a heavy downpour; buckets of water are sheeting off your roof. Your gutters are there to collect this deluge and channel it safely away from your home's foundation. But instead, you see waterfalls cascading over the sides of your gutters, soaking the ground directly beneath your eaves. This isn't just an unsightly mess; it's a serious home maintenance issue. When gutters overflow, that water pounds the ground, eroding landscaping, digging trenches, and, most critically, pooling dangerously close to your foundation. Over time, this can lead to basement leaks, cracked foundations, and even structural damage. The constant moisture can also rot fascia boards, soffits, and even damage your roof decking. Before you panic, understand that most gutter overflows are not a sign of catastrophic failure but rather a localized blockage that can be resolved with a bit of elbow grease.
How It Works
To understand why your gutters overflow, it helps to understand how a properly functioning gutter system works. Your roof, by design, sheds water. Gutters, typically K-style or half-round, are strategically installed along the eaves, just below the edge of the roofline, to catch this runoff. They are installed with a subtle but essential slope – approximately 1/16 to 1/8 inch per 10 feet of run – directing water towards the downspouts. These downspouts are vertical pipes that carry the water from the gutters to the ground level, where extensions (like splash blocks or buried drains) direct it several feet away from your home's foundation.
The system relies on an unobstructed path. Rainwater collects in the gutter trough, gravity pulls it along the gentle slope towards the downspout opening, through the downspout, and then away. When leaves, twigs, shingle grit, seeds, and other debris accumulate in the gutter or, more critically, in the downspout opening or the downspout itself, they create a dam. Water can no longer flow freely. As more rain falls, the water level rises behind this blockage until it reaches the top edge of the gutter and spills over. Think of it like a clogged sink – the water has nowhere to go but over the rim. The heavier the rain, the faster the gutters will fill and overflow. Even a small blockage can become significant during a torrential downpour, turning a minor trickle into a full-blown waterfall. Understanding this simple mechanism highlights why most solutions involve clearing these obstructions.
Step-by-Step Fix
1. Safety First – Always prioritize safety when working on a ladder. * Use a sturdy extension ladder placed on firm, level ground. Have a helper spot the ladder if possible. Stay within the ladder's weight limit. Never lean the ladder against the gutter itself, as it can damage the gutter or cause the ladder to slip. Instead, lean it against the fascia board, just below the roofline. Wear heavy-duty work gloves to protect your hands from sharp debris, pests, and grime. Consider safety glasses if you're working overhead or with a power washer.
2. Identify the Overflow Point – Locate the specific section(s) where water is spilling. * During the next rain, or by simulating heavy rain with a garden hose (careful not to overspray onto your siding or into electrical components), observe exactly where the gutters are overflowing. Note if it's a specific section of the trough, near a downspout, or if an entire run is overflowing. This helps pinpoint the area to focus your cleaning efforts. It's often the lowest point of a gutter run, just before the downspout, where debris tends to accumulate.
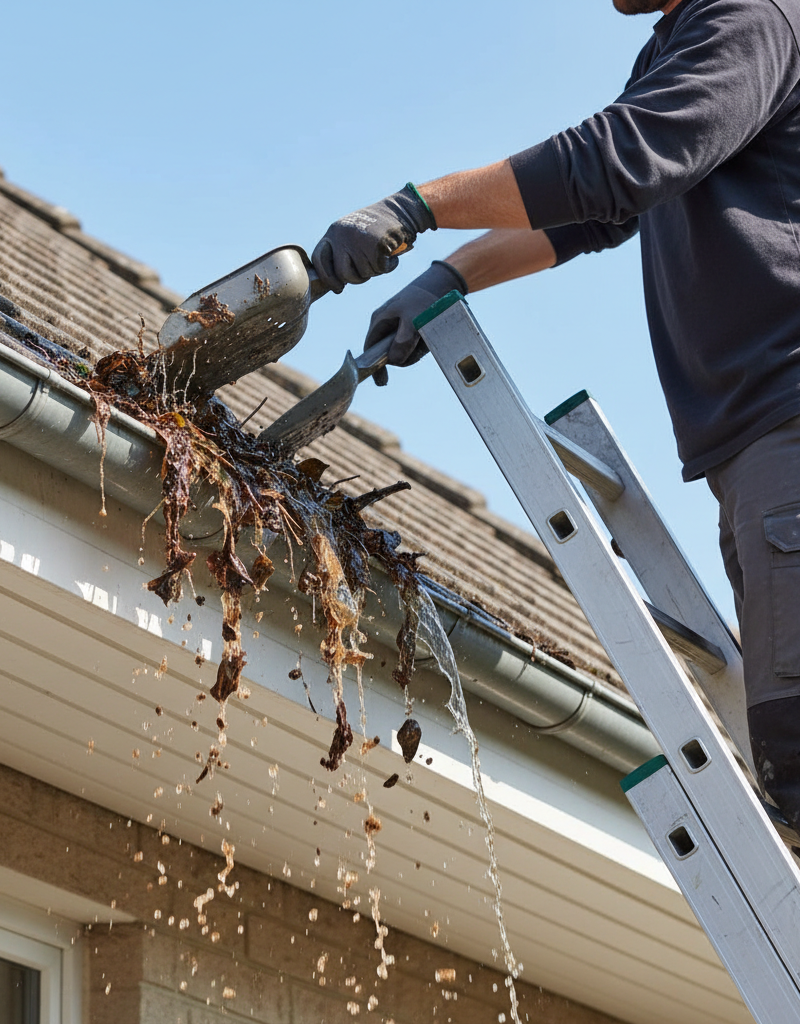
3. Clear Gutter Troughs – Remove all visible debris from the gutter channels. * Using your gloved hands, a small trowel, a gutter scoop, or even a shop vac, remove leaves, sticks, shingle grit, and other accumulated debris from the entire length of the gutter. Start at one end and work your way to the downspout. Place the debris in a bucket or tarp for easy disposal. Pay close attention to corners and where different gutter sections meet, as these areas are prone to collecting more gunk.
4. Flush with Water – Confirm proper drainage by running water through the system. * Once the troughs appear clear, use a garden hose with a strong nozzle to flush water into the gutter, starting from the highest point of each section. Watch the water flow. It should move freely towards the downspout and exit without pooling. If water still pools, it might indicate a low spot or a subtle blockage further down.
5. Unclog the Downspout Opening – The most common culprit for recurrent overflows. * Often, the opening to the downspout gets completely jammed with debris. Reach into the downspout opening and pull out any packed leaves, twigs, or shingle grit. You might need to use a sturdy wire hanger straightened out or a thin, flexible brush to dislodge deeper clogs that are just beyond arm's reach. Be gentle not to damage the downspout itself.
6. Clear the Downspout (from above) – If the clog is deeper within the vertical downspout pipe. * If water still isn't flowing freely after clearing the opening, the clog is likely further down the downspout. From the top of the downspout, try pushing a plumber's snake, a garden hose (turned on to a moderate pressure), or a specialized downspout auger down the pipe. Be careful not to force the hose or snake too hard, as it could damage the downspout or connections. A pressure washer with a specialized gutter cleaning attachment can also be effective here, but exercise extreme caution.
7. Clear the Downspout (from below) – Address clogs accessible from the ground level. * Remove any downspout extensions at ground level. If you see debris, clear it out. If you can access the bottom of the main vertical downspout pipe, try flushing water upwards with a garden hose or using a plumber's snake from below to push the clog upwards or break it apart. Sometimes, gently tapping the outside of the downspout with a rubber mallet can help dislodge a stubborn clog, but avoid denting the metal.
8. Check Gutter Slope – Ensure the gutters are pitched correctly towards the downspouts. * After clearing all noticeable clogs, if water still pools significantly in sections of the gutter, it might be an issue with the gutter's slope. Place a level on an unclogged section of the gutter. It should show a slight downward pitch towards the downspout (roughly 1/16 to 1/8 inch drop for every 10 feet). If the gutter is level or slopes away from the downspout, it will need to be re-pitched. This usually involves adjusting the hangers or re-installing sections. This can be a moderate DIY task requiring some comfort with measurements and a drill. If unsure, a handyman or gutter professional can correct the slope.
9. Inspect for Damage – Look for sags, dents, or gaps. * Check the entire gutter system for visible damage. Look for sagging sections where water might collect, dents that trap debris, or gaps between gutter sections or where the gutter meets the fascia. Damaged sections may need repair or replacement. Small holes can sometimes be sealed with gutter sealant, but larger damage might require professional attention.
Common Causes
- Debris Accumulation: The overwhelming majority of gutter overflows are caused by a buildup of leaves, twigs, pine needles, shingle grit, seeds, and even animal nests (birds, squirrels). This debris eventually forms a dam, preventing water flow.
- Clogged Downspouts: Often, the downspout itself, particularly at the elbow where it turns into the vertical pipe, becomes completely packed with debris. This acts as a bottleneck for the entire gutter section.
- Improper Gutter Slope: If gutters are not installed with the correct downward pitch towards the downspouts, water will sit and stagnate rather than drain. Over time, this standing water collects more debris and eventually overflows.
- Undersized Gutter System: In rare cases, especially with high-volume roofs (very steep or very large), the existing gutters or downspouts may simply be too small to handle the amount of rainfall during heavy storms. This is less common but can occur after re-roofing or if the original installation was inadequate.
- Damaged or Sagging Gutters: Gutters that have pulled away from the fascia, are bent, or have significant sags can create low spots where water collects and then overflows, even if the downspouts are clear.
- Gutter Guard Issues: While designed to prevent clogs, some gutter guards (especially mesh or reverse curve types) can get clogged themselves with small debris, seeds, or shingle grit, still leading to overflow if not cleaned periodically.
Common Mistakes
- Ignoring the Problem: Allowing gutters to overflow repeatedly leads to costly damage to fascia, foundation, and landscaping. Address overflows promptly.
- Only Cleaning Visible Debris: Many homeowners only scoop out the obvious leaves but neglect to flush the system or check for clogs deeper within the downspout. The downspout opening is the most critical area.
- Using a Pressure Washer Incorrectly: While powerful, a pressure washer can damage gutters if the stream is too strong or directed improperly. It can loosen seams, blow off paint, or even detach gutters from the fascia board. Use a wide fan tip and moderate pressure, or opt for a specialized gutter cleaning nozzle.
- Not Addressing Downspout Extensions: If your downspout extensions are clogged or directing water too close to your foundation, clearing the top of the system won't solve the core drainage problem.
- Ignoring Gutter Slope: If gutters consistently hold standing water even after cleaning, the problem is likely an improper pitch. Simply cleaning won't fix this structural issue, which needs to be corrected.
- Neglecting Seasonal Cleaning: Gutters should be cleaned at least twice a year – once in late spring after tree pollen and seeds fall, and once in late fall after leaves have dropped. If you live in a heavily treed area, more frequent cleaning might be necessary.
Cost & Time Breakdown
| Task | DIY cost | Pro cost | Time |
|---|---|---|---|
| Clear gutter troughs | $0–$10 | $100–$250 | 30 min – 2 hrs |
| Unclog downspouts | $0–$20 | (Included above) | 15 min – 1 hr |
| Inspect/Flush system | $0 | (Included above) | 10–20 min |
| Minor re-sloping/tightening | $5–$50 | $150–$400 | 1–3 hours |
| Full gutter cleaning service | N/A | $150–$450 | N/A |
Tips & Prevention
- Regular Cleaning Schedule: Clean your gutters at least twice a year – once in late spring/early summer after seeds and pollen have fallen, and once in late fall after all leaves have dropped. Consider more frequent cleaning if you have many large trees overhanging your roof.
- Install Gutter Guards: While not maintenance-free, quality gutter guards (like fine mesh or micro-mesh systems) can significantly reduce the frequency of cleaning by preventing large debris from entering the troughs. Be aware that even guards need occasional brushing off to remove shingle grit and small particles.
- Trim Overhanging Branches: Prune tree branches that directly overhang your roof and gutters. This reduces the amount of leaves, twigs, and sap entering your gutter system.
- Extend Downspouts: Ensure your downspout extensions direct water at least 5-10 feet away from your home's foundation. Splash blocks are a good basic solution, but buried drainage pipes are even better for full protection.
- Inspect After Storms: After strong winds or heavy storms, take a quick walk around your house to check for any visible gutter damage or immediate blockages that might have formed.
- Look for Warning Signs: Don't wait for a full overflow. Look for early signs like sagging gutters, water stains on your fascia, or debris visible from the ground.
When to Call a Professional
While most gutter overflows are manageable DIY tasks, there are specific situations where calling a professional is the smarter, safer, or more effective option. If you lack a sturdy ladder, are uncomfortable working at heights, or cannot safely access your gutters due to roof pitch or height, a professional gutter cleaning service is money well spent. You should also call a pro if, after thoroughly cleaning, your gutters continue to overflow, suggesting deeper issues like improper pitch, hidden damage, or an undersized system that requires re-installation or replacement. Any signs of water actively entering your attic or walls, persistent foundation dampness, or visible damage to your fascia or roof decking warrant immediate professional assessment to prevent more extensive and costly structural repairs.
Related Articles
Keep troubleshooting with these hand-picked guides from FixlyGuide:
- The 3 Hidden Reasons Your Gutters Fail in Heavy Rain (It’s Not Just Leaves) — Overflowing gutters during heavy rain often stem from a few common, yet overlooked, issues beyond simple leaf clogs, leading to potential s…
- The #1 Gutter Overflow Culprit in Heavy Rain (It’s Not Just Clogs) — Discover why your gutters overflow during heavy rain, often due to an overlooked issue beyond simple clogs, and how to fix it.
- The #1 Mistake That Warps Deck Boards (And How to Fix It for Good) — Prevent and repair warped deck boards by understanding the underlying causes and implementing effective, long-term solutions.
- The #1 Deck Sealing Mistake Most Homeowners Make (And How to Fix It) — Discover the most common error in deck sealing that leads to premature wear and how to correct it for lasting protection.
- The #1 Mistake Homeowners Make When Sealing a Deck (and How to Fix It) — Prevent costly damage and extend your deck's life by avoiding common sealing errors and following a simple, effective resealing process.
- This 1 mistake destroys countless roofs (hidden in your gutters) — Proper gutter cleaning and maintenance are essential for protecting your home’s roof, foundation, and landscaping from water damage. Learn…
Frequently asked questions
Why do my gutters overflow only when it rains heavily?+
Gutters often overflow only during heavy rain because a partial clog can still allow smaller amounts of water to pass. However, a significant downpour quickly overwhelms the narrowed passage, causing water to back up and spill over the edges before it can drain effectively through the constricted downspout or gutter section.
Can gutter guards prevent overflowing?+
Gutter guards can significantly reduce debris buildup and help prevent overflows by blocking large leaves and twigs. However, they are not maintenance-free. Smaller debris like shingle grit, pine needles, or seeds can still accumulate on top of or under some types of guards, eventually leading to blockages if not periodically cleaned.
How often should I clean my gutters to prevent overflows?+
To prevent overflows, you should clean your gutters at least twice a year: once in late spring after tree pollen and seeds have fallen, and again in late fall after all the leaves have dropped. If your home is surrounded by many trees, especially pine trees, more frequent cleaning (3-4 times a year) might be necessary.
What happens if I ignore overflowing gutters?+
Ignoring overflowing gutters can lead to a host of expensive problems, including foundation damage (cracks, basement leaks), fascia and soffit rot, landscape erosion, pest infestations (mosquitoes, termites attracted to damp wood), and even damage to your home's siding and roof decking from constant water exposure.
How do I know if my gutters are sloped correctly?+
You can check your gutter's slope by flushing water through a clean section with a garden hose. The water should flow steadily towards the downspout without pooling. For a more precise check, use a spirit level on the bottom of an empty gutter. There should be a slight downward pitch of approximately 1/16 to 1/8 inch for every 10 feet of gutter run towards the downspout.
Is it safe to clean my gutters myself?+
Cleaning gutters can be done safely if you take proper precautions. Always use a sturdy, stable ladder on level ground, have a spotter, and wear protective gloves and eyewear. Never overreach or stand on the top rungs of the ladder. If your roof is very high, steeply pitched, or you're uncomfortable with heights, it's best to hire a professional.
Can I use a leaf blower to clear my gutters?+
Yes, a powerful leaf blower (especially one with a concentrated nozzle or a specific gutter attachment) can be an effective way to clear dry, loose debris from gutters. However, it's less effective for wet, matted leaves or stubborn clogs in downspouts. Always wear eye protection when using a leaf blower.


Discussion
Loading comments…