Tools & materials you'll need
Affiliate links- AmazonEPA-recognized lead test kitFor preliminary testing; professional testing recommended for major renovations
- AmazonDisposable coveralls with hood and boot coversTo protect skin and clothing from contamination
- AmazonDisposable glovesmultiple pairs
- Amazon6-mil plastic sheeting1-2 rolls · For containment walls and floor covering
- AmazonHeavy-duty painter's tapee.g., tuck tape, for sealing plastic
- AmazonHeavy-duty 6-mil plastic disposal bagsmultiple
As an Amazon Associate FixlyGuide earns from qualifying purchases — at no extra cost to you. Prices and availability are accurate as of publication and subject to change.
Quick Answer
If your home dates pre-1978, assume lead paint is present. The real danger isn't intact paint, but the invisible lead dust generated when you sand, scrape, drill, or demolish surfaces. Mitigation involves proper testing, meticulous containment of the work area, using HEPA-filtered vacuums, and wet cleaning to prevent the spread of lead particles, significantly reducing health risks during renovations.
The Problem
Imagine undertaking a simple renovation project – perhaps sanding down an old window frame or patching a wall – only to unknowingly release a silent, invisible toxin into your home. This is the reality for many homeowners tackling DIY projects in older homes, specifically those built before 1978. While the presence of lead paint itself isn't always an immediate threat, disturbing it through common repair activities like sanding, scraping, or drilling can create fine lead dust and chips. These particles, often too small to see, can be inhaled, ingested, or carried throughout your home on shoes and clothing, posing serious health risks, particularly to young children, pregnant women, and pets. Lead poisoning can lead to developmental delays, neurological damage, and other severe health issues. The insidious nature of lead dust lies in its ability to accumulate in the body over time, making even seemingly minor exposures dangerous. Many homeowners assume that a fresh coat of paint over the old solves the problem, but this merely encapsulates the lead; it doesn't eliminate the hazard if the underlying layers are ever disturbed. Understanding the true risks and implementing proper safety protocols is not just a recommendation; it's a critical responsibility for anyone working on an older home.
How It Works
Lead-based paint was widely used in homes before 1978 due to its durability, vibrant color, and moisture resistance. The "lead" refers to various lead compounds (like lead carbonate or lead chromate) added to the paint mixture. When these compounds are intact and undisturbed, they generally pose a low risk. However, the atomic structure of lead is such that when the paint matrix is broken—through abrasion, impact, or heat—microscopic lead particles are released. These particles can be as small as 0.5 microns, making them respirable (small enough to be inhaled deep into the lungs) and difficult to filter with conventional dust masks. Once inhaled or ingested, lead mimics calcium in the body, allowing it to be absorbed into the bloodstream and distributed to the brain, bones, kidneys, and other organs. Unlike many toxins, lead has no known safe exposure level; even small amounts can accumulate and cause damage. Children are particularly vulnerable because their brains and nervous systems are still developing, and they are more prone to hand-to-mouth activities, ingesting dust from contaminated surfaces. Furthermore, lead dust settles on surfaces and can persist for years if not properly cleaned, making ongoing exposure a significant concern long after a renovation project is complete. This persistent nature means that lead is not just a problem during an active renovation but a potential long-term household contaminant.
Step-by-Step Fix
Before undertaking any project that disturbs painted surfaces in a pre-1978 home, prioritize testing and robust safety measures.
Step 1: Get Your Home Tested for Lead – Identify the invisible enemy.
Invest in a professional lead inspection and risk assessment, especially if you plan extensive renovations. While DIY lead test kits are available, they can offer false negatives or identify lead but not the extent of the hazard. A certified lead inspector will use an X-ray fluorescence (XRF) analyzer for non-destructive testing, providing immediate, accurate results on painted surfaces. They can also take paint chip, dust, and soil samples for laboratory analysis, which gives a comprehensive understanding of lead hazards in your home. This upfront investment is crucial for comprehensive safety planning.
- If you decide to DIY test: Purchase EPA-recognized lead test kits. These typically involve swabbing a suspect surface. Follow instructions meticulously. No matter the result, proceed with caution if you're working on a pre-1978 home.
- Why it matters: Knowing exactly where lead paint is present allows you to focus containment efforts and decide if professional abatement is necessary.
Step 2: Isolate the Work Area Completely – Build a protective bubble.
Before any work begins, seal off the renovation area from the rest of your home. Remove all furniture, curtains, rugs, and anything else that can absorb or collect dust. For items that cannot be removed, cover them tightly with two layers of 6-mil plastic sheeting and painter's tape. Cover floors with similar plastic sheeting, extending it up the walls by at least six inches. Use zippered plastic sheeting or overlapping plastic flaps at doorways to prevent dust migration. Seal off HVAC vents with plastic and tape to stop lead particles from circulating throughout the house. Think of it as creating a completely enclosed "clean room" to contain all potential contamination.
- Tools for isolation: 6-mil plastic sheeting, heavy-duty painter's tape (e.g., tuck tape), utility knife, masking film.
- Safety check: Ensure you have adequate ventilation within the contained area (e.g., a fan exhausting to the outside through a sealed window, if possible, maintaining negative pressure) but not recirculating air.
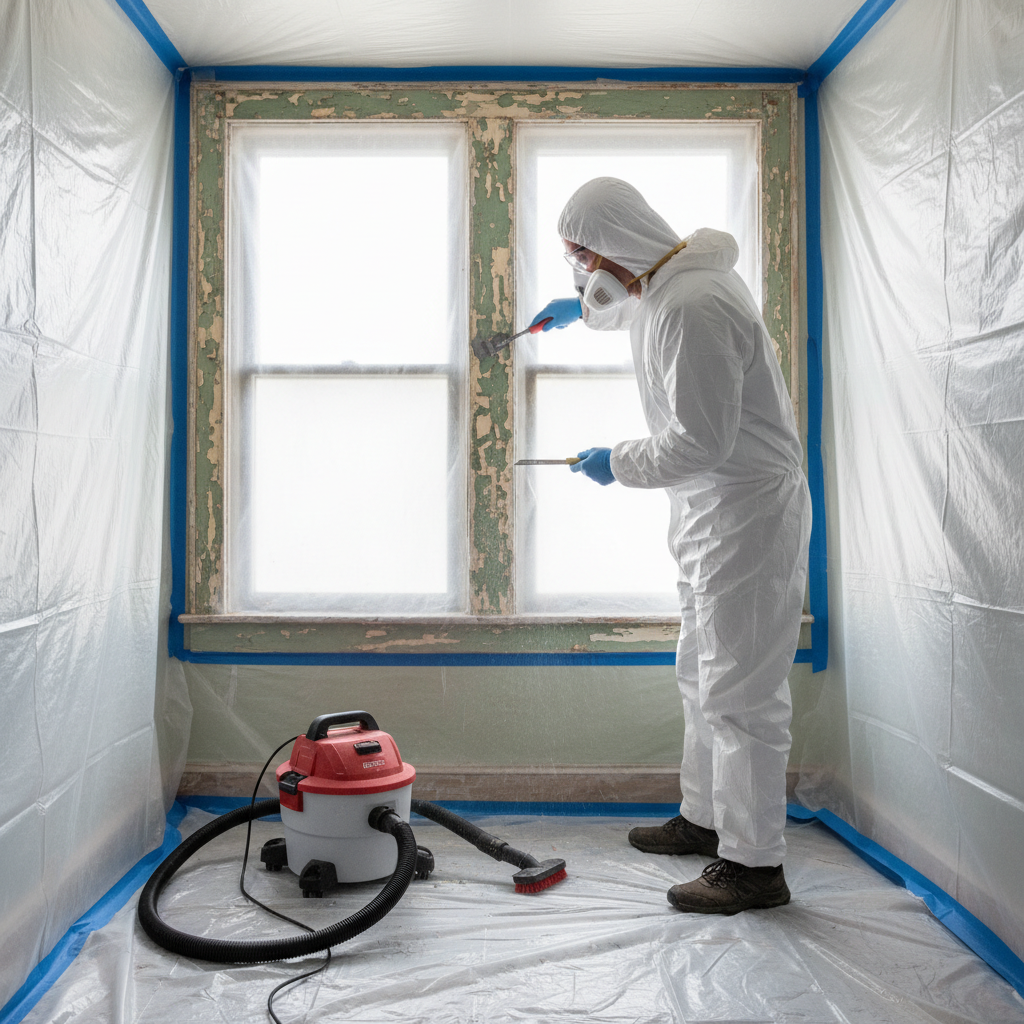
Step 3: Wear Proper Personal Protective Equipment (PPE) – Your first line of defense.
Lead dust is insidious, so protect yourself from head to toe. Don a disposable respirator (N100 or P100 rated, not just a standard dust mask), disposable coveralls (with a hood and boot covers), safety glasses or goggles, and disposable gloves. Change gloves frequently, especially when moving between contaminated and "clean" areas. Never wear work clothes outside the contained area or into other parts of your home without thorough cleaning. Plan for a designated "decontamination" area just outside your work zone where you can remove and bag soiled PPE.
- Respirator tip: Ensure your N100/P100 respirator has a proper fit. Men with beards may need a powered air-purifying respirator (PAPR) for adequate protection.
- Don't skimp: Your health is worth the investment in proper PPE. Ordinary dust masks offer virtually no protection against lead dust.
Step 4: Use Lead-Safe Work Practices – Minimize dust generation proactively.
The goal is to generate as little lead dust as possible. Avoid sanding, scraping, or grinding lead paint dry. Instead, use wet methods: mist surfaces with water (adding a surfactant like a few drops of dish soap can help) before scraping or sanding. Use chemical paint strippers as a last resort and only those certified for lead paint removal, following all manufacturer safety guidelines. When using power tools, ensure they are equipped with HEPA-filtered vacuum attachments. Collect paint chips and debris on the plastic sheeting as you work. Never use heat guns above 1100°F (593°C) as this can vaporize lead and create hazardous fumes.
- Tools for lead-safe work: Wet/dry sandpaper, spray bottle with water/surfactant, heavy-duty scrapers, specialized lead paint strippers (if necessary), power tools with HEPA vac attachments.
- If you must sand dry: Use a HEPA-filtered sander system, and increase ventilation, but always prioritize wet methods.
Step 5: Contain and Dispose of All Debris – Lock down the hazard.
As you work, routinely collect all paint chips, dust, and debris. Gently fold up the contaminated plastic sheeting from the floor and walls, rolling it inward to contain any loose particles. Double-bag all lead-contaminated waste in heavy-duty 6-mil plastic bags, tying them securely. Label the bags clearly as "Lead-Contaminated Waste." Research local regulations for disposing of lead waste; it may require special handling and cannot simply be thrown out with regular household trash. Contact your municipal waste management or health department for specific instructions.
- Disposal tip: Keep kids and pets far away during disposal. Do not drag bags through your home.
- Local regulations: Waste disposal varies by municipality. Never assume standard trash collection is acceptable.
Step 6: Meticulous Two-Stage HEPA Vacuuming and Wet Cleaning – The final purge.
After all debris is removed, thoroughly vacuum all surfaces in the work area – floors, walls, windowsills, frames – with a HEPA-filtered vacuum cleaner. A regular shop vac or household vacuum will not suffice; its filter will not capture the fine lead particles and will instead re-disperse them into the air. Following vacuuming, perform a "wet wipe" cleaning. Use disposable wipes or cloths soaked in a general all-purpose cleaner and wipe down all surfaces. Rinse your cloths frequently in a separate bucket of water, disposing of the dirty water down a utility sink (not a regular drain if possible, check local rules). Repeat the wet wipe process until no visible dust or residue remains. This two-stage cleaning process is critical for removing microscopic lead dust.
- HEPA vac rental: If you don't own one, rent a certified HEPA vacuum from a tool rental store.
- Wet cleaning precision: Wipe in one direction to pick up dust, not spread it. Dispose of all cleaning cloths and mop heads as lead-contaminated waste.
Step 7: Post-Renovation Cleaning and Testing – Confirm your success.
After you believe the area is clean, it's wise to perform another round of thorough wet cleaning. Consider professional post-renovation lead dust testing, especially if children or pregnant women reside in the home. A certified lead risk assessor can take dust wipe samples from floors and other surfaces to confirm that lead levels are below federal and local hazard standards. This provides peace of mind and verifies the effectiveness of your containment and cleaning efforts. Ensure the area passes clearance testing before reoccupying it, particularly with vulnerable individuals.
- Consider a pro: Professional clearance testing is the gold standard for verifying lead safety.
- Don't rush: Take your time with final cleaning and testing to ensure long-term safety.
Common Causes
- Homes built before 1978: This is the primary "cause" as lead paint was commonly used in residential construction during this period, mandated by federal law in 1978. Any painted surface could potentially harbor lead.
- Disturbance of painted surfaces: Activities like sanding, scraping, drilling, cutting, or demolition of old painted surfaces are the most common ways lead dust is generated and released.
- Deteriorating paint: Chipping, peeling, flaking, or chalking paint in older homes naturally releases lead dust and chips into the environment, even without active renovation.
- Friction and impact surfaces: Doors and window frames that rub together, or areas like stair treads and railings, can wear down lead paint over time, creating friction dust.
- Improper renovation techniques: Using aggressive dry sanding, high-heat methods, or failing to contain work areas allows lead dust to spread widely.
- Lead-contaminated soil: Exterior lead paint that has chipped or peeled over decades can contaminate the soil around a house, especially near foundations, leading to ingestion hazards, particularly for children playing outside.
Common Mistakes
- Ignoring the "pre-1978" rule: Many DIYers assume that because paint looks new, it
Related Articles
Keep troubleshooting with these hand-picked guides from FixlyGuide:
- The Hidden Reason Your GFCI Trips (It's Not Always a Faulty Outlet) — A continuously tripping GFCI outlet is a critical safety warning, often indicating moisture, a faulty appliance, or a wiring problem that r…
- The Secret to Lush Raised Beds? It's Not Just About How You Water — Smart irrigation for raised garden beds isn't just about automation; it's about delivering the right amount of water precisely when your pl…
- The 3-Ingredient Secret to Sparking Clean Carpets (That Most Don't Know) — Unlock the secret to brilliantly clean carpets with a simple, potent three-ingredient homemade solution that effectively tackles stains and…
- The Sneaky Way a Gas Tax Freeze Could Raise Your Property Bill — A gas tax freeze promises immediate relief at the pump, but for homeowners, it can trigger hidden costs, from deteriorating roads to potent…
- The 4-Hour — Transform your garden into a self-sufficient oasis with smart strategies for watering, weeding, and pest control, minimizing your effort.
- The Nasty Truth About Your Slow Shower Drain (And the DIY Fix) — A slow shower drain is more than an annoyance; it's often a sign of a blockage that chemical solutions can worsen. Learn how to clear it sa…
This article was independently written by FixlyGuide based on the source topic.
Frequently asked questions
How do I know if my home has lead paint?+
The most definitive way is to have a certified lead inspector conduct a risk assessment using an XRF analyzer or take paint chip samples for lab analysis. While DIY test kits exist, professional testing offers the most accurate and comprehensive results.
Is it safe to paint over lead paint?+
Painting over intact lead paint can encapsulate it and reduce immediate hazards, but it doesn't eliminate the underlying risk. If the paint underneath is ever disturbed (sanding, drilling, chipping), lead dust can still be released. It's a temporary solution, not a permanent remediation.
What kind of vacuum do I need for lead paint dust?+
You *must* use a HEPA-filtered vacuum cleaner. Regular household or shop vacuums will not capture microscopic lead particles and will instead recirculate them into the air, making the problem worse. HEPA vacuums are specifically designed to trap these fine particles.
Can I remove lead paint myself?+
For small, intact areas, careful DIY removal following strict lead-safe practices (containment, wet methods, PPE, HEPA vacuuming) may be possible. However, for large areas, deteriorating paint, or extensive renovations, it's highly recommended to hire an EPA-certified lead abatement professional due to the significant health risks involved.
How long does lead dust remain a danger?+
Lead dust does not break down naturally. If not properly cleaned and remediated, lead dust can remain a hazard in your home for decades. It settles on surfaces, permeates carpets, and can be disturbed and re-aerosolized repeatedly, leading to long-term exposure risks.


Discussion
Loading comments…