Tools & materials you'll need
Affiliate linksAs an Amazon Associate FixlyGuide earns from qualifying purchases — at no extra cost to you. Prices and availability are accurate as of publication and subject to change.
Quick Answer
If your home was constructed before 1978, the default assumption should be that lead-based paint is present on interior and exterior surfaces. The primary danger isn't intact lead paint, but rather the microscopic dust particles released when these surfaces are disturbed during common home repairs or renovations like sanding, scraping, drilling, or demolition. This lead dust is highly toxic, particularly to young children, and can lead to severe developmental and neurological problems. To ensure safety, always test for lead before starting work, meticulously contain the work area, use appropriate personal protective equipment (PPE), and implement strict cleaning protocols to prevent lead contamination throughout your home.
The Problem
You're excited about that kitchen remodel or finally tackling the peeling paint on your old window sills. You strip off the old wallpaper, sand down a doorframe, or chip away at a stubborn layer of paint, feeling productive. What you might not realize is that with every scrape and every cloud of dust, you could be liberating a silent, invisible toxin into your home: lead. For homes built before 1978, the risk is substantial. Lead-based paint was once common, prized for its durability and vibrant color. However, decades of research have unequivocally linked lead exposure to a host of serious health issues, especially in children under six and pregnant women. Even low levels of lead in the bloodstream can cause irreversible neurological damage, learning disabilities, behavioral problems, reduced IQ, and stunted growth. Adults aren't immune either, with exposure linked to hypertension, kidney damage, and reproductive problems. The danger intensifies when renovation activities convert lead paint into fine, respirable dust and particles that can be easily inhaled or ingested. This dust settles on surfaces, carpets, toys, and can be tracked throughout the house, creating a persistent hazard long after the work is done. Ensuring your family's safety during any renovation in an older home requires a proactive, informed approach to lead paint management.
How It Works
Lead-based paint typically consists of lead carbonate, lead oxide, or other lead compounds mixed into an oil or alkyd base. These lead pigments provided excellent opacity, durability, and resistance to moisture, making them ideal for both interior and exterior applications. When applied, the paint dries and forms a relatively stable layer. As long as this paint remains intact and undisturbed, the risk of lead exposure is minimal. The danger arises when the paint film is broken or deteriorated. Over time, paint can chip, peel, or chalk due to weathering, impact, or normal wear and tear on surfaces like windows, doors, and trim. This creates flakes and dust particles that can become airborne or settle on nearby surfaces. The most significant hazard, however, comes from mechanical disturbance during renovation. Actions such as sanding, scraping, drilling, cutting, or demolition generate vast quantities of microscopic lead dust and paint chips. For example, sanding a square foot of lead-painted surface can release billions of lead particles into the air. These particles are often too small to see but can remain suspended in the air for hours before settling. Once settled, they can be re-aerosolized by walking, vacuuming, or air currents. Children are particularly vulnerable because they crawl on floors, put their hands and objects into their mouths, and their developing bodies absorb lead more readily than adults. Ingesting even a tiny amount of lead dust—equivalent to a few grains of sugar—can elevate blood lead levels to dangerous concentrations. The body mistakes lead for calcium, allowing it to enter bones, organs, and the nervous system, where it causes its devastating effects. Proper containment and cleaning are critical because lead dust cannot be removed with typical household cleaning methods; specialized HEPA filtration is required to capture these fine particles.
Step-by-Step Fix
Before embarking on any project that disturbs painted surfaces in an older home, assume lead paint is present and take precautions.
-
Test for Lead — Don't skip this crucial diagnostic step.
- Purchase EPA-recognized lead test kits (usually swab-based) from hardware stores. These provide a quick indication, though results aren't always definitive for all paint layers. Follow kit instructions carefully. Some kits involve rubbing a solution-soaked swab on a sanded area of paint; a color change indicates lead.
- For a more accurate assessment, especially for larger renovations, hire a certified lead inspector. They can perform X-Ray Fluorescence (XRF) testing, which gives immediate, non-destructive results, or take paint chip samples for laboratory analysis. This is the gold standard for lead detection.
-
Plan and Prepare — A well-thought-out plan minimizes risks.
- If lead is confirmed, or if you're proceeding without testing and assuming lead is present, create a detailed work plan. Determine what painted surfaces will be disturbed and how you will contain them.
- Relocate all furniture, rugs, curtains, and personal items from the work area. If items cannot be moved, cover them completely with two layers of 6-mil plastic sheeting and painter's tape to create a sealed enclosure.
-
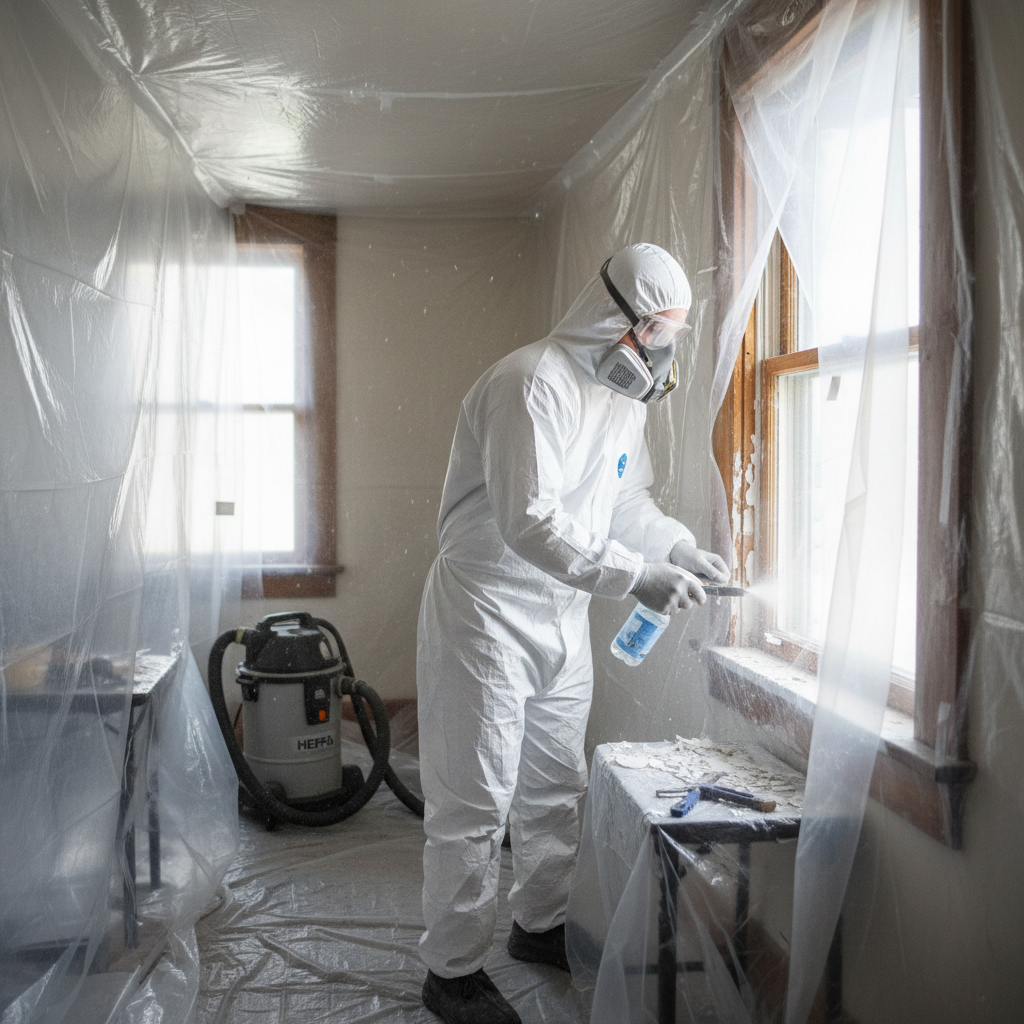
Establish Containment — Prevent lead dust from spreading throughout your home.
- Seal off the work area from the rest of the house using 6-mil plastic sheeting and painter's tape. Use two layers around doorways, creating an airlock entry. Tape sheeting securely to walls and floors, overlapping edges by at least 6 inches.
- Turn off central HVAC systems in the work area to prevent circulating dust. Cover all supply and return vents within the work zone with plastic and tape. Close all windows and doors leading out of the work area.
- Lay down heavy-duty plastic sheeting (at least 6-mil) on the floor, extending at least 2 feet beyond the work footprint. Overlap seams and tape them securely.
-
Gear Up with PPE — Protect yourself from inhalation and contact.
- Wear a properly fitted N100 or P100 lead-specific respirator (with HEPA filters). Standard dust masks are insufficient. Ensure a tight seal—men with facial hair may struggle to get a proper fit.
- Don disposable coveralls or old clothes that can be laundered separately (or disposed of). Wear disposable shoe covers, gloves (nitrile or similar), and eye protection (goggles, not safety glasses) to prevent contact with skin and eyes.
-
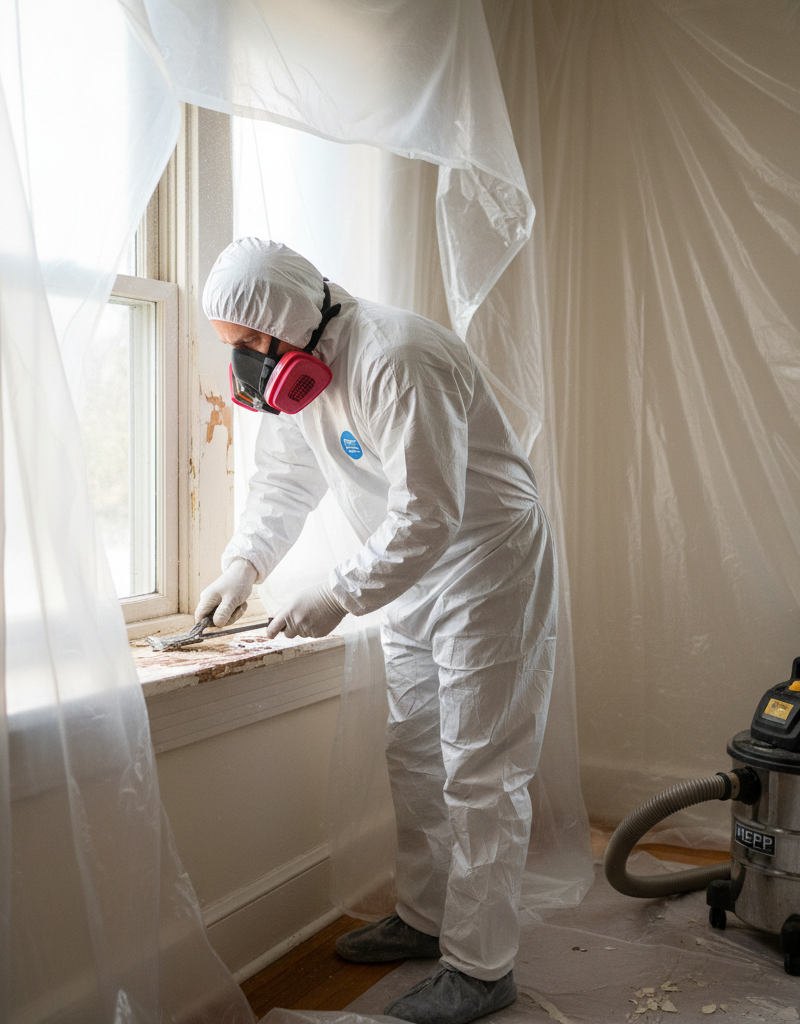
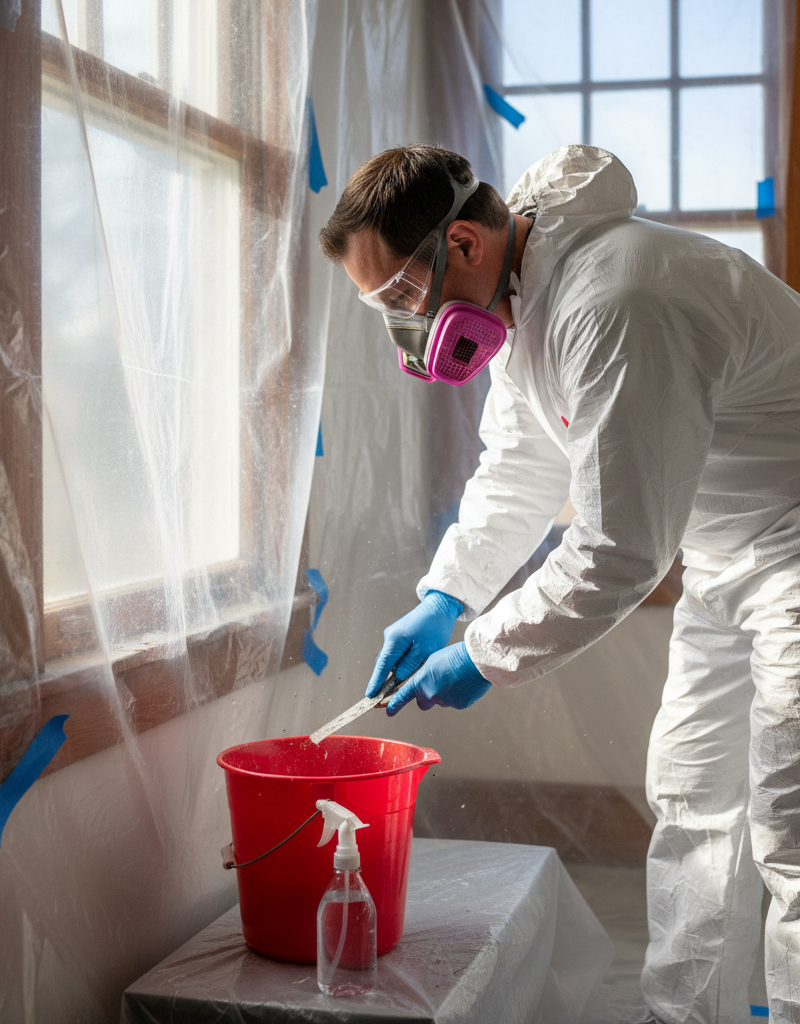
Use Lead-Safe Work Practices — Minimize dust generation whenever possible.
- Avoid high-dust methods like power sanding, grinding, or abrasive blasting. If these are unavoidable, ensure the tool has a HEPA-filtered vacuum attachment.
- Opt for wet scraping or wet sanding where feasible. Moisten surfaces with a water mister before disturbing them. This significantly reduces airborne dust.
- When heat guns are used for paint removal, keep the temperature below 1,100°F (593°C) to prevent lead from vaporizing. Always use continuously monitored heat guns for this purpose, never an open flame.
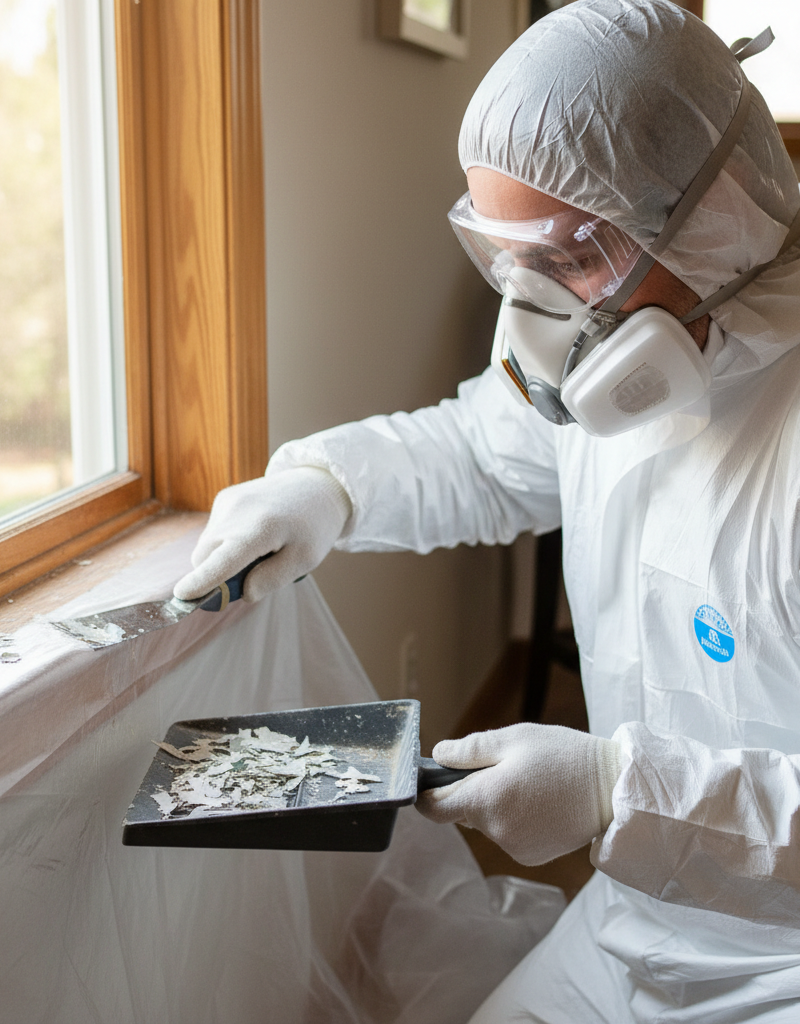
- Collect paint chips and debris in heavy-duty plastic bags as you work.
-
Maintain a Clean Work Area — Regular cleanup reduces accumulation.
- Periodically mist surfaces and the floor within the containment area to encourage dust settlement.
- Use a HEPA-filtered vacuum cleaner to clean up dust and debris. Do not use a regular household vacuum cleaner, as it will simply exhaust lead dust back into the air.
- Use damp cloths (single-use or dedicated disposable wipes) to wipe down surfaces. Change cloths frequently.
-
Decontaminate Before Exiting — Don't track lead out of the work zone.
- Before leaving the containment area, remove disposable coveralls, gloves, and shoe covers. Place them in a heavy-duty plastic bag.
- Carefully remove your respirator and place it in a sealed bag or container for proper cleaning/storage.
- Wash hands and face thoroughly with soap and water immediately after exiting the work zone, even if you wore gloves.
-
Final Cleanup and Disposal — Thoroughness is key to safety.
- After all work is complete, perform a meticulous cleanup. Mist floors and surfaces one last time, then vacuum everything with a HEPA vacuum.
- Wet-wipe all surfaces (walls, trim, floors) with a lead-specific cleaning solution or strong detergent and rinse with clean water. Change cloths frequently and dispose of them properly.
- Carefully roll up the plastic sheeting from the floor towards the center, trapping all debris inside. Place all plastic, used PPE, paint chips, and cleaning materials into double-layered, heavy-duty plastic bags. Seal them tightly.
- Contact your local waste management authority for information on proper disposal of lead-contaminated waste. It often requires special hazardous waste handling.
Common Causes
The presence of lead paint is a historical issue, primarily stemming from its widespread use before it was banned for residential purposes in 1978. Understanding where and why it was used can help homeowners anticipate risks:
- Age of Home: Any home built before 1978 is likely to contain lead-based paint. The older the home, the higher the probability and the greater the number of layers that might contain lead.
- High-Traffic Surfaces: Areas exposed to frequent friction, impact, or moisture were often painted with lead paint due to its durability. This includes windows (sills, sashes, casings), doors and door frames, stairs, railings, banisters, and porches. Friction from opening and closing windows or doors can generate lead dust.
- Exterior Surfaces: Exterior siding, trim, fences, and outbuildings were commonly coated with lead paint because of its weather resistance. Deterioration from sun and rain can cause chalking and peeling, releasing lead into the soil and air.
- Dust From Deterioration: Even if intact, lead paint can deteriorate over time due to age, poor maintenance, or environmental factors. As it chalks, peels, or chips, it creates lead dust and flakes that settle on surfaces, window troughs, and the ground around the home.
- Unsafe Renovation Practices: The most significant cause of lead exposure in older homes is disturbing lead paint during renovations without proper precautions. Sanding, scraping, cutting, or demolishing painted surfaces without containment and PPE aerosolizes lead, creating an immediate and widespread hazard.
Common Mistakes
Avoiding these common missteps is critical for keeping your home lead-safe during renovations:
- Assuming No Lead is Present: Many homeowners mistakenly believe that if their paint isn't peeling, or if their home was built
Related Articles
Keep troubleshooting with these hand-picked guides from FixlyGuide:
- 7 Inspection Red Flags That Secretly Signal a $20,000 Bill — Don't let your dream home become a money pit. Many buyers and even some inspectors overlook subtle home inspection red flags that lead to f…
- 7 Hidden Equity Drains Costing You Thousands Annually — Your home is an asset, but silent problems like minor leaks, poor insulation, and deferred maintenance can drain its value. Discover the se…
- The 12 Checks That Prevent 80% of Costly Home Repairs — Don't wait for a disaster. Our comprehensive monthly home maintenance checklist reveals the surprising, simple tasks that catch small issue…
- The Surprising Trick to Cutting Your Dryer Bill By $100 Per Year — Installing a clothesline can significantly reduce your energy bills and add a fresh scent to your laundry. This guide covers how to choose…
- Is a Wall-Mounted Pressure Washer Right for Your Garage? The Unvarnished Truth — Discover if a wall-mounted pressure washer is the right cleaning solution for your home, offering a powerful and space-saving alternative t…
- What's That Burning Dust Smell When Your Heat Kicks On? The HVAC Secret — That weird smell when your furnace starts isn't always serious, but understanding its cause can prevent bigger issues and improve home air…
Get the print-ready PDF of this guide
A clean, ad-free, printable version you can keep on your phone or pin to the workshop wall. We'll also send occasional weekly tips matched to your home situation.
- Print-optimized layout
- Tools, materials & every step included
- Unsubscribe anytime
This article was independently written by FixlyGuide based on the source topic.
Frequently asked questions
How do I know if my house has lead paint?+
The only way to know for sure is to test. You can use an EPA-recognized lead test kit for a quick indicator or hire a certified lead inspector for more accurate results and paint chip analysis. Assume lead paint is present if your home was built before 1978.
Is it safe to live in a house with lead paint?+
Intact lead paint that is not peeling, chipping, or chalking generally poses less risk. The danger arises when the paint deteriorates or is disturbed, creating hazardous lead dust. Regular cleaning and careful handling of any damaged paint are crucial.
Can I remove lead paint myself?+
While DIY lead paint removal for small areas is possible with extreme caution and proper containment, it's highly recommended to consult with or hire an EPA-certified lead abatement contractor for larger projects. Improper removal can spread lead dust and contaminate your home extensively.
What kind of respirator do I need for lead paint?+
You need an N100 or P100 respirator equipped with HEPA filters. Standard dust masks or N95 respirators are not sufficient to protect against microscopic lead particles.
How do I dispose of lead paint waste?+
Lead-contaminated waste (paint chips, dust, plastic sheeting, used PPE) must be double-bagged in heavy-duty plastic bags and sealed. Contact your local hazardous waste facility or municipal waste management for specific instructions on disposal, as it often requires special handling.
Discussion
Loading comments…